Order of Construction
Reader DANIEL in SAINT JOSEPH writes:
“Hi Mike, I am looking to start building in the next year or two on my up north Minnesota cabin land. I was planning on doing my own general contracting to save. In what order would you recommend I schedule the subs to do their work and when should I begin finding the subs? I already have the septic and well installed for my camper.”
 Mike the Pole Barn Guru writes:
Here is a general construction sequence. In most instances, you want to line up your subcontractors 6-12 weeks prior to needing them. Further ahead, seems to make it difficult to get return calls. A great source of more reliable subs, is by contacting your nearest Home Builders Association and asking for referrals.
1. STAKE LOT
First step of home building is locating your new home on its lot. This will usually involve a surveyor who will come out and accurately drive stakes to locate your home on lot. They will be used by excavators and foundation subcontractors to guide their work.
2. OBTAIN PLANING, ZONING AND BUILDING PERMITS (Where required)
3. TEMPORARY UTILITIES
You will need to have water, electric power, and toilet facilities available during construction process.
4. CLEAR AND ROUGH GRADE
Clearing is removal of trees and undergrowth from actual construction site and yard areas. Rough grading is moving dirt around to establish approximate drainage patterns, yard areas, drive and walk levels, etc. you hope to achieve. Properly compact any fill in no greater than six inch lifts.
5. WELL
If you are going to have a well, you might as well dig it up front so you will have water available for construction.
6. LAY OUT BUILDING
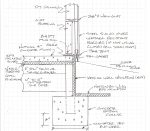
7. DIG HOLES FOR COLUMNS OR PIERS
Call for hole inspection (where required)
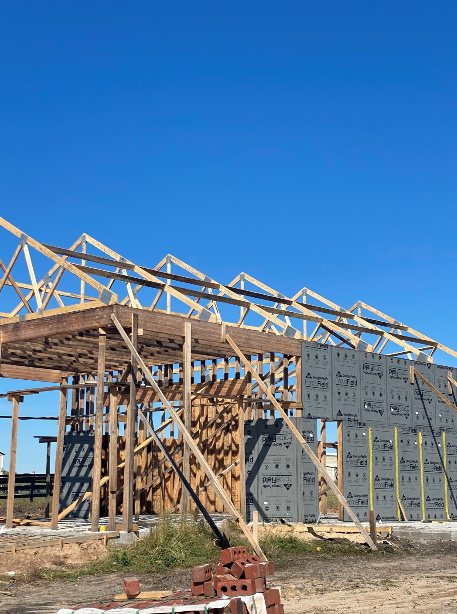
8. SET COLUMNS IN HOLES OR INTO WET-SET BRACKSET Backfill per plan
9. INSTALL
a)SPLASH PLANKS
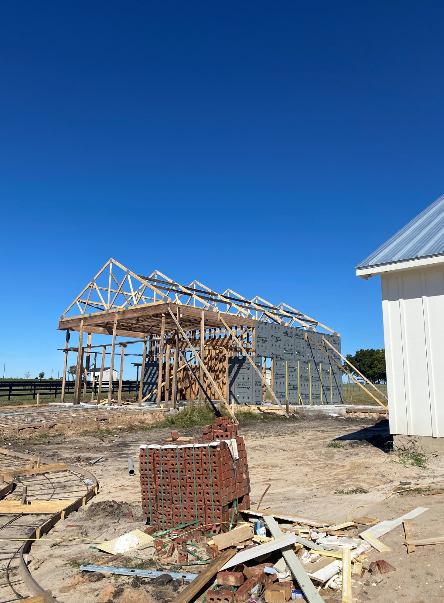
b)TRUSSES AND/OR RAFTERS
c) Purlins and all other roof framing (including ceiling joists and bracing)
d) roof steel and ridge cap (or sheathing, felt and roofing)
e) any raised wood floor framing and floor sheathing
f) Girts and all other wall framing
10. CALL FOR FRAMING INSPECTION (where required)
11. INSTALL
a) Weather Resistant Barrier over wall framing
b) Entry doors, sliding doors and windows
c) All steel wall trims except corners
d) Wall steel and corner trim
12. SEWER AND WATER TAPS
If you are connecting to municipal water and sewer, this is where pipes are laid to house and actually connected (tapped into) water and sewer mains.
13. UNDER SLAB UTILITIES
Any plumbing and electrical needs to go under concrete slab is installed here.
14. UNDER SLAB VAPOR BARRIER, UNDER SLAB AND PERIMETER SLAB INSULATION, PEX FOR RADIANT FLOOR HEAT
15. SLAB FLOOR
16. ANY STAIRS RESTING ON SLAB FLOOR
Get these in now so that the subs working inside can get from one floor to the other without depending on ladders.
17. GARAGE DOOR AND EXTERIOR LOCKS
Some people wait until end to get garage door in. But we think having it in place creates a good place to store materials and equipment during construction. Installing exterior locks means whole house is secure.
18. BACK-OUT FRAMING
This is a general category including interior room partition, soffits for wall cabinets, and drywall nailers.
19. FIREPLACE AND CHIMNEY
A prefabricated fireplace should be installed before roughs (below). A prefab will have a framed chimney. A masonry fireplace and chimney can be installed before any brick veneer.
20. ROUGH HVAC
HVAC (heating, ventilation, air conditioning) sub is first of three “mechanical” subs (plumbing, electrical, HVAC) to come to job. He will install duct work for your HVAC system and possibly furnace. He comes first because stuff he puts into walls is biggest and most inflexible.
21. ROUGH PLUMBING
Next comes plumber to install his pipes.
22. ROUGH ELECTRICAL
Codes call for house to be “dried in” before wiring is installed. With exterior windows and doors in place and roof on, it’s time. For roughs, electrician will put in boxes (switch, outlet, and lighting) and will pull wires into them. Cable, telephone, speaker wires, etc. are also installed at this point.
23. ELECTRIC & GAS METER SET
You’ll need these in place to get some heat in house for drywall installation.
24. GUTTERS AND DOWNSPOUTS
It’s good to get water away from house as soon as possible.
25. WALL INSULATION
Once everything else is in walls and rough inspections are completed, it’s time to insulate your home.
26. TEMPORARY HEAT
With meters set (above), HVAC sub can get some temporary heat going. This will be critical for getting drywall joint compound (mud) to dry in a timely fashion. Carpet sub also needs a warm home so carpet is installed at a temperature comparable to normal living conditions.
27. DRYWALL
Sometimes called “Sheetrock®.” This will be “hung” (screwed to wall girts, studs and ceiling joists), taped (at joints), and “mudded” (joint compound applied) . . . after the in-wall plumbing, HVAC, electrical, and insulation have been inspected!
28. ATTIC INSULATION
29. CABINETS
Base and wall.
30. INTERIOR DOORS AND TRIM
Trim materials installed here may include door casing, base mould, window stool and apron, window casing, chair rail, crown mould, built-in cabinets, stair railing parts, and others. This step also includes hanging doors.
31. PAINT AND WALLPAPER
First coat of paint is usually sprayed. Get it in before hard wood floors are installed.
32. HARDWOOD FLOORS
Now it’s time to install your hardwood floors.
33. COUNTER TOPS
Counter tops are next. this may involve a different sub than one who installed cabinets.
34. VINYL AND CERAMIC TILE
Vinyl floor coverings and ceramic tile are installed. Two different subs.
35. SAND ANF FINISH WOOD FLOORS
This is first of two finishes. The last is done just before you move in.
36. APPLIANCES AND SPECIAL EQUIPMENT
This would include all of your major appliances – washer, dryer, range, oven, refrigerator, as well as any other special equipment you have specified.
37. FINISH ELECTRICAL
Here is where electrician comes back to install switches, outlets, light fixtures, ceiling fans, door bells, etc. He will also hook up appliances, furnace, air conditioner, doorbell, and so forth.
38. FINISH PLUMBING
Plumber will install sinks, lavatories, toilets, and all faucets.
39. FINISH HVAC & FINAL HEAT
Your heating sub will install registers and get furnace and air conditioning running properly.
40. SHOWER DOORS AND MIRRORS
Install shower doors. Hang mirrors.
41. CARPET
Now it’s starting to feel like home!
42. HARDWARE AND SCREENS
Typically, this is door, window, and closet hardware. Window screens.
43. DRYWALL REPAIRS
You may need to get drywall subcontractor back out to patch some dings caused by other subs’ work. This is normal.
44. CLEAN UP
This is final interior clean up.
45. FINAL PAINT
Touching up drywall repairs and so forth.
46. FINAL WOOD FLOOR FINISH
This should be your last inside job before moving in.
47. RETAINING WALLS
These outside home building jobs can be going on while work proceeds inside.
48. WALKS, DRIVES, AND PATIOS
You should wait until drywall has been delivered, because drywall trucks are VERY heavy, and could damage your flat work
49. SEPTIC TANK AND DRAIN FIELD
Same as above on timing with regard to drywall delivery. Septic tank holds waste and allows microbic action on solids. Drain field is where effluent leaches into soil.
50. FINISH GRADING AND LANDSCAPING
Final finished grades are established to ensure proper drainage away from home, and to prepare yard for landscaping. Trees, shrubs, grass, etc. are installed.
 DEAR POLE BARN GURU: Looking for 4pcs 4x6x18 treated ground contact. JERRY in COATESVILLE
 DEAR POLE BARN GURU: After reading some opinions on some forums I am getting ready to insulate the roof of my metal pole barn. Paper backed fiberglass insulation will not stop condensation without putting plastic sheeting over top of it. How do you feel about this method? Insulation against the underside of the metal roof with plastic over the insulation. DAVE DEAR
  If there is one thing I have learned in my construction industry career, it is insulation manufacturers, suppliers, installers, etc., will seemingly come up with or say anything in order to promote their product over those of others.
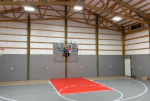 DEAR NICHOLAS: We have a half-court in our post frame shouse, wish we would have gone 20′ ceilings rather than 16′. As far as heights, we can engineer and provide up to 40′ sidewalls and three stories (or 50′ and four with fire suppression sprinklers), so your heights are not a problem at all.
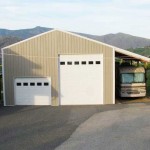
 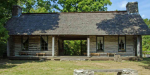 DEAR POLE BARN GURU: Have you ever built a dog trot style like this using metal buildings? Do you have pictures you can share? My husband and I really want to do this dog trot and hope to see pictures. Can you tell me what size the two structures were the you provided? Also can you provide roof pitch? Our plan is to place at least the first structure or both and build the porch in between. REEDE in STAFFORD
  DEAR SETH: You are in Climate Zone 5A for commercial metal buildings requirement for ceiling is R-49 Walls R13 + R14 continuous. You could meet this with all closed cell 7″ in roof, 4″ in walls, or do a combination of 2″ of closed cell plus 10″ open cell in roof. 2″ closed/4″ open in walls. Spray foam should be applied directly to inside of steel.
 DEAR SCOTT: It was bad enough when your tin guys put bubble wrap over your housewrap. Compounding your having spent your hard earned money on both, is closed cell spray foam should have been applied directly to inside of steel siding. Water under a bridge at this point. You should fill balance of wall cavity with unfaced rock wool and no interior vapor barrier. Wall will now dry to inside (meaning you may have to mechanically dehumidify). You did not say if your added lean to has an attic space or not. If your intent is to insulate with plane of roof (purlins) here is some guidance:
 DEAR CHRISTOPHER: Thank you for your kind words.
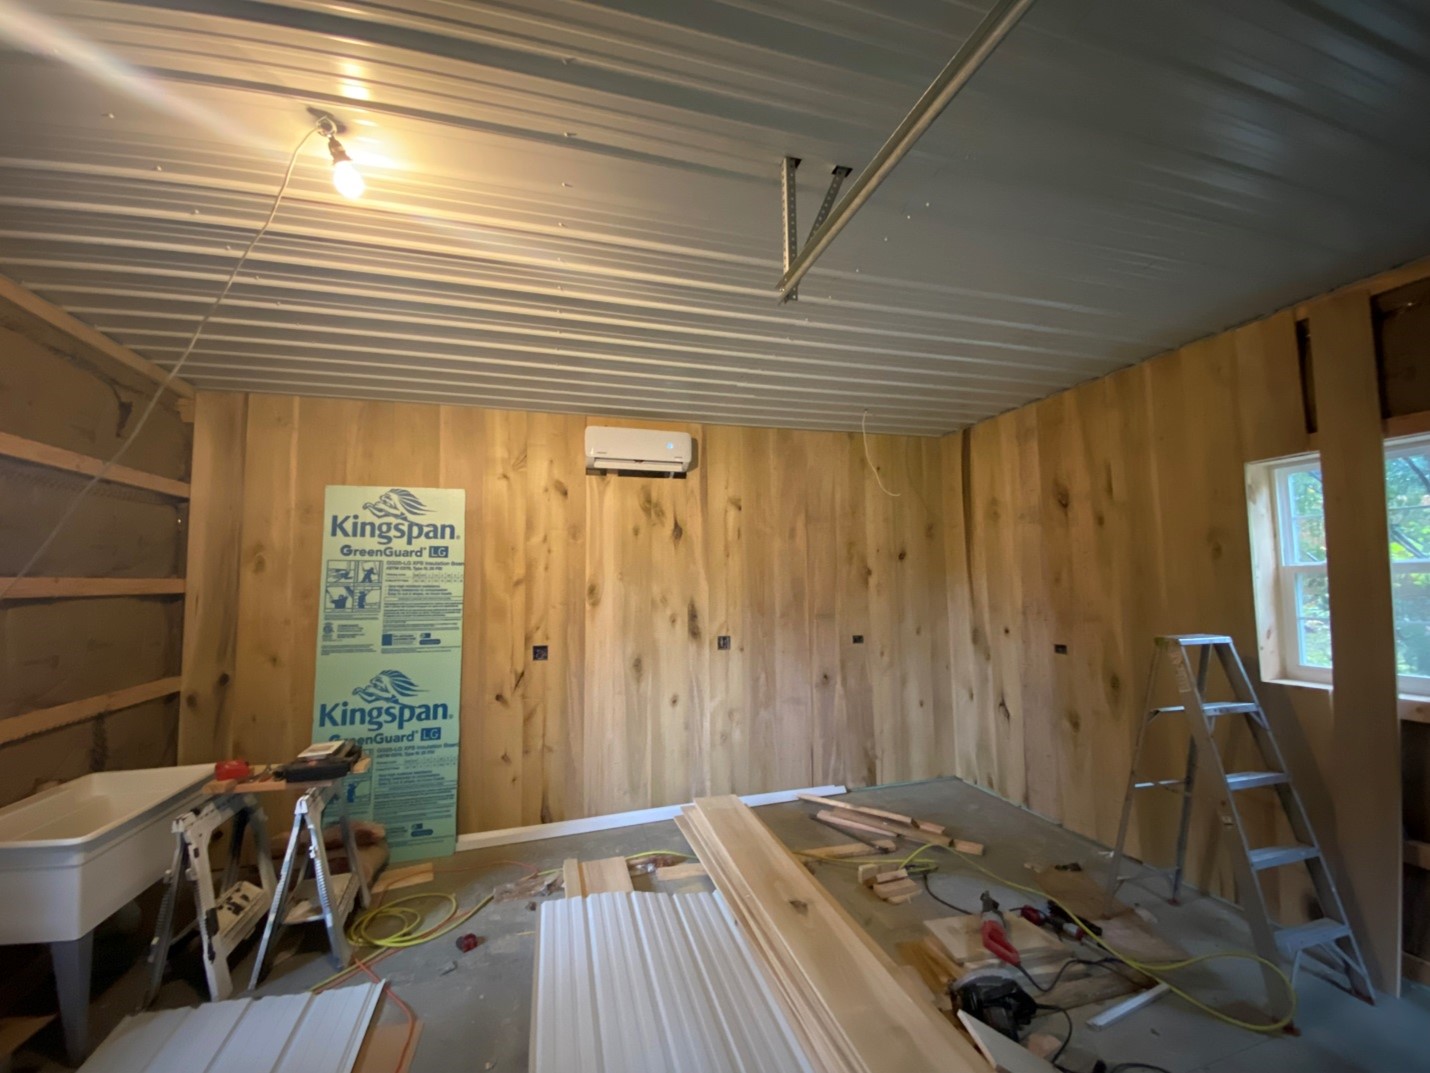
 DEAR KAL: You are in Climate Zone 5A, so a ceiling vapor barrier is not required by Code. Building scientist and founding principal of Building Science Corporation Joe Lstiburek states, “Plastic vapor barriers should only be installed in vented attics in climates with more than 8,000 heating degree days.” (More on degree days here:
 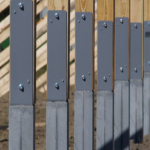 DEAR JONATHAN: We have had several clients provide their own pre-cast Permacolumns and they can be incorporated into our engineered designs. There is, however, a less costly option to explore:
  DEAR POLE BARN GURU: Hello, my question, which I can’t seem to find a straight answer anywhere online. Is anything needed between interior PVC panels, closed cell spray foam and the exterior metal siding? The pole barn is located in southern Indiana. It’s used as a shop and being heated occasionally with a wood stove. BENJAMIN in INDIANA
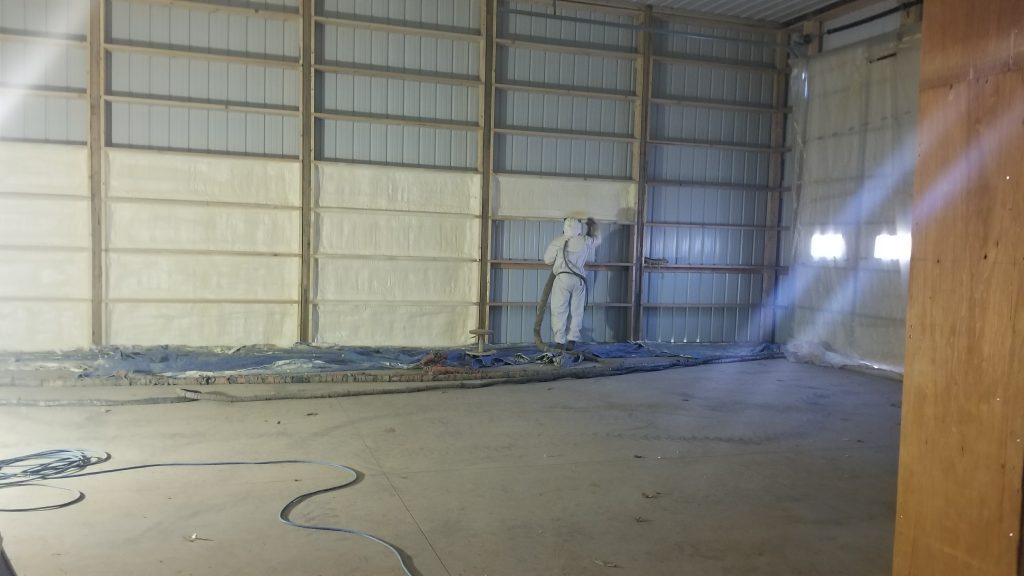
 DEAR BJ: Absolutely a bad idea. Pole barns “work” (e.g. stay standing) due to shear strength of steel sheeting (or OSB, plywood, etc., if used). When you place insulation boards between steel and framing, you are severely impacting ability of steel to carry those loads, as steel can shift slightly under wind loads. Eventually this will cause screw shank deformation (would take some very long screws), as well as slotting under screw gaskets, creating leaking (provided building doesn’t just fail first). If you really want to use XPS sheets, cut them to fit snugly between purlins and girts, taping all edges to achieve a tight seal.
 DEAR POLE BARN GURU: I would like to think of something for my 2 boys and I. One story 3 bed 2 bath. Living room dining room kitchen, laundry room with walk in closets. About what size would you recommend? SHANNON in KIPTON
 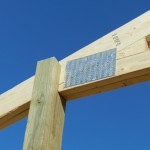 DEAR BRIAN: Thank you for being a reader of my articles. Even with a very low design wind speed, low risk occupancy and a well-protected site, it is unlikely 4×6 columns would be adequate to properly carry design loads, given your eave height. As you are possibly considering utilization of ganged (double) trusses, and will need larger columns anyhow, you may want to consider increasing column spacing to 12 feet on center. Fewer holes to dig, fewer columns to set and your budget will be much happier. In any case, I would encourage you to invest in a fully engineered building – any possible savings you might believe you would attain without engineering, will be quickly eaten up when you have a failure.
 DEAR JOE: My own post-frame building has a 48′ x 60′ main center section. Downstairs has a clearspan floor (yes, spanning 48 feet), with a 16 foot high ceiling. Upstairs is a full living area, again with 16 foot high ceilings. A portion of this upper level also has a small mezzanine. Overall building height at peak of roof is 44 feet. So, in answer to your question – fully engineered post-frame construction lends itself very well to multiple stories (up to three stories and 40′ tall sidewalls, or four stories and 50′ tall sidewalls with fire suppression sprinklers). We have provided over 100 of our buildings to clients in New England states, including a dozen or so in New Hampshire.
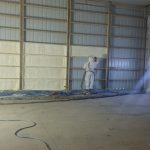 When it comes to insulating a building envelope, there are various methods that can be used depending on the building’s purpose and the required level of insulation. However, combining metal roof and wall panels with spray polyurethane foam insulation (SPF) is widely considered one of the most effective ways to achieve secure, strong, and long-lasting insulation. Utilizing this method of insulation offers numerous benefits including the sealing of panel joints, creating a vapor barrier, providing thermal insulation, and producing air barriers.
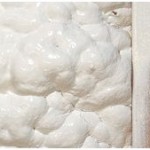
 The thickness of the initial pass fillet during picture framing should be at least 0.5 inch and should not exceed the maximum pass thickness recommended by the foam manufacturer. The minimum thickness of the initial pass is specified to provide enough material to activate the blowing agent and initiate the cure. After picture framing the perimeter of the area, the applicator fills in the center of the cavity using the maximum thickness recommended by the foam manufacturer. Maximum pass thickness varies by foam formulation and is listed in the technical data for each SPF product. Excessive pass thickness can result in inferior quality due to the increase in foam temperature during curing. For most closed-cell SPF, the maximum pass thickness is 1.5 to 2 inches. It is important for applicators of closed-cell SPF to follow manufacturers’ installation instructions on pass thickness limits and proper cooling times between subsequent passes made if they wish to develop the desired total thickness of the insulation.
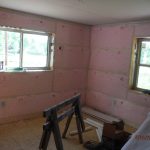 DEAR MICHAEL: Internal sweating is a function of many more things than how you detail your wall insulation (you are correct in having Tyvek on exterior, vapor barrier on interior). As your building shell gets tighter, moisture is going to be trapped inside and you may need to mechanically dehumidify in order to prevent condensation. Some considerations – have a well-sealed vapor barrier under your slab, grade outside of building at no less than a 5% slope for at least 10 feet. Properly vent eaves and ridge, in correct proportions. You may want to consider your choice of blowing fiberglass into your walls, as it will settle over time, leaving a cold spot at top of wall. It is also affected by moisture. I would recommend using Rockwool batts instead.
 DEAR POLE BARN GURU: What’s your experience with Rich-e board insulation? TERRY in NORTHPORT
  DEAR TERRY: Hansen Pole Buildings’ warehouse had a 40 plus year old steel roof, it leaked water like a colandar. We also wanted to add overhangs to eaves and endwalls. In order to overlay our old roof (building is 96′ x 96′), we placed 2×8 rafters at each existing truss, fastening through into truss top chords. We then joist hung 2×6 purlins between each rafter. Although we did not insulate (building is cold storage), we could have placed R-30 Rockwool batts between purlins. As long as your underlying old steel roofing is able to withstand any shear loads imposed, then pretty much any well thought out design solution would work. Ideally, you should engage a Registered Professional Engineer to evaluate your current structure and design a best structural solution. Least expensive, provided you can access underside of roof, your least expensive will be a tear off. If you have an attic space, order roof steel with an Integral Condensation Control factory applied. Any contractor who you would consider hiring should be booked out for at least a year, if not longer, and will want a premium unless they just happen to live nearby.
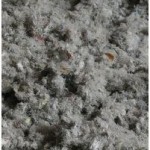
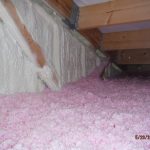
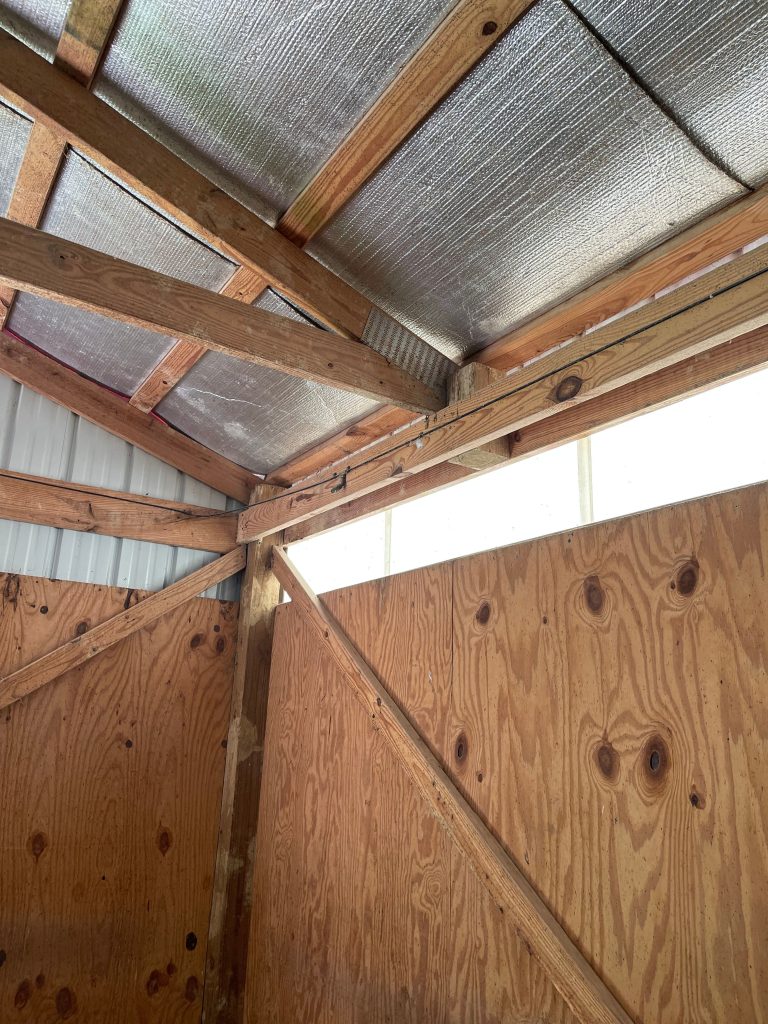
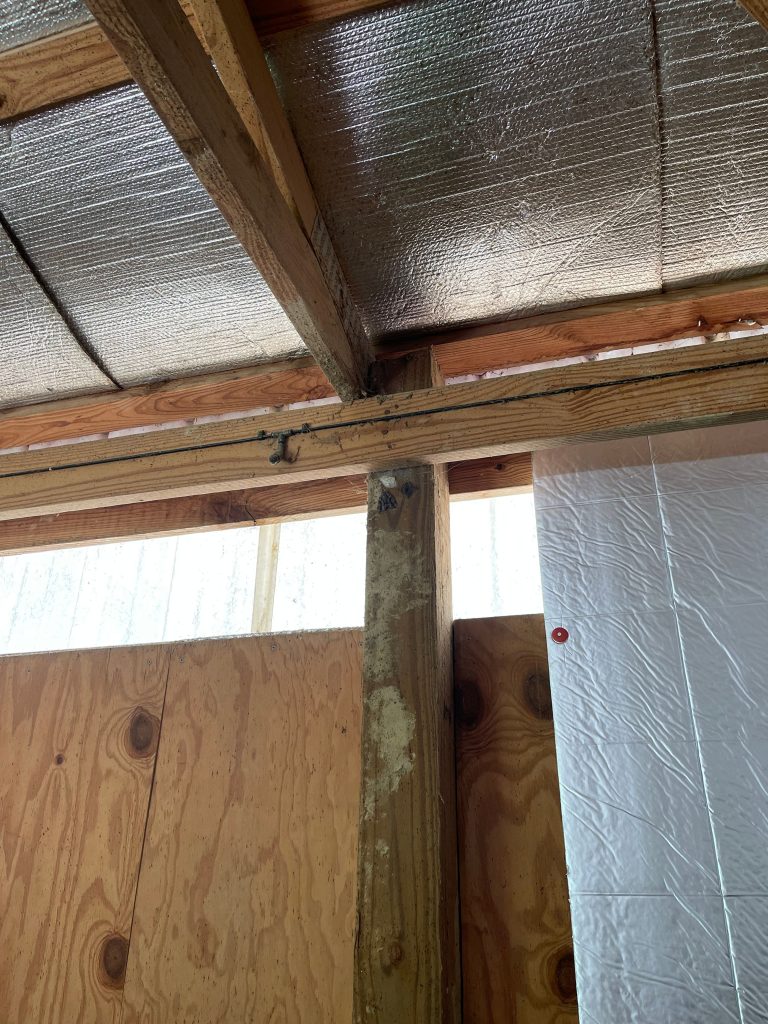
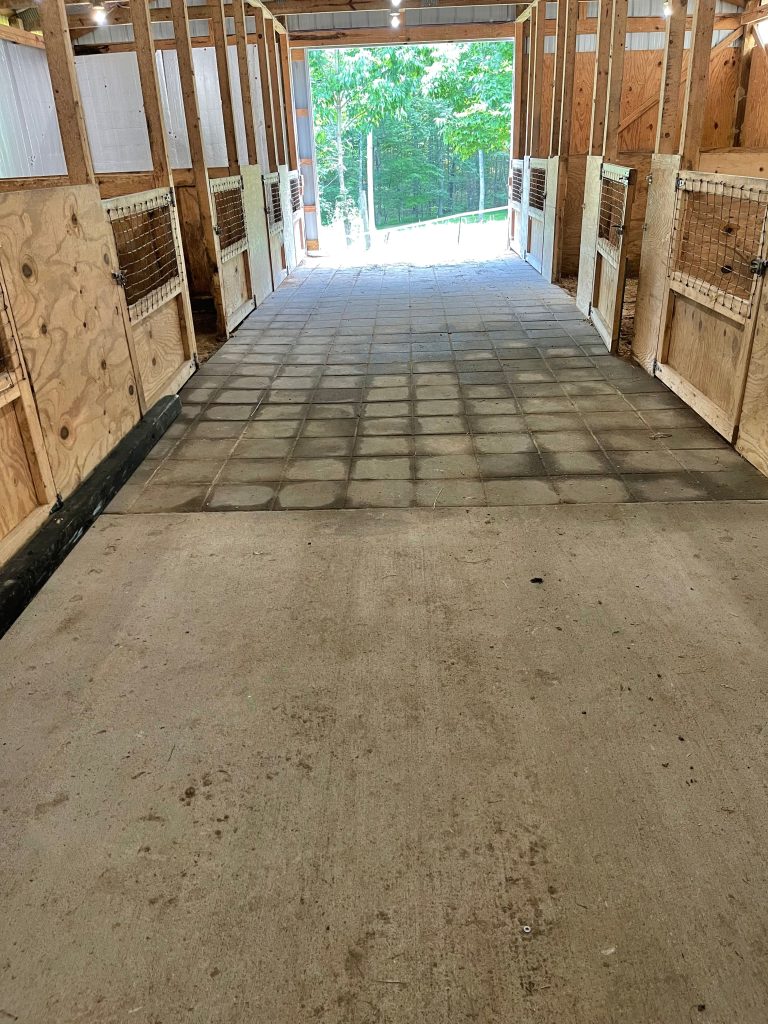
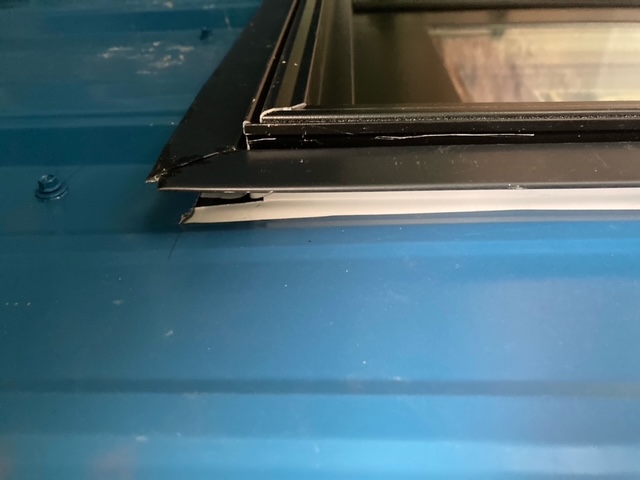
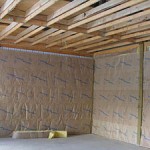
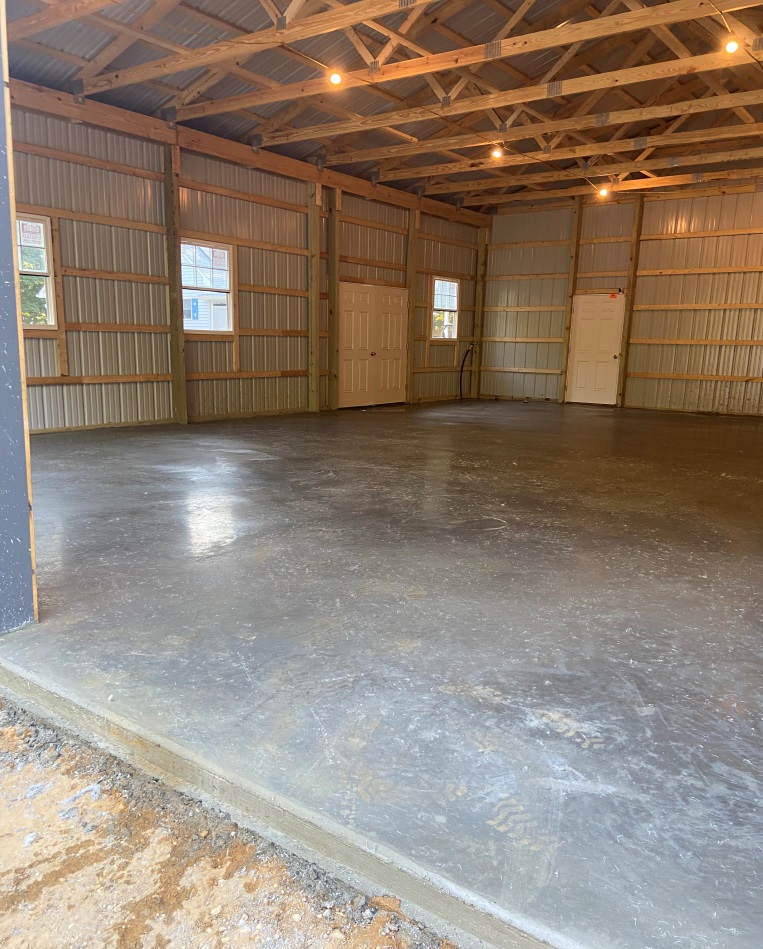
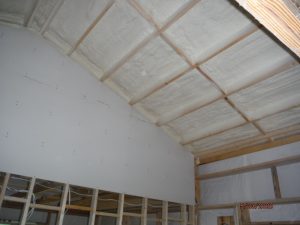 When you see these shadowy lines, you are actually seeing trapped dust particles collecting in front of bookshelf wall girts. And unfortunately, since dust is behind wall finish, you can’t just wipe it down.
 DEAR POLE BARN GURU: Hello, I am currently being approved from my lender to build a 30’x40’x10′ pole barn shop. I will have 12″ eaves with soffit vents. The shop will be climate controlled 365 days a year. I am getting lots of different advice on insulation/building envelope. I wanted to get your opinion. I do not think spray foam will be in my budget. Could I use Tyvek wrap with fiberglass batts in walls and blow in fiberglass in ceiling? Or should I use something like Solarguard under the roof, and Tyvek on the walls. I would appreciate any suggestions you may have. I want to get this build right. If you could send me your reply to my email that would be great! Thanks so much. SHAWN in NOBLE
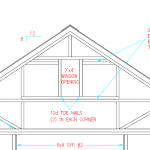 DEAR POLE BARN GURU: Do you have an engineered work around for gable ends so I could replace the vent with an egress window? BRUCE in GOLDENDALE
  “
“  Mike the Pole Barn Guru responds:
 DEAR KAITLIN: Most pole barns are built either without being engineered or to Risk Category I. For residential purposes, it would need to meet more stringent structural requirements of Risk Category II. You will probably have to add some perimeter slab insulation in order to meet Energy Code requirements. My best recommendation is to engage a Utah Registered Professional Engineer to do a physical evaluation of your existing building and to design needed structural upgrades.
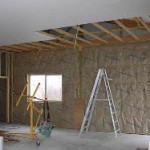 DEAR WESLEY: I have seen many far less well thought out wall systems without exterior sheathing not experience issues with condensation. As far as air sealing, you could get a blower door test done to find out exactly what your situation is. For extended reading, please see
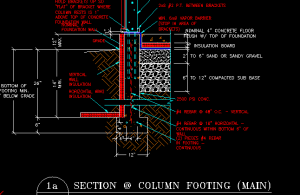
  DEAR TRIPPE: We always suspend our columns eight (8) inches above bottom of holes and mono-pour footing and concrete encasement in a single pour (saves on paying for short haul charges). While concrete typically reaches 75% of compressive strength in seven days, when I was building we would pour one day and start building next day. For slabs on grade, it is recommended to not walk on them for 24-48 hours after a pour. Keep in mind, concrete compressive strength is in psi (pounds per square inch) and soil bearing capacity under footing is in psf (pounds per square foot). Most soil will support a maximum of 2000 psf or 13.88 psi, so your concrete (at 2500-3000 psi) is going to be much stronger, even after a very short time span, than soils beneath. You can increase concrete strength by ordering a higher cement mix and speed curing time by use of hot water (avoid use of chemical additives to speed curing).
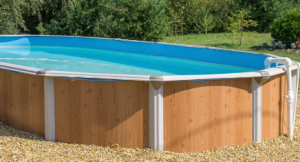 DEAR POLE BARN GURU: I live in Minnesota and wanted to insulate my above ground pool. I cut sheets of 2” Dow styrofoam to fit in between the legs of the pool. I want to use pole barn steel to surround the pool frame to hide the styrofoam, any ideas? SHERRIE in MINNESOTA
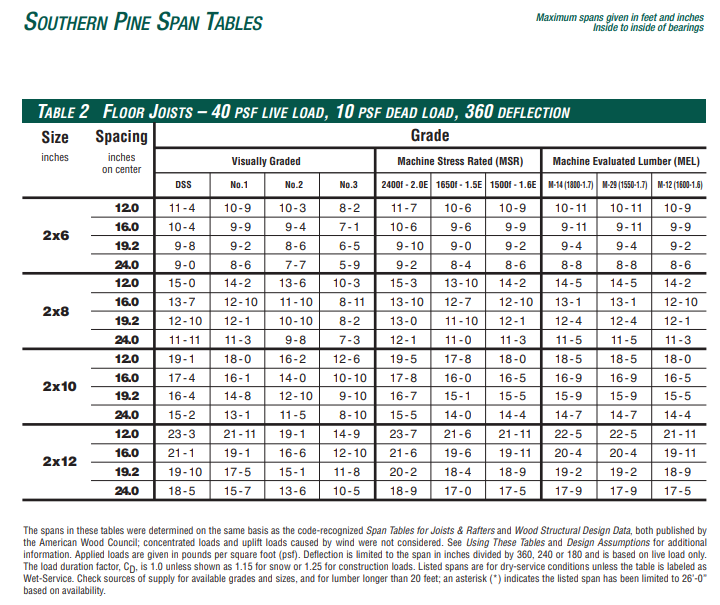
 DEAR TAMI: Provided footings beneath your CMU wall are adequate in dimension, probably. In areas of your existing wall where ICC ESR approved engineered wet-set brackets for columns will be placed, existing blocks will need to be removed and replaced, so brackets can be properly poured into wall.
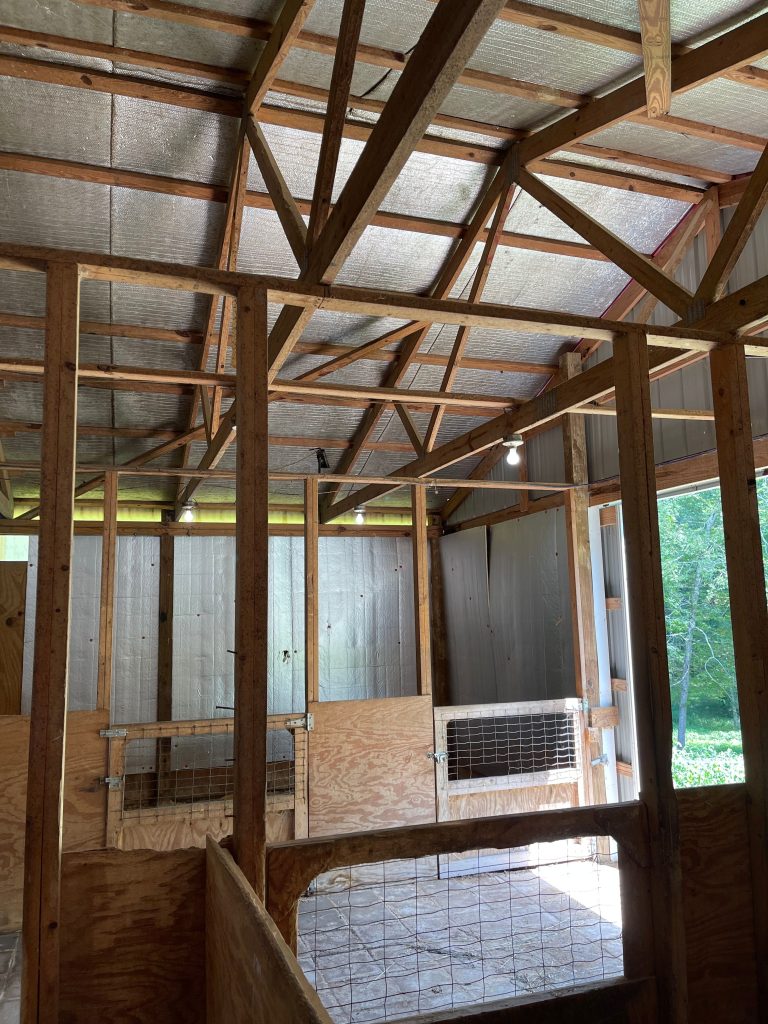
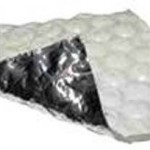
  If you have not seen ridiculous claims of double digit R-values from reflective radiant barriers yet (aka ‘bubble wrap insulation”) you will. Read more about these claims here:
 DEAR CODY: In my humble opinion, foundation walls for post frame buildings defeat much of the cost savings with little or no added benefit. I will now step off my soap box….
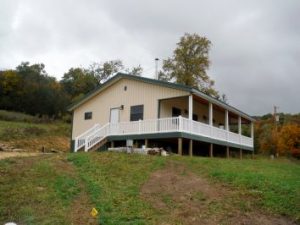 DEAR POLE BARN GURU: Can any of your buildings be built where the back half of the building is suspended on poles…..because the ground slopes downhill? What about zoning? Do you check with my county to find out whether or not I can have a building? DAVID in WESTMINSTER
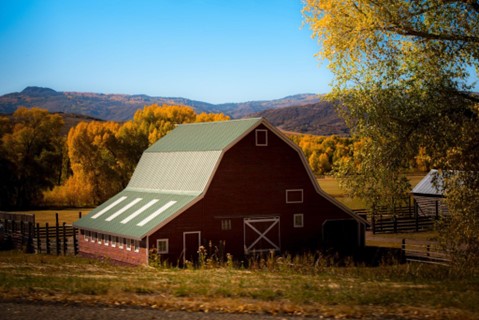
 “Hi guru, I need your guidance. I am looking to build a 30x135x14 commercial building for dog daycare. I have no experience in building/ordering a pole barn and want to get it right.
  Under 2021’s IECC (International Energy Conservation Code) for commercial buildings Ceilings should be R-49, Walls R-20 plus R-3.8 continuous, slab R-15 three foot down at perimeter and R-5 under slab itself.
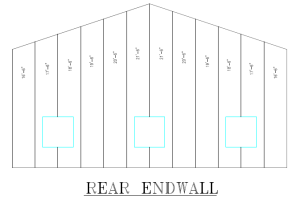 DEAR MATT: Our buildings (as are most Pacific Northwest Buildings) measure 36 feet from outside of column to outside of column. This allows for 12 sheets of steel plus the lap on the 12th piece (covering 36′ 1-1/2″ roughly) to be installed without having to rip the last steel panel lengthwise. Pressure preservative treated splash planks, headers, etc. will be applied to exterior faces of columns, giving a framed finished width of 36’3″.
 DEAR KEVIN: #1 reason to not use pit run is it is difficult to auger holes through.
 Robertson County is in Climate Zone 4A, where 2021 International Energy Conservation Code (IECC) requires R60 in roofs and R30 in walls. You can meet wall requirements with 7-1/4″ Rockwool (
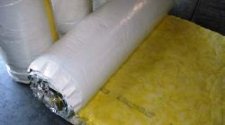 DEAR MARK: You are now finding one of many “joys” of using vinyl backed metal building insulation. You will want to read my personal metal building insulation story:
  DEAR RON: Problem #1 is dry set (bolted) brackets are not rated for moment (bending) forces, unlike wet set brackets. This becomes problematic, especially in areas of high wind.
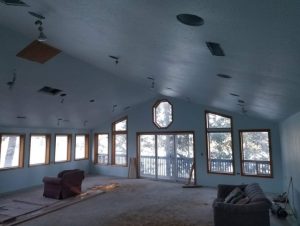 DEAR CHRIS: Saline County is located in Climate Zone 5A. As such conditioned buildings require R 60 attic insulation.
 DEAR MARK: Thank you for your kind words about our YouTube videos.
  DEAR POLE BARN GURU: Do you all have barns with living quarters? Not looking for a barndominium, per se, but a restroom with a shower and a living room in addition to 4 stalls and a tack room. we plan on staying there at first while we build the main house on the property, then use for guests or storage. SARAH in SARASOTA
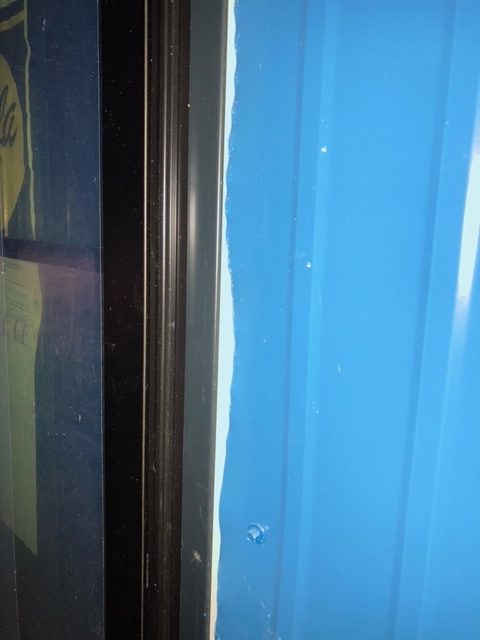
 DEAR STEVE: Your building has sadly become an experiment to show what happens when adequate uplift provisions have not been made during construction. Hopefully your building has been insured for replacement costs – so you can have this work hired out.
 MYTH #8. THERE ARE NO FOOTERS IN POST FRAMES
 DEAR POLE BARN GURU: Good afternoon! Looking to see what trim to use on the corners?
 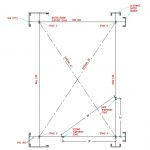 DEAR POLE BARN GURU: How much more difficult would it be to put the metal roof on if you can’t square the roof trusses. Because the posts were not cemented in properly. We are 8′ out of square on a 24’x50′. Would it be possible to square being that far out? TOM in BLOOMSBURG
 DEAR POLE BARN GURU: What are the building code standards for the horizontal infill framing between the posts of a post frame buildings, in terms of timber size, horizontal/vertical on center distance. I have seen 2x4s and 2x6s used, usually 24″ o/c vertically. Horizontally, how far can they span horizontally? JOHN in BANDERA
 DEAR POLE BARN GURU: Thanks for taking the time to respond… hope this finds you doing well… I’m planning on using closed cell foam… so if I’m using closed cell I don’t have to use house wrap? I’m new to all this… so any advice you could give me would be greatly appreciated… RICKY in INDIANA
 DEAR POLE BARN GURU: Hey bud I wanted to pick your brain for a second. If a person built 2 steel truss pole barns the exact same… the only difference, one would be wrapped in metal, and the other would be wrapped in wood siding… which one would be stronger? The one with wood siding would be using 1×8 hemlock boards if that makes any difference. Thanks. RICKY in KINGSPORT
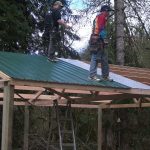 DEAR POLE BARN GURU: I have seen some discussion on “price per sq. ft. to build” a barndominium you said DIY was about $85 I believe correct? When you say DIY, are you referring to like self contracting the house or self contracting and actually doing plumbing, electrical, flooring, shower install labor, etc.? LANCE in YOUNGSVILLE
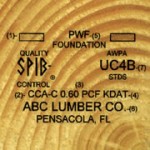 DEAR STEPHEN: I would have absolutely no qualms about using properly pressure preservative treated (UC-4B rated) columns in ground. Personally, my lovely bride and I live in an 8000 square foot finished, million dollar post frame shouse (shop/house) with embedded columns. I have also built (yes, me) two post frame buildings in Eastern Tennessee – one for my eldest son in Maryville (read about it here:
  DEAR POLE BARN GURU: I have a pole barn and need the outside sliding doors replaced. There are two doors and they’re each 10′ high, 8′ wide, and 1-2/3″ thick. Do you do this kind of work? ANDY in MIAMISBURG
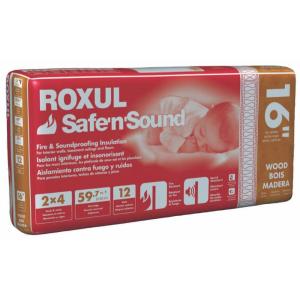 Now – on to your question at hand. For your walls, it appears most folks do exactly as you propose and build a 2×4 wood stud wall inside of their PEMB’s (pre-engineered metal building) steel wall girts. You will want to completely fill your wall cavity with insulation – I would recommend rock wool, as it is not affected by moisture (here is information on one particular product
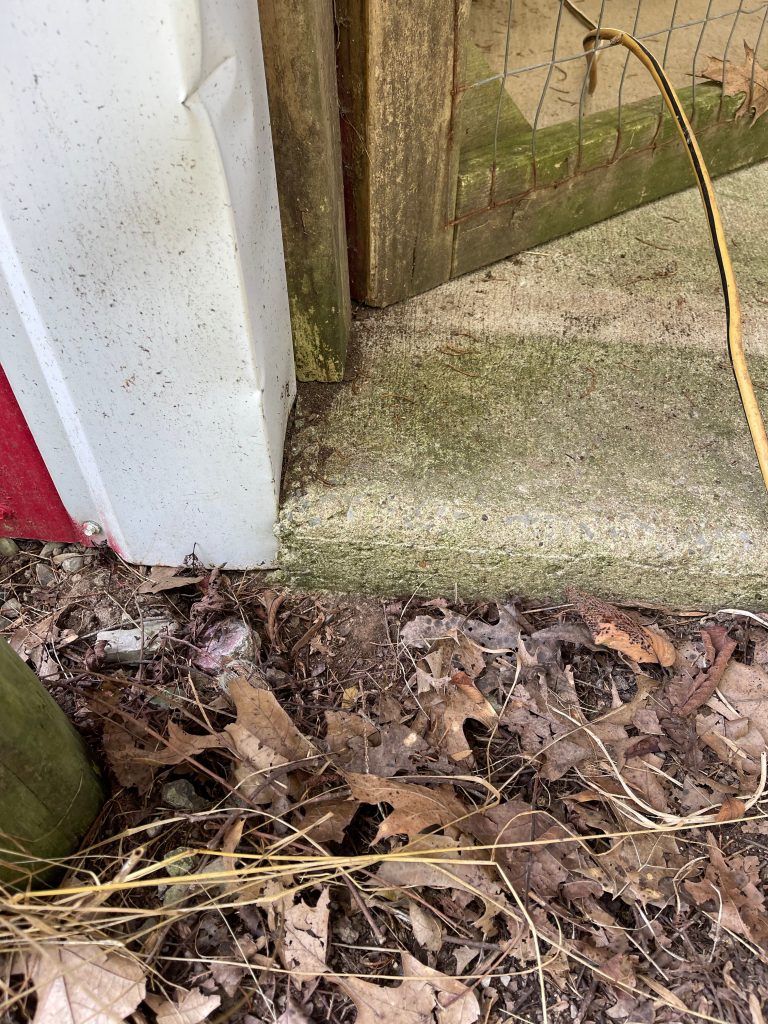


 DEAR JOSEPH: More important than concrete thickness will be what you have done to prepare your site. Properly prepared and well compacted, it is possible a four inch thick slab could do everything you need it to be. It might behoove you to thicken slab to five or more inches in zones of wheel travel and add 1/2″ rebar in these areas (less than five inches thick does not provide adequate concrete coverage for rebar to be effective).
 DEAR BEN: Code requires a one inch minimum of airflow across your entire roof surface above batt insulation. Air flowing only at steel ribs would be inadequate to meet requirements. Assuming you have 2×6 roof purlins, 5-1/2 inches of blown cellulose would give you roughly R-19.25. You would be better served by using 2-1/2 to 3 inches (R-17.5 to R-21) of closed cell spray foam applied directly to underside of your roof steel, as it does not have to be vented above.
 DEAR KEVIN: Your call happened to be routed to one of our newer Building Designers. Post frame construction is highly complex, with a literal unlimited number of possibilities, this being one your designer was unfamiliar with.
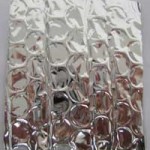 DEAR FRANCES: Without having to pull off your building’s roof steel, install some fashion of condensation control then reinstall it – there is only one practical solution – two inches of closed cell spray foam applied directly to underside of your steel roofing. This would provide an R-14 insulation value. It is unlikely to have an effect on reduction of noise from rain, as it is not good at blocking sound waves. “Double bubble” offers little to no R-value and would require being installed between framing and roof steel.
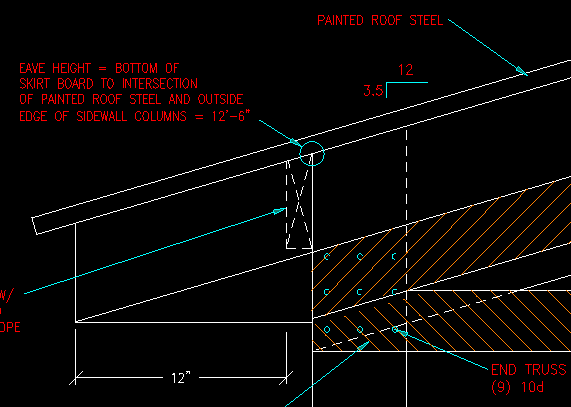
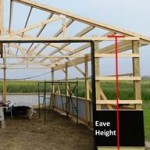 EAVE HEIGHT
 APPROPRIATELY SIZE SPACES
 I am really considering using a Hansen Pole Barn Kit for the shell, but need to figure out how to ensure 60% humidity inside the building doesn’t rot it from the inside out. I know that HVAC Dehumidification will be very import, but so is how to seal the build walls from both the outside and inside, how to insulate the walls and ceiling (especially since we plan to have a flat ceiling thus an attic area where the Ceiling and Roof may need to both be insulated to avoid condensation, etc.
 DEAR OMER: Thank you for being a loyal follower. Although I certainly have the ability to do your structural design, I prefer not as it would place me in a position of liability as well as practicing engineering without a license. Even though you are building a permit exempt agricultural building, I would encourage you to build from engineered plans – as you say you want it to be “rock solid for generations to come”. Only having it fully engineered is going to give you this sort of assurance. Sawing your own wood is also problematic
 DEAR POLE BARN GURU: I have a 40″ side wall pole barn with rough cut red oak 6″ x 6″ posts on 8″ centers. The posts are bolted to engineered U braces that are secured in the concrete. The top of the posts have 2″ x 8″ rough cut red oak inside and out secured with through bolts. The bottom of the posts where they are secured to the u braces seem to me as a pivot point. Would “Y” bracing from the top down to about 4 foot to the center of each post be sufficient, or do I need to come down to the bottom near the U braces and run a board all the way across the 40 foot span and then 1 in the middle and “W” brace the side walls. I was thinking of keeping it open with the oak sealed with linseed oil or equivalent for looks, but could close in the sides. Thanks RUSS in STUARTS DRAFT
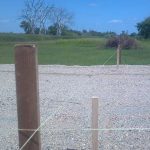 DEAR POLE BARN GURU: Good morning, I’m getting ready to have a slab poured in my 30’x30′ pole barn, the slab will be 7 inches thick (was meant to be 6 but I failed to bring the base material up high enough) of 4000psi, with fiber mesh along with wire mesh. The pad site is level and compacted asphalt millings (compacted by a 14 ton vibrating roller). The base material I was advised to use is a “clean fill”, that is mined from below ground from a local quarry, its best described as similar to a baseball infield dirt. The base is approximately five inches thick. I personally put the base down, spraying it with water and compacting with a vibrating plate compacter as I went. My main question is based upon your knowledge, is it your opinion that this will provide a suitable base for the slab? I appreciate any input you may have. Thank you and thanks for a great site! ADAM in CLARKSBURG
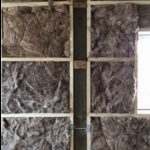 DEAR POLE BARN GURU: If an individual builds a pole barn that he intends to fully heat does he HAVE to insulate it? Can’t find a definitive answer in the IBC or IECC. BOB in CROWN POINT
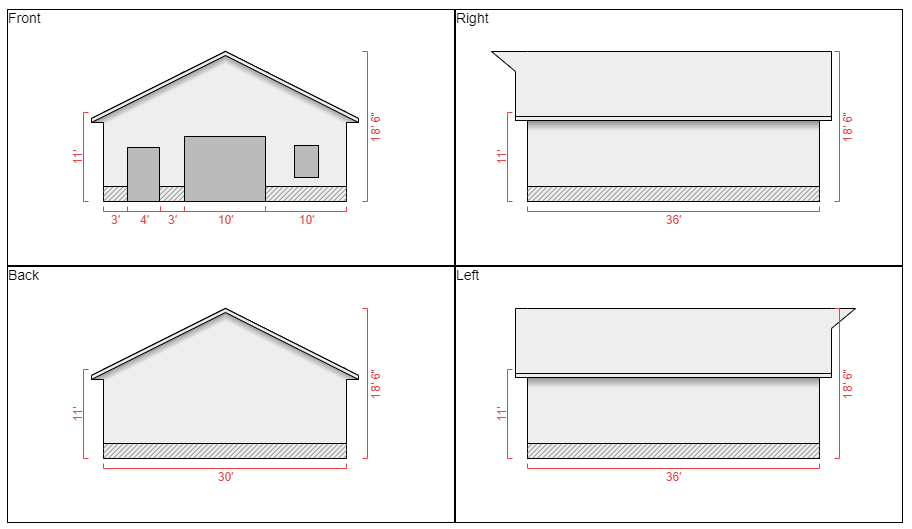
 DEAR JACK: A great place for info is the
 Roof – order roof steel with an Integral Condensation Control (Condenstop or Dripstop) factory applied. Install a steel ceiling across truss bottom chords, blow fiberglass insulation in above steel ceiling. Vent attic at eaves with enclosed vented soffits and ridge.
 DEAR AMANDA: Thank you for your interest in a new Hansen Pole Building. These would be included items:
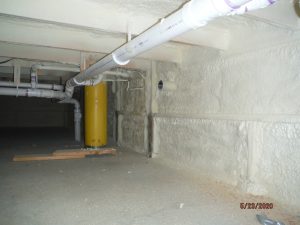 Closed cell spray foam applied directly to steel roofing and siding can be a great product for controlling condensation, achieving an air tight barndominium and at R-7 per inch is a great insulation solution. So good, I strongly encourage its use, especially for those buildings in Climate Zones one and two (deep South).
 DEAR KURT: Thank you for your investment in a new Hansen Pole Building – be sure to send me lots of progress photos during construction (and of course ones when it is all complete).
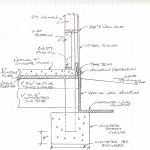 DEAR GREG: Any possible movement would come from either inadequately compacted or loose soil below column footings, inadequate footing diameter, or frost heave. To prevent frost heave, columns footings should be placed at frost depth or deeper and perimeter of slab should be insulated vertically with rigid insulation. In your climate zone, this would entail a four foot ‘tall’ R-10 insulation board. Install on inside face of pressure preservative treated splash plank, with top of insulation even with top of concrete slab. As an alternative, you can insulate slab perimeter per Frost-Protected Shallow Foundation requirements found here (note, slab edge does not have to be thickened or have a stem wall):
  Now, I’ve been told to do closed cell insulation on my walls 1” thick. I wanted an opinion on whether to go every inch of the walls top to bottom all the way to the roof? Would I benefit from the insulation at all by just going to the 10’ mark (my lowest wall height) because that’s as high as my interior osb is going anyway. I guess what I am asking is it any benefit to insulate closed cell up to 10’ mark from the floor and then just bubble foil the main shop above 10’ to give a finished look? THOMAS in PLEASANT HILL
 DEAR POLE BARN GURU: We are looking to build a 40×90 pole barn, with 1/3rd being used for storage and 2/3rds for a vehicle maintenance. Both will be heated and storage cooled. Concrete floor, shingled roof, insulated, vertical metal siding, no windows, 5 overhead doors on the same side. Can you span the trusses from wall to wall and provide the above with no center columns? Thank you, ROD in CLEVELAND
 DEAR POLE BARN GURU: What base size and height is correct for a cupolas for a 32’ wide by 36’ long by 35-40’ high with a 10 over 12 pitch roof? Thank you for your answer. NANCY in SPENCER
 DEAR ERIC: 40 years ago I provided a post frame building kit package for a tire dealer in Pahrump!
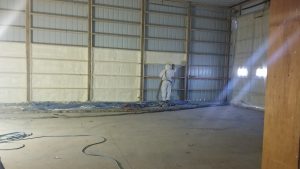 Installing spray foam during winter months is more challenging, but one can increase potential for a successful installation in several ways. One way to successfully apply spray foam insulation in winter, despite less than ideal conditions, is to use a winter blend of spray foam. Closed-cell spray foams can be formulated into a winter blend allowing them to withstand colder environmental and surface temperatures. If you want to install open-cell spray foam insulation, however, it’s not possible to create a winterized formulation. Instead, you must create a suitable environment at installation site (e.g. add heat to building).
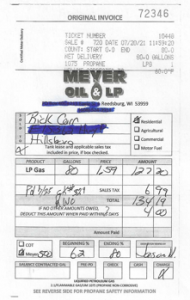 They did not refill the tank until 7-20 21. They filled it from 62% to 80%! It only took from 92% down to 62% to heat the building ALL winter!
 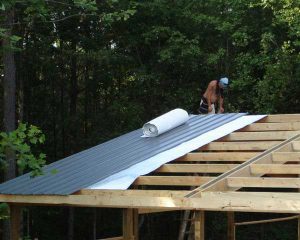 For walls – siding, weather resistant barrier (aka house wrap), unfaced batts, clear poly, interior finish works fine. On your roof, house wrap allows moisture to pass through and be trapped between it and roof steel – possibly causing premature degradation of your roofing. You need a thermal break directly below roof steel. I would recommend an Integral Condensation Control (
 They don’t include the materials used, so I can’t research the materials cost. But does this sound like a reasonable quote? Seems high, but this is my first pole building. Maybe material cost is like lumber, UP UP UP…?
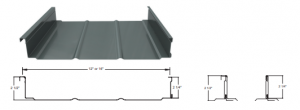 DEAR POLE BARN GURU:
 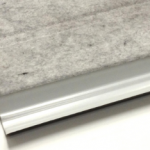 My first choice would be to design your building to be capable of supporting a ceiling, use raised heel trusses and blow in fiberglass insulation. With raised heel trusses you can get full thickness from wall-to-wall and you do not end up heating dead space between roof trusses. Roof steel should be ordered with a Integral Condensation Control (
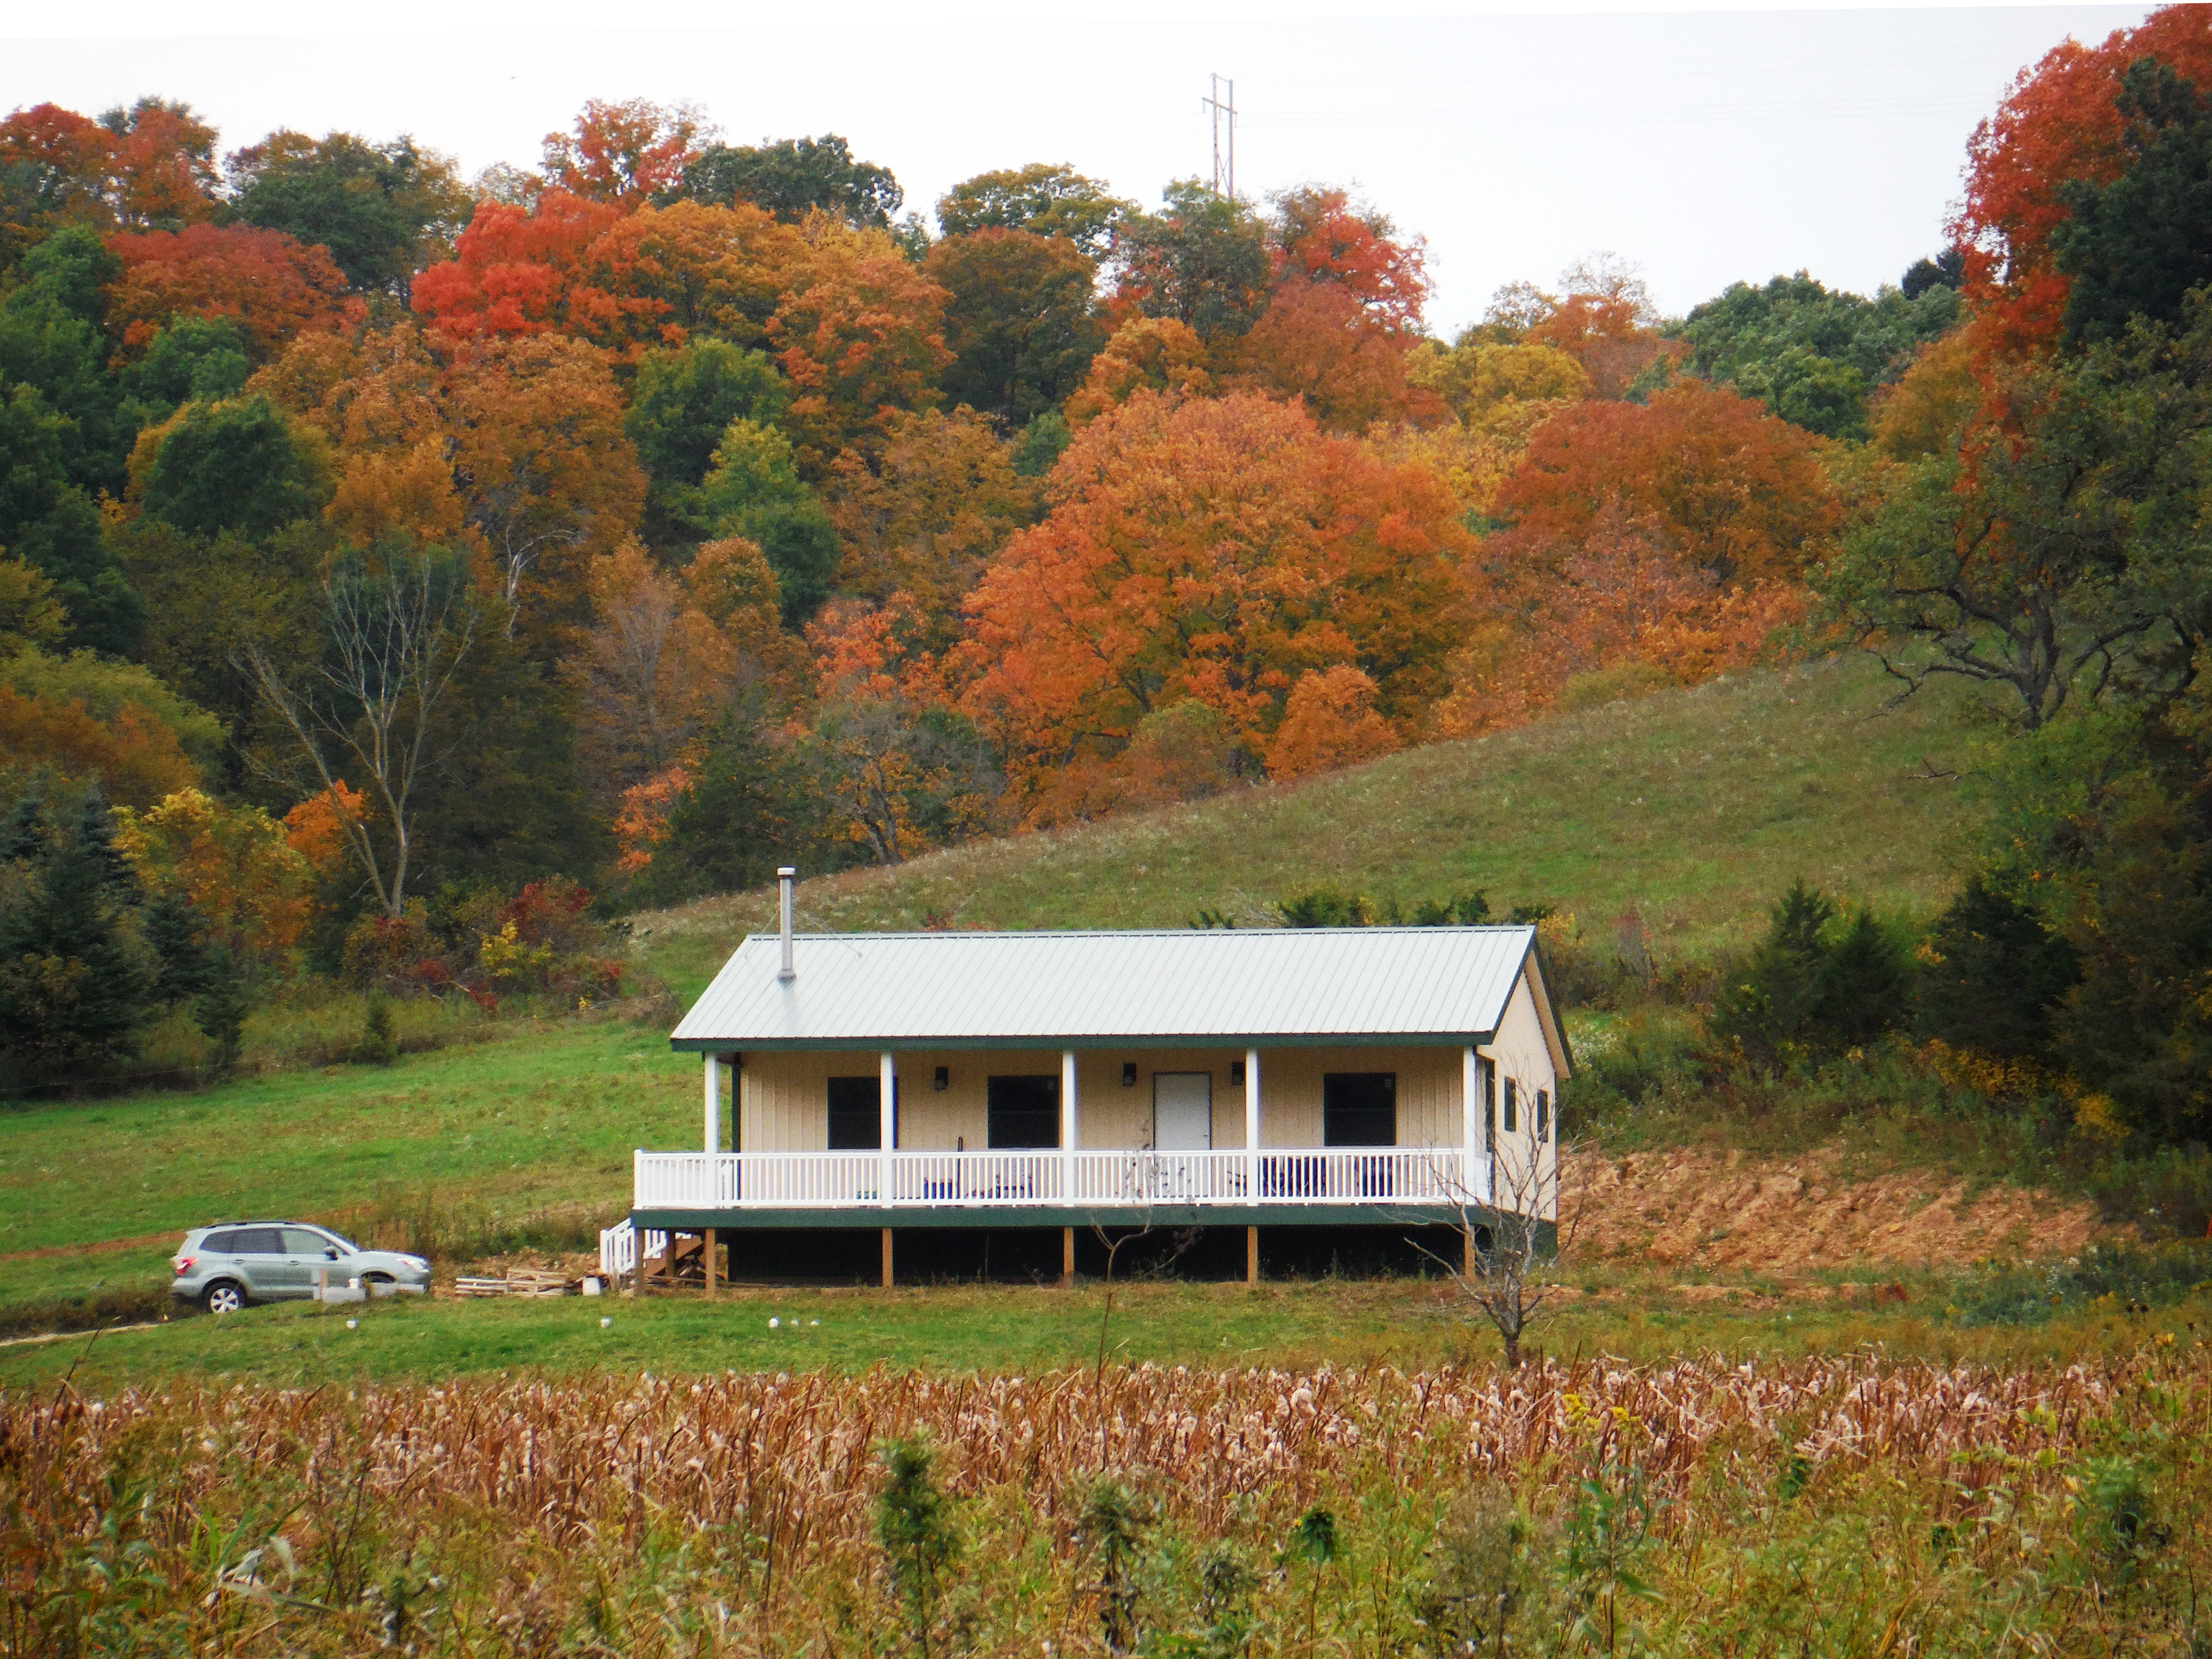
 Most crawl spaces are created with dirt floors, face it, they are low budget and meet Code with a 6mil black Visqueen Vapor Barrier installed. Now retired Hansen Pole Buildings’ Designer Rick Carr built himself a hunting cabin over a crawl space a year ago and decided to take a slightly different route. He opted to do a thin layer of concrete to cover ground in his crawl space, with an idea of being able to roll around using a mechanic’s creeper, should he need to work on sub-floor utilities. Here is an excerpt from part of Rick’s planning:
  DEAR TAMI: Most pole building roof systems are designed to support a bare minimum roof dead load – usually 2.5 to 3.3 psf (pounds per square foot). If this is your case, then your structure would not be able to support this added weight. We made a decision a year ago to use a minimum top chord (roof) dead load on all our roof trusses spanning 40 feet or less of five psf – just in case our clients decided to sheet their roofs with OSB or plywood with an underlayment and didn’t tell us about it in advance.
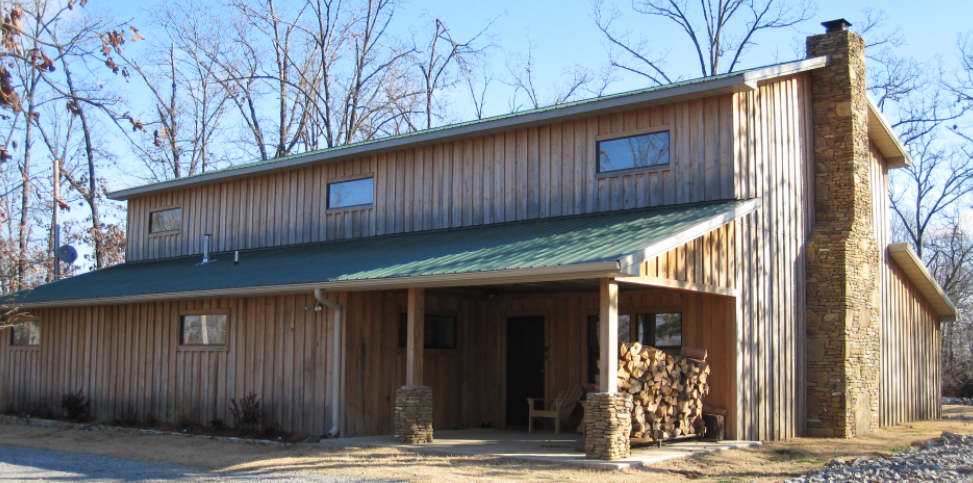
 DEAR POLE BARN GURU:
 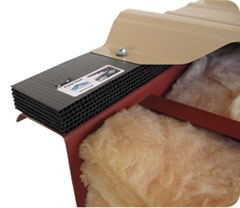 “Would this product
 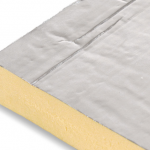 DEAR POLE BARN GURU:
  Hansen Pole Buildings are carefully designed and engineered to exacting and stringent standards. Included with these structural design solutions are some components an average individual cannot just go buy off a shelf at your local lumber dealer or big box store. Due to liability issues with materials specified on plans not being able to be readily acquired by general populace members, our third-party engineers are unable and unwilling to put their seals and signatures on plans where we are not providing components. Even if they were to do so (and you could find parts as specified) we have so much buying power, we are able to provide materials at a price level competitive to anything you would be able to acquire on your own.
 For walls – best results will be from two inches of closed cell sprayed to inside of wall steel, then fill balance of wall cavity with either open cell spray foam, or unfaced batts (ideally stone wool
  DEAR POLE BARN GURU:
  Here is how we did it for my Sales Manager, Dan, in my past life when I was a post frame building contractor. Dan wanted a 30′ x 50′ monitor style building for a garage/shop and then an office above. We had engineered a clearspan roof/floor truss combination for support of wings and second floor. This system had a double truss every 10 feet. At eight feet from each outside wall, we mounted columns to these trusses to support roof of raised center. Joists we placed for ceilings and floor system. With an 8/12 roof slope, upper level used scissor trusses with a 5/12 interior pitch.
 DEAR ERIK: Yes, our structural plans, sealed by our independent third-party engineers are designed to meet or exceed loading requirements for each individual building’s jurisdiction. We have provided several buildings in Clark County, including the giraffe barn at your Lion Habitat Ranch in Henderson. We do always have our clients verify load conditions with their Building Department prior to ordering. This will give you an idea of what will be on form to be completed:
 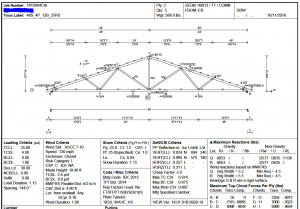 DEAR DAVID: If your building’s roof trusses have been designed for at least a five psf (pounds per square foot) bottom chord load (often shown as BCDL on engineered truss drawings) then they could support weight of either 7/16″ OSB or 5/8″ sheetrock. Neither product is designed to span greater than two feet, so you would have to add framing between trusses to adequately support.
 It was always our intention to build a pole barn or barndominium on the property but with the requirement of having such in place to qualify, we now need to consider doing this as part of the loan process.
 DEAR POLE BARN GURU:
 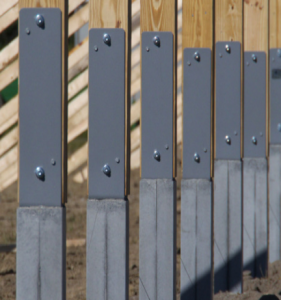 DEAR TIM: Back in my post frame building contractor days we built many a building in and around Medical Lake.
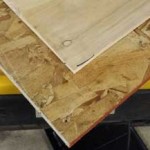 Rated at 44NG (2/3rds of a perm), 7/16 inch OSB sheathing can be a reasonably good vapor barrier, however you may want to consider instead using 3/8″ CDX plywood as it has a 57 NG rating. Do not seal it (paint is a seal) or tape seams and your wall is probably okay.
 DEAR POLE BARN GURU: I wrapped my post frame with double bubble with silver foil on both sides and then put my metal on, going to use Textrafine unfaced insulation and then steel lining walls. Do you see a problem with this? CHARLES in MONROEVILLE
 DEAR POLE BARN GURU:
  DEAR KIM: Most existing pole buildings are not structurally adequate for residential purposes, unless they were specifically designed and engineered for R-3 (residential) use. Your Building Official is prudent in requiring you to have a Registered Professional Engineer review your building for structural adequacy. This engineer can also advise you of any non-conforming points, as well as how to resolve them.
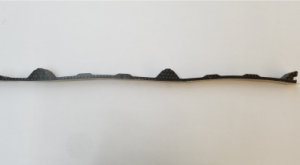 DEAR MARK: Communication – we as humans do so much of it and all too often do not fully convey our intentions. I am just as guilty as any other person, so do not feel like you are alone in this. This is one reason we strive to do everything in writing, so both parties are clear on each other’s expectations.
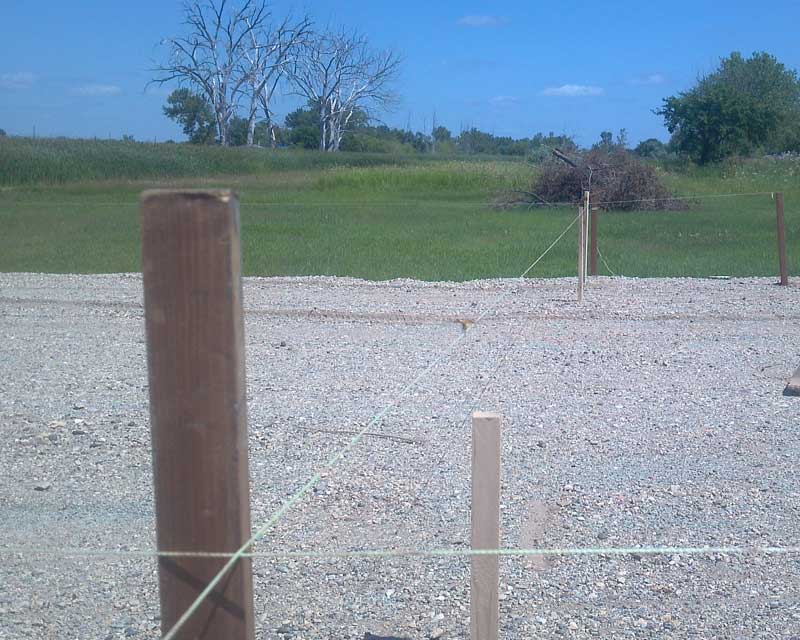
 DEAR DYLAN:
 DEAR LAUREL: We have provided numerous fully engineered post frame buildings to clients in Alaska, however we are fairly certain they all provided their own labor to assemble (DIY). Typically we have delivered all materials to Port of Seattle docks and our clients have secured barge/container space for transport to Alaska. We have also had clients schedule flat bed trucks to pickup their buildings from our shipping locations in Washington, however this would be a much more rare circumstance.
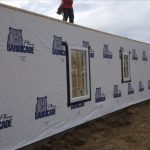 DEAR POLE BARN GURU:
  DEAR ANDREW: You actually probably need at least a 12′ ceiling for a lift. I always recommend at least 3′ from a wall and 3′ in between (it avoids door dings). With a 40′ wall – this will not quite work out (in my ideal world). I like 10′ wide doors, as they keep mirrors on much better. I also like 8′ tall doors, hardly any more than 7′ and gives room for racks, most lifts, etc.
 I am having trouble deciding on how to insulate the perimeter slab. Oregon requires minimum R-15 for slab edge insulation. Ideally I would prefer to see concrete at exterior perimeter vs treated grade board that’s visible, however the treated grade board seems to be most cost effective in design. TRENT in WALLA WALLA
 DEAR BRYCE: By Code you are unable to count any contribution from gable end soffits and areas between overhanging end purlins should be blocked solid to prevent airflow (and to properly create a load path to transfer shear forces from roof to ground). A construction flaw (such as daylight coming in under trim, probably should be fixed, rather than counted. By Code requirement is 3.84 square feet or 552.96 square inches of net free ventilating area located in upper 1/2 of your building’s attic space. My recommendation would be to install gable vents sufficient to provide airflow requirements.
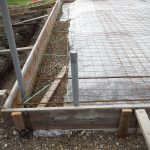 You should install a well-sealed vapor barrier under your slab while Code requirement is 6mil, however 15mil is far less likely to be damaged during a pour. Run vapor barrier up sides and onto top of 2×8 splash planks Overlap seams by at least 6″ and tape. Most often we see 1/2″ rebar on a 16″ grid.
 DEAR POLE BARN GURU:
  DEAR POLE BARN GURU:
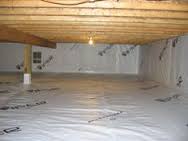
 So… if this is not going to be a building I heat 24/7 and never cool. Can I get by with reflectix under the metal roofing and insulating between the purlins with unfaced insulation, if I’m only going to heat it when I’m in it during the winter (heat with a wood stove).
 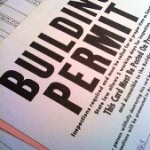 DEAR POLE BARN GURU:
 First I want to say I love your web site, the information I’ve been reading is invaluable! I am located in Spokane County. I have a 24x24x10 post frame garage that was here when I purchased the house. The walls have commercial girts R19 insulation. I would like to heat this garage and use it as a woodworking shop. Right now the ceiling is open and there is no insulation. The roof is sheeted with OSB, then felt then steel roofing panels. There is no ventilation or overhangs to install soffit vents. The roof has 4:12 pitch.
 Plastic vapor barriers should only be installed in vented attics in climates with more than 8,000 heating degree days. You can forego the plastic and use a vapor retarder (kraft-faced insulation or latex ceiling paint) in all other climates except hot-humid or hot-dry climates. In hot-humid climates, attics should not be vented and vapor retarders should not be installed on the interior of assemblies.
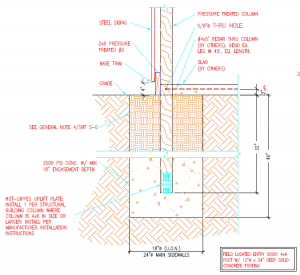 DEAR JAMES: This information should have been clearly indicated on engineer sealed plans you are using for construction. Actual required depth, diameter and amount of concrete required to prevent settling, uplift and overturning is carefully calculated by your building’s engineer, once all factors can be considered. These include, but are not limited to: soil strength at your site, building wall height, roof slope, weight of building itself, snow load, wind speed and wind exposure, seismic considerations, whether building is fully or partially enclosed or is ‘open’, as well as spacing of columns. In most cases, I would expect to see an engineered design of roughly 40 inches in depth, 18 inches in diameter, with a minimum of 18 inches depth of concrete in bottom of hole (a bottom collar) and base of column held up eight inches from bottom of hole. A steel uplift plate is typically placed on columns in concreted area to prevent uplift. All of these factors as well as typical suggestions above should be fully reviewed and sealed by your building’s engineer prior to your moving forward.
 DEAR RON: If I was going to do this I would use 15mil black plastic as 6mil will just not hold up over time. I would seal it to my building’s pressure preservative treated splash plank and make sure to have ground sloping away from my building beneath plastic minimum of 5% (three inches in five feet).
 DEAR MATT: In my humble opinion, this could be resolved by having clear markings on Pressure Preservative Treated wood to not leave any doubt as to what proper use is. I have stomped my feet on this very issue for years:
  DEAR POLE BARN GURU: Can I build my pole barn in Hernando County without any problems from the county for permitting which is located in Brooksville, Florida? CHARLES in BROOKSVILLE
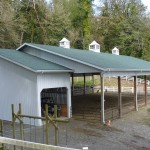 DEAR JANE: Before making changes to your building, such as this, it would behoove you to consult with engineer who originally designed. If they are unknown or unavailable, you should consult with an engineer who can evaluate what you have and what you want done, in order to determine if structural upgrades will be necessary. Many pole barns with little or no sides were not originally designed to support this added wind load, and it is best to be safe, rather than sorry.
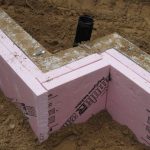 DEAR POLE BARN GURU:
 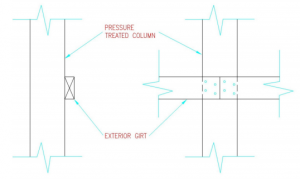 Wall girts flat on column exteriors are inadequate to carry imposed loads and will not meet deflection limitations. I would suggest you reinforce each of them to create either an “L” or a “T”. Assuming you have 6×6 wall columns, you could place a 2×8 bookshelf style girt on top or bottom of each girt, nailing through 2×8 into existing girts with a 10d common nail at say 12 inches on center. This will create an insulation cavity and allow for easy interior finish.
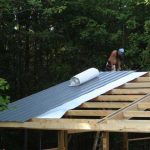 Least expensive financially, but does take some extra labor hours, especially if it is windy – a single air cell layer reflective radiant barrier. Six foot widths will install much quicker than four foot. Make sure to order with a six foot width NET COVERAGE and an adhesive tab along one edge with a pull strip. Without an adhesive tab all butt edges will require seam tape, not expensive, but adds lots of time. Do not waste your money on adding an extra approximate R 0.5 for double bubble (two layers of air cells).
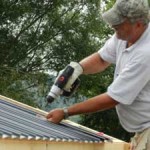 As much as we would like to believe otherwise, not every client or contractor is morally trustworthy. We have provided builder information to potential clients and had these same wonderful clients try to get builders to go around us and cut a better deal for their building materials. Conversely, we have had builders tell our clients to buy everything direct from them and they will get a better deal.
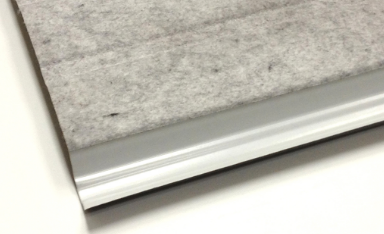 Absolutely, you should be concerned about attic condensation. Warm moist air from inside your conditioned space will rise into attic and when it comes in contact with your building’s roof steel’s cooler surface it will condense (even with ventilation). For sake of ease of construction I would recommend an integrated Condensation Control Membrane (
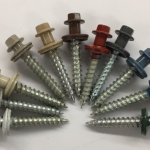 DEAR JOSEPH: From Hansen Pole Buildings’ Construction Manual, Chapter 2:
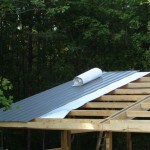
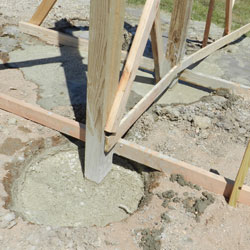 DEAR PAUL: I am guessing you are talking about concrete poured for a footing pad under the columns.
 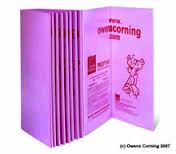 As only incidental heat will be provided into crawl space areas, using rigid foam insulation boards beneath a thin concrete slab might very well prove to be an undue expense.
 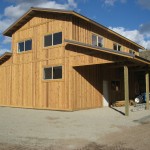 DEAR POLE BARN GURU:
  DEAR JIM:
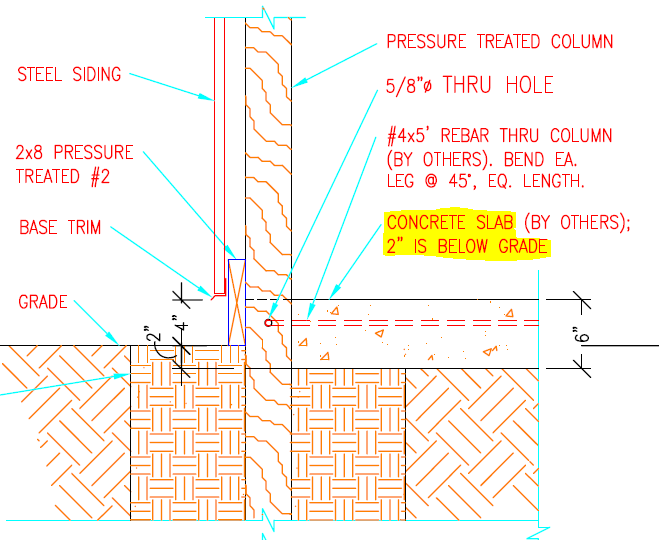
 DEAR POLE BARN GURU: I am planning on building a post frame home with a standard wood framed floor structure. It will have a crawlspace below but will not have concrete stem walls. The building site slopes down, some of the crawlspace may be excavated below grade, some areas will be above grade. Looking for ideas for skirting the crawlspace to provide the most appealing look at exterior side and keep out water and pests. TRENT in WALLA WALLA
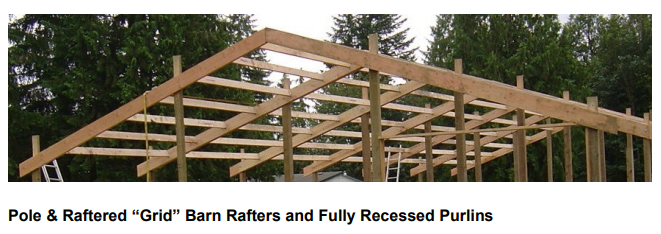
 Replace your present overhead and sliding doors with insulated overhead doors. Tear out foil “insulation” and throw it away. Keeping eave and ridge vents sealed, use closed cell spray foam insulation across walls and underside of roof deck. An absolute minimum thickness will be two inches, providing approximately R-14. You will need to weigh benefits of greater R values against investment.
 DEAR POLE BARN GURU: Pole Barns for Stilt Construction – Just read your Kitty Hawk story – And FEMA backs you up. From FEMA-DRs-4085-NY Foundation Requirements and Recommendations for Elevated Home – Piles can be used with or without grade beams. When used without grade beams, piles extend to the lowest floor of the elevated home. Improved performance is achieved when the piles extend beyond the lowest floor to an upper floor level, although owners should check with an insurance agent to understand how the extended piles will be rated for flood insurance. Using grade beams provides resistance to rotation (also called “fixity”) in the top of the embedded piles and improves stiffness of the pile foundation system against lateral loading. So extending the piling up as the wall structure is the way to go. Thanks for your site – just starting to look at building a RV style (really for a 14-foot tall boat) pole barn in a flood zone area. (recently downgraded from a “V” area fortunately). So I was interested in piles instead of the typical foundation anchoring. Need to install pilings under the concrete pad as well. Your site has been informative. Thinking about a 30 x 48 x 16 but need to work up a design I can get thru our HOA architectural review board. MARK in GREENBACKVILLE
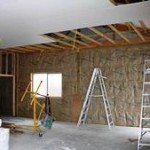 DEAR ROB: A downside of most HVAC duct work – little or no thought becomes involved in how to effectively insulate it. Wrapping ducts with a thin layer of fiberglass or radiant reflective barrier happens to be more for show than being effective. Unless your plan has roof plane insulation, I would place ductwork as close to ceiling level as practical and bury them within blown in insulation (I’d even pay a little extra for insulation to be thicker over ducting).
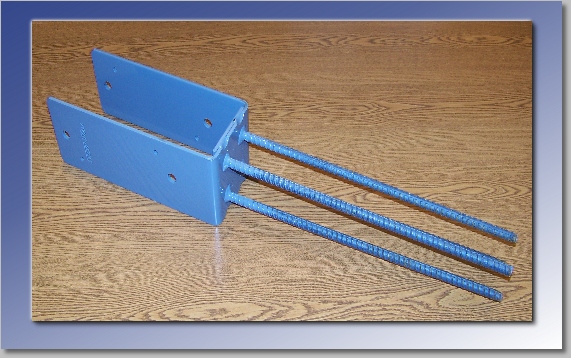
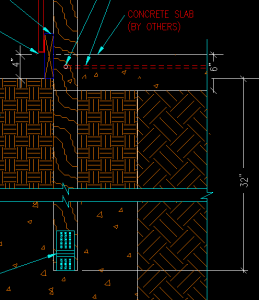 DEAR ANDREA: My father’s family came to be United States citizens after arriving from Norway prior to 1900, so I have always had an affinity towards all things Norse. (A little snippet of my Norsk history here:
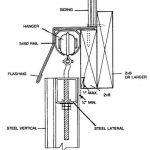
 DEAR LONNIE: A consideration would be to design entire building to be able to be climate controlled, as you may decide to expand your office space, or building may be re-purposed in future and require some or all of remainder to be conditioned.
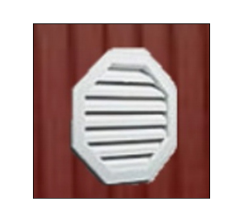 If this does not resolve problems, then you need ventilation. I will surmise your building does not have enclosed vented soffits and a vented ridge. Can’t go back and correct lack of overhang issues now, but you can add gable vents – a minimum of 242 square inches net free ventilation area in each endwall with vents located in top half of each gable.
 Detached cold storage buildings are constructed with a sole purpose of producing or storing goods in low temperatures. Think of them as typical heated buildings turned inside out. Instead of keeping heat in during cold weather, they keep heat out during warm weather.
 Building access should be through a wide 14 foot tall insulated overhead door in each endwall. Industry standard storage bins are four feet square and three feet tall. Bins can be stacked five high, leaving room for mechanical equipment above with a 20 foot interior clear height.
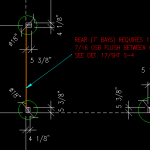 DEAR SCOTT: Regardless of whether your addition will be open, enclosed, or somewhere in between uplift should always be a consideration. Ideally the original EOR (Engineer of Record) who designed your 40′ x 80′ building would be consulted, not only because of a potential uplift issue, but also due to what affect open carport will have upon existing building. You may be placing wind shear issues upon endwall closest to addition and these will need to be addressed, as well as if endwall column footings will be adequate to support added weight (not just dead load, but also potential weight of a snowfall). An issue of drifting needs to be reviewed also, as snow could build up upon carport roof against existing endwall.
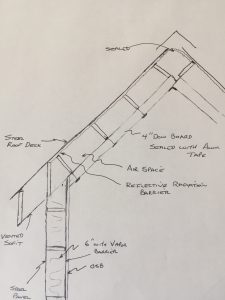 I love my two pole buildings I purchased from you guys. Just need some help on insulating the roof on my last building.
  DEAR PATRICK: Back when I was a contractor we would run into this situation occasionally. Our solution then was to stand columns in holes, brace them and then backfill with pre-mix concrete with very little water in it. Concrete weight would displace water in hole. It did take a significant amount of concrete, however it was only about $30 a yard then.
 DEAR POLE BARN GURU: Many years ago I had a friend that made a good income renting heated storage space in a very large pole barn to boat owners. He complained of the heating costs involved. I told him he could heat the space for a fraction if he would insulate with hay bales encapsulated with foam. He also thought the idea was a little odd (do you notice a pattern with how people receive my ideas? 😉 I don’t know if anyone has ever done it, but I may give it a try before my time is up.


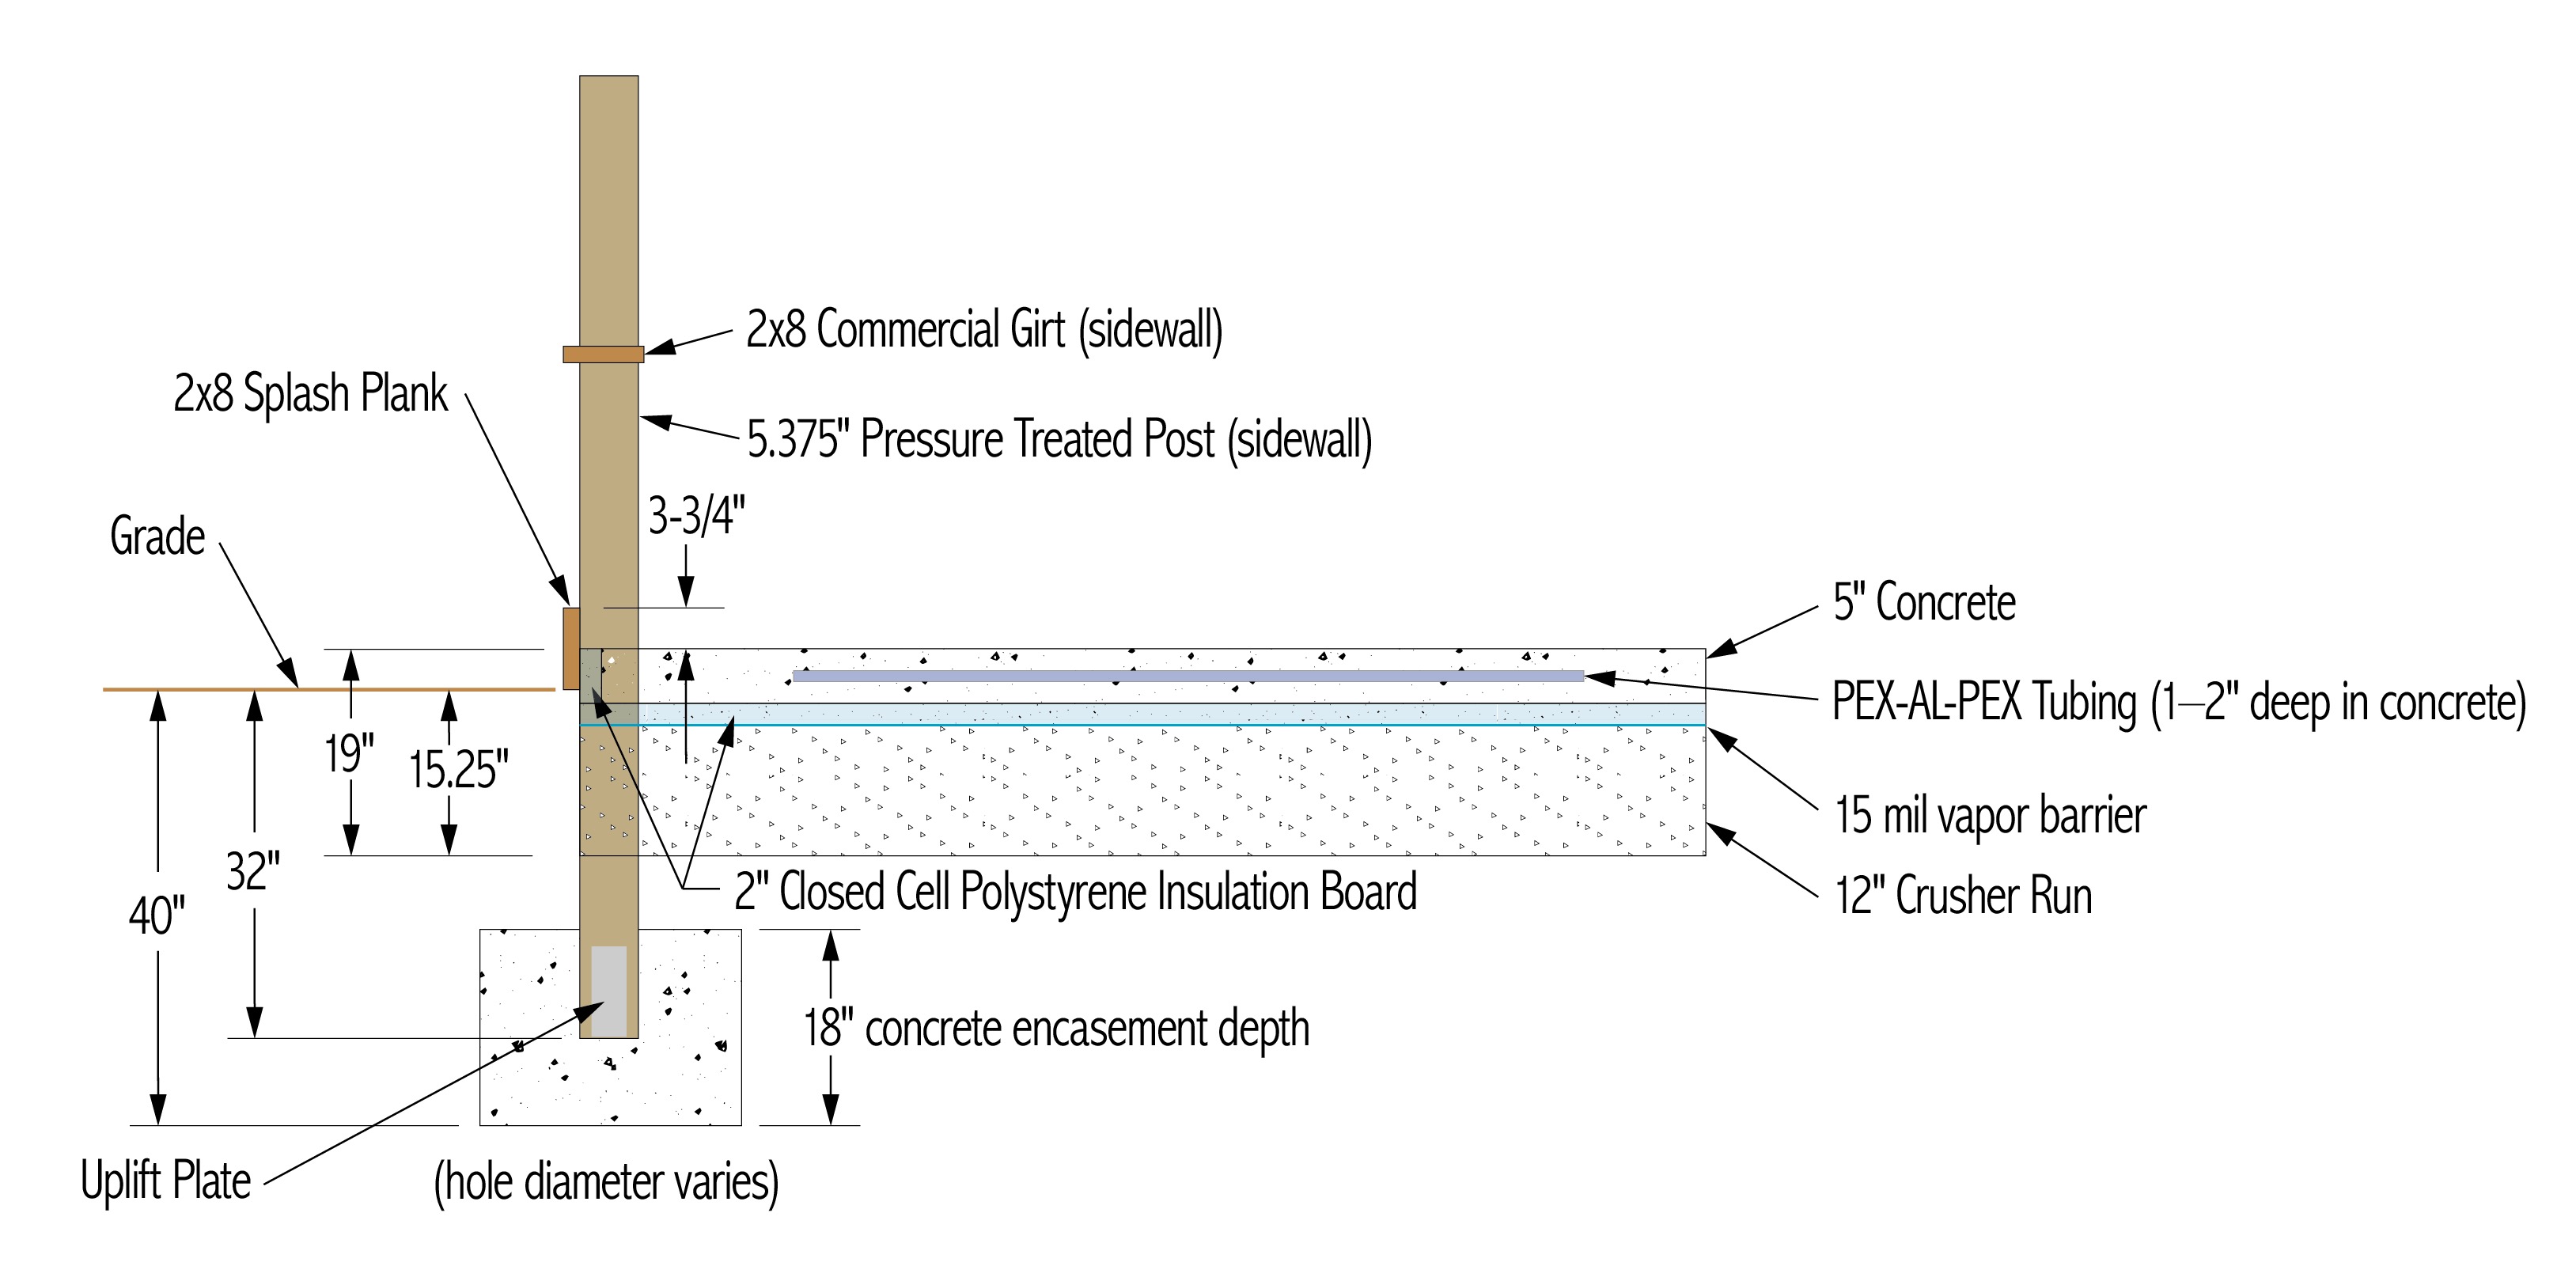
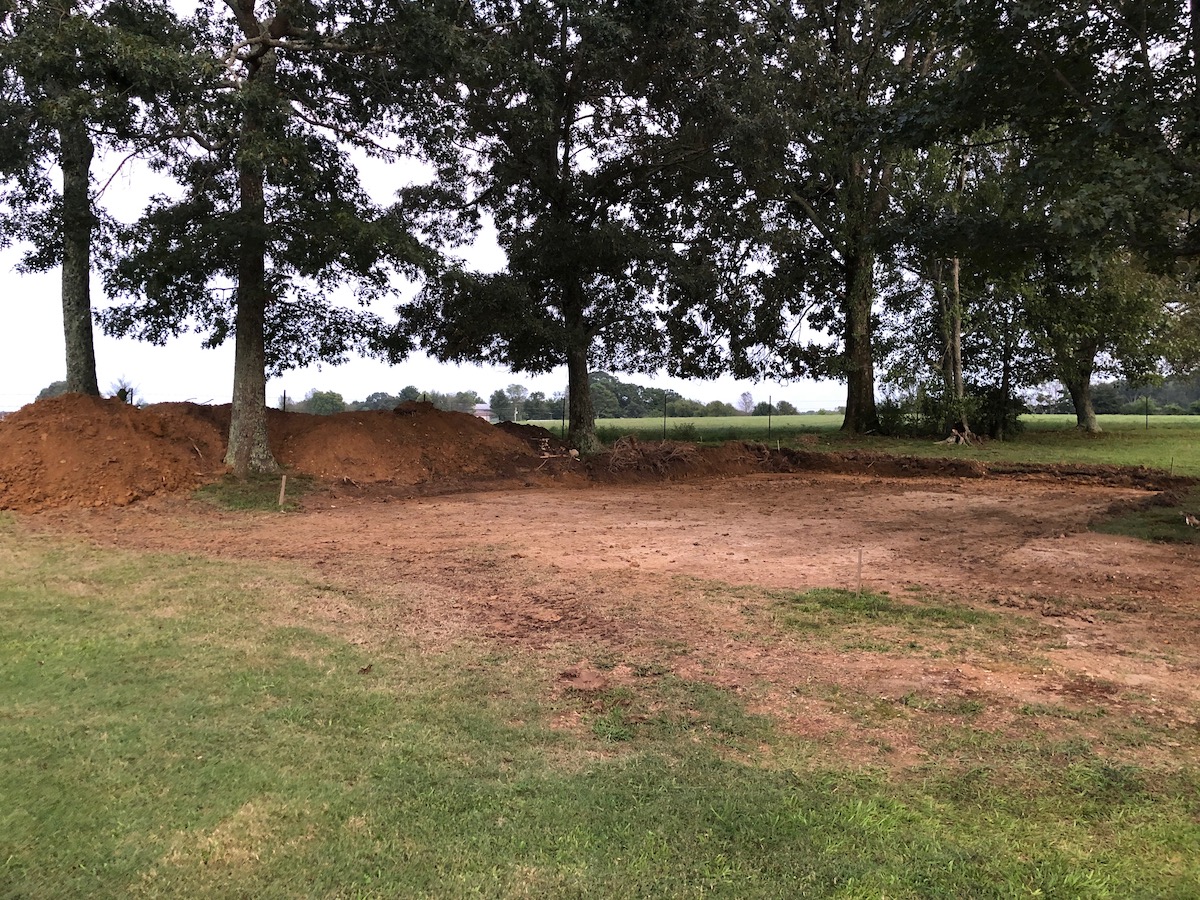