Tag Archives: shear loads

Why Not a 2×6 Bookshelf Girt on a 4×6 Column?

Why Not a 2×6 Bookshelf Girt on a 4×6 Column?

Client TROY in MONROE COUNTY writes:

It was my understanding that 4×6 posts were used, so a 2×6 girt could be mounted flush on the inside of the building and extend 1.5” beyond the post at the outside of the building. Why can’t exterior and interior sheeting be applied to the 2×6 girt?  What is the advantage of the 2×8 girt?

Are the rafters spaced at 12’, is that the need for 2x10s?

If they’re set on the same post as the truss, is there room?  5.5” post minus 3” for double truss leaves 2.5”.  Do you take away 1.5” for the rafter leaving 1” of post?

Feel free to call if it’s too much to type

Thanks”

Mike the Pole Barn Guru says;


Thank you for being an inquiring client, those who ask lots of questions are those who get results they are happiest with!

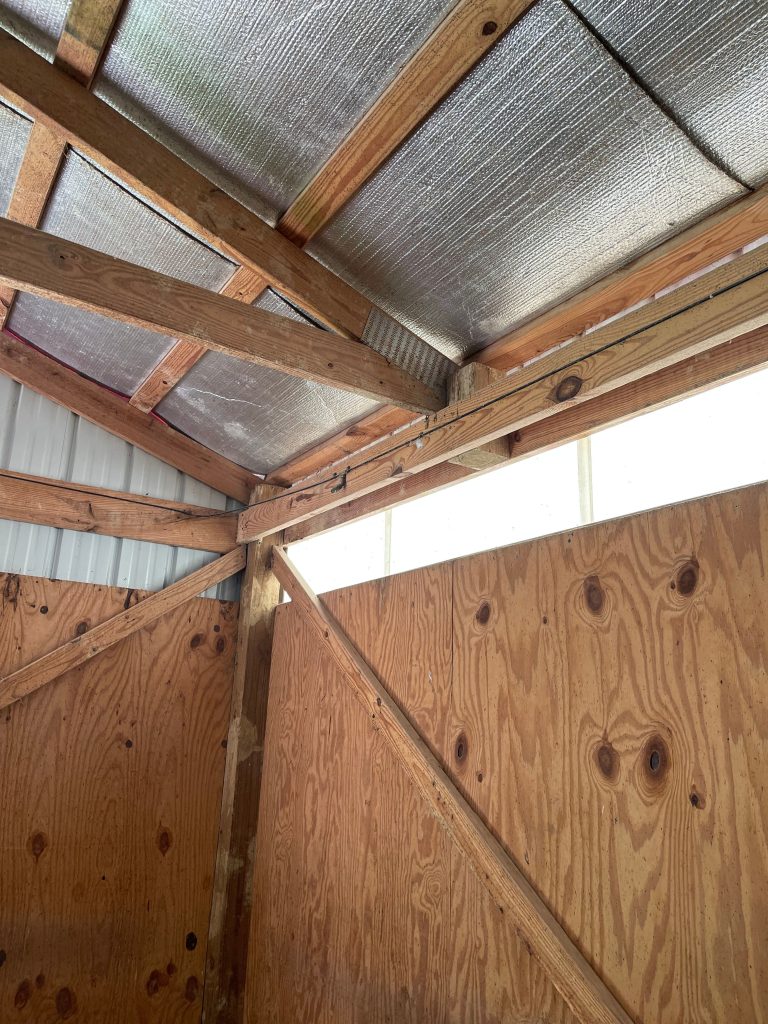
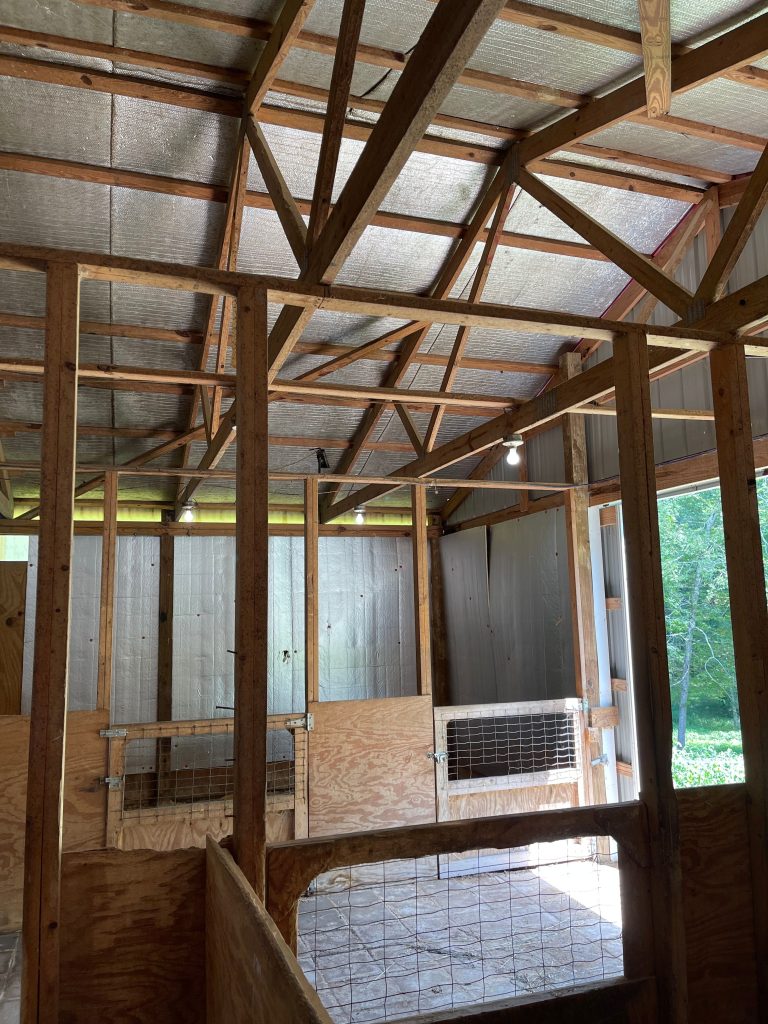
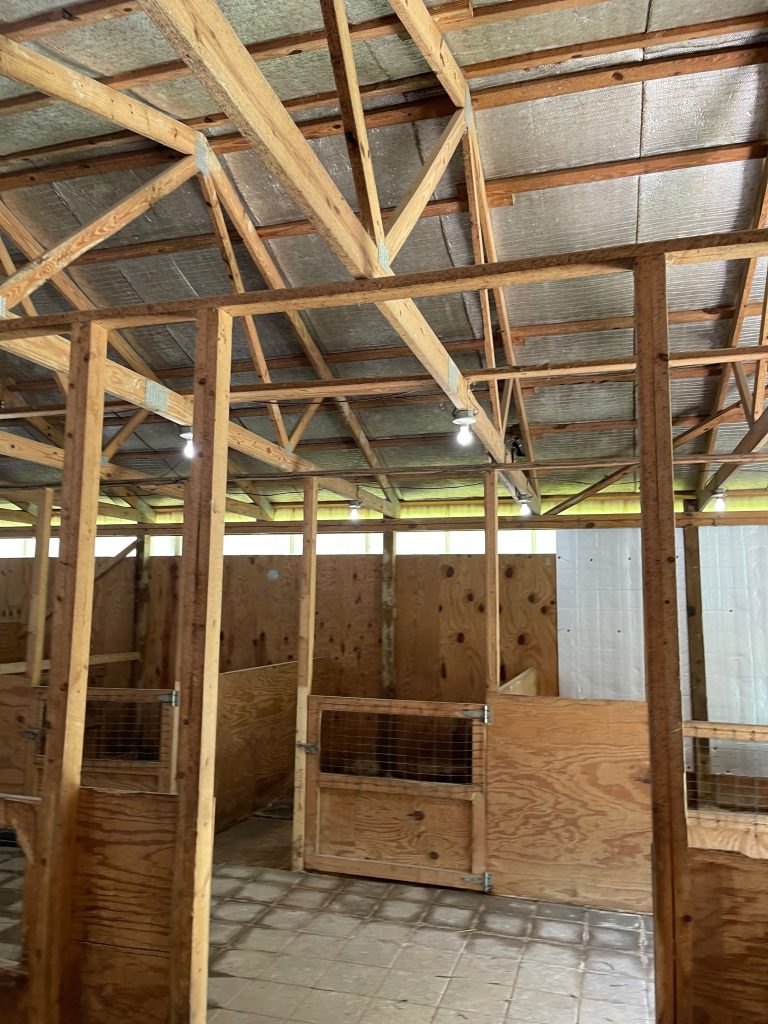
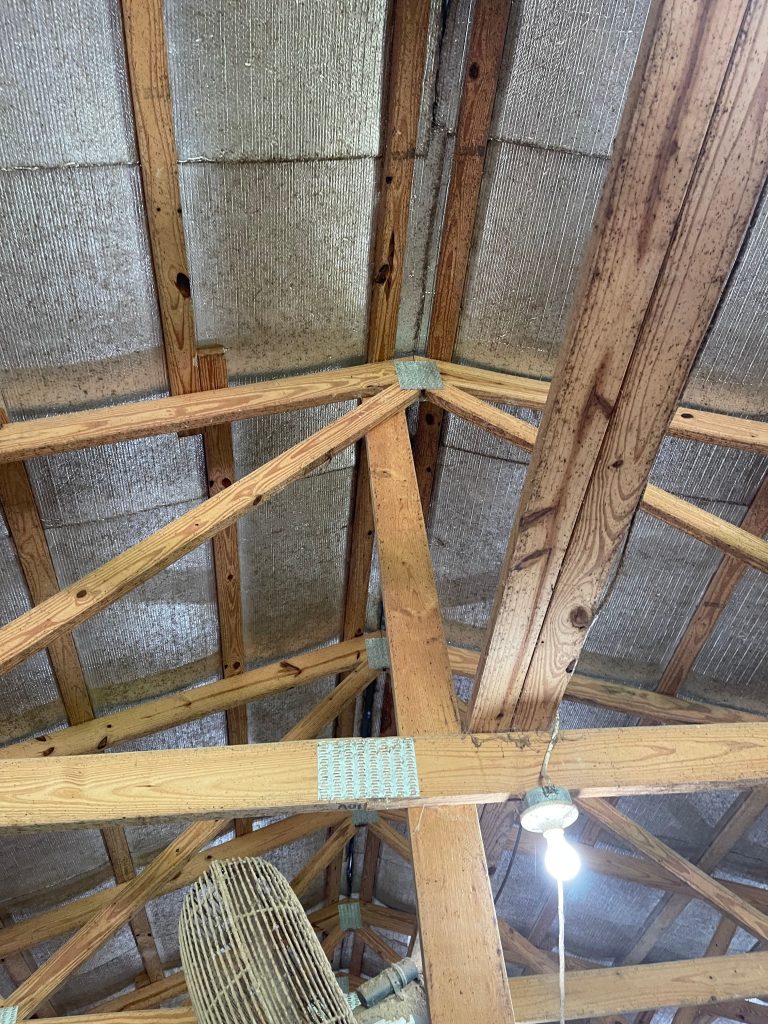
On a 14′ sidewall, truss bearing columns are unlikely to work as 4×6 due to failure in weak axis bending (they want to buckle due to compressive loads from dead loads and snow). So now we are into either 6×6 (or in some cases larger) solid sawn columns, or glu-laminated columns for truss bearings.

Couldn’t 2×6 bookshelf girts be used and be flush to both sides of these?

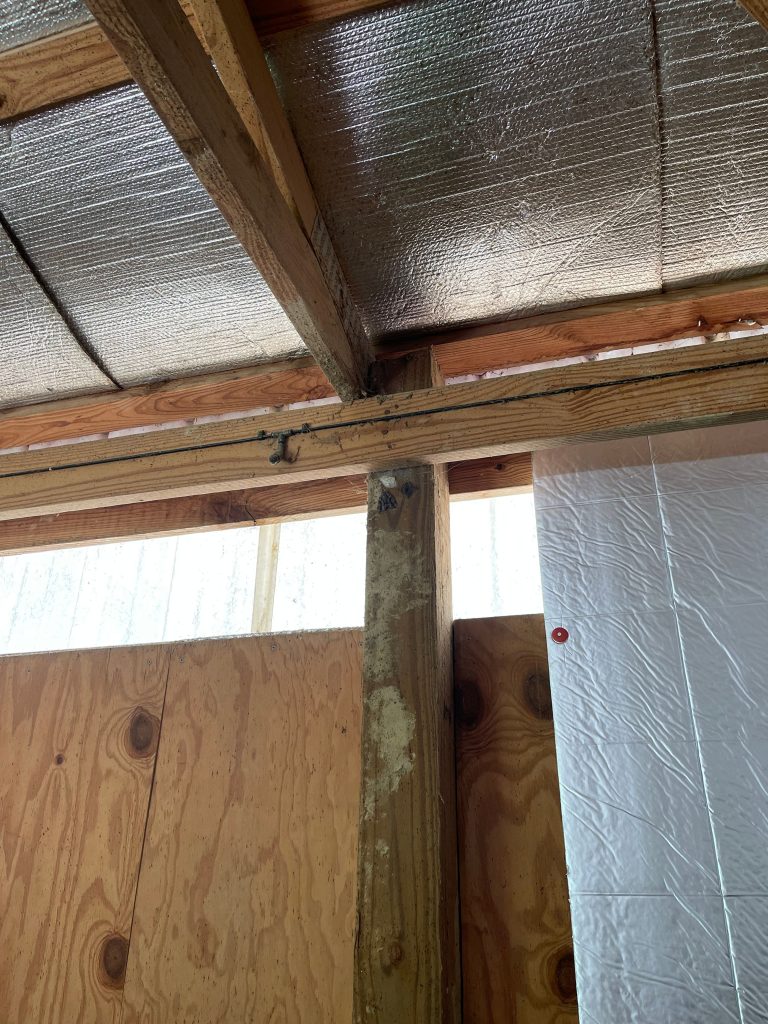
With 6×6 columns, they do tend to vary in dimension – sometimes as great as 1/2″. This would potentially result in columns sticking outside of plane of a 2×6 bookshelf wall girt, making finish on one side problematic.

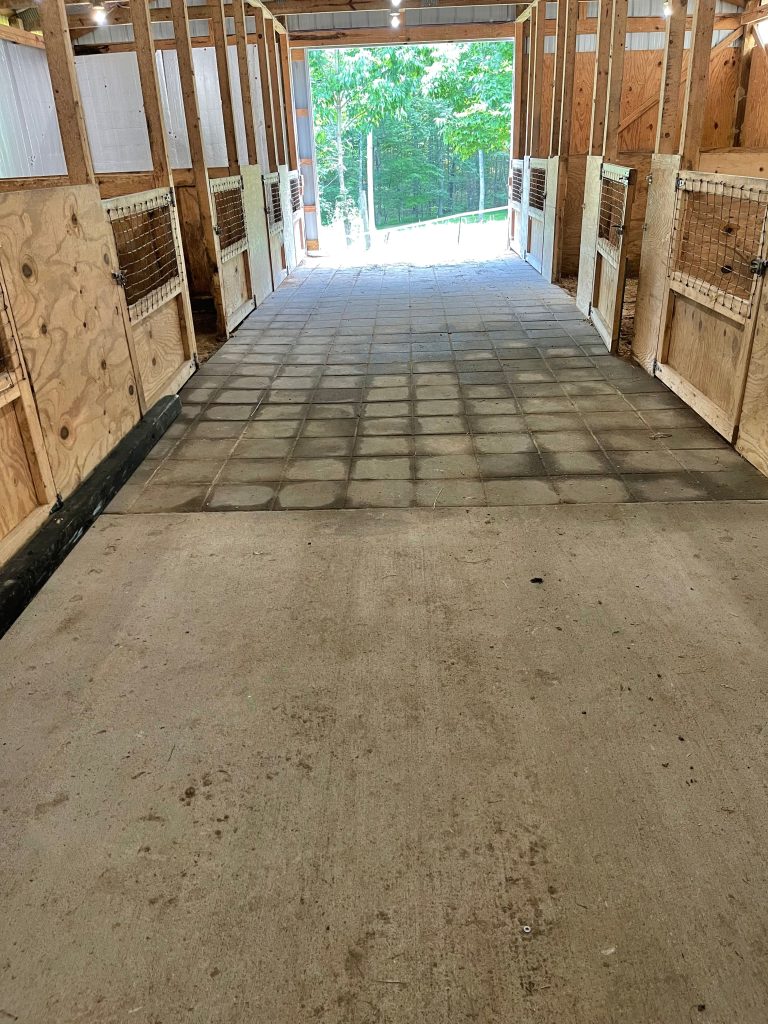
More importantly (and less recognized by most providers) is pressure preservative treated splash plank at base of enclosed walls must be attached adequately to transfer wind shear loads from roof, down through wall sheathing (steel siding), to splash plank, then to columns and into ground. Greatest forces are at the top and bottom of walls. When splash planks are applied to the exterior face of columns, it allows for appropriate connectors to be placed from splash plank to column to provide a continuous load path. 

Other members (such as overhead door headers and window supports) are also best installed on exteriors of columns (they transfer shear loads as well).

To hide columns and provide for space occupied by exterior fastened members, 2×8 bookshelf girts work nicely in combination with either a 6×6 solid sawn or multi-ply 2×6 glu-laminated column.

This also allows for a deeper wall cavity, hence greater thicknesses of insulation may be utilized. I would consider using two layers of 3-1/2″ Rockwool batts with a well-sealed interior vapor barrier.

While main clearspan interior double trusses will notch three inches into sidewall columns, rafters for your attached shed will be applied to column faces, rather than further notching of columns. With your roof loads, it actually takes two 2×10 rafters on each side of columns spaced every 12 feet.

Provided your site has adequate space, I would recommend you consider a 40′ x 48′ x 14′ clearspan building, rather than 28′ x 48′ x 14′ with a 10′ x 24′ attached shed on one side. It will be easiest to assemble, takes away a pitch break between main building and shed, eliminates an interior column and provides full headroom from eave-to-eave. This would also allow for those 8′ wide by 9′ tall overhead doors to be increased in width to 9 or 10 feet wide, keeping mirrors on vehicles. You will also find this to have far greater value for resale (multiple times more than any added investment).

Please feel free to reach out to me at any time with structural questions.

Can I Turn an Existing Pole Barn into a Barndominium

Can I Turn an Existing Pole Barn into a Barndominium?

Reader MICHELLE in GALLATIN writes:

“Hi Mike, my name is Michelle and I live in Nashville Tennessee. I am under contract on an existing pole barn (30′ x 60′) that I am going to turn into a Barndominium. (Picture attached) Today we had the structural engineer come out because the city tells me I will need a letter from him saying the building is up to codes before they will issue a building permit. The structural engineer is not familiar with Barndominiums and has some questions about the roof sleepers. Everything else checks out OK. Is there any possibility he could call you to pick your brain on this? I am willing to pay you for your time on the phone call. Just so you know I am looking to do the spray foam on the ceiling and walls as per all the discussions I read on the barndominium Facebook page. Please feel free to call me if you’d rather talk this through more on the phone with me before the structural engineer calls you. If you decide you have the time to take his call.”

Mike the Pole Barn Guru says: Because Michelle is so nice, here are my insights, addressed by photo:

Wood entry door in wood jambs should be replaced with an insulated, factory painted, steel door with factory painted steel jambs


Reflective Radiant Barriers (RRB) are only effective at controlling condensation when seams are thoroughly taped together.


Roof trusses are unlikely to have been designed to support a ceiling load – requiring further analysis. Provided they are either adequate, or can be repaired to carry a ceiling load, heels are not deep enough to provide full depth of insulation from wall-to-wall. Design solutions could include (a) remove reflective radiant barrier from roof and use closed cell spray foam insulation to underside of roof deck, or (b) use closed cell spray foam closest to eaves on top of ceiling with blown fiberglass to R-60 in balance of attic area. Spray foam needs to be installed to allow for at least one inch of clear airflow above. Diagonal braces at corners are inadequate to properly transfer shear loads. It is possible to replace screws at top and bottom of each roof and wall panel with 1-1/2″ #12 diaphragm screws, with one each side of every high rib. This should get you to 80-90 pounds per lineal foot of shear resistance.


Eave lights should be removed as they will not transfer shear loads and will be covered with insulation and interior finish materials. Truss carriers (and their connections) should be checked for adequacy to carry concentrated loads from intermediate trusses. As a carrier is on the inside face of columns, an interior set of wall girts will need to be added to support finishes.


Sliding doors will need to be replaced either with solid walls, or an appropriate door or window(s). I would want to see an X brace between the end truss and the next truss at centerline connected to each chord with a Simpson LSTA12 or similar.


Connections between roof purlins and trusses are probably inadequate, particularly at endwalls.


Truss bottom chords should be braced laterally no less than 10′ on center (and probably more like every 6-7′). Ceiling joists would fulfill this requirement.


Remove any current concrete slabs – re-pour four inches thick over no less than four inches of compacted gravel, a 6mil minimum well-sealed vapor barrier and ideally R-10 EPS insulation boards.


If a dead attic space will be created, provide venting at eaves and ridge


Roof steel is showing signs of aging, I would recommend replacing – remove RRB and order roof steel with an Integral Condensation Control factory applied, unless roof assembly is to be insulated only with spray foam insulation.


Perimeter of slab should be insulated with R-10 EPS boards down two feet, then outwards two feet

My recommendation – I would continue to use this building strictly as a barn and erect a new, fully engineered and Code conforming post frame home elsewhere on this property. Bringing this building up to meet Code requirements as a dwelling will cost more in time and labor than building is worth. https://hansenpolebuildings.com/2022/01/why-your-new-barndominium-should-be-post-frame/

Screw Holes: Predrill or Punch?

I happen to be very, very picky about how a finished post frame (pole barn) building looks. One thing I really notice is if screw lines are straight or not. I have seen some buildings where screw locations appear to have been predrilled using a scatter gun – up and down and everywhere except straight.

Hansen Pole Buildings’ Construction Manual does provide instructions on how to pre-drill screw holes to achieve straight lines. There are other acceptable methods however.

Loyal and long-time reader VINCE in CHAFFEE writes:

“Is using an awl or punch an acceptable alternative to pre-drilling screw holes?”

And he attached this video:

https://youtu.be/DWltNxO-TT4

There are some things missing from this video.

Due to slight length variations, panels should be pushed so downward ends are all flush. Any variability will be covered by trims at top edge.

Steel panels should be held in place to prevent panel slippage. I used to use pairs of vice grips, with felt pads glued on to prevent scarring of painted surfaces.

Punching always seemed to work best when there was something solid beneath punching locations. I normally used a clean scrap piece of 2×4.

Bottom and top of steel panels need to be “double screwed” – a screw needs to be placed on each side of every high rib. Not only is this per manufacturer’s installation instructions, it also is necessary to adequately transfer shear loads, in most instances.

Recently I attended NFBA’s (National Frame Building Association) 2019 Frame Building Expo. While there, I found County Line Concepts (www.CountyLineConcepts.com) has designed a better “mouse trap” for punching holes in steel panels.

Please check out this live Expo video featuring Gordon: https://www.facebook.com/polebarnguru/videos/2110669922360329/

Now a Ridge Runner 3:10™ may be too great of an investment for an average DIYer, however it is certainly something worth investigating for contractors.