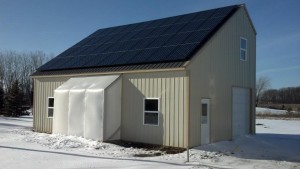
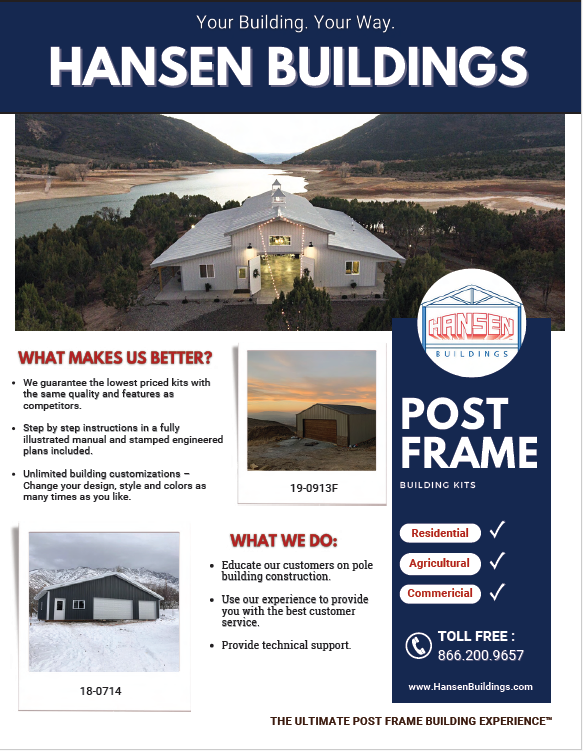
Why Your New Barndominium Should Be Post Frame
For those who follow me – you know I am all about people loving their end results. As long as one has a fully engineered building they love, I couldn’t be more pleased, regardless of the structural system.
In My Humble Opinion – fully engineered post frame buildings are your best design solution in nearly every case. My exception would be if one desires a clearspan over 80′ or a very low slope roof – then I would recommend PEMB (red iron).
PEMBs do have some of their own unique challenges – a foundation engineer must be hired, they take lots of concrete and foundation bolts must be precision placed, Requires heavy lifting equipment to erect, when shell is done – have to frame a house inside. Thermal bridging is a concern and how does one hide those big steel frames?
But, what about stick frame?
 Perhaps stick built construction’s biggest advantage is builders and tradespeople are very comfortable working in and around stick framing. All registered architects and most building inspectors are very familiar with stick framing. International Residential Code (IRC) provides a prescriptive ‘cook book’ to follow for adequate structural assembly, within certain limitations. These limitations include, but are not limited to, no story height of greater than 11 feet 7 inches (R301.3), no hurricane prone areas with a design wind speed of 130 mph or greater located south of Virginia, or 140 mph elsewhere (R301.2(5)B), and no ground snow loads over 70 psf (R301.2.3).
IRC802.10.2.1 further limits truss spans to a maximum of 36 feet and building lengths to 60 feet (measured perpendicular to truss span). Trussed roof slopes must be at least 3:12 and no greater than 12:12.
Want a 40’ x 72’ x 14’ shop/house barndominium? Sorry, outside of what IRC allows.
And because IRC tables cover up to a worst case scenario (given maximum design parameters), it creates overkill, wastefulness and redundant framing members. Translated to – it takes more pieces than might be necessary in a fully engineered structural system.
Fully engineered post frame buildings include foundation plans, PEMBs require one to hire another engineer to provide foundation design. Plan upon a grand or more just for PEMB foundation engineering and this can quickly escalate should a Geotechnical Engineer need to perform soils testing.
Post frame does not require precision placed anchor bolts, and requires no use of cutting torches or welding.
Post frame requires minimal concrete to resist settling, overturning and uplift. Any slabs on grade do not need to be thickened or have continuous footings/foundations.
Post frame can be erected D-I-Y without a need for heavy equipment (although I do appreciate a skid steer with an auger to dig holes). Any physically able bodied person, who can and will read step-by-step instructions can successfully erect their own beautiful post frame building.
Post frame has no highly conductive steel frames to thermally isolate and attempt to conceal.
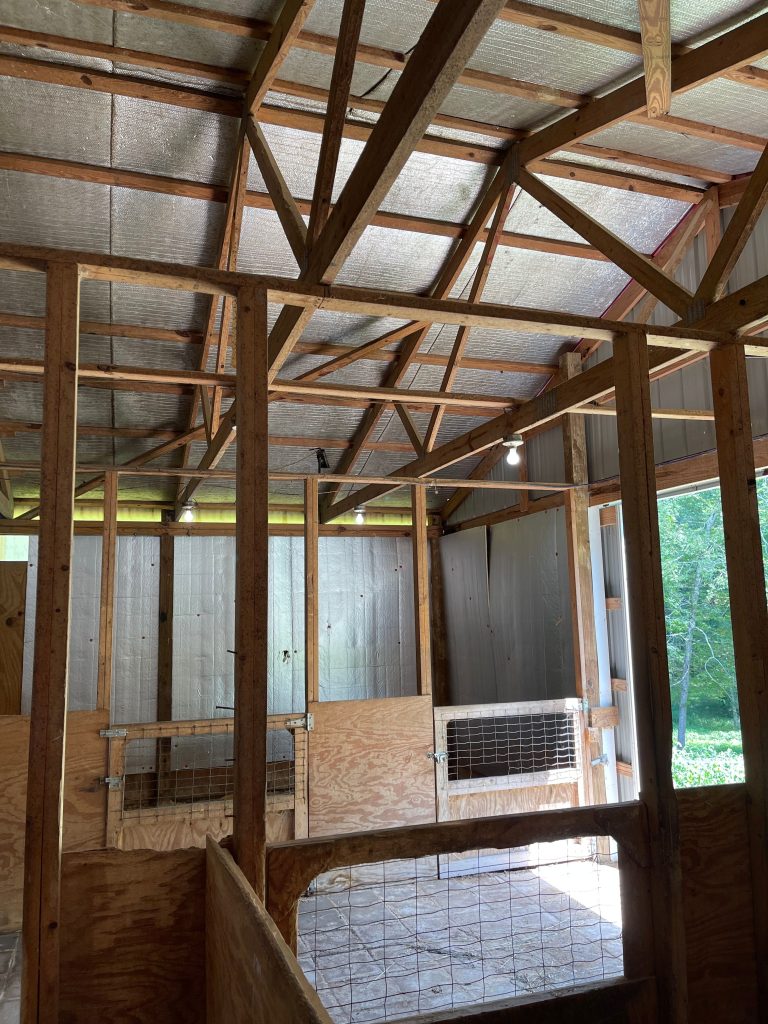
Post frame is easily adaptable to more complex rooflines, and can be done in any combination of alphabet letter shapes. Fully engineered post frame can easily be erected over crawl spaces as well as full, partial or walkout basements.
When properly designed (with bookshelf wall girts), exterior walls are ready for wiring, insulation and interior finishes – no need to frame a home inside of a building shell.
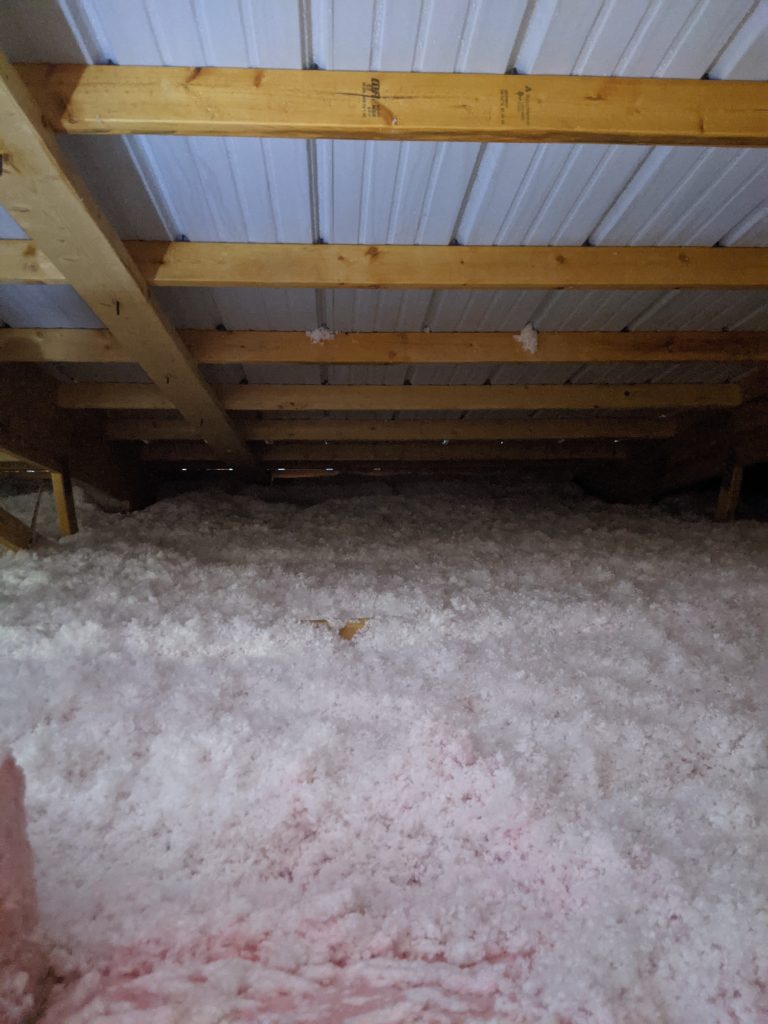
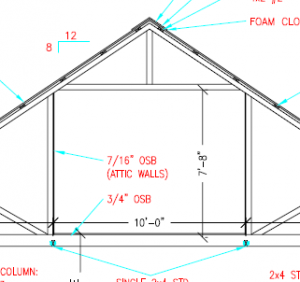
Post frame provides deep wall insulation cavities and with raised heel trusses, any depth of attic insulation can be blown in above a finished ceiling.
Post frame can readily be done multi-story, with up to 40′ sidewalls and three stories (or 50′ and four stories with fire suppression sprinklers).
 When considering energy costs, there is a false preconception solar panels are extremely expensive and cost-ineffective. However,
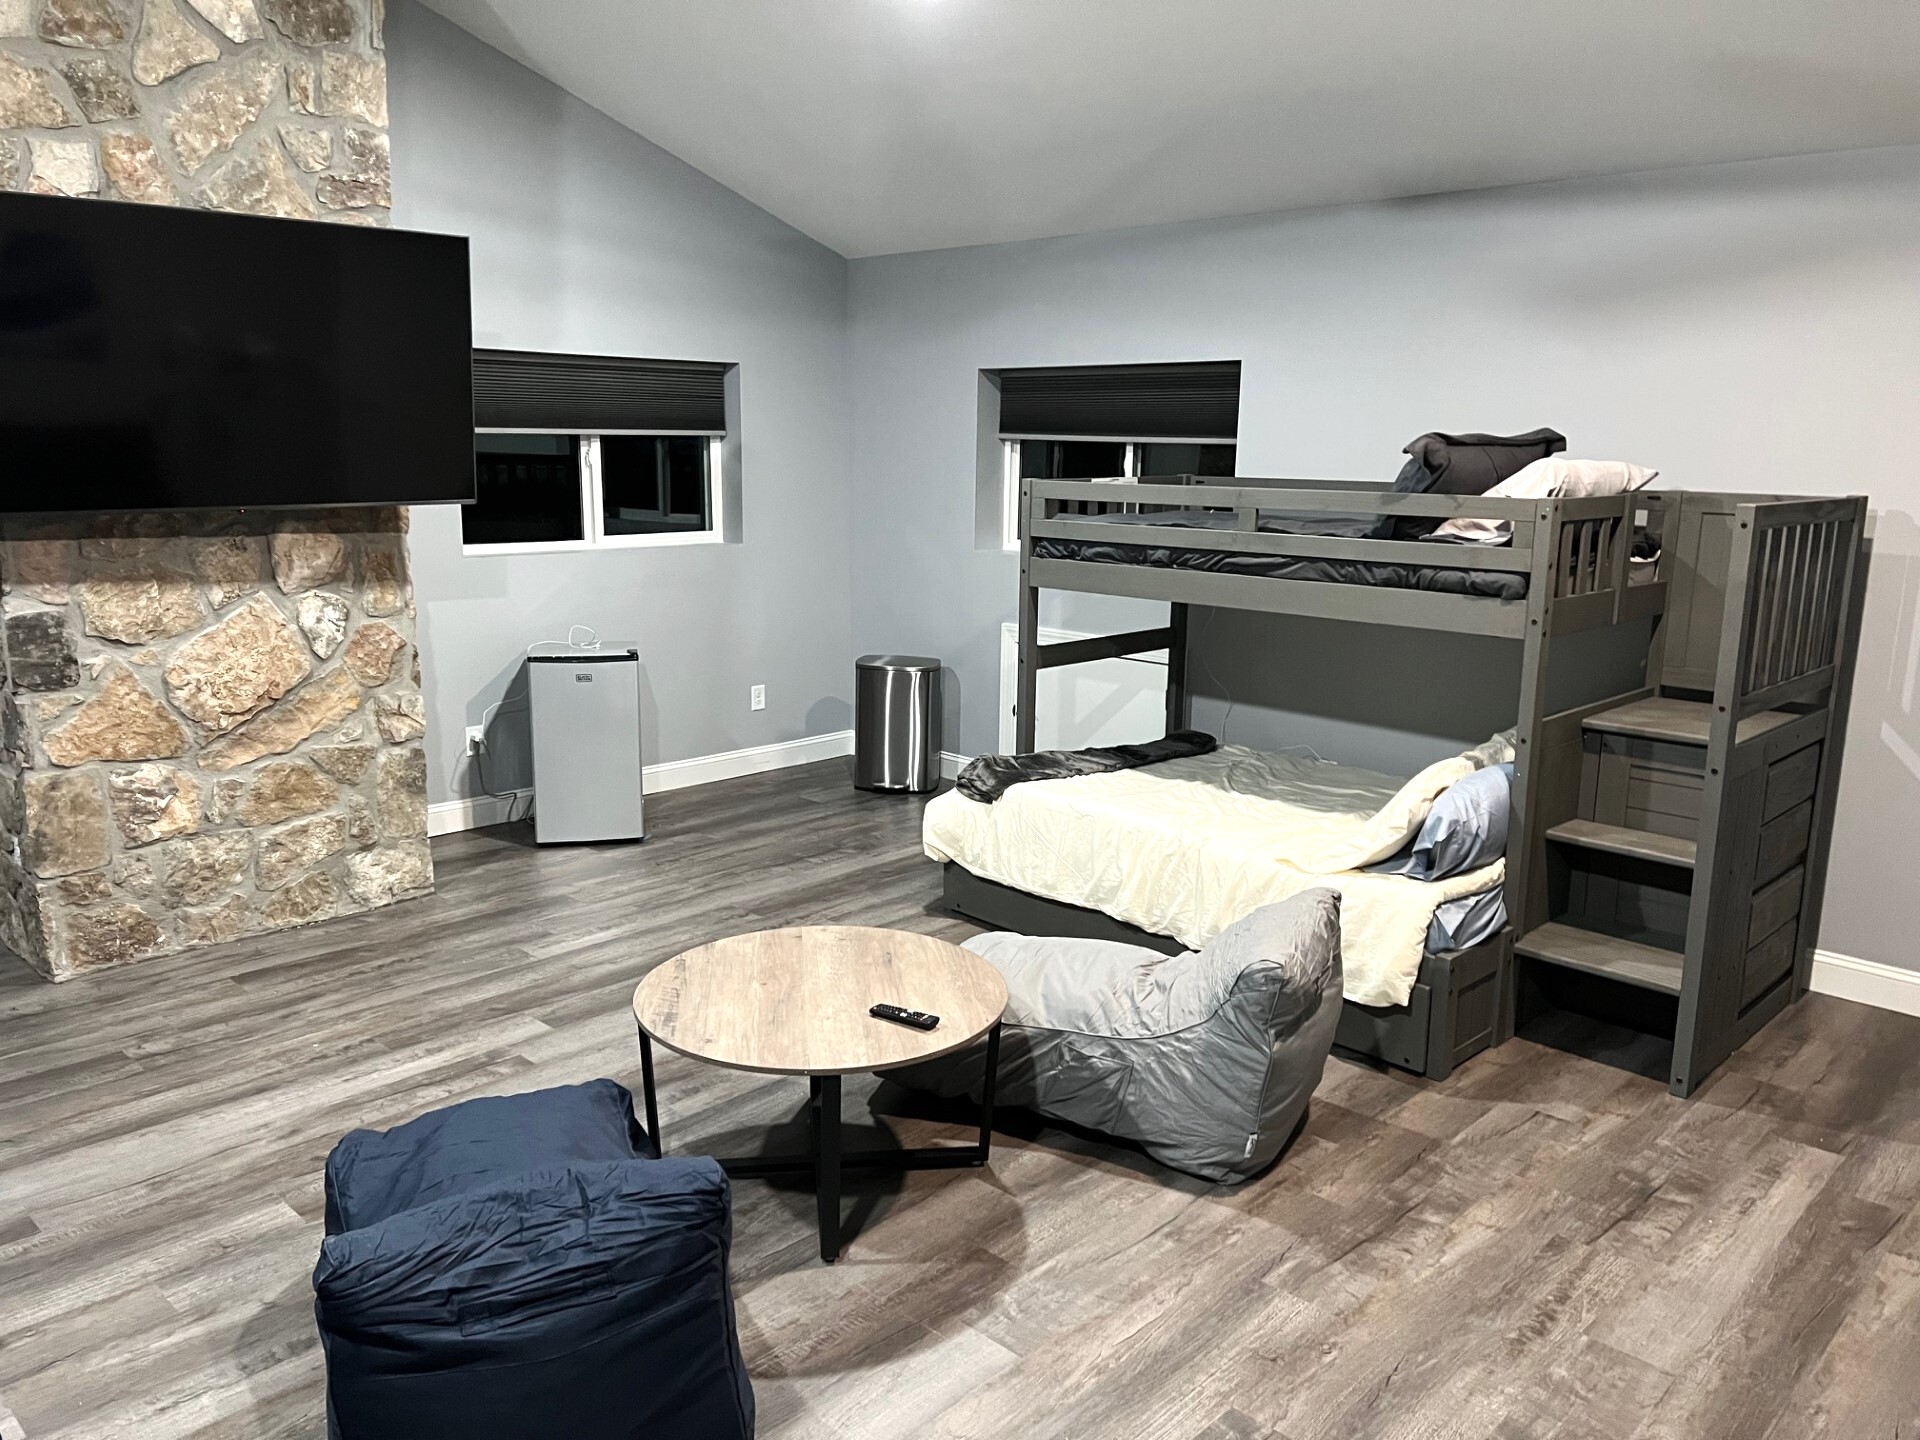

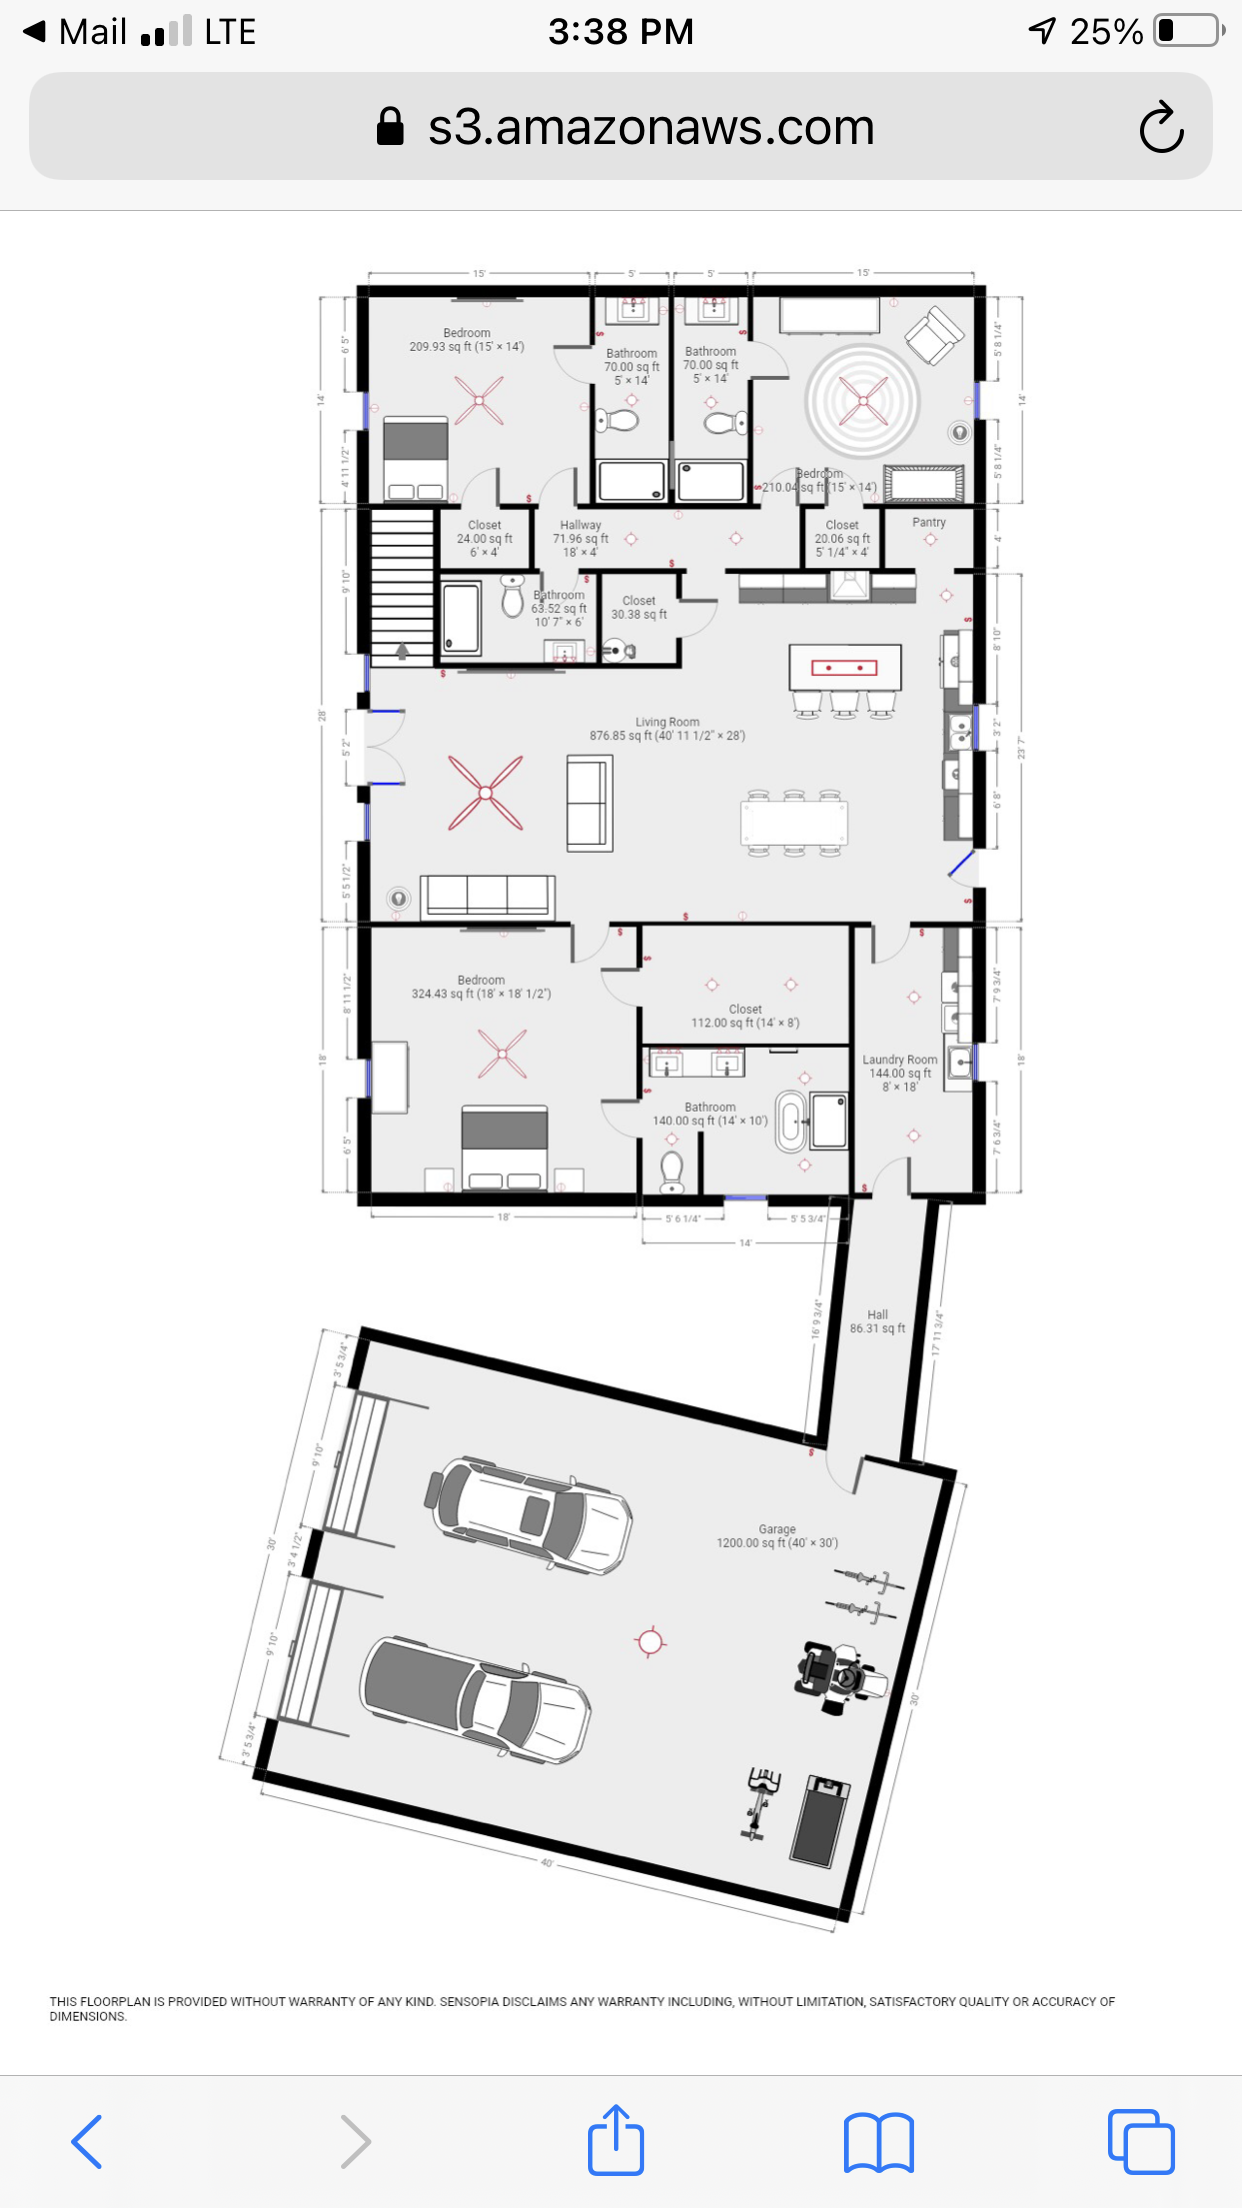
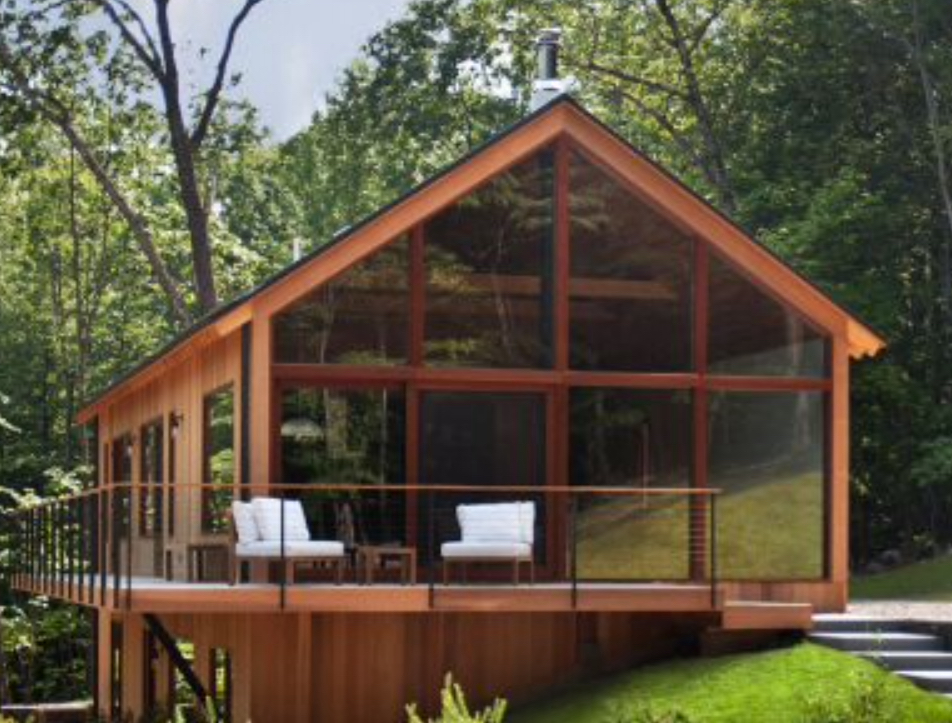
 We can create your ideal dream floor plan with this look. Every barndominium Hansen Pole Buildings provides is 100% custom designed to best meet the wants and needs of our clients and their loved ones. Please see #3 here to assist in determining needed spaces and approximate sizes, and to have professional floor plans and elevation drawings produced affordably.
  Now we do have a fair number of clients using wet set brackets, keeping their building columns above ground (
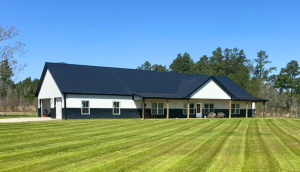 Once you have completed a business plan, find a lender who specializes in construction loans. To determine if you are qualified for a construction loan, your lender will need to verify your income, cash reserves, debt–to-income ratio and credit score and know you can provide necessary down payment. Down payment will be up to 30 percent of requested loan amount. Borrowers may use land equity as a substitute for a down payment. These requirements will allow your lender to see if you are able to repay the loan. Lenders are skeptical about providing construction loans to individuals. Providing a business plan for them to review will demonstrate you have researched and understand what is involved in constructing your barndominium.
 Commonly (when addressed at all during construction) solutions to this problem have often involved creating a thermal break. A thermal break reduces contact between a structure’s warm interior air and cooler metal roofing, thereby reducing or eliminating overall condensation. Installing a reflective radiant barrier, often termed Vapor Barrier, involves laying rolls of faced ‘bubble wrap’ across your building’s purlins prior to roof steel installation. Ideal weather conditions are required for this as even a slight wind can make this a challenging or altogether impossible task. This can cause jobsite delays and may bring progress to a halt while a structure remains unprotected to weather. Even when ideal weather conditions are present, installing a reflective radiant barrier can be a very dangerous task, requiring builders to expose themselves to awkward material handling on a building’s bare roof framing. These risks and delays often generate additional costs for both owners and builders, but have often been necessary with reflective radiant barrier being the only relatively affordable option to prevent interior dripping.
 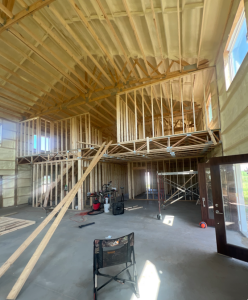 Even with all of my years as a manager of owner of truss plants, 48 feet is as wide as I have participated in – although for our own personal shouse (Shop/house), we wish we would have gone 12 feet wider (no matter what size you build, it is never big enough). Your added investment, for floor itself, between having a myriad of internal columns, or clearspanning is roughly four dollars per square foot. For what it adds in downstairs usability by not having columns or walls to work around, it is worth every cent in my mind. Add to this it allows for all utilities to be hidden from view and they are a winning combination. As we are providing more barndominiums seemingly every day, we have many clients taking advantage of clearspan floor trusses and have never heard a regret from having done so!
 DEAR RON: Most often (and most cost effective) is to effectively increase sidewall (eave height) and use a raised wood floor. To prevent rodent infiltration, clients have either used this:
  DEAR POLE BARN GURU: Do you have an option to put the posts on a concrete wall or pylon? Where the posts don’t go in the ground. DREW in HAW RIVER
  DEAR POLE BARN GURU: Not too sure if you’re able to help answer my question. I’m a homeowner looking to build a 24x24x10 pole barn with a 6/12 roof pitch. Looking to build my rafters for a more open ceiling instead of using trusses. My question is should I use 2×10 or 2×12 for rafters and do you recommend 24” or 48” spacing? I will have 12” over hangs. FRANK in MILFORD
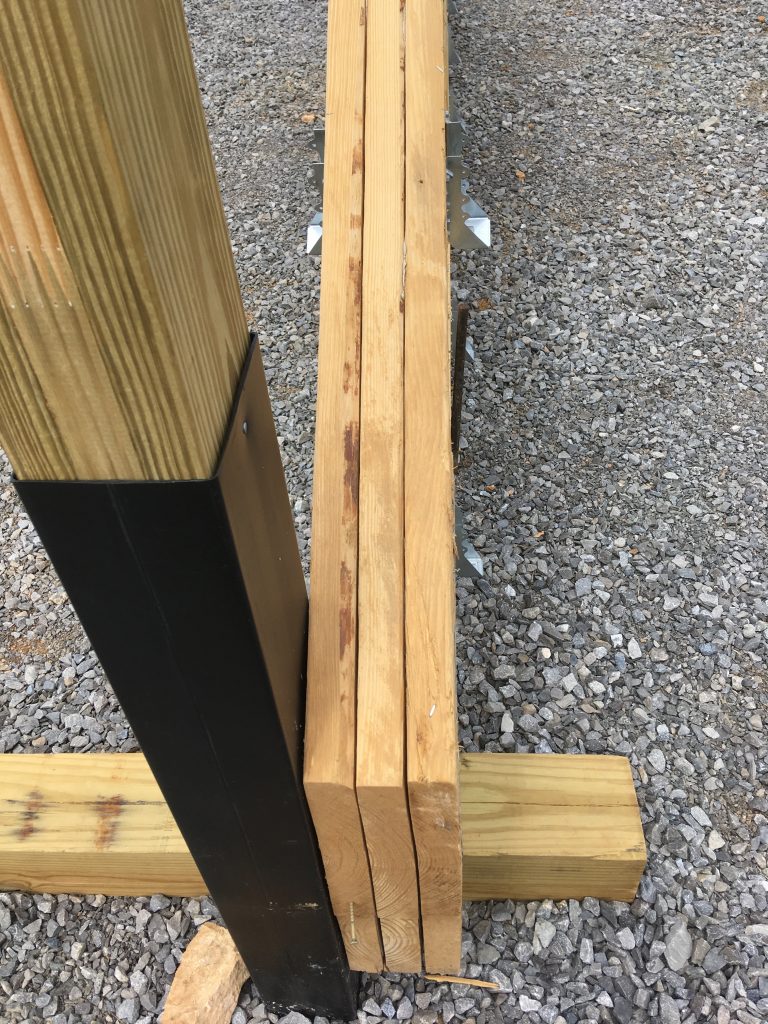
  1) Why would you want to use your own posts, when we have available and affordable stronger glulaminated columns than anywhere else in America?
 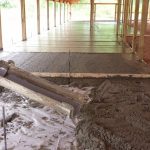 DEAR POLE BARN GURU: I am getting ready to pour a concrete slab in my 24’x30′ pole barn. I calculated the thermal contraction along the 30′ length to be just over 1/8″. Would it be a good idea to install a foam sill sealer type material onto the inside of the grade boards to accommodate any thermal movement of the slab? DAVID in WESTFIELD
  DEAR POLE BARN GURU: O great pole barn genius, what would I want to store an RV, also be at least a 2 car garage, and workshop, with a couple finished rooms for living quarters? What’s that beast called, and what should I budget for it low/high in KY? KIM in PAYNEVILLE
 DEAR BJ: Absolutely a bad idea. Pole barns “work” (e.g. stay standing) due to shear strength of steel sheeting (or OSB, plywood, etc., if used). When you place insulation boards between steel and framing, you are severely impacting ability of steel to carry those loads, as steel can shift slightly under wind loads. Eventually this will cause screw shank deformation (would take some very long screws), as well as slotting under screw gaskets, creating leaking (provided building doesn’t just fail first). If you really want to use XPS sheets, cut them to fit snugly between purlins and girts, taping all edges to achieve a tight seal.
 DEAR POLE BARN GURU: I would like to think of something for my 2 boys and I. One story 3 bed 2 bath. Living room dining room kitchen, laundry room with walk in closets. About what size would you recommend? SHANNON in KIPTON
 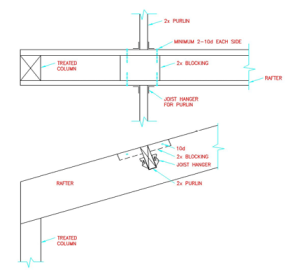 DEAR MICHAEL: A caution – if your shed roof ties in at any height other than exactly at eave, or is not at same slope as existing roof, you have a snow slide off/drift load to contend with and are best to engage an engineer to account for this extra loading. An exception would be if you have a snow retention system on your existing roof. Assuming above is not an issue, please read on. As I do not know your loads, you can fill in blanks in this formula to find out: (roof live load + roof dead load) x spacing (in your instance 96″) x span in feet squared (14′ squared for you). Divide this answer by: 8 x Rafter Section Modulus x Fb (fiberstress in bending of lumber proposed to be used) x 1.15 (duration of load for snow) If your result is 1.0 or less, then you are golden. Section Modulus is depth of member squared x width of member divided by 6 Example : 2×12 = 11.25″^2 x 1.5″ / 6 = 31.64 Fb for #2 grade Southern Pine will be 2×8 = 925; 2×10 = 800; 2×12 = 750
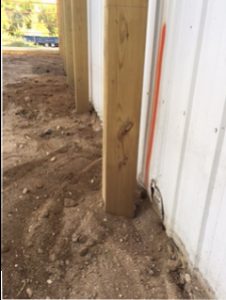 DEAR GLEN: Maybe, provided your existing building footings are adequate to support weight you will be adding. Easiest and safest way is to set a row of columns directly alongside existing building wall, so you can treat new structure as being self-supporting. You will not have to pour a foundation, you can auger holes, place UC-4B pressure treated columns in holes, then backfill bottom 16-18″ with premix concrete to create a bottom collar. If your new lean-to has a pitch break, or is lower than main roof on high side, you do need to account for weight of slide off/drifting snow onto it. This can be avoided, by installing a snow retention system on your existing roof.
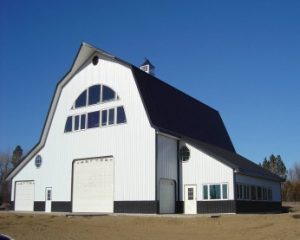 DEAR POLE BARN GURU: What is the difference between a pole barn home and a barndominium? SHARON in WESTCLIFFE
  DEAR TERRI: Fully engineered post frame, modest tastes, totally DIY, move in ready, budget roughly $70-80 per sft of floor space for living areas, $35 for all others. Does not include land, site prep, utilities, permits. Your new Hansen Pole Building kit is designed for an average physically capable person, who can and will read and follow instructions, to successfully construct your own beautiful building shell, without extensive prior construction knowledge (and most of our clients do DIY – saving tens of thousands of dollars). We’ve had clients ranging from septuagenarians to fathers bonding with their teenage daughters erect their own buildings, so chances are – you can as well! Your new building investment includes full multi-page 24” x 36” structural blueprints detailing location and attachment of every piece (as well as suitable for obtaining Building Permits), our industry’s best, fully illustrated, step-by-step installation manual, and unlimited technical support from people who have actually built post frame buildings. Even better – it includes our industry leading Limited Lifetime Structural warranty! If hiring it done turnkey, expect to pay two to three times as much. This is why so many of our clients do some or all work themselves.
 DEAR POLE BARN GURU: My question is that i want one pole barn to house at least 4 vehicles, an RV as large as 45 ft. and a small home around 500 sq feet. Is this possible? JASON in OWENSBORO
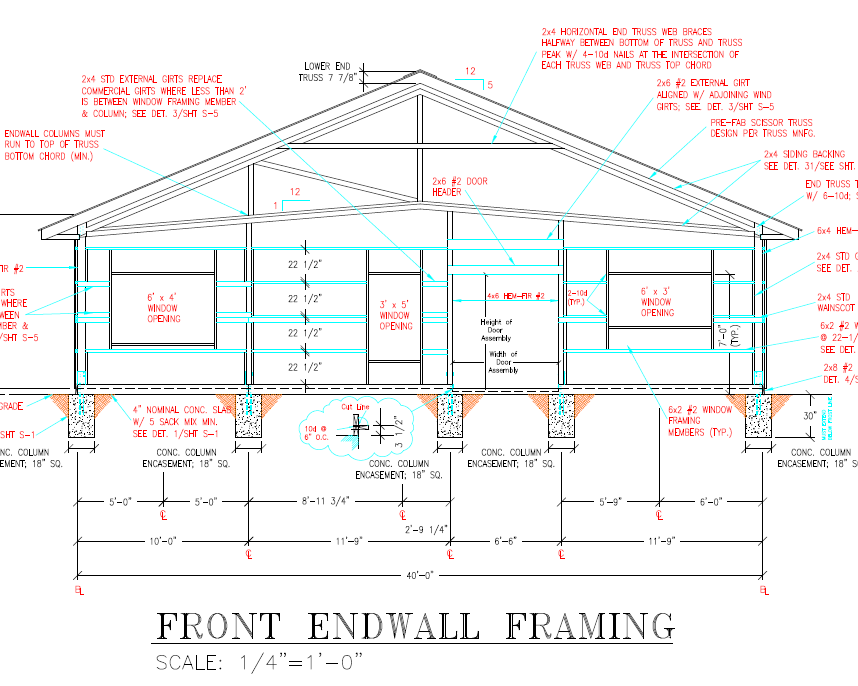
 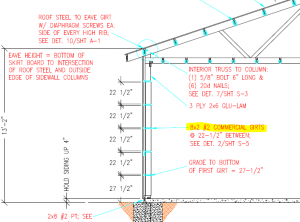 DEAR MATT: While it would certainly make for a larger screw target, when wall steel panels are predrilled, keeping screw lines straight and hitting commercial girts really is not an issue. Outside of extra materials and more labor, there are a couple of areas of possible concern: 6×6 columns vary in dimension. With a 2×8 commercial girt, extending 1-1/2″ outside of columns, a 6×6 up to 5-3/4″ can easily be hidden. If your idea is to use a 2×6 commercial girt, behind a 2×4 external girt, if columns run over dimension they will leave an uneven surface for internal finish. Of course, should you mount a 2×4 external girt above or below a 2×8 commercial girt (forming an “L”), then this concern goes away. Your other possible challenge would be in connecting these two members. Greatest force on wall girts is outward suction, so your 2×4 external girt and 2×6 bookshelf commercial girt will need to be adequately connected so as to not have external girt pull away and fail. This connection should be analyzed by an engineer.
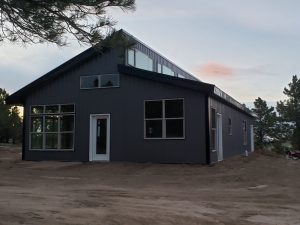 Skillion roofs have a single sloped flat surface. Other names for this style include lean-to, mono-pitched or mono-slope, or shed roof. They are popular for minimal and contemporary-style buildings.
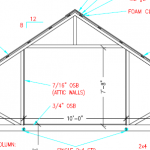
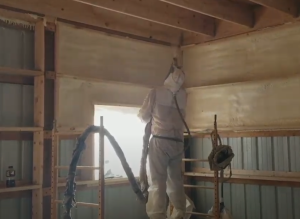 If it was my own roof – I would remove all fiberglass roof plane insulation, increase thickness of closed cell spray foam to at least two inches, then fill balance of 2×8 cavity with either open cell spray foam or rock wool batts (rock wool is not affected by moisture and does not lose R value during cold temperatures).
 IRC
IRC


 There are jurisdictions sadly attempting to prevent ‘pole barn houses’ in their neighborhoods. Scenarios usually go something like this – a potential homeowner inquires to their local building permit issuing authority and asks, “Can I build a pole barn home here”? Too often (in my opinion one time is too often) they are told flatly no. Most of these who do move forward, automatically default to an easy route and stick frame.
 When I first began selling pole barn kits in Oregon, back in 1980, they were almost universally no permit required farm buildings. As our service area expanded into states such as California and Nevada, engineering was required in most instances, however there was never a concern about a pole building not being approved for use in any jurisdiction.
 We have also added an in-house Barndominium Floor Plan Specialist to our team. This service creates for you your ideal dream floor plan, as every barndominium Hansen Pole Buildings provides is 100% custom designed to best meet our clients and their loved ones wants and needs. Professional floor plans and elevation drawings can be yours for as little as $695 and should you happen to move forward and order your barndominium from us, we offer a credit back against your investment of $695 – effectively making this a free service for a one story barndominium!
 Mike the Pole Barn Guru says:
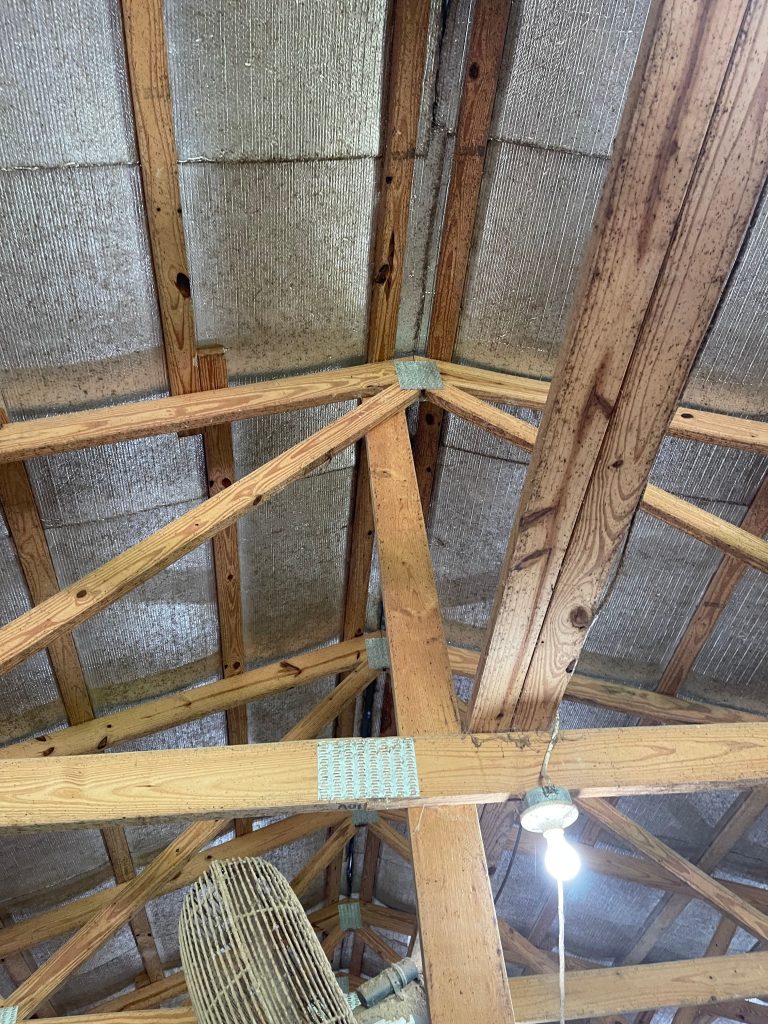
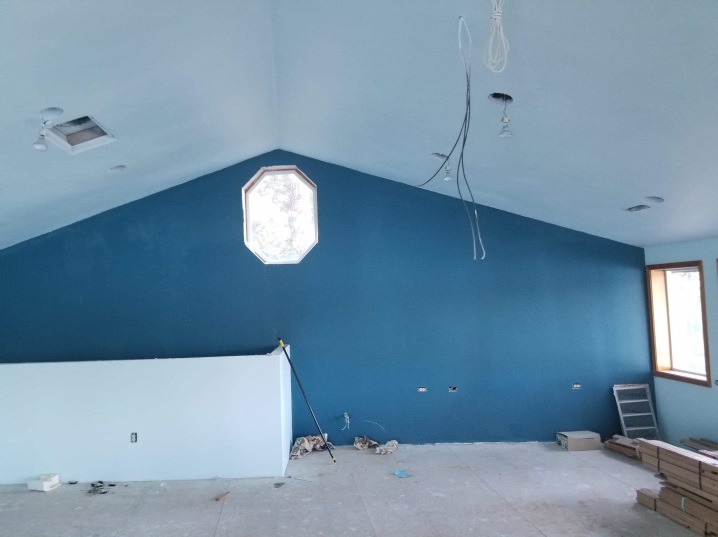
 “Greetings – I’ve got a pole barn style home that’s about 2.5 years old and I’m having moisture issues in the attic. Hoping I can talk with someone to get a consult or second opinion to resolve as quickly as possible. Let me know if it is something you can connect on. Attached is an image from the attic where you can see moisture on the underside of the metal roof. It freezes at night and then during the day when the sun is out, it melts and drips into the attic insulation.
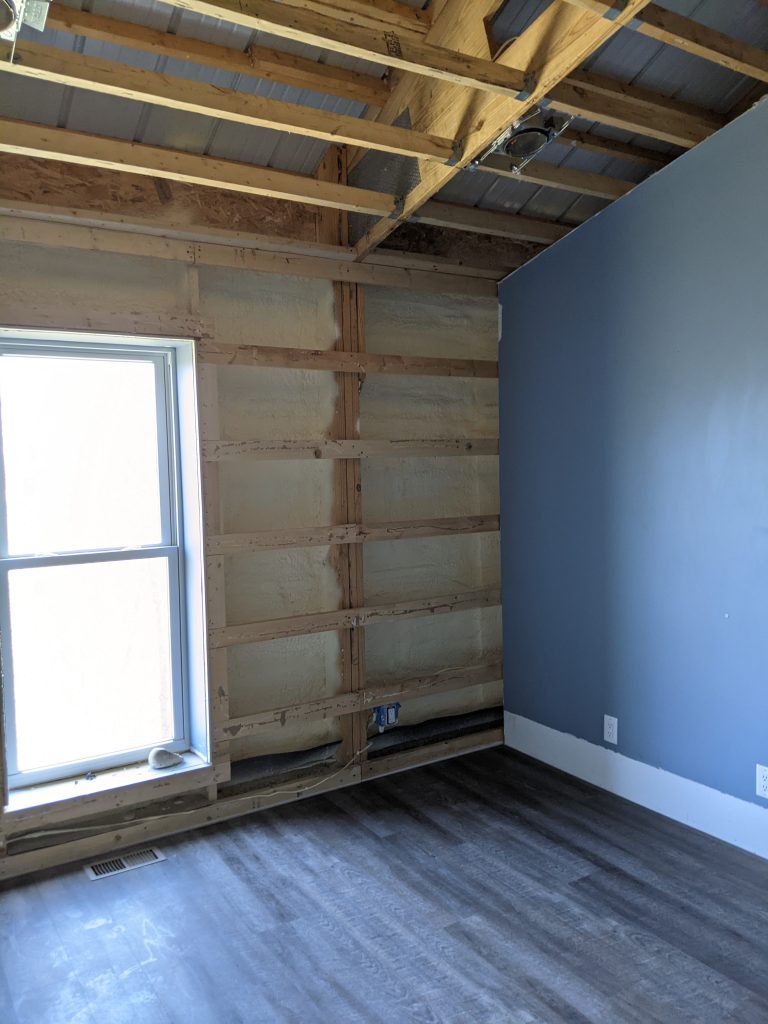
 Easiest solve is to have two inches of closed cell spray foam applied to underside of roof purlins. Any other solutions will take removal of roof steel panels, adding a thermal break, and then reinstalling roofing.
 Your new building investment includes full multi-page 24” x 36” structural blueprints detailing the location and attachment of every piece (as well as suitable for obtaining Building Permits), the industry’s best, fully illustrated, step-by-step installation manual, and unlimited technical support from people who have actually built post frame buildings. Even better – it includes our industry leading Limited Lifetime Structural warranty!
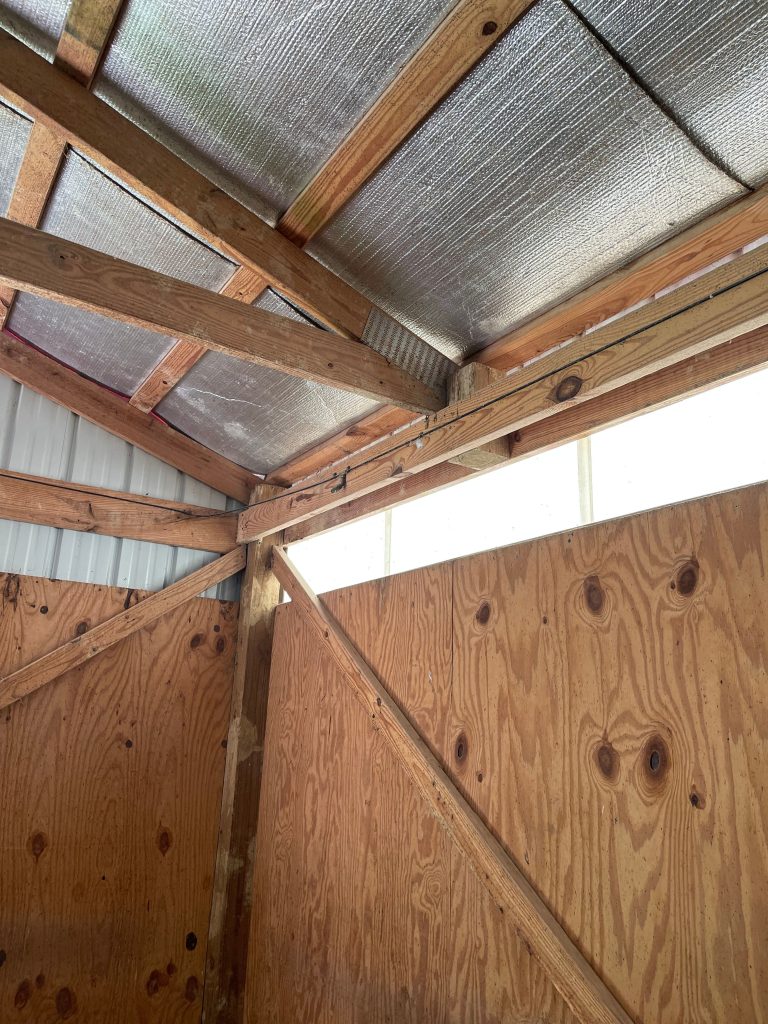
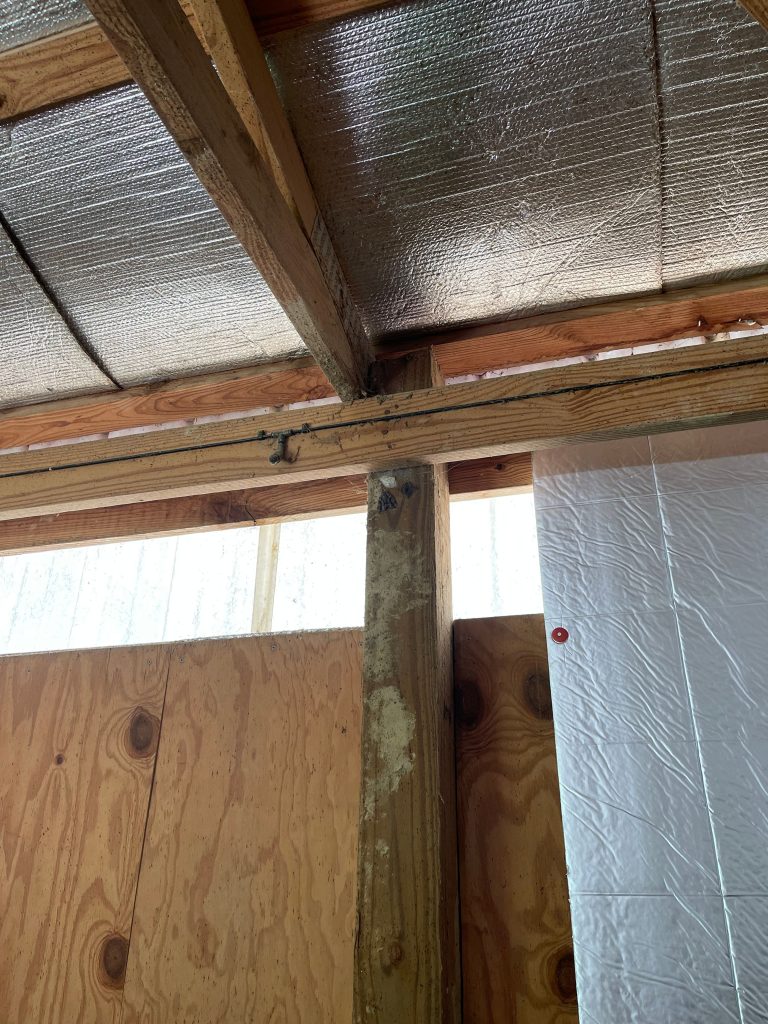
 Closed cell spray foam applied directly to steel roofing and siding can be a great product for controlling condensation, achieving an air tight barndominium and at R-7 per inch is a great insulation solution. So good, I strongly encourage its use, especially for those buildings in Climate Zones one and two (deep South).
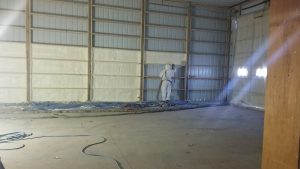
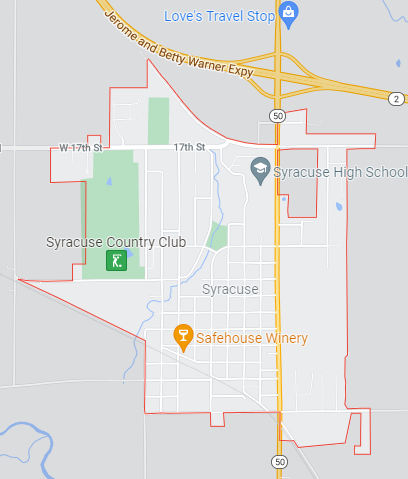 Syracuse, Nebraska was laid out in 1869 when it was certain railroads would be extended to it. With a population of roughly 2000, Syracuse is pretty well smack dab centered in Nebraska, in Otoe county.
 Most post frame buildings have shells erected then slab poured, so this should not be an issue. A pressure preservative treated splash plank should be in place around this building’s perimeter. It will become forms for your slab. Snap a chalk line on the inside of splash planks up 3-1/2″ from bottom, this will be top of your slab.
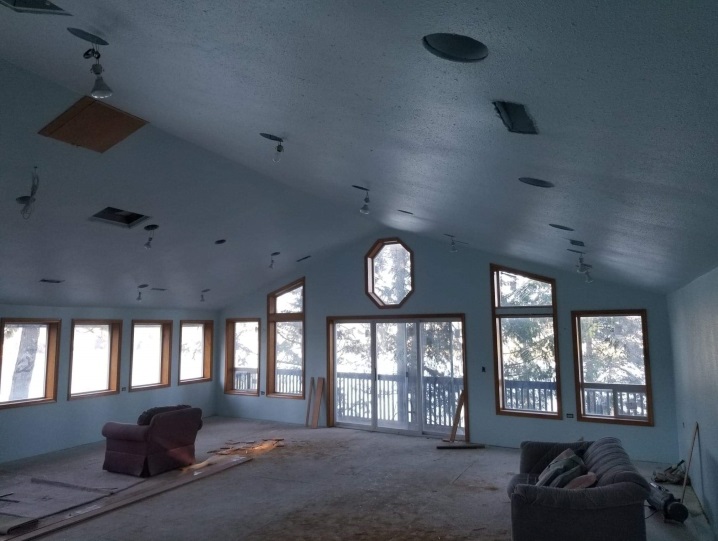


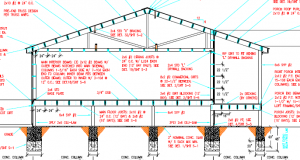
 Your new building will be designed for an average physically capable person who can and will read instructions to successfully construct your own beautiful buildings (and many of our clients do DIY). Your building will come with full 24” x 36” structural blueprints detailing the location and attachment of every piece (suitable for obtaining Building Permits), a 500 page fully illustrated step-by-step installation manual, as well as unlimited technical support from people who have actually built buildings.
 Fully engineered post-frame buildings (pole barn houses in this article) can be entirely Code conforming structural systems. There may be a thought pole barn houses are ‘unsightly’ to some, due to being most often sided with roll formed steel panels. Post frame buildings can have any roofing and/or siding materials found on other structural systems, such as stud wall (stick frame). Sidings can include wood, vinyl, masonry, stucco, the possibilities being endless. To place a restriction only upon one structural system, rather than all systems universally could be seen as prejudicial, as well as a restriction of free trade and Interstate Commerce.
 “Please be aware that the Land Development Code and adopted Building Codes
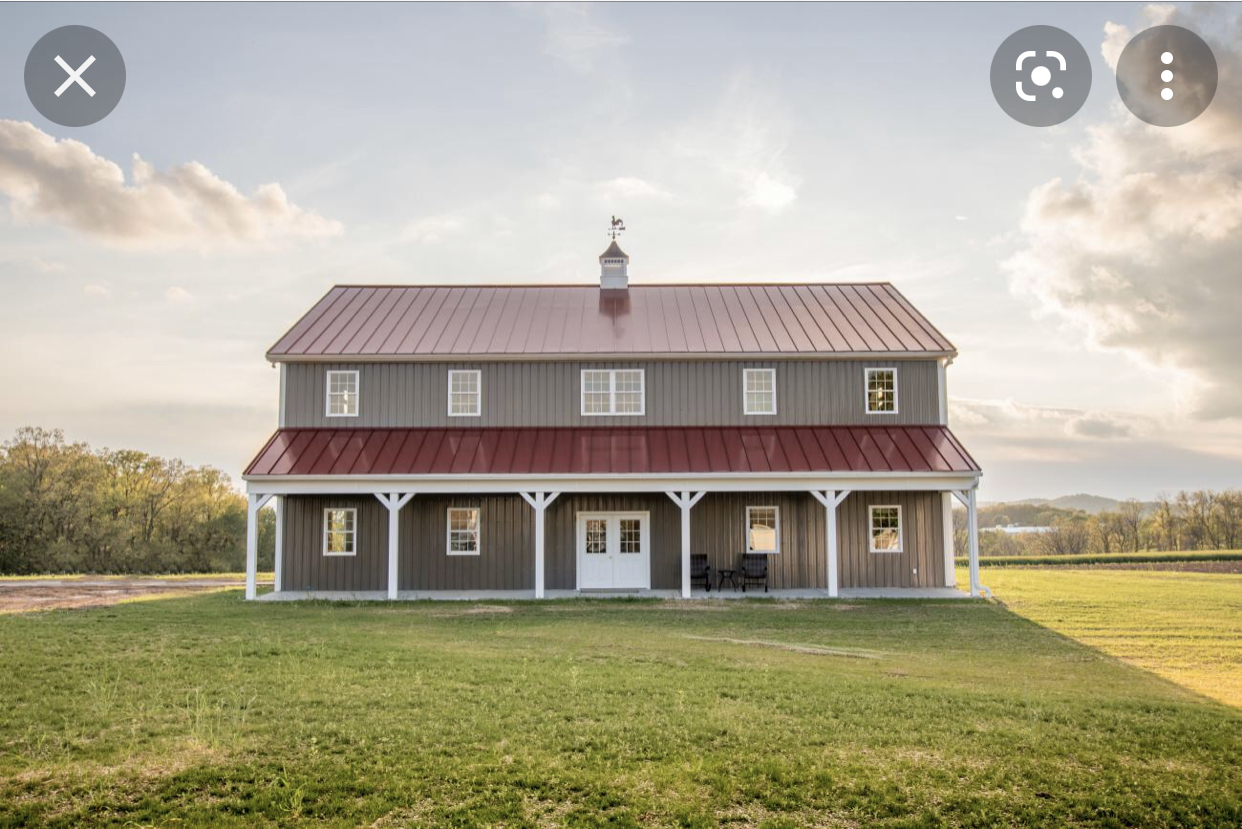
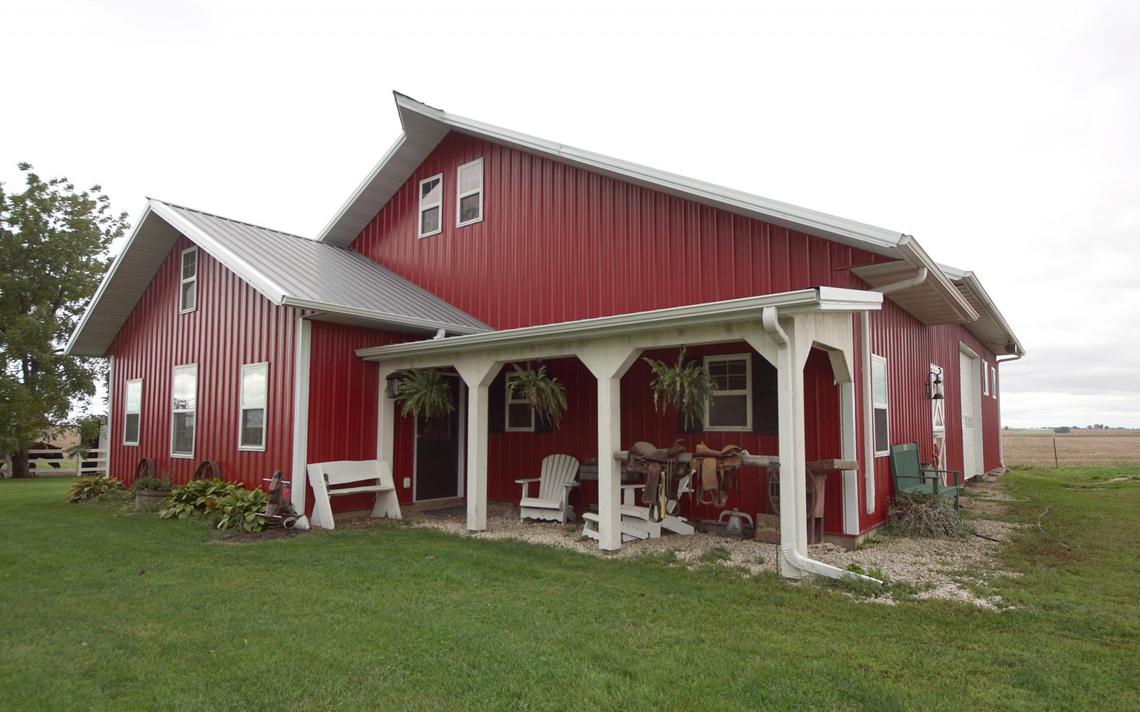
 Fully engineered post frame homes and barndominiums (barn homes) are beautiful because they only limit your heights under Building Codes to three stories and a 40 foot wall height (add another story and 10 feet for having fire suppression sprinklers – a good idea anyhow). My lovely bride and I live in a post frame home with a 44 foot overall height (and a cupola on top of it). Although this article is written for two story homes it may prove helpful:
 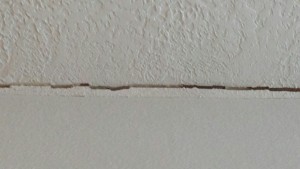 Having a barndominium built? You may anticipate a few things going wrong, but you’d expect your builder to erect your house on solid ground, right? Don’t be so sure.
 2000
2000 Planning Departments are an extension of a jurisdiction’s ruling body (city council, county commissioners) and have basically power of life and death. They can dictate footprints, heights, setbacks, type of cladding (roofing and/or siding), and even colors. They ARE limited to ordinances written by their ruling body, so if you do not hear an answer you like, ask for a copy of their written ordinance. If they cannot produce one, then it does not exist and can be disregarded.

 #3 Have professional floor plans
 Our particular building site had significant amounts of clay and we chose to excavate it out (over excavate) and replace with compactable fill. Our site is also built up, so any rain or snowmelt runs away from our home. After 15 years of service we have only minimal hairline cracks in our slab on grade – even though we have been through winters of seven feet of frost! Our building has no perimeter grade beams and our columns are embedded in concrete six feet below grade.
 At Hansen Pole Buildings, we are literally “All About the Building” and we strive to provide “The Ultimate Post Frame Building Experience™”. Every single one of our fully engineered post frame buildings is custom designed to best fit our client’s wants and needs. Rarely will we be least expensive, however we will always provide a best value solution.
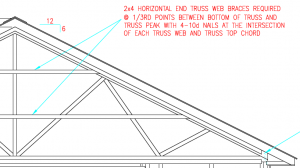
 Your fully engineered post frame home is 100% Building Code Compliant and most typically has pressure preservative treated columns embedded in ground with both concrete footings and bottom collars. Alternatively your home can be mounted to steel brackets set in concrete piers.


 Commonly (when addressed at all during construction) solutions to this problem have often involved creating a thermal break. A thermal break reduces contact between a structure’s warm interior air and cooler metal roofing, thereby reducing or eliminating overall condensation. Installing a reflective radiant barrier, often termed Vapor Barrier, involves laying rolls of faced ‘bubble wrap’ across your building’s purlins prior to roof steel installation. Ideal weather conditions are required for this as even a slight wind can make this a challenging or altogether impossible task. This can cause jobsite delays and may bring progress to a halt while a structure remains unprotected to weather. Even when ideal weather conditions are present, installing a reflective radiant barrier can be a very dangerous task, requiring builders to expose themselves to awkward material handling on a building’s bare roof framing. These risks and delays often generate additional costs for both owners and builders, but have often been necessary with reflective radiant barrier being the only relatively affordable option to prevent interior dripping.
  The topic was brought up at the Aug. 6 meeting after Szokola reported he had seen more than one house come through requesting permits in which the house didn’t quite fit with what a typical house in the area might look like.
 Now let them work. Don’t try to supervise every blow of a hammer or placement of every stud. These guys are professionals and they know more about their trades than you do, and probably, if they came to you well recommended, they take pride in their work. Let them do it.
 In order to have your greatest possible resale value, you should have any lofted space designed so as to be considered as habitable space. International Residential Code (IRC)
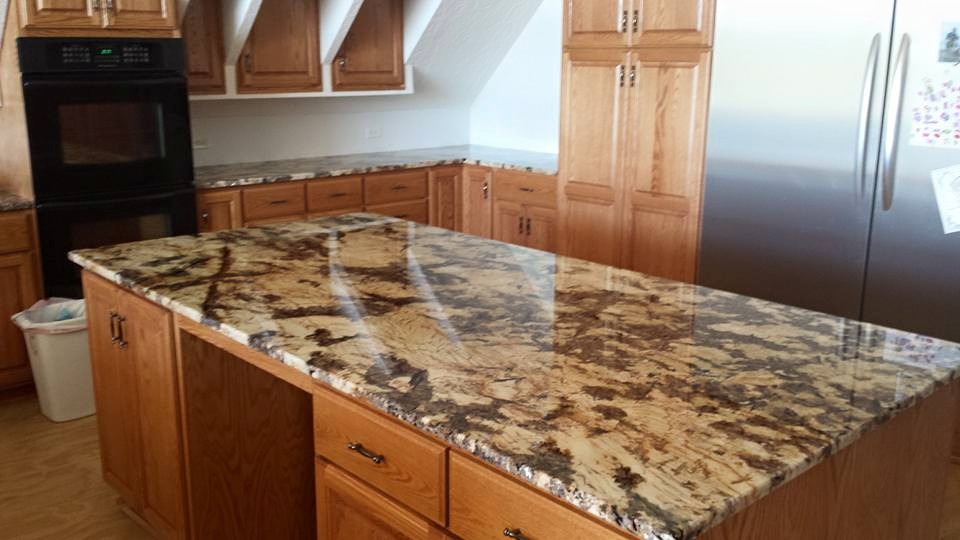
 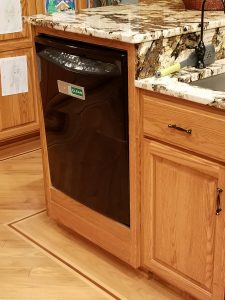 Another thing we did in building our cabinets was to put the dishwashers on a wood pedestal by the seating for the bar area. Dishes are easier to add or remove at that height for both Mike and myself. I’m in a tall power wheelchair so access to appliances is paramount for me.
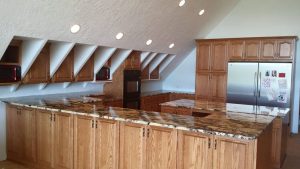 The aisleways between an island or peninsula should also be plenty wide for two people working in a kitchen at the same time. Again, without knowing we’d need more width between counters and appliances, we designed the kitchen with 52″ between the kitchen sink and island. We used a full 5′ between the island and fridge/freezer area due to the doors possibly being open when the other one of want’s to get by. Both allow Mike and I to be working in the kitchen at the same time and he can zip around my chair if need be.
 Have lots of children? Rather than having all sorts of very small bedrooms so each child has their own space – institute room sharing, incorporating larger bedrooms with walk in closets. While lots of small bedrooms may work well for your lifestyle, it is a personal design choice not appealing to most potential buyers.
 Curb appeal describes a potential buyer’s feeling of a home as he or she approaches it, based on how it looks from outside. In recent years, this initial impression has extended beyond just physical and into a realm of virtual reality. How a home looks online can also greatly influence a buyer’s interest — in fact, in today’s highly competitive market, this is where curb appeal really begins.
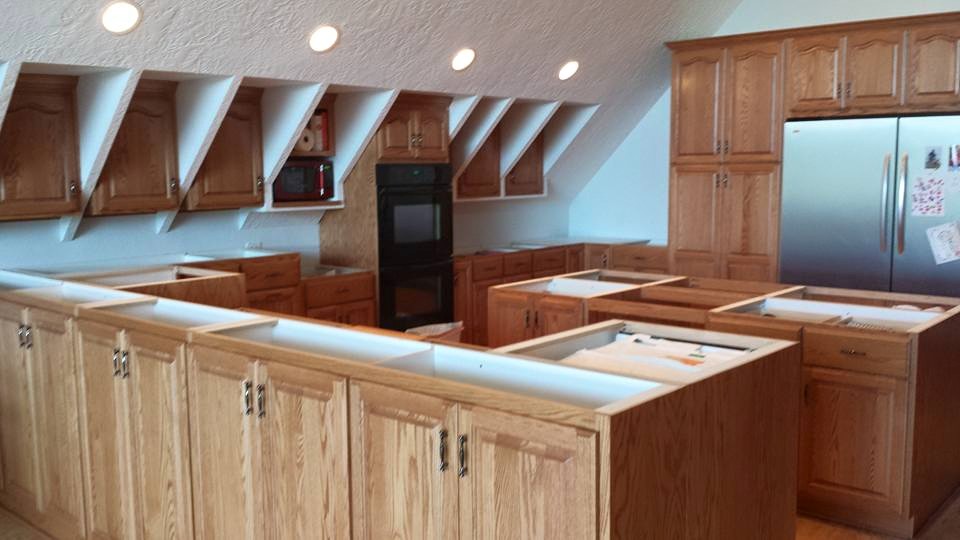

 Seemingly millions of canned house plans are available (for a small to large fee) across a plethora of internet websites. 99.9% of these plans have a similar problem – they were designed for a flat lot in suburbia! Yep, they look stunning on a website. Considering spending your hard earned money on one thinking you will save money by using cheap house plans? This would be an equivalent to everyone buying 34 inch waist 36 inch inseam Levi’s. They fit me just fine, but what if you are not 6’5”? Or maybe you do not even like Levi’s?
 “We would like to build a post frame home but I would like to have a whole house fan to cut down on cooling costs. Most barndos we see under construction use spray foam insulation directly against the metal roofing/ siding which would prevent the use of a whole house fan. You talk about blown in insulation and roof venting which sounds similar to stick built homes. So is it safe to assume that your designs would allow us to install a whole house fan in the attic space with adequate venting? I fondly recall the ancient airplane engine attic fans 3 or 4 ft wide from years ago and was pleasantly surprised to see the new ones drastically reduced in size and volume. What is your opinion on this?”
 I know that the costs for SIPs mostly comes from the manufacturer having to essentially custom make each piece. In this application the SIP panels could be made as rectangles that are as wide as your center to center post distance and as tall as is convenient. Any angled pieces for gable ends and any fenestrations could be cut on site, reducing SIP manufacturing costs. The SIPs also would likely not have to have much dimensional lumber built into the SIP because it is just holding up itself and windows, not the whole building thereby drastically reducing your thermal bridging. You could also foam seal between the SIP panels to provide air sealing (which I believe is standard for SIPs anyway.)
 DEAR POLE BARN GURU:
 DEAR POLE BARN GURU: I’m interested in a residential building approximately 20ft x 30ft. How tall would the walls need to be to include a loft bedroom with headspace to approximately 4ft from the sides? JUDE in DUPONT
 I would recommend using premanufactured wood floor trusses between floors (
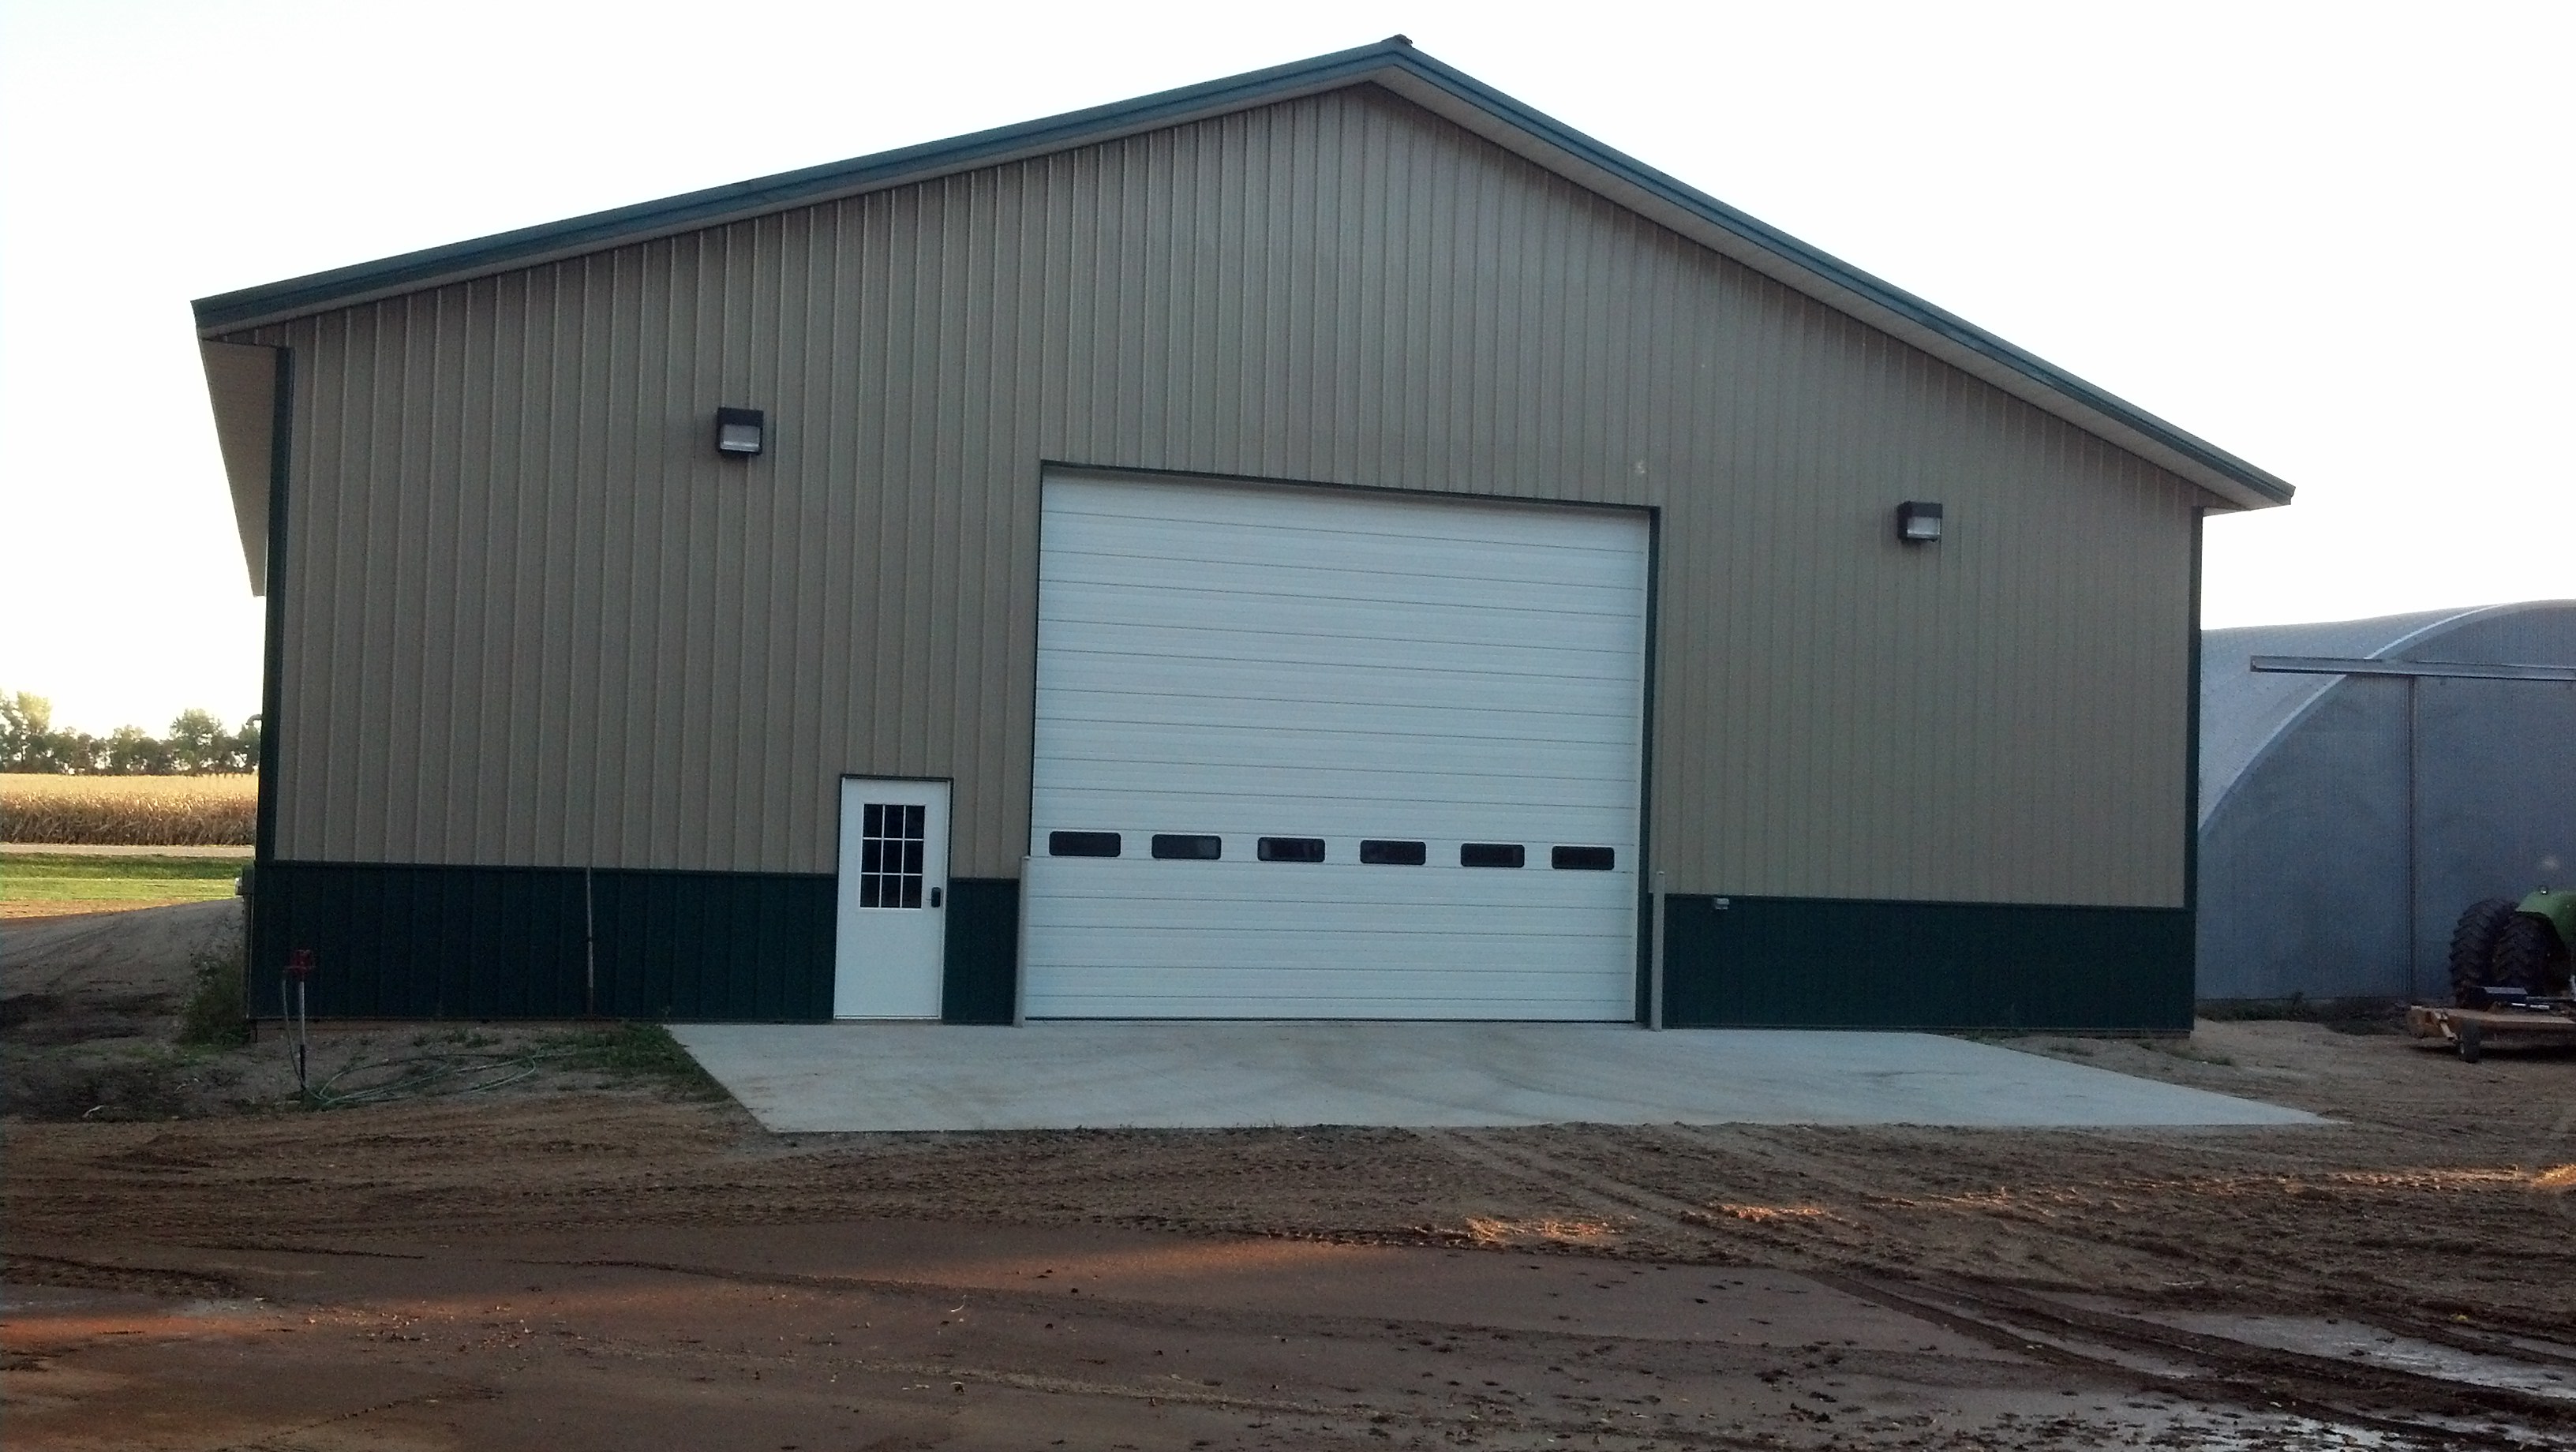

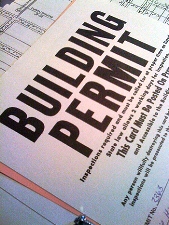
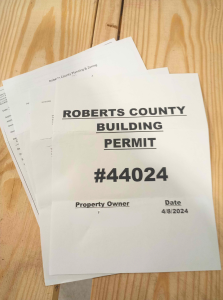 In most parts of our country (and probably most other developed countries), it will be a necessity to acquire a building permit in order to construct a new barndominium, shouse (shop/house) or post frame home. Easiest way to find out is to contact your local authorities to find out if indeed this is your case.
 A few years ago, our oldest son Jake needed a new post frame garage at their home near Knoxville, Tennessee. His mom convinced him this plan would be so much better with a mother-in-law apartment upstairs. We used 4×2 (2x4s turned flat) floor trusses to span a 24 foot width!
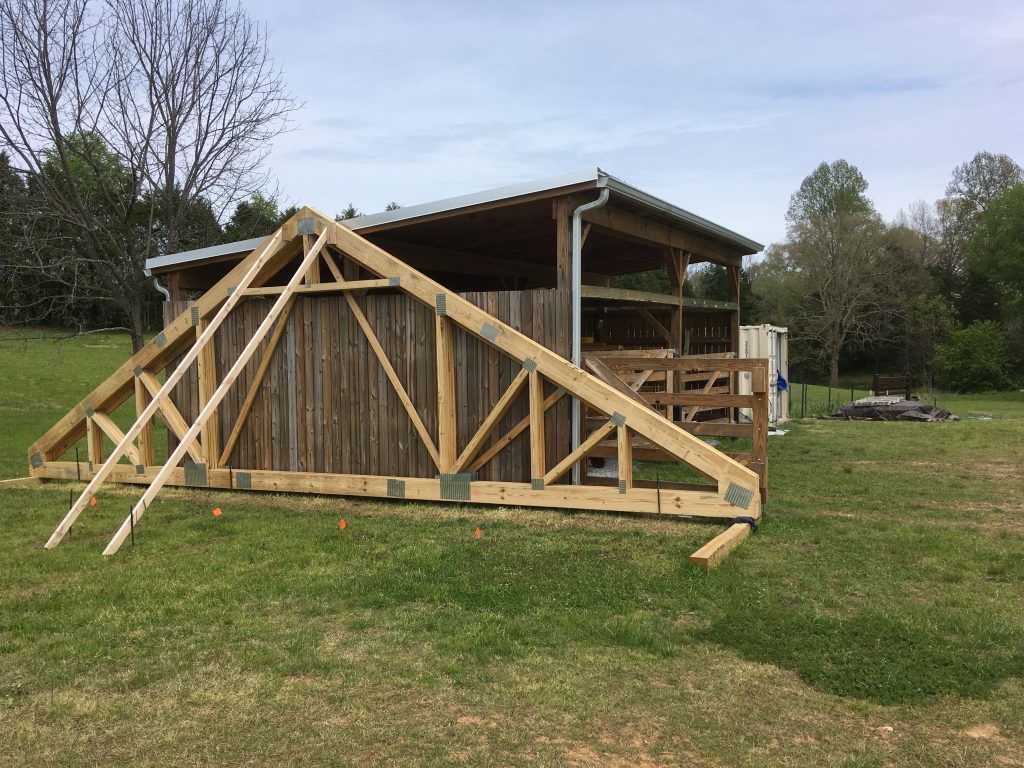
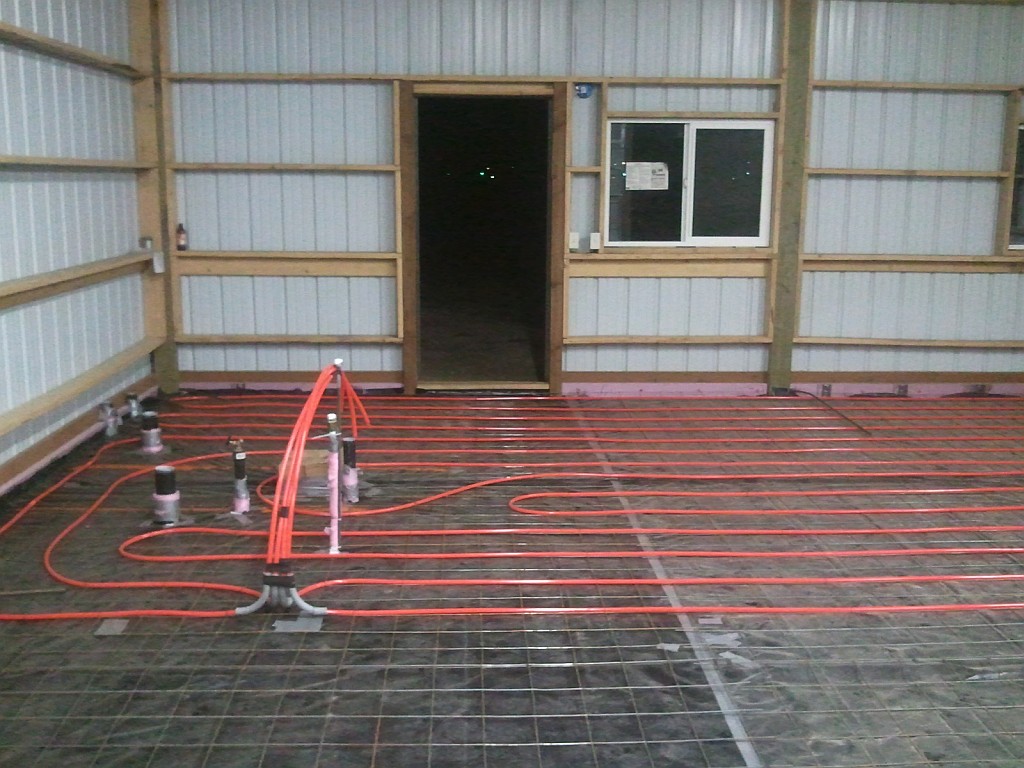
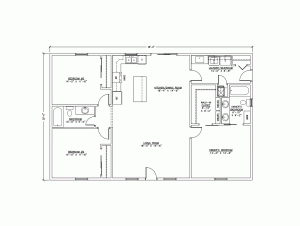
 For those who have been following along, I have covered preliminary steps leading to actually designing a functional and affordable floor plan.
 Thank you for your interest in a new Hansen Pole Building. We have wholesale relationships all across America and will ship bulkiest items, in most cases lumber and trusses, from your locale – freight costs will be no more for you, than they would be to any other location.


