Tag Archives: building department

You Can’t Build it Here Part I

You Can’t Build It Here

Pole Barn Guru BlogWhen I first began selling pole barn kits in Oregon, back in 1980, they were almost universally no permit required farm buildings. As our service area expanded into states such as California and Nevada, engineering was required in most instances, however there was never a concern about a pole building not being approved for use in any jurisdiction.

Now there were some ‘tough’ Building Departments. Most providers and builders refused to even quote permitted pole buildings within Multnomah County, Oregon or King County, Washington – just because they involved engineering and had plans examiners who were actually engineers themselves.

As our Pacific Northwest pole building industry evolved and expanded, we knew we had clients who were bootlegging our buildings into homes, but it wasn’t until I built a shouse (shop/house) for myself in rural Spokane County, Washington nearly 30 years ago, where I actually participated in a post frame building specifically designed for residential use all along.

In recent years, there has been a literal explosion of barndominiums across our country – many of these being post frame homes. And why not? Post frame offers so many benefits over limitations of what is considered to be a more traditional structural system – stick (or stud wall) framed.

Perhaps stick built construction’s biggest advantage is builders and tradespeople are very comfortable working in and around stick framing. All registered architects and most building inspectors are very familiar with stick framing. 2018’s International Residential Code (IRC) provides a prescriptive ‘cook book’ to follow for adequate structural assembly, within certain limitations. These include, but are not limited to, no story height of greater than 11 feet 7 inches (R301.3.1), no hurricane prone areas with a design wind speed of 130 mph or greater located south of Virginia, or 140 mph elsewhere (R301.2(5)B), and no ground snow loads over 70 psf (R301.2.3).

IRC802.10.2.1 further limits truss spans to a maximum of 36 feet and building lengths to 60 feet (measured perpendicular to truss span). Trussed roof slopes must be at least 3:12 and no greater than 12:12.

Wood is a very forgiving building material and, even when miscut, replacement material is usually only a short drive away. America’s home building industry has built traditional, wood stick framed homes, on site for decades.

Many builders, architects, carpenters and other subcontractors prefer to work on stick built homes as compared to alternative building systems, as it is what they are familiar with.  Because traditionally framed houses are so popular, dimensional lumber and stick built framers are readily available.

Another advantage of stick built homes is they allow for a great level of design freedom.  One can design a home with various ceiling heights, angles and curves, niches and other details. Stick framing is one way to achieve those unique details at a fairly affordable cost.

Despite its popularity, stick framing does have some drawbacks. Because stick built homes are assembled outside, over several weeks, framing lumber is subject to outside moisture. If lumber gets too wet, it can shrink and warp as it dries and cause cracks in the attached drywall.  This shrinking and warping can also make it difficult to properly insulate. To decrease risks of potential moisture problems, exteriors are covered with an appropriate and well-sealed Weather Resistant Barrier and lumber should be properly dried before drywall and insulation are installed.

Another drawback of a stick built home is it usually takes several weeks to complete framing.  Total amount of time it will take will obviously depend on the size and complexity of house plans and size, experience and availability of any particular framing crew.

A framing crew must precisely cut, assemble and erect framing components sometimes in adverse weather conditions.  Working around adverse weather conditions is another challenge with stick framing.

Come back in two days for the conclusion in You Can’t Build it Here Part II.

Building Permit Makes It All OK? Think Again!

Building Permit Makes It All Okay? Think Again!

This article “Town of Rush orders woman to move barn it granted her permit to build” by Brett Davidson was published at www.WHEC.com February 24,2022

A woman from Rush has been ordered to tear down a brand new barn on her property because it violated the town’s zoning laws, but it was the town that approved the plans and issued the building permit.

Elizabeth DiStacio told News10NBC Anchor Brett Davidsen it has broken her financially and emotionally.

She thought she did everything right.

“I don’t sleep,” DiStacio said. “I cry every night. I sit there and cry and I’m still crying.”

News10NBC

In the fall of 2019, she decided to put up a large pole barn on the family’s property in Rush. She submitted a survey map to the town building inspector and marked with an “X” where she wanted to construct the barn.  

Davidsen: “You had a permit?”

DiStacio: “Yes, I did. A building inspector never came out, took a look at anything, just issued the permit.”

With this permit in hand, she hired a contractor. The cost of the job was about $25,000. Then, about a month into construction, the building inspector for the Town of Rush showed up for the first time and told her the barn was too close to the road and violated the town’s zoning law—which calls for a 110 foot setback. The barn was about 50 feet. The inspector ordered the construction crew to stop work, but by then, the framing for the 1,900 square foot barn had already gone up.

Davidsen: “So you didn’t alter the map?”

DiStacio: “No.”

Davidsen: “You didn’t misrepresent where you wanted to put the barn?”

DiStacio: “I was upfront and honest.”

Davidsen: “Did you know what the setback was?”

DiStacio: “No. Oh no I didn’t. I didn’t even know anything about a setback.”

It appears, while looking at the survey map, the inspector mistook the existing house’s setback distance of 117 feet for that of the proposed barn.

“It wasn’t Elizabeth’s fault the zoning officer misread the map,” said DiStacio’s attorney, John Vogel.

“She wasn’t misleading. She wasn’t engaged in any subterfuge or anything improper, and the town granted the permit, and now it seemed like they were pulling the rug out from under her,” Vogel added.

The Town of Rush also didn’t issue a written stop-work order—which its own bylaws require. When she didn’t get it after several months, DiStacio brought the contractor back.

“I didn’t hear anything from the town, so I’m like, ‘Finish it,'” DiStacio said.

Eventually, she applied for a variance with the Rush Zoning Board of Appeals but was denied.

So she took her fight to court. But a judge recently ruled against her, saying the board was thorough and rational when it rejected her request. The judge ordered her to take down or move the barn.

So we went to the Town of Rush to find out how this could have happened.

“It’s just a comedy of errors,” said Town Supervisor Gerald Kusse.

Rather than defend the town’s actions, he made this stunning admission.

“I would describe what happened as the very direct dereliction of duty on our building inspector at the time. Because all the investigation, as they’ve done proves that to be true,” Kusse said.

Kusse points out that the building inspector would have caught the mix-up much sooner had he visited the property earlier to ensure the layout was in compliance.

“Why he didn’t, I don’t know,” Kusse added.

Kusse said the inspector in question no longer works for the town.

Davidsen: “Given all of this, could the town have done something for her financially to move that barn?”

Kusse: “I’m one vote. I would have liked to proceed in that direction.”

But Kusse said members of the town board and the town attorney nixed the idea, concerned about setting a bad precedent.

“Why do I have to pay when I did everything the town asked me to do?” questioned DiStacio.

DiStacio said moving the barn will cost an additional $35,000. She has until mid-March to get it done.

Davidsen: “What has this done to you financially?”

DiStacio: “When this thing is done, I have zero in the bank. Zero. And that’s what I’ve got to show for it.”

Home improvement jobs can be very involved, and most of us don’t know all the pitfalls before launching into a project.

So Davidsen spoke with the Finger Lakes Building Officials Association President Jim Bailey about what you can do to avoid problems like Elizabeth DiStacio had. He shared this advice:

  1. Before you do anything, know your local zoning laws, things like setback requirements, and how they pertain to your property.
  2. Make sure you have detailed plans about your project, and hire professionals if you need to.
  3. Make sure you are getting inspections by town officials throughout the entire process.
  4. Most importantly, over-communicate with your local building inspectors and code officers.

“Through communication, you can utilize the education that all the municipal employees have for their profession and through that communication and dialog, then you can achieve compliance, which is really what everybody wants,” Bailey said.

Mistakes do happen, but ultimately, the responsibility lies on the homeowner.

Building Codes and Requirements in Contract Terms

Building Codes and Requirements in Contract Terms

Disclaimer – this and subsequent articles on this subject are not intended to be legal advice, merely an example for discussions between you and your legal advisor.

Please keep in mind, many of these terms are applicable towards post frame building kits and would require edits for cases where a builder is providing erection services or materials and labor.

BUILDING CODES: The Total Cost of this Agreement is based upon an agreement between Purchaser and Seller, for Seller to perform according to a specific scope of work, per code and loading information as stated in the Agreement. Total Cost to Purchaser may be increased depending upon the review completed by one or more of Purchaser’s permit approval granting agencies, which include, but are not limited to building and land use departments, in which event either the Seller or Purchaser shall be relieved of further obligation under this Agreement if the increase in Total Cost is greater than ten percent (10%). 

In the event the building department, any other governmental agency or agent may require revision(s), further documentation, or explanation of any work after one initial plan check/review, Seller will advise the Purchaser of any required changes or modifications. Upon notification by Seller of extra work or materials required, Purchaser shall authorize Seller to perform such according to Section xx of this Agreement, “Change Orders”. 

Seller is not responsible for any plan check fees, re-inspection fees, special inspections, analyses or reports which are not ordinarily provided by Seller to a building department, plan check or inspector, including, but not limited to any additional charges resulting from unfamiliarity of said person(s) with either post frame buildings in general or the work as specifically designed by Seller. 

Once the approved plans and specifications have been reviewed by the applicable jurisdictions and building permit has been issued, both Seller and Purchaser may rely upon those approved plans and specifications as conforming to all applicable regulations and building codes of the jurisdictional building authorities. 

Total cost, unless otherwise specified, includes two sets of engineered 24″ x 36″ plans. Extra sets are available at time of order for $xx per set. Plans will be made available online (once drafted) and must be fully reviewed and approved by the Purchaser prior to deliveries being scheduled. Time spent handling calls or Emails made by the Purchaser, Purchaser’s agent(s), or Purchaser’s permit issuing agencies to engineer of record will be paid for by Purchaser, directly to the engineer, at engineer’s prevailing rate. 

In the event any conflicting information is found on the plans, Purchaser agrees to immediately notify Seller. Seller will promptly clarify or correct any conflicting information (at no charge to Purchaser), this being Purchaser’s sole remedy. 

Building Codes require attics above insulation to be ventilated with a net free area (NFVA) not less than 1/150 of area of space being ventilated. NFVA may be 1/300 of area of space ventilated, provided 50 percent of required ventilating area is provided by ventilators located in the upper portion of space to be ventilated at least 3 feet above eave, with balance of required ventilation provided by eave or gable vents. Purchaser to make provisions for adequate ventilation, if not so included in Agreement.

My commentary: permit issuing authorities can and will do some absolutely bizarre things. Often all it takes is one new person in a department who is fresh out of school and wants to prove their brilliance by upsetting an apple cart. This caps these unforeseen costs to both parties.

PER ANSI/TPI 1 LEGAL REQUIREMENTS MANDATE: In all cases where a Truss clear span is 60 feet or greater, the Owner (Purchaser) shall contract with any Registered Design Professional for the design of the Temporary Installation Restraint/Bracing and the Permanent Individual Truss Member Restraint and Diagonal Bracing. In all cases where a Truss clear span is 60 feet or greater, the Owner (Purchaser) shall contract with any Registered Design Professional to provide special inspections to assure that the Temporary Installation Restraint/Bracing and the Permanent Individual Truss Member Restraint and Diagonal Bracing are installed properly.

For extended reading on this subject, please visit: https://www.hansenpolebuildings.com/2019/09/responsibilities-where-the-legal-requirements-mandate/

Prescriptive Structural Requirements for Post Frame Buildings

In a misguided effort to make things “easier” for potential building owners and builders, some Building Departments have prescriptive requirements for non-engineered pole buildings.

This means if someone walks in their Building Department’s door and wants to construct a post frame building, as long as the building owner (or builder) agrees to build to match these prescriptive requirements, they will be issued a structural permit. This is, of course, with a caveat of being able to meet requirements of other departments, such as Planning (https://www.hansenpolebuildings.com/2013/01/planning-department-3/).

WHY IS THIS BAD?
Doesn’t this save a lot of money, not having to pay an engineer?

No.
Prescriptive requirements are often based upon, “we have always done it this way”, rather than having a basis in sound fundamentals of structural design. Every three years a new Building Code version is published, sometimes with sweeping changes in structural design as better research and new technologies (and products) have become available. Many highly qualified design professionals, including engineers, are involved in Building Code revisions.

A classic example of this came when International Building Codes were first adopted in 2000. Prior Codes did not have deflection criteria for wall members in those cases where members did not support a rigid finish (like plaster or gypsum board). New Code limits deflection for all instances. In order to meet these new requirements, in many cases, pole building wall girts can no longer be installed “flat” on wall column exteriors.

Many times materials are included in prescriptive requirements doing nothing but causing more work for whoever is actually doing construction, as well as using unnecessary larger lumber members than what an engineer would have specified.

On occasion, these prescriptive requirements do not actually meet sound structural design! In my spare time, I have challenged more than one of these and gotten Building Departments to make changes, as their prescriptive requirements would have resulted in an under designed building.

Scarily….if you build to prescriptive requirements, and have a collapse, your Building Department is absolved from any structural liability!

THE SOLUTION

If a Building Department has PRESCRIPTIVE REQUIREMENTS for Post Frame Buildings – invest in an engineered building. It is less expensive to pay for engineering and it guarantees a building be designed to sound engineering practice and actually meet building code requirements. Your bonus is those sealed plans are your “insurance’ – your building’s engineer is now liable for both safety and integrity of your new building as long as his or her plans are followed.

Unknowedgeable Post Frame Building Suppliers

Reader JEREMY in STAFFORD SPRINGS is experiencing challenges with unknowledgeable post frame building suppliers. I will share his own words with you:

“I am currently attempting to price out for a metal building, post frame or conventional stick built. The dimensions we are looking at is a 40×60 with a 12 foot roof. I am having a hard time locating post frame construction components locally, and when I go to the local supply houses it seems that they are no more or even less knowledgeable than I am with this construction technique. So I figured I would start reaching out. I have a few questions. Do you sell components individually, such as wet set post anchors, laminated columns, roof trusses? Do you design plans that will satisfy code requirements? I live in Stafford Springs CT, which is in Tolland County. I have not spoken with the inspectors office at all yet. I would rather do my research first and come to them prepared.”

Well Jeremy, thank you for reaching out to us. Your dilemma is not unlike those faced by potential post frame building owners everywhere. For being as “simple” as they may look, post frame buildings are very complex structures, involving literally hundreds of pages of background calculations – very few providers have capabilities to do this type of analysis. Post frame buildings are ALL we do – unlike lumberyards and big box stores who, in trying to be all things to all people, end up generally being nothing to anyone.

Hansen Buildings Construction Manual
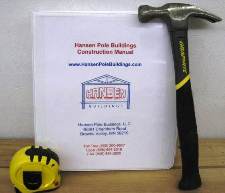
In order to keep our prices as reasonable as possible, we typically provide only complete post frame building packages. This allows for minimization of shipping expenses and potential freight damage, as well as us not having to provide $200 of Technical Support on a product we make only $100 on (we provide unlimited free Technical Support during construction, if our nearly 500 page Construction Manual and your engineered plans leave you with any uncertainties).

Every Hansen Pole Building comes with third-party engineer sealed structural plans and supporting calculations based upon climactic data for your area.

In your not too distant future I would encourage you to visit with your local Planning Department (https://www.hansenpolebuildings.com/2013/01/planning-department-3/) and Building Department (https://www.hansenpolebuildings.com/2019/01/building-department-checklist-2019-part-1/ and https://www.hansenpolebuildings.com/2019/01/building-department-checklist-2019-part-ii/).

Building Department Checklist 2019 Part II

BUILDING DEPARTMENT CHECKLIST 2019 PART II

Yesterday I covered seven of what I feel are 14 most important questions to ask your local building department.  This not only will smooth your way through permitting processes, but also  ensures a solid and safe building structure.

Let’s talk about these last seven….

#8 What is accepted Allowable Soil Bearing Capacity?

This will be a value in psf (pounds per square foot). If in doubt, err to side of caution. As a rough rule – easier soil to dig, weaker it will be in supporting a building. A new post frame building will only be as solid as it’s foundation, and it’s foundation will be only as strong as soil it rests upon.

Some jurisdictions (most noticeably in California and Colorado) will require a soils (geotechnical) engineer to provide an engineered soil report, spelling out actual tested soil strength.  Other states may have requirements as well, so be sure to ask ahead of time.

#9  Is an engineered soils test required?

If so, get it done ahead of time.  Don’t wait. It’s easy to do and there are plenty of soil (geotechnical) engineers for hire.

#10 What is your Seismic Category (such as A, B, C, D-1, D-2)?

While rarely do potential seismic forces dictate design of a post frame building, there are instances where they can.  A high seismic potential, with high flat roof snow load and low wind load will be one case. Other case will be when you are considering a multiple story structure.

#11 Are wet-stamped engineer signed and sealed structural plans required to acquire a permit?

Some Building Department Officials will say no to this, yet during plans review process they request structural engineering calculations to prove design, or (worse yet) they make wholesale changes to plans, based upon how they think a post frame should be constructed.

Engineer sealed pole barn
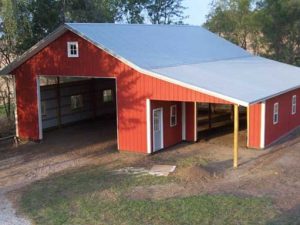
My recommendation – invest in engineered plans. It becomes an assurance a registered design professional has verified your building will meet Code mandated loading requirements. In some cases, insurance companies offer discounts for buildings designed by an engineer. It’s certainly worth asking your agent for one!

In some cases, Building Permits will be granted with only requiring engineer sealed truss drawings. We do not condone this practice, as it creates a false sense of security.

Are exterior finished (showing roofing and siding) elevations required with building plans? Will more than two sets of drawings be needed for permit submittal?

#12 Verify Building Risk Category.

Most buildings not frequently occupied by public (not a home, business or municipal building) represent a low hazard to human life in event of a failure and are ASCE (American Society of Civil Engineers) Category I. This information can be found by Building Officials in IBC Table 1604.5 (not to be confused with Use and Occupancy classifications from IBC Chapter 3).

#13 In areas with cold winters, is frost depth greater than 40”?

All building columns or foundations must extend below frost line to prevent heave. We don’t design for any depth less than 40”, and have designed for up to seven feet deep in some areas!

#14 Does the Building Department have any unusual Building Code interpretations, amendments or prescriptive requirements for non-engineered buildings which could affect this building?

If so, get a copy from your building department for us, or anyone else whom might be considered to be a provider for your building project.

Even though “the Code is The Code”, there are a plethora of local folks who think they have better ways or better ideas than world’s smartest structural minds, who have actually written the Code. And once again, I can’t stress enough: build only from plans sealed by a Registered Design Professional (architect or engineer). It will make life easier all around when it comes to getting your permit, even if you have been told seals are “not required”.

No one inside or outside of a permit office wants a construction process to be any more difficult or challenging than necessary.  Being armed with correct information (after doing homework of course) will be a solid step in the right direction.


Acquire a Building Permit First

You want a new pole barn, so you put together some plans, order up some materials, have them delivered and start building. In all of this excitement something was overlooked – acquiring a Building Permit!

Reader SHELBY in COLORADO writes:

“Hello,

My name is Shelby, my father and I are trying to build a pole barn and they are saying we need a ground inspection and trusses report to say that it can handle so much wind and snow! We have the building plan and started having all the materials delivered but we can’t get a building permit till we get these two inspections! I was wondering if that is something you could possibly help us with or if you know someone who could! So we could get this permit!”


It appears you have placed a proverbial cart before the horse. Before even contemplating any building project there are a pair of conversations you should have with proper authorities. First of these will be to your Planning Department: https://www.hansenpolebuildings.com/2013/01/planning-department-3/, second to your Building Department: https://www.hansenpolebuildings.com/2013/01/building-department-checklist/.

Building Permit
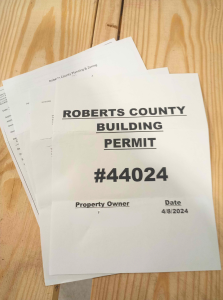
Your Building Department wants an engineered soils report for your site, not an unusual request in much of Colorado, as there are some fairly unstable soils. You will need to contact a Registered Professional Engineer in your area who specializes in geotechnical work (Google – Geotechnical Engineers near me). They will visit your site and do an analysis to determine if it is even capable of being built upon. With this report in hand you can then take this soils report and your proposed building plans to yet another RDP (Registered Design Professional – architect or engineer) who can prepare a set of sealed drawings for your building. “Truss report” being asked for are engineer sealed drawings for prefabricated trusses you will be utilizing to support your building’s roof. You will need to provide your RDP sealed plans to your choice of truss providers, so they can design trusses adequate to support loads detailed within your sealed plans.

Sadly, you may have already invested in some materials you will be unable to use in construction of a properly designed building. All of these reasons are why I always encourage clients to invest in a complete post frame (pole barn) building package from a supplier who can provide engineer sealed plans specifically for your building, along with correct materials delivered to your site – it could have saved you a significant amount of heartache, as well as money.


What is a Building Official?

What is a Building Official, and what is their Scope of Work?

The average potential new post frame owner (as well as most building contractors) has little or no idea of what a Building Official’s scope of work truly is. Sean Shields and Kirk Grundahl, P.E. (Professional Engineer) recently published an article in SBC Magazine in regards to this very subject. At the end of this article, I will tell you why this is so important.

I will include here only excerpts from the authors’ summary:

“The following simply summarizes what the model code states, as it is adopted into law:

A building official’s role is to administer and enforce the adopted building code, nothing more and nothing less.

The building official shall examine all aspects of the construction project for compliance with the specific charging language and scope of the section of the code being evaluated.

If anything about the construction project does not conform to the requirements of pertinent laws, the building official shall, if there are any non-conforming issues, reject in writing, stating the reasons therefor.

Implied here is that the written rejection shall provide:

  1. Specific evidence of non-conformance, and
  2. Enough information for the owner of the building to be able to cure the non-conformance based on the evidence provided, and
  3. A clear and easy to understand pathway to cure the deficiency.

Building Permit
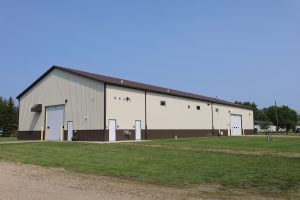
The building official is also authorized and directed to enforce the provisions of this code. The building official shall have the authority to render interpretations of this code and to adopt policies and procedures in order to clarify the application of its provisions. Such interpretations, policies and procedures shall comply with the intent and purpose of this code.

Implied here is the fact that not everything needed to enforce the code is going to be written in the code. Hence, interpretations will need to be made with respect to what meets the intent of the code. This is generally and easily undertaken as follows:

  1. A registered design professional (RDP) or approved source provide an accepted engineering analysis or research report and signs and certifies their belief that the issue being dealt with conforms to the code.
  2. A research report is provided by an approved source.
  3. A research report also known as a technical evaluation or accepted engineering analysis is provided by an ANSI ISO/IEC 17065 Accredited Product Certification Body
  1. Obviously, the best-case scenario for building official authorized interpretations is to have them based by an RDP that signs, certifies and seals conformance with the building code provisions. Why?
  • This says that the given RDP takes responsibility for their engineering evaluation scope of work.
  • The work of the RDP is under the authority of a legal entity generally called a Licensing Board and by law has to work in their area of expertise or be subject to fines and loss of their license.
  • The work of the RDP is also generally insured through professional liability insurance.

As a final analogy, a building official is identical to a police officer, where all of us desire that the police officer follow the rule of laws as written. In other words, we would not want a police officer to do the following:

  1. A police officer picks me up for driving under the influence.
  2. My hair was just dyed scarlet and gray because I am an Ohio State fan.
  3. The police officer thinks this is weird and says you must be intoxicated.
  4. The police officer handcuffs me, takes me down to the station, and puts me in jail.

Preferably, the police officer would do a definitive science-based test to ensure I was indeed intoxicated before putting me in jail.

Thankfully, all professional building officials we know base their decisions:

  1. On following the rule of law, and
  2. Using accepted engineering as the basis of interpretations when needed, and
  3. Provide evidence of non-conformances to the law, and
  4. When non-conformances exist, provide an easy to understand pathway to cure it.”

I told you I would tell you why this is important – because a building official cannot merely say something is wrong. He or she is required to put any non-conforming issue in writing and why. And, most importantly, provide an easy to understand method to solve the issue.  


Ten Tips for Planning a Building

Planning a Building – guest blog by J.A.Hansen

Hansen Buildings Construction ManualI am the principle owner and CEO of Hansen Buildings – offering to give Mike a day off from writing a blog. Over the years I’ve done just about everything at Hansen Buildings, including shipping (setting up the original shipping department), ordering materials, writing parts of the Construction Manual and even selling buildings (not my forte at all!)

My main job since the beginning of Hansen Buildings some 16 years ago – has been to oversee the drafting team and review every set of plans my company produces for clients. Yes, I said every set of plans….thousands of them! In doing so – there are things clients do with or to their buildings that make me cringe. If I can dissuade even one client from making a mistake they will regret, my day is a success!

In no particular order – here are things to consider when planning a building:

  1. Size – by all means plan out the LARGEST building you can fit on your property and squeak out enough pennies to pay for. Designing a building with the idea “I’ll add onto it later” is NOT going to save you money in the long run. Instead, decide on the basic footprint that will service you not only today, but for as many years as you expect to use it. If you think you “just might” purchase a vehicle or trailer requiring a larger door sometime down the road – at least design a bay wide enough for the door to fit in. Tell us what size, so we can space your poles to accommodate the future door. You can cover it with steel (or whatever siding you choose now, and cut the opening for the door when you can afford it. Same idea with windows – they can be framed in later, if you want to save some money now on your initial investment.
  1. Doors – as long as I am talking about doors – why people order 8’ x 8’ overhead doors is beyond me. Do you know what fits through an 8’ wide door? Not much. Unless you have a smart car or a riding lawnmower to put through it. No standard production pickup will fit through the door, even if you pull the mirrors in. Measure what you are going to put through your doors – and make the doors at least 2’ wider. Adding 4’ is so much kinder, and allows you to open the door without dinging the vehicle or wall next to you.
  1. Entry doors – you need at least one by code. The idea is – if there is a fire or electrical failure and your garage opener stops working, you have a way OUT. And if your building is large enough so if you had to find the entryway in the dark or around a lot of equipment or “stuff”, make sure you have more than one entry – on opposite ends or sides of the building. Walk around your property and think through traffic lines – meaning, is your entry door going to end up where it’s most accessible and used? I have lost count of the hundreds of doors I have moved on plans because at the last minute, once the client sees the plans, they decide to move the entry door.
  1. Windows – Choose even sizes. You may think a 3’6” x 4’6” is a great size, but you will pay for a 4’ x 5’, so why not get the most for your dollar? People think 3’ x 3’ windows sound “large” but they really are not. Once you have all the casings around it, there is not as much light (or viewing area) as you think. Take a tape measure to a building where you pick out windows you think are a size you’d like, then measure them. You might be surprised at how big “large” really is.
  1. Overhangs – about 95% of the building kits ordered from us have 12” “enclosed” overhangs. This is NOT something you want to try to add on later, so if it was my building and I could only afford a second overhead door or overhangs – I’d pick the overhangs and add in the overhead door when I had the money for it. If you have a building with a large footprint, or very tall, 12” overhangs will look….unattractive (dare I say silly?). Ask us to do a sketch for you to show the difference between 12”, 18” and 24” overhangs on your building if you are unsure. We want you to have a building which is functional, but also one that looks great too.
  1. Stop trying to match siding colors to other buildings you have on your property. It’s a never ending battle we have with customers who call and ask things such as, “How Gray is the Light Gray?” Or, “should I get the white or bright white siding to match my house?” Even if we mail you color chips for siding (and we are happy to do so), once in the sun, the siding will fade. Guaranteed. How much and how fast is anyone’s guess. When I got married to The Pole Barn Guru, he added on a huge closet for me (thanks honey!), and I was hesitant but careful to ask why he didn’t put the “same blue” on the closet exterior walls. His answer, in his typical MikeSpeak was, “I did.” Now sixteen years later, amazingly – it pretty much matches! Older siding won’t continue to fade as much, but newer siding, whether steel or cement – or whatever you have, will fade at a faster rate the first few years. Paint will do this too. So – what colors do you pick? Complementary colors – colors that “go together”.
  1. If you do have a shed planned for your building and it’s a “roof only”, do not put enclosed overhangs on it. Every time a client orders a shed like this, I want to start offering wasp or hornet spray as a purchase-able option! What you have created is a “nesting” place at your eaves, and good luck keeping it from filling up with something “less than desirable”. At a minimum, purchase fine screen to run along the inside. Yes, I know you want to match the overhangs on the main building, but be aware of the problem you are creating. Maybe open overhangs will work, but most often, clients choose to not put overhangs at all on the shed, and it looks just fine with the main building having enclosed overhangs.
  1. Wainscot – is another thing I’d never “option out” on my building. My husband and I put up a 48’ x 60’ Gambrel building – with 18’ enclosed sheds, and added wainscot for “looks”. Am I ever glad I did! I usually encourage folks who have cars or other vehicles or machinery to opt “in” for wainscot – in case there is an accidental dent. My lovely daughter-in-law, who was doing us a favor in mowing around our barn, got a little too close to the building. I was so glad I only had to order (2) 3’ pieces of wainscot for replacement instead of (2) 30’ pieces on the back wall!
  1. Shingles versus steel roof. I am living testimony for opting for steel! Where I come from, not far from the Hansen Pole Buildings home office, you rarely see a steel roof on a home. When the shingles were past due to be replaced on my mobile home (which my son now lives in), my husband gently told me how easily steel would go over my shingles and I’d “never have to touch it again”. I am not sure where the “shingles are best” originated in my brain, but I put up quite a resistance to the steel idea. For 2 years I balked. And when my roof started to leak, decided my stubbornness had to take a break! We put down 2×4’s, put the steel over top, and voila! – a new roof. I smile every time I look at it – it looks clean, sharp, and makes my 20 year old mobile home look like new! And I’ll never have to touch it again.
  1. I should have listed this one first. It really is the most important “tip” I can give you. Go to your planning department (in my case planning/building department was one in the same) with a drawing of the size of the building you want to build, and where on your property you want to put it – with dimensions. Then talk to them about what they will allow, and if there are any requirements. This should be done before you ever get a quote on a building, and definitely before you purchase one! Too often we have folks who order a building, we produce the plans, and then they find out their building is “too tall”, “too large”, too “something” they didn’t plan for. And they didn’t verify their codes, or get sealed plans. All kinds of “oopses” that cost money – and hard feelings.

Take your time planning a building – and take “enough” time to plan it right. Don’t suddenly throw a size and doors/options at us, get plans drafted and then think we should revise them for free several times over. Or order a building and expect it all to be delivered “next week”. I can guarantee a building will have changes when I am told, “this one is a RUSH job, can you get the plans drafted by tomorrow?” Yes, my drafting dept. can. And I know I’ll see it being redrafted next week…or the week after.

Have fun with planning your new building – this may be the largest purchase you ever make…and will last longer than anything else you buy in your lifetime!

Mike the Pole Barn Guru – my mentor, friend and happily my husband – will be back next week. Stay tuned.

Planning Your Equestrian Riding Arena

Planning Your Equestrian Facility


Those of you loyal readers who actually read links in this article are going to see our daughter Bailey Momb’s name frequently. 2018 Tennessee Walking Horse Celebration made for me being a proud dad with Bailey riding to a World Grand Championship (link has results): https://twhnc.com/content/wp-content/uploads/2018/08/RESULTS-TUESDAY-EVENING-8-28-18.pdf.


Moving forward, reader JACLYN in FREDERICK writes:

“Hi There!

We are starting to investigate options to build a barn and indoor riding arena on a property we are purchasing.  We are looking to build 10 stalls.  Where do we start when discussing options?

If possible we would like to mimic the 1800’s log cabin house on the property.  But we also don’t have a huge budget. 

Do you do indoor arenas as well?  I have traveled in Spain and Portugal and wondered about the cement, stucco, and concrete block barns there.  How does that change the cost and longevity of the structure?

Thank you very much for your time.  Yes, I have visited your website. The barns are gorgeous.  So you manufacture off site any pieces or everything on site?

Thank you!”

Mike the Pole Barn Guru writes:

To avoid placing a cart before a horse, best place to begin this process – contact your jurisdiction’s Planning Department to ascertain if you will be allowed to build your desired facility where you want it located. https://www.hansenpolebuildings.com/blog/2013/01/planning-department-3/


Once you are satisfied with Step Number One, now confirm design criteria with your local Building Department: https://www.hansenpolebuildings.com/blog/2013/11/design-criteria-3/

Once you have these two projects completed, shift to giving serious consideration to your stall barn needs. Some important reading about stall barns:

https://www.hansenpolebuildings.com/2012/08/stall-barn/
https://www.hansenpolebuildings.com/2012/06/stall-barns/
https://www.hansenpolebuildings.com/2014/10/horse-barn-aisles/

My encouragement, always start your building planning from inside out. Determine spaces your facility will need – stalls, tack rooms, feed storage, washrooms, etc., and how much space should be allotted for each. Arrange spaces so they will have a most convenient flow. Footsteps become important over course of a day – if you are having to constantly traipse from one end of barn to other due to a poorly thought out layout, you will regret your choices forever. Visit other similar facilities and do lots of asking questions about what does and does not work for others.

With all of this information in hand, dial (866)200-9657 and speak with a Hansen Pole Buildings’ Designer.

Your new building(s) can look like anything you want them to look. Only limiting factors are imagination, available space and budget. Trying to mimic your 1800’s log cabin house could easily end up doubling your investment into your stall barn. There do exist some “log look” options: https://www.hansenpolebuildings.com/2016/05/log-sided-pole-barns/. Keep in mind, most cost effective and durable siding and roofing will be roll-formed steel.

Most certainly we provide horse riding arenas. Some reading about arenas: https://www.hansenpolebuildings.com/2015/06/horse-riding-arena/.

Post frame buildings are designed to be the most cost effective permanent structure one can have constructed. In countries similar to those you have visited, masonry becomes a construction material of choice for virtually everything building. Any form of masonry construction will prove to be exponentially more expensive, without adding significantly to arena lifespan (and potentially involving greater amounts of upkeep).

Your kind words about our buildings are most appreciated, we hope to add your new building(s) to our portfolio of photos.

All components for your new building will be manufactured off site and shipped into your location for assembly either by you (most cost effective and usually best end result) or a building contractor of your choosing.


Both Ends Open, Pole Barn Wind Load Challenge

The Both Ends Open, Pole Barn Wind Load Challenge
There are plenty of people who just do not understand the basic concepts of how wind loads are transferred through a pole barn (post frame building) to the ground. Included amongst these would be those who desire buildings which are enclosed on both long sidewalls and open on both ends. This is one of the worst possible design concepts one can come up with in a new post frame building.

Of course somewhere along the discussion between the Building Designer and the client this statement always seems to come up:
“Well Joe Blow has one down the road and his is still standing”.
My response to this is – “Joe has just been phenomenally lucky”.

In my years living in Eastern Washington, we made numerous trips from Spokane to Seattle. Driving across Interstate 90, one passes through the towns of Moses Lake and Ellensburg. This is prime grass growing country, where numerous hay storage buildings have been constructed over the years, with both ends open. The majority of these now have complex systems of braces and/or extra diagonal columns added to their sidewalls in attempts to maintain them standing vertical. More than a few of them only remain standing up because they are full of hay – the contents alone are what is keeping the buildings standing.

I’ve hashed through this challenge in the past, however it is apparent too few people have read and grasped the situation (read more here: https://www.hansenpolebuildings.com/2017/04/open-endwalls-hay-barn/).

For those of you who enjoy audience participation, please go find an empty shoe box and a pair of scissors.
Remove the lid (and the shoes) from the shoe box. Place it open side down on a table top. Push down on the box – pretty stable, isn’t it?
Next, cut both of the narrow ends completely out of the box. Again place it open side down on the table and push on it…..
Flat as a pancake, isn’t it?

The very same concepts work to keep buildings standing. Remove too much or all of the ends and the building does a fall down, goes boom.

Just because Joe happens to have a building standing which sound engineering practice says it should not be, does not make it right. Most folks are going to make a significant financial investment into a new post frame building and my personal preference is for them to not have their insurance company paying to replace the building.

Non-commercial Plot Plans

Non-commercial Plot Plans

Considering adding onto an existing non-commercial building, or constructing a new one? If you live in an area governed by Planning and Building requirements, then you are most likely going to need to have a plot plan – and soon!

When Will You Need It?

Before you ever think about the structural requirements (e.g. Structural Building Plans) you are most likely have to pass through the gauntlet which is your Planning Department. To get a feel for what the Planning Department is all about, read here: https://www.hansenpolebuildings.com/2013/01/planning-department-3/.

You can do the Plot Plan Yourself!

Most jurisdictions are fairly lenient in this area and will allow self-drawn plot plans on 8-1/2” x 11” sheet(s) of white paper. I recommend doing it in pencil, as you may be required to make some modifications in proposed building size or location.

Here is what to include:

The scale you are using (1” = 10 feet, etc.) and an arrow showing which direction is north.

Location and dimension of all property lines.

Adjoining street(s) location and names as well as points of vehicular ingress/egress, including driveways/access easements, sidewalks, curbs, etc.

Location, dimensions and use of all existing and proposed buildings, structures, parking areas, drainage, landscape areas or other planned site improvements such as stairs, ramps, retaining or other walls, etc. For all proposed buildings show porches, walks, decks, roof overlaps, etc.

Sidewalks, curbing, stairs, ramps or other walls, etc.

Existing buildings scheduled for demolition or removal.

Location, dimensions and type of all public and private easements (i.e.: drainage, access, utilities).

Setbacks/distances from buildings to property lines, easements & center line of rights of way, other buildings, streams water bodies, ordinary high water mark (OHWM) , and wetlands, etc.

All water bodies such a lakes, creeks, streams, ponds and wetlands need to be indicated.

Any critical area buffers.

Location of any slopes over 30%

Location of any flood plains.

Location of proposed or existing sewage disposal system(s), well(s), sewer line(s), and water line(s) and distances to buildings. Oftentimes your local Health Department will have information on the location of existing lines and systems, if you do not have it in hand.

Indicate the building height on plot plan (verify first if your jurisdiction wants wall height, mean roof height or overall building height as well as how they measure those heights).

Armed with a good pot plan, you are ready to take on the Planning Department!

Overhead Door Columns in Pole Barn Enclosure

No Columns for Overhead Doors

There are a few clients out there who leave parts of one or more walls open, with the idea of enclosing them at a later date. Most often this is done with the idea of being able to save money, however it is not always much of a money saver, especially if done wrong.

Here is just one example of why fully enclosed is a bargain compared to three sided: https://www.hansenpolebuildings.com/2014/03/three-sided-building/.

Reader NATHAN from MOUNT VERNON writes:

“I have an existing pole building that is 36 by 36 (12′ spacing on all columns) and is 16′ at the front, 20 at the next column back, 16 again at the second column and 12 at the rear of the structure. It is only sided on two sides (back 12′ wall and one side). I’m looking at finishing the building out with three 14ft doors on the front, but no columns were installed for this purpose. The concrete poured for the existing columns will prevent me from having proper footing if I put in new columns as in a new build. Can I bolt the new columns to the existing ones (Blocking and 5/8’s galvanized threaded rod) and have the bottom in a post base of suitable size and strength. As there is no concrete floor in the structure at this point I was also thinking of increasing the slap thickness in these areas and adding rebar. Your help is greatly appreciated Nathan.”

Nathan happens to be in a part of the country which requires Building Permits for most everything. At some point in time he is going to have to have a Registered Design Professional involved (RDP – architect or engineer) as his Building Official is going to want to see an engineer’s seal on the plans for the remodel.

There are numerous possibilities the RDP may take for a design solution. To keep in mind, these columns will be supporting no roof load, so it is merely a case of having them be adequate in size to resist wind loads, as well as the door itself.

While Nathan’s idea probably works, it might be easiest to mount the columns needed for the overhead doors into appropriately designed column brackets: https://www.hansenpolebuildings.com/2012/01/concrete-brackets/. A header can be run from one roof supporting column to the next to stabilize the top of the columns.

Before getting into a situation such as Nathan’s, research all of the options available. You might be able to enclose the building fully for little or no extra investment. As another alternative, financing is available which (with moderately reasonable credit) could allow some or all of your new building to be funded from a third party source with affordable monthly payments.

Check into your financing options today: https://www.hansenpolebuildings.com/financing/


Pole Building Plans for Sale

Pole Building Plans for Sale

Ah, Spring time, when a young man’s heart turns to how to “get a deal” on a new pole barn. Oftentimes it starts rather like this, Can I just buy the building plans from you guys stamped and all? I need a 40×60 40 wide 60 deep 16′ tall so I can fit a 14′ tall 10 wide door and a 12′ tall 18′ wide door I also need 18″ overhangs Located in Utah”.

 Apparently this is with some sadly mistaken idea you are able to source the correct materials, on your own, at a lower investment than what you could get them from us for.

I will explain why this idea is not going to save you money.

We have streamlined our process for efficiency. This means by the time you get your plans, we are far into a ton of series of steps which happen concurrently – and have done much of the “work”….which has a cost. People are willing to pay an architect several thousand (or tens of thousands) dollars for house plans, but they are unwilling to pay an appropriate amount for the work involved to produce truly custom post frame (pole) building plans.

So, you get the plans from us, but decide to purchase your materials elsewhere because you just are so sure you can get a better deal. Then you are disappointed because you paid more than you thought it was going to cost. In the case of Hansen Pole Buildings – we buy millions upon millions of dollars of materials direct from the manufacturers every year. We have buying power which builders do not even get. We also know all of the best sources for materials and in some cases have components manufactured just for us, with superior quality features you cannot get anywhere.

Unless you are going to become ‘midnight building supply’ and steal your materials (which would be unethical as well as immoral and unlawful), you are not going to get the same quality of materials at anything approaching our price.

After all of this, you still decided to go out on your own and invested in materials which don’t match the plans, or you (or your contractor) do not build according to the plans and blame us when your Building Department won’t sign off on your completed project.

Don’t try to fool yourself – if you want the best “deal” on your new post frame building, come to the experts who can produce engineered plans for exactly what you want to construct, provide you with step-by-step instructions and deliver all of the right materials, to your jobsite in a timely manner.

Will 4×6 Columns Carry the Load?

Another excellent question from a soon to be new post frame (pole building) owner.

Post-Holes-150x150DEAR POLE BARN GURU: The materials just arrived for my pole barn and construction is to start on Monday. The building will be 30×40 with attic trusses with an 8/12 pitch, 24 inches on center with a 1ft overhang (there is a total of 21 trusses). In the materials there was 4- 28ft 6x6s, and 14-18ft 4x6s. My question is will the 4×6’s be able to handle the load bearing of the attic trusses, or should they be 6×6’s as well? Thank you for your help. JIMMY IN PLYMOUTH

 DEAR JIMMY: I tried to look you up in our data base, but found you are not one of our clients, however, I am always happy to help anyone who takes the time to ask a question. At Hansen Pole Buildings, every member (columns and boards) in the building is checked via a sophisticated and proprietary software system to insure all components and connections are properly designed to support the loads which will be applied to them – prior to going to the engineer who reviews all of the work and verifies it is correct. Only then are your components ordered and scheduled for delivery.

With 18 foot long columns, I would surmise you have a 14 foot eave height. Not knowing all of your load conditions (roof and ground snow load, design wind speed and wind exposure) I can only rely upon judicious experience when I say it would be highly unlikely a 4×6 column would be adequate to carry the loads.

In many cases a 4×6 is stronger than a 6×6 (here is why: https://www.hansenpolebuildings.com/2014/08/lumber-bending/). The one place where the 4×6 falls down (hopefully not literally) is as the columns get longer from grade to truss, the 4×6 tends to want to buckle in the narrow direction.

My recommendation – ask your contractor (or the supplier of the pole barn kit package) to show you the engineer sealed plans for your building. This is your only assurance the structure will be adequately designed to withstand wind and snow loads. If they cannot provide the engineering, for whatever reason, I recommend you delay construction until an engineered design is provided. Keep in mind also, an engineer sealed roof truss drawings is NOT the engineering for your entire structure (far too many folks believe if the trusses are engineered, the building is as well).

Best of luck to you, and if you do not mind, please share the results of your questioning.

To my loyal readers – my educated guess is Jimmy is going to find out the building he has ordered was not designed by an engineer and the columns as delivered are under designed. I would encourage anyone who is going to invest their hard earned dollars into a new post frame building to demand it be designed specifically for your needs (not something which is generic and maybe close) by a Registered Design Profession (RDP – architect or engineer).

Here is a secret I have shared before:

https://www.hansenpolebuildings.com/2014/10/non-engineered-building/

Overhead Door Trim

Welcome to Ask the Pole Barn Guru – where you can ask questions about building topics, with answers posted on Mondays.  With many questions to answer, please be patient to watch for yours to come up on a future Monday segment.  If you want a quick answer, please be sure to answer with a “reply-able” email address.

Email all questions to: PoleBarnGuru@HansenPoleBuildings.com

DEAR POLE BARN: I am working on insulating and installing a tin liner in my pole barn. My question is about my overhead doors and how to add overhead door trim on the door frames behind the metal door track. I was thinking of slipping 6″ fascia trim behind the door track and then reinstalling the lag bolts for the tracks. I would like your opinion on how you would apply overhead door trim so there is no wood exposed. DAVE IN ALBANY, IL

DEAR DAVE: In most instances, we see folks put J Channel around the perimeter of the overhead door brackets, which (as you mention) would leave wood exposed. Your idea of using fascia trim (a 1-1/2” x 5-1/2” L trim) would probably work well.

Mike the Pole Barn Guru

DEAR POLE BARN GURU: With the 29 gauge painted roof is there OSB or plywood to go under it or is it just fastened directly to roof truss? LEROY IN ERIE

DEAR LEROY: Most 29 gauge ribbed steel roofing panels can be applied directly to the roof purlins (framing which runs perpendicular to the roof trusses). Your RDP (Registered Design Professional – engineer or architect) can confirm as to whether a particular product will be adequate to withstand the applied climactic conditions (snow or wind) without the need for sheathing.

Mike the Pole Barn Guru

DEAR POLE BARN GURU: Good Afternoon, I am curious if your buildings are ok to be built into a hill?  I have a hill in my back yard that part of the back and 2 sides would be built into to get the size unit that I would like to put up.  Are your sides ok to have the dirt filled back in onto or would I have to keep it away with a retaining wall?  Or can the materials be cut to sit on top of a block wall which can have the dirt filled back to?  Thank you for any information you can provide. RONALD IN WHITEHALL

DEAR RONALD: Pole (post frame) buildings are not designed to support the weight of dirt backfilled against them, however they can easily be mounted to the top of a foundation wall – either poured concrete or block – with the materials cut to fit the wall.

Mike the Pole Barn Guru

DEAR POLE BARN GURU: I’m doing a build out for client who has pole barn 55×30 we are building 20 x30 2 bed, small family room, bath and kitchen. No vapor barrier….client is worried about mold. So my question is do I put up Tyvek on the inside before I put up interior walls? I’m installing drywall 1/2 off floor. Help is appreciated. LARRY IN LEMONT

DEAR LARRY: I’d caution you to make sure the building itself was originally designed as a Risk Category II structure, as many post frame buildings (pole barns) are not designed for residential occupancies. If the engineered building plans show Risk Category I, are not engineered, or can’t be found, a RDP (Registered Design Professional – engineer or architect) should be engaged to determine the structural adequacy of the as built structure and specify corrections which will need to be made in order to assure the integrity of the building, as well as the safety of the occupants.

Also – many jurisdictions require approval for Occupancy changes by the Planning Department as well as a structural permit from the Building Department. Don’t get on the wrong side of either of these – it is far better in this case, to ask for approval, rather than plead for mercy later.

Provided your client has screwed on steel for siding, remove the panels and install Tyvek between the siding and the sidewall framing. Tyvek is a building wrap and is designed so, when properly installed, water vapor can escape the wall.

My first choice for wall insulation is BIBs (https://www.hansenpolebuildings.com/blog/2011/11/bibs/) with unfaced batt insulation as the second pick.

With either of these – a vapor barrier such as six ml clear visqueen (https://www.hansenpolebuildings.com/blog/2013/07/moisture-barrier/) should be placed on the inside of the insulation, prior to gypsum wallboard installation.

There will be a plethora of different answers for any ceiling, and to give best recommendations would require knowledge of how the existing building is constructed – as well as the “vision” your client has for how this space should look and perform when completed.

Mike the Pole Barn Guru

Obtaining a Building Permit Around the World

Building Permits Around the World

One might have the mistaken idea obtaining a Building Permit is the same pretty well anywhere in the United States. Unless you have had the opportunity to be involved in construction in various locales across the country, you might have the idea what happens where you are in “the norm”.

One thing I have learned is, norm is not Norm!

building permit
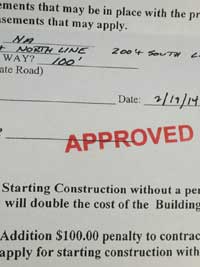
Here in Roberts county, South Dakota a minimum of $20 will obtain a building permit from the county clerk – no plans, no inspections and same hour service. Get to the I-5 corridor in Washington, Oregon and California, a permit for the same sized building could cost thousands of dollars and involve a several month wait for someone to come to your property to do a wetlands evaluation! I’ve seen permits take up to a year to be issued in California!!

My friend Dom, in Ecuador, recently obtained a building permit, and shares his experience:

“Building permits can be tough in Ecuador, but they can also be ridiculously easy.

Depends a bit on the project and the municipal where it´s located.

In my experience, the municipal in Playas Villamil is really a pain.  Quito not so much.  While the municipals in Santa Elena (Salinas area), and Jipijapa (for area of coast south of Manta) are pretty easy.

My experience this week at the municipal of Jipijapa getting a permit to build my 170m2 (1829ft2) house on a 330m2 (3552ft2) lot was pretty straightforward.

The hardest part was the week or two wait for the municipal to send an inspector to define the construction limits or as they say here “linea de fabrica”.  It helped that my architect knew someone in the municipal who owed him a favor (I guess).  

Once that happened I had to go to the municipal with a signed official copy of the architectural plan which after heavy negotiating cost me $500 for a plan guaranteed the municipal would approve.  If not, he´d redo it.

Plus, I had to take several copies of the property deed (escritura), certificate of registry (certificado del registro de la propiedad), electrical plan also made by the architect, and a copy of the 2015 property tax payment (predios) which for my property cost well under $100.

Altogether the permit cost $135 and took 3 days.

The requirements are basically the same all over Ecuador but every municipal will have their particularities.

So now on the blueprints, permit, the 2015 tax payment and a few other minor things I´ve now spent a total of $900.

And now I´m also ready to build!”

No matter where you are in the world, some advance preparedness when planning to build is always a good choice. Do this first – it will save you a potential world of hurt later:

A few more words of wisdom: https://www.hansenpolebuildings.com/blog/2013/01/planning-department-3/

Anyone have any experiences in another country? Canada or Mexico perhaps? Please write me, I’d love to hear about it

Don’t Build Without a Building Permit

ASK THE POLE BARN GURU is for everyone – those who own, or hope to own, a pole building, contractors as well as Building Officials. Here is a real life interaction with a Building Official:

“I have a customer erected pole barn 50 x 60 and very concerned with 50 foot span engineered trusses resting on 2 x 12 nailed to the sides of 4 x 6 posts at 8 foot o.c.

Please respond, my email is xxxx and I can forward some photo graphs. I am the building code official here in xxxx, and this building was erected without a design drawing.”

 Mike the Pole Barn Guru response:

“Thank you for reaching out to me, I’d be happy to assist in any way possible. Any photos would be appreciated, as well as the sealed truss drawings.”

And back to The Pole Barn Guru from the Building Official:

“Thanks for the prompt reply.

Attached is the sketch used to construct this building (no stamp, this sketch was hand drawn by the sales rep supplying the trusses).

Also attached are the Truss Design Drawings.

Also attached are a few photos of the building and the truss support at the wall line.

Get a Building PermitMy concern is the structural integrity of the 2-2×12 (separate, not fastened together as a beam) nailed into the side of the 4 x 6 posts at 8 ft. o.c.

The shear stress on the nails thru the 2 x 12 into the posts seems to be the weak point of the load path.

 I would expect an LVL beam set into notches or on top of the posts to carry the load.

 In addition, I do not see any lateral bracing of the walls, other than the metal siding attached to the purlins.

 I am looking to get a feel if this design is close to being adequate or if there is a real problem here with weak framing.”

I’m on the road today, so won’t be able to get more complete answers to you as quickly as I would like.

One problem I am seeing right away, the roof trusses are designed to be placed 2′ o.c. but they are 4′ o.c.

It appears wall height is somewhere around 16′ – would this be a correct guess?

Just a quick opinion – this building has some serious problems. In the end – my recommendation is going to be for them to provide engineer sealed drawings (wet stamps and signatures) to verify the building as built (or with numerous corrections) is adequate to support the imposed loads.

More later ~ Mike the Pole Barn Guru

And here is my more detailed response:

Here is a more complete list of issues/potential issues with the pole building:

I’ve used the wind speed (Vult) of 110 mph as listed on the truss drawing. I feel this is in error and it should probably be 115 mph. I also assumed an eave height of 16′.

Sidewall column footings need to be a minimum of 30″ in diameter in order to support loads as listed on the truss drawings (assumes soil bearing capacity of 2000 psf) and should be a minimum of 6 inches thick.

Provision needs to be made to prevent column uplift.

The columns at 8′ on center appear to be three ply 2×6 glulams – depending upon the manufacturer, they may be adequate.

It appears the wall girts are 2×4. Spaced 24″ o.c., it would take 2×6 #2 to adequately support the wind loads given the Code requirements for deflection.

While they do not have to be fastened together, the (2) 2×12 truss carriers are inadequate to support the loads imposed by the trusses. A (4) ply 2×12 #2 SYP carrier would be adequate and would be stressed to 95.6%. A 1-3/4″ x 11-7/8″ 2800f LVL would also work. Connections are going to be an issue here – I ideally like to see the carriers notched into the columns, as then uplift becomes the force to be reckoned with. Each truss is placing 5200# of force on the middle of the 8′ truss carrier span.

Other than the front endwall, the walls (if adequately fastened with the correct size screws) will carry the shear loads without the need for further bracing. The front endwall must resist 3771# of shear force – which is impossible to do with diagonal braces – as enough fasteners cannot be placed in the ends of the braces to resist the imposed loads. Plywood or OSB shear walls should be added at the corners.

My real concern is with the trusses. The drawings submitted show the trusses spaced every 2′, yet they are installed every 4′. The truss drawings specify a 2x6x12″ 1650msr bearing block to be applied to each heel of each common truss, yet they do not appear in the photos provided. Truss drawings specify bottom chord bracing to be every 2’2″ in lieu of a ceiling as well as continuous lateral bracing on the longest diagonal truss web.

All doors should be verified for the ability to resist the applied wind loads, else the building will need to be treated as “partially enclosed”, which is just going to compound the issues.

In my humble opinion, the best bet is for the building owner to hire a registered professional engineer to design fixes for his building…and get a building permit.

Building Officials

Things You Probably Didn’t Know About Building Officials

Building Officials…..these words alone spark fear in the hearts of some folks, although they shouldn’t. Your local Building Inspector or Plans checker is there to help make certain the next building project undertaken by you, your neighbors or friends is Code compliant – protecting the safety of those who will be future occupants of the structure.

I happen to have a particular fondness for Building Officials: https://www.hansenpolebuildings.com/blog/2012/04/i-like-building-officials/

In a recent survey conducted by the National Institute of Building Sciences (NIBS) for the International Code Council (ICC) is was found 30 percent of all building safety professionals (your Building Officials) are planning upon retiring within the next five years!

Let this one sink in for a moment…..30 percent is nearly one out of every three!

Part of this is due to the greying of those in the profession, where over 55 percent of the Building Officials are 55 years of age or more. And, less than 16 percent are under age 45!

Interestingly, the survey reveals 57 percent of Building Officials work in departments with nine or less employees, with most having to perform multiple job functions – from plan reviews to field inspections.

These hard working folks are having to wear many hats!

Adding to the challenges of adequately staffing Building Departments are the number of building officials who were let go during the great recession, and did not come back when the building industry began to recover.

Maureen Guttman, president of the Building Codes Assistance Project (BCAP) says part of the problem is also, “Municipalities can’t afford to pay a professional who really has the qualifications to do the work”.

Ms. Guttman also expressed concern for the under-staffing or nonexistence of code enforcement in several jurisdictions across the country, noting a lack of checks and balances for the building industry could have a grave impact.

In my humble opinion, jurisdictions should be encouraged to invest the appropriate resources to maintain proper levels of adequately training Building Officials to protect their citizens and their citizens’ property.

Registered Design Professional

National Lampoon’s Vacation

In the iconic 1983 movie National Lampoon’s Vacation, the Griswold family plans a trip to Wally World to see Marty Moose

Just like the Griswold’s plans, sometimes best laid plans for buildings don’t come out just as anticipated. Wrong turns are made, dimensions sometimes go astray. Face it. In life, stuff happens.

And sometimes, when the stuff has happened, there is a Building Official who wants proof the stuff which has happened will work. Or, some higher authority to come up with a “fix” or “repair” to make what is referred to “as built” on the jobsite stand up structurally.

Most Building Officials are not as forgiving as Wally World owner, Roy Wally in the movie

Engineers SealWhen a pole building is constructed from engineered plans (not just the use of prefabricated metal connector plated trusses, built from engineer sealed truss drawings), oftentimes the Registered Design Professional (RDP – engineer or architect) can provide a brief letter to the Building Official, in the event things have gone astray. Sometimes a sketch needs to also be provided, but (provided this method is acceptable to the Building Official) this fix is going to prove far less expensive than having to rework one or more pages of the blueprints.

The calamity occurs when a Building Official wants an engineer sealed fix or repair for a set of plans which was not designed by a Registered Design Professional. There are very few RDPs who are willing to take on this type of work, when they are not the Engineer of Record for the building. A “letter” from the engineer is probably not going to be forthcoming. In most cases, the solution is going to result in having to hire an RDP to do a complete analysis of the structure.

Can you see the $$$$?

I believe Hansen Pole Buildings to be an exception to the norm – as we use the very same structural design programs as our engineers. The difference between a Registered Design professional sealed set of plans and calculations, and the non-sealed plans….the engineer’s review and seal.

This is not the case if an individual has drawn up something of their own, or purchased a building kit from their local lumberyard. Even otherwise “reputable” pole building kit package suppliers often have significant differences between their non-engineered and engineered buildings.

The easiest solution is to have a plan which is checked out in advance. Don’t just rely upon Clark Griswold’s knowledge base (and become the next National Lampoon comedy of errors) – invest in a pole building kit package which comes with plans specific to your building, sealed by a Registered Design Professional.

Most Read Pole Building Blogs

A Baker’s Dozen – The Most Read Articles of 2013

Sometimes, in order to know where to go, it is helpful to see where we’ve been. These are the most read blogs from 2013.

#13 Board and Batten Siding

https://www.hansenpolebuildings.com/blog/2013/03/board-and-batten-siding/

While popular, board and batten siding should be installed considering shear values. Advice on installing board and batten siding for structural integrity.

#12 Building Department Checklist Part I  

https://www.hansenpolebuildings.com/blog/2013/01/building-department-checklist/

The 14 most important questions on your Building Department Checklist to ask while planning a new building. Pole buildings ascribe to local building codes, making them a solid and safe construction choice.

#11 Repainting Steel Building Panels  

https://www.hansenpolebuildings.com/blog/2013/01/repainting-steel/

Repainting steel building panels can be labor intensive. Done right, results are favorable with cost savings. Tips on how to prepare steel panels for repainting.

#10 Steel Roofing: This Lap isn’t Dancing

https://www.hansenpolebuildings.com/blog/2013/02/steel-roofing-4/

Repainting steel building panels can be labor intensive. Done right, results are favorable with cost savings. Tips on how to prepare steel panels for repainting.

#9 Pole Barn or Block Foundation?

https://www.hansenpolebuildings.com/blog/2013/03/block-foundation/

The merits of typical pole barn foundation design versus block foundation. Concrete costs plus connection stability and longevity favor pole barn foundation design.

#8 Mike’s Roof Rules

https://www.hansenpolebuildings.com/blog/2013/02/mikes-roof-rules/

My top rules for designing the roof of your new pole building. Tips to keep a roof leak free while withstanding years of abuse.

#7 Zip Up Ceiling

https://www.hansenpolebuildings.com/blog/2013/03/zip-up-ceiling/

Fast and easy to install, Zip up Ceiling is an aesthetically pleasing new ceiling choice for a pole building. Discover a grid-free, mold and mildew resistant alternative to drywall.

#6 Tico and 10d Common Nails

https://www.hansenpolebuildings.com/blog/2013/01/tico-10d-common-nails/

Choosing the right diameter and length nails is an important part of constructing a new building. Tico nails no longer exist, but 10d common nails in 1-1/2″ and 3″ are good standards.

#5 Poplar, not Popular  

https://www.hansenpolebuildings.com/blog/2013/03/poplar/

The use of yellow poplar for board and batten siding on pole barns. Discover why “new” poplar is not decay and disease resistant like poplar from days of old.

#4 What does 2×6 Lumber Weigh?

https://www.hansenpolebuildings.com/blog/2013/02/2×6-lumber/

Calculating the weight of 2×6 lumber is important when dead loads are applied to purlins attached to roof trusses. How many 2×6’s can a person carry on a jobsite?

#3 Pink 2×4 Studs  

https://www.hansenpolebuildings.com/blog/2013/01/2×4-studs/

Painting 2×4 studs a light magenta color began as a marketing ploy. Pink 2×4 studs brought increased sales and possibly subliminal breast cancer awareness.

#2 Pole Building Bar: A Road Runs Through It  

https://www.hansenpolebuildings.com/blog/2013/05/pole-building-13/

Cruisers Bar in Stateline, Idaho shows the originality and functionality of a pole building bar designed for motorcyclists to literally drive through.

And the MOST READ article of 2013:

Pole Barn Flood Insurance  
https://www.hansenpolebuildings.com/blog/2013/01/pole-barn-flood-insurance/

Pole barn flood insurance should be included in a pole building checklist prior to construction. A Flood Elevation Certificate must be obtained to qualify for flood insurance.

Building Official Out on a Limb

Don’t get me wrong – in case I have not previously gotten my message across in earlier articles – I genuinely like Building Officials.

Most of them really do care, and go out of their way to help both do it yourselfers and building contractors. With very few exceptions, Building Officials, field inspectors and plans checkers are not registered design professionals (architects or engineers). It is when structural concerns arise, which can get them in over their heads. Going too far out on a limb without support can be dangerous.

I was contacted by one of our clients over the weekend, who is putting up his own building. The site is in the western United States, and in his particular case the design wind speed requirement is for 105 mph (miles per hour) with an Exposure C for wind (a site which is not protected from the wind). In the west, the lumber species of choice for treated timbers is generally Hem-Fir. It takes a pressure treatment well (albeit with the need to be incised) and is fairly plentiful.

Building Column OrientationThe building plans call out for the sidewall (double truss bearing) columns to be 6×8, with the six inch face oriented towards the sides of the building.

Columns in pole buildings must be able to support combined forces from bending (the wind) and compression (weight of the roof and any applicable snow loads). In most cases, the bending forces are going to be the majority of the issue.

The reason for the contact from the client was – he placed his posts with the wrong side towards the wind!

Now in construction, things happen…..it is solving the things which keep it interesting. And in pole buildings, I can’t think of a time a challenge didn’t have one or more solutions.

The client was told by his building official, “normally a 6×6 is sufficient” and he would sign off on the posts the wrong way, as long as we provided a letter stating so.

Our proprietary pole building design software gives the calculations for every component of the building. In this scenario, the columns needed to resist a ground line moment of 37,184 inch-pounds (for more on “moments” please read: https://www.hansenpolebuildings.com/blog/2012/09/bending-moment/).

Oriented properly, the 6×8 has a section modulus (Sm) of 51.563 inches. Sm is derived by squaring the depth of a member, multiplying by the width of the member, and then dividing by six. The calculations showed the columns, as designed, to be stressed to 98.4% of capacity.

Turn the column the wrong way, and the Sm is reduced to 37.82 inches and it is now overstressed by 34.2%!! Same timber. Wrong direction. Wrong answer.

BTW (by the way) – the Building Official’s 6×6 scenario would be overstressed by 83%!!

The client does have some options:

The building official could sign off on the columns as placed, making him now the designer of record (I would not recommend he do so).

In cases such as this, building officials could agree to allow the building to be designed for a lesser wind speed and exposure. At 90 mph and Exposure B, the columns would work in the orientation they were placed.

The columns could be pulled out of the ground and placed the correct direction.

Or, we could come up with a repair – which could prove to be difficult and costly. It will depend mostly upon how far along the construction process is.

Moral of the story, the direction any column is to be placed in a pole building is specified on the plans. It is not a suggestion. There are valid structural reasons it must be oriented exactly as designed. This is one place where a mistake is not so easily corrected, as the columns are literally set in stone (concrete).

Pole Barn House Part I

About a decade ago my bride took a phone call from a potential pole barn purchaser. The female caller identified herself and then said despairingly, “My husband wants me to live in a pole barn house…and I don’t want to live in a barn!”

Unfortunately the level of her panic told my wife this caller really had no clue as to what a pole building could “be”. My wife got off the phone, turned in her chair and stated to me “we need to build a barn.” Now I am more than happy to accommodate my lovely bride, but to have her suddenly declare she wanted to “build a barn” definitely got my attention.

Hansen Buildings Admin Building
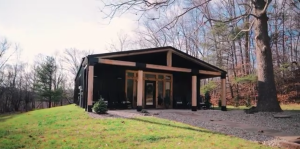
As it turned out, she wanted to build a pole barn house. She wanted the traditional “barn style”, which is called a gambrel, and to finish it “just like a house”. To make a long story short – we did just that. The main part of the building is 48’ x 60’ with two 18’ enclosed sheds. I dropped one of them back a bit from the front end wall to create more of a residential “look” and make it more stylish.

Center of the downstairs houses vehicles, a huge hot tub, a vintage pickup and two huge boats. One of the side sheds is a deluxe office space, with custom cabinets and built in desks.

Upstairs has a large bedroom and master bath walled off, with a circular stairway up to a loft for my wife’s sewing room. The living room is huge, with vaulted ceilings and room for a pool table, desk/office space plus a dining area. Both the bedroom and living room have gas fireplaces.

My wife calls her pole barn house her “home fit for a queen”. I do believe she just may be right!

I’ve noticed post frame building (the caller’s “pole barn”) becoming more popular over the past several years. Having personal experience, I can relay from the trenches.

The resultant of my wife’s conversation was we decided to use post frame construction to construct a building which could be used residentially. We also felt post frame offered advantages which no other form of construction could.

Here are the Good, the Bad and the ugly of our over 8,000 square foot post frame building:

UGLY

Even though I truly understand post frame construction, I appreciate Building Departments which actually perform structural plan reviews and field inspections. Where the building is located, for the price of an average Domino’s® Pizza order, one can obtain a Building Permit – with no inspections!

The HVAC system – it is also Good….until it needs to be serviced, as it is nearly impossible to find a contractor who is knowledgeable and will travel to 90 miles South of Fargo.

We ordered Traco triple glazed Low-E argon vinyl windows of various sizes, styles and dimensions, including a series of 10 which make an arch 24 feet wide and 12 feet tall. One of the selling points by wholesaler Guardian Building Products was the lifetime warranty. Only after the windows began failing (including one which literally fell out of the vinyl) did I find Traco had sold their vinyl line and my warranty was worthless.

BAD

We had to get a variance as an accessory building in this particular jurisdiction was limited to a 10 foot eave. My wife convinced them of just how impractical the limitation was, and they stamped her request as “approved”.

At times Building Contractors tend to “go their own way” – and ours was no different. We ended up with stairs so steep they never would meet Code, yet there would have been plenty of room for them to have been done right.

The elevator. Yes, elevator. My wife told me she wasn’t going to hike up a 20 foot rise of stairs forever. The pneumatic elevator is a nifty idea, and it is fabulous when it runs. It does require some adjusting from time to time to keep it operating.

GOOD

The building is on an ideal site on a lot of over two acres. The land to the North is owned by the State of Dakota for a game refuge and to the South, one can see six miles up Lake Traverse to Browns Valley, MN.

The building uses geothermal wells as part of the HVAC system. A series of 275 foot deep wells are incorporated in it. Once past the sticker shock of the system, it is very cost effective. We were told it would take 24 hours to get building up to temperature, however it is closer to four to six hours.

Dale and Tom from Timber Technologies provided glu-laminated Titan Timbers as long as 50 feet in four ply 2×8 for the overall height of 44 feet above grade. After they were placed and concreted in we had some 60 miles per hour winds. The tops of the columns reminded me of watching the Tameracks near our Spokane, WA area home which bend in the wind, but never break.

This building is gambrel (barn) style. The center portion has a 20 foot tall eave, and is 48 feet wide. The roof pitch break is eight feet from each side horizontally and 16 feet vertically. The upper portion of the roof has a 6/12 roof slope. The center portion has clear span wood parallel chord floor trusses which are 44 inches thick. From top of slab to ceiling in this 48 by 60 area is 16 feet. It was designed to be a one-half court basketball court. Above this are gambrel trusses with a 16 foot ceiling height – the inside slope of the gambrel is 12/12 which makes for some unique interior spaces.

Truss fabricator WB Components and the engineers at Alpine Engineered Products were exceptional to work with, they never said no and always were looking for a better design solution.

BIBS insulation is the bomb. I had used it in the walls of my garage shop in previous years. Besides affording a nice R-value, it fills all of the voids, making for a very quiet interior, even when the wind is howling outside.

One of the keys to success is not in how we do the job right the first time, but how we take care of the mistakes. Each side of the gambrel portion of the building has an 18 foot wide side shed, with I joist rafters. The rafters were ordered from The Home Depot® in Fargo, who had a great price. The challenge – only AFTER the said builder had installed them did he realize the sent a smaller size than what was ordered and needed to carry the load! The Home Depot® stepped up and provided enough additional I joists to cut the spacing in ½ – at no additional charge

But  – there’s more!  Come back tomorrow for a client’s experience in building a pole barn house.

Colorado Hay Barns

I woke up this morning in El Paso, Texas and this evening I am in Montrose, Colorado. It was a long drive and I am certain the rental car company will appreciate all of the miles I am putting on their car.

Interesting trip today – some great scenery, especially North of Durango, Colorado. Just after negotiating the rental mobile through a one-lane stretch of highway (due to rock slides), there was a herd of seven big horn sheep. On the road.

Of course I pay attention to buildings along the route. After leaving Farmington, New Mexico, as I approached Durango, are a plethora of hay fields. Where there are hay fields, there are usually hay barns, this area being no exception.

My “favorite” hay barn was a roof only pole building along the left side of the highway. It ran lengthwise, with the eave side towards the highway being probably two feet closer to the road at the top, than the bottom. To counteract this “list”, the enterprising farmer had placed two substantial blocks of concrete in the field on the side of the building away from the road. A re-bar loop had been poured into the top of each block.

Each corner column on this side of the building had been secured to its respective concrete block with a fairly stout cable. I could not help but think this building is the resultant of a less than ideal design solution.

Many Building Permit issuing jurisdictions offer agricultural exemptions for farm buildings. The requirements for this exemption varies wildly from Building Department to Building Department. La Plata County, Colorado (where Durango is) requires permits with structural reviews for all structures which are in unincorporated portions of the county and not on a Native American reservation.

Turns out the leaning hay barn is on a reservation, so the outcome is probably in line with the plans….not good.

Hay Storage BuildingThe challenge of designing a roof only hay barn is there are no endwalls to transfer wind shear loads from the roof to the ground. This causes the columns to have to do all of the work and increases the pressure they must withstand by a factor of four! The resultant is large dimension columns, unwieldy and/or improper bracing, very deep holes filled with concrete and more expense.

The best hay barn designs have one (and ideally both) gabled endwalls covered with structural siding over wall girts. In many cases, it is less expensive to add the endwalls, than to construct just a roof.

Hay barns without sides tend to have a fair degree of spoilage from the weather, as rain rarely falls straight down. This makes adding covered walls even more attractive!

Dear Pole Barn Guru: What Size Glulam Should I Use?

Welcome to Ask the Pole Barn Guru – where you can ask questions about building topics, with answers posted on Mondays.  With many questions to answer, please be patient to watch for yours to come up on a future Monday segment.  If you want a quick answer, please be sure to answer with a “reply-able” email address.

Email all questions to: PoleBarnGuru@HansenPoleBuildings.com

DEAR POLE BARN GURU: I’m building a 32’x40′ pole barn using 6×6 treated posts on 8′ centers and would like to use a glue-lam beam across the 40′ length, but am not sure how to calculate the size needed to support the roof or if I need to increase the support post size.

This will be the ridge beam. I live in a sparsely populated area of Alaska, but plan on a trip to town soon to look at other similar sized buildings. There are no building regs out here, but I have looked at some large metal buildings blown down by 90 mph winds we had two years ago and another built out of rough cut spruce logs (ridge beam type) that looked pretty simple to build. I planned to use posts sunk 6′ and set in concrete. I always like to err on the safe side, so overkill is OK. MUSHING

DEAR MUSHING: Even in the remote areas of Alaska, there are probably much safer and practical methods to design a pole building rather than trying to utilize a ridge beam 40 feet long. I’d seriously recommend rethinking your design and using prefabricated ganged (two ply or greater) wood roof trusses placed at each sidewall support. This will be much more efficient than the use of a huge beam.

In any case, you need to determine the design load for your site. Here is one possible source: https://www.groundsnowbyzip.com/

The International Building Code also provides a table of ground snow loads for Alaskan locations: https://publicecodes.cyberregs.com/icod/ibc/2012/icod_ibc_2012_16_sec008.htm

You might want to consider getting an engineered pole building kit package, which could be easily shipped out of the Port of Seattle or Tacoma. This would take away your guessing at how to construct it right.

Back to your question….assuming a relatively low roof live load of 40 psf (pounds per square foot), your beam has to be able to support somewhere in the area of 30,000 pounds of weight (this will depend upon the dead loads – what is being used for roofing, etc.).

Assuming the snow will remain on the roof for an extended period of time, a Duration of Load of 1, is probably realistic. This means you will need a 2400f rated glulam with a Section Modulus of around 800 (for information on Bending Moments and Section Modulus read more at: https://www.hansenpolebuildings.com/blog/2012/09/bending-moment/).

In the above scenario, you would be looking at a 6-3/4” x 27” deep glulam beam!! Not only will this be amazingly expensive, but it will also result in the need to hire a crane to set it in place.

DEAR POLE BARN GURU:  HEY MIKE…………COULD YOU GIVE ME THE NAMES  AND ADDRESSES OF A COUPLE OF YOUR CUSTOMERS IN NYS HUDSON VALLEY AREA?  THANKS! NEW YORK NICK

DEAR NICK: Thank you for your continued interest in a new Hansen Pole Building. Among the thousands of building kit packages we have provided are hundreds in New York (as well as every other state in the U.S.A.). We are VERY protective of the personal information of all of our clients, just like we will be of yours. Most people feel very uncomfortable with having “strangers” visit their homes and buildings. It is a security and safety issue, as it would be all too easy for an unscrupulous person to use this method as a way to case things out for “less than helpful” activity.  Please click on the Free Product Guide and we will be happy to mail you a very nice 32 page “showroom” of our buildings.

Here is what a few of our clients have to say: https://www.hansenpolebuildings.com/testimonials.htm

DEAR POLE BARN GURU: You have provided a tremendous amount of information and have given us a lot of questions that need answering – Thank you.

One of the major questions we have, what is code to make a living space (studio) type apartment inside one of these structures?  The second floor load being 40 psf, can this be increased for living space?

Do you have contractors that can assemble this on our site?  What kind of cost would be associated with assembly?

We are in the process of obtaining a VA construction loan with our local credit union and the above questions may be answered through that process.

I’ll take your questionnaire to our building department next Friday to get all those questions answered.

Thanks for your time and patience as we are just starting down this unfamiliar road.

WANTING IN WALLA WALLA

DEAR WANTING:  You are very welcome, we try to assist our clients to be as educated as the want to become, so as to make certain the choices they make in the end, are the right ones.

A 40 psf second floor live load would be Code loading for a residential living space. You will need to meet the Washington State Energy Code for level of insulation in relationship to the number and area of openings (doors and windows) in the conditioned space. Whoever designs your HVAC (heating, ventilation and air conditioning) systems can assist you with the proper recommendations to meet the requirements.

While we are not contractors, we do deal with builders who may be able to assist you with your project: https://www.hansenpolebuildings.com/find-a-builder.php

Fair market value for assembly varies greatly depending upon geographical location and the costs of doing business in any particular state. In my mind, a competitive labor quote should be around 50% of the cost of the materials being installed. As it begins to creep upwards from there, I think about strapping on my old nail belt and doing the work myself.

Please do not hesitate to contact us at any time we can assist you.

Dear Pole Barn Guru: I Have a Roof Mold Problem

ADDED BLOG DAY!  Due to a large volume of questions to the Pole
Barn Guru, we are adding another day for answering questions – so look for more Pole Barn wisdom from The guru on Saturdays – starting – today! 

Welcome to Ask the Pole Barn Guru – where you can ask questions about building topics, with answers posted on Mondays & Saturdays.  With many questions to answer, please be patient to watch for yours to come up on a future Monday or Saturday segment.  If you would like a quick answer, please be sure to answer with a “reply-able” email address.

Email all questions to: PoleBarnGuru@HansenPoleBuildings.com

DEAR POLE BARN GURU: Have a 45′ wide x 120′ long by 20′ tall pole building.  All walls are insulated and covered with plywood sheathing.  Bottom cord of all trusses also sheathed with 1/2″ plywood.  Metal roofing is installed over felt paper that is installed over 1/2″ plywood roof sheathing.  Building has continuous ridge vent and multiple 10″x20″ soffit vents.  None the less we still have mold growing on the bottom side of the roof plywood. Here in Oregon we get ALOT of rain, so frequent moisture issues.  Should I add gable end fans?  Roof fans?  Thoughts. RAINING IN EUGENE

DEAR RAINING: Provided the underside of the ceiling plywood does not also have mold growth, then the moisture is an issue from the enclosed attic space. By Code, the requirement for attic ventilation is for 1/150th of the area of the attic to be in vents, provided at least 50% is in the upper ½ of the attic and at least three feet above the eave vents. This net free area is to be equally divided between the eave and the ridge.

In your case, the minimum requirement would be 18 square feet at both the eave and the ridge. My guess is your ridge is inadequately ventilated, thus the mold issue.

You should begin by replacing your current ridge with a product such as the Klauer Roofline Ridgolator 4 (www.https://klauer.com/metalcomponents.html). With 220 net square inches of free air per ten foot section – your 120 foot long ridge would provide just over the bare minimum required for proper exhaust.

Powered exhaust fans in each gable would certainly help, provided they are located towards the peaks of the gables, and have sufficient capacity to be able to pull air from 65 feet away.

DEAR POLE BARN GURU: What is the depth i should place my poles in the ground in concrete 24×48 10 feet tall not in city. SOMEWHERE IN SNOHOMISH

DEAR SOMEWHERE: As the county you are building in requires Building Permits for all structures the size of yours, and they do a structural plan check prior to issuing permits – you will need to go by whatever is on the approved plans.


Not knowing your design wind speed and exposure, dead loads on the building, roof slope and soil bearing properties, I can only say typically I would expect holes 40 inches deep, with the bottom 18” backfilled with premix. In the event you are constructing a “pavilion” style (all walls open), then it would be best to entirely backfill the holes with

Planning Department: Get Permission!

Planning Department – Get Permission First, Don’t Beg Forgiveness

Every once in a while I read a story and it just makes me wonder, “What were they thinking”?

The story below appeared February 25, 2014 in a Post-Tribune article written by Kitty Conley:

Variance granted for pole barn already under construction

 CROWN POINT — The Lake County Board of Zoning Appeals gave its approval to Robert Biocic on Feb. 19 for an extra-sized pole barn, construction of which had already been started without the owner checking with the county for permission.

The project was noticed and Biocic was told to stop for not having gotten the approval. The fine for starting the project without a permit is considerably larger than the cost of getting the permit in the first place. It is three times the cost of the permit based on the value of construction. Then he still has to pay for the permit fee, according to Steve Nigro, planning and building administrator for Lake County.

Planning DepartmentIn addition to getting the required building permit, Biocic needed a variance-of-use for putting up a building of 3,134 square feet, where only 1,302 square feet are allowed.

The variance was granted by the BZA for construction on the 1.2 acres at 12952 W. 181st Ave. in West Creek Township.

All I can say is this building owner was extremely lucky. He could very easily have been forced to tear down his partially constructed building!

It is so easy to play by the rules. Start with your jurisdiction’s Planning Department….before considering building anything.

To know what to do at the Planning Department: https://www.hansenpolebuildings.com/blog/2013/01/planning-department-3/

Notice, the route taken by Mr. Biocic was not an inexpensive one – he was fined three times the cost of the Building Permit!

What the article does not say is – I am wondering if this building owner’s life is going to be made miserable during the inspection process. Planning and Building Departments do not look favorably upon those who do not play by the rules!

Dear Pole Barn Guru: What is the Best Pole Building Drainage?

Welcome to Ask the Pole Barn Guru – where you can ask questions about building topics, with answers posted on Mondays.  With many questions to answer, please be patient to watch for yours to come up on a future Monday segment.  If you want a quick answer, please be sure to answer with a “reply-able” email address.

Email all questions to: PoleBarnGuru@HansenPoleBuildings.com

DEAR POLE BARN GURU: Looking at a 40×60 pole barn on my 80 acre property. Weighing all the usual options, but the biggest issue that I have is the site. There is a couple degree down-hill pitch towards the site that the building will be built. Traditionally, we would put in a frost wall foundation, high enough so that the swale could divert any runoff around the building. Given I’m much more inclined to go with a pole barn at this site, what can I do to get the building up off the ground high enough to avert any natural pole building drainage from running under the barn?

I am used to traditional foundation/stick framing, but not sure about sub-foundation planning for pole barns.

Thanks for helping! LIGHTENING IN GOOD THUNDER

DEAR LIGHTENING: Assuming this is not going to be used as a home (in which case I would make entirely different recommendations using a raised wood floor), I’d approach this as for any pole building drainage solution. I would order columns long enough to get the required depth to extend below the frost line, plus make up for any grade change. After the columns were set, I’d bring in fill to get the elevation of the bottom of any future concrete slab above the highest point of the surrounding grade. Above the high side of the building, a French drain can be installed to divert any natural drainage.

For those who are not familiar with the term – a French drain is when you dig a trench and then put some drain rock in the bottom of it. Then lay in one or more rows of perforated 4 inch pipe and fill the rest of the trench with drain rock.

DEAR POLE BARN GURU: Looking around on your website, I seem to be unable to find the dimensions and wood species, and shape of the poles that come with your buildings.  Help? FREAKYALIENBABY

DEAR ALIEN: There are many variables which are going to influence the answers to your question. One of those is going to be geography – where the building will be constructed.

The other is, what loads will need to be supported by the columns. As wind and/or snow loads increase, so will the size of the columns.  Whether it’s enclosed or “roof only” makes a huge difference, as well as eave heights over 16’.  I mention only a few of the variables here as examples.

As to dimensions, we use 4×6, 5×6 (In some parts of the country 4×6 and 6×6 are not available, but 5×6 is), 6×6, 6×8, 6×10.

In the East and Midwest, the species with be SYP (Southern Yellow Pine); in the west HFir (Hem-Fir).

We also use glu-laminated columns, anything from 3 ply 2×6 to 4 ply 2×8 and larger.

The shape?  Not round – these are not fence posts nor telephone poles.  They will be square (if 6×6) or rectangle if dimensions are not equal on both sides.

If you decide you want certain size columns – because it makes you “feel like it’s sturdier”, that’s fine, as long as they meet code.  For example – we’ve had folks request “all 6×6’s” even though they don’t understand under certain conditions a 4×6 will outperform a 6×6, and going to a 6×6 gave them no added “strength” to their building.  They basically paid for larger columns – for no added value.  But that’s a topic for another blog.  Once you get a quote and are ready to purchase, we can give you a pretty good idea of what size columns will be used on the building you plan to purchase – according to the loads applied to it – and the size.  Hope this helps!

 DEAR POLE BARN GURU:  Who do I go to to get the information regarding my proposed building’s Code requirements for wind and snow? Would code enforcement have it?  MEANDERING IN MAINE

 DEAR MEANDERING: Typically most jurisdictions have a department such as : “Building”, “Community Development”, etc. – they are the department you would need to go to in order to acquire a permit to build.

If unable to easily determine: if you are in the city limits, call city hall. If outside of city limits, call the county courthouse. Ask either who you would need to speak with to obtain a building permit.

DEAR POLE BARN GURU:  I am pricing post frame building.  One mfg uses 26 ga steel while another uses 29 ga.  Which is better when not considering price?  Is tensile strength a big consideration? HIKING IN FROM HERON LAKE

DEAR HIKING: I suppose the real question to be asked is, do you NEED 26 gauge steel?

This article answers lots of questions about steel thickness:

https://www.hansenpolebuildings.com/blog/2012/01/steel-thickness/

Tensile strength is a consideration, as it will directly affect the strength and spanning capabilities of the steel. To the best of my knowledge, all of the major steel roll forming companies are manufacturing 29 gauge product with an 80,000 psi minimum tensile strength. There is a company which is providing 26 gauge product which is softer, it has a lower yield point. This allows for the steel coil to be roll formed into siding on machine with fewer dies stages, which reduces the investment needed into the machine. Although their steel panels are thicker, they won’t span any further, as the steel is not as strong.

DEAR POLE BARN GURU: I have read dozens of different opinions, many contradicting each other, on condensation.  I have built a monitor style pole barn 44×40 with a 20′ raised center isle.  Will have a 20×20 loft that will be finished and insulated.  The rest will be open shop space.  I have the trusses on 48″ centers with 2×4 purlins laid flat on 24″ centers.  I need to know what will be the best underlayment to put between the metal and purlins.  I was looking at solid attic foil, that is basically, a vapor brainier and radiant barrier, with no insulation.  But I saw an article that said that it would still condensate on the bottom of the attic foil.  I will be using 26ga galvalume screw down panels, and I am in north Louisiana. LOOKING IN LOUISIANA

DEAR LOOKING: Easiest solution is to place reflective insulation, like an A1V product between the roof purlins and the roof steel (see www.buyreflectiveinsulation.com).

Other important things to do – make sure to place a good vapor barrier under your concrete slab. https://www.hansenpolebuildings.com/blog/2012/09/concrete-slab-3/

You also need to have proper ventilation – with good intakes at the eaves from vented soffits, as well as a vented ridge. https://www.hansenpolebuildings.com/blog/2014/02/pole-building-ventilation/

Zoning Code: You Be the Judge

You Be The Judge

While I have my own strong opinions about this particular case, I’d like for my readers to weigh in with their opinions, before I shout out mine, and the reasoning behind them. Weigh all sides of the story, then please share with all of us what you think of it.

Here is the story:

JOHNSTOWN, Ohio — Calling it a miscommunication between the landowner and the township zoning inspector, the Liberty Township Board of Appeals denied a request to tolerate a completed structure that was later found in violation of the township’s zoning code.

Although the structure, a pole barn, already was built when a neighbor filed a complaint, the board members agreed Wednesday at an appeal hearing they had to enforce their own zoning code or risk other landowners challenging it.

“If we approve yours, there’s no stopping it,” board member Dale McCombs told the landowner, Harry Johnson, who had the pole barn built. The board vote was unanimous in favor of denying the variance, 5-0.

Johnson, who lives on the 6000 block of Johnstown-Utica Road, completed the construction of a pole barn on his property in June. But after it was built, one of his neighbors, Michael Reed, took a complaint to the zoning inspector, claiming Johnson had violated the zoning code.

The violation in question was the requirement that structures be built 35 feet away from the lot line. Reed claimed the structure was built much closer to his lot, less than five feet away from the property line.

Zoning inspector David Cole said when he spoke with Johnson about constructing the barn, he was told by Johnson that Johnson’s property went right to the middle of a driveway that is accessed by five surrounding properties. So Reed approved the zoning permit based on Johnson’s assertion.

However, according to a deed Cole later pulled from the county, Johnson’s property rights did not go to the center of the driveway. Johnson could use it to access his property, but he did not own it. Thus, the building was built much closer to the driveway and Reed’s property, which Reed took issue with.

Johnson told the board of appeals it was Cole who suggested that he build the pole barn where it now stands. But Cole said he was under the impression that Johnson owned the land where he said he did. McCombs said later it appeared there was some miscommunication and misinformation between the sides.

“Obviously I made a mistake, but I was led to believe that the property line was the middle of the road,” Cole said after the meeting Wednesday.

Cole said he cited Johnson for the zoning violation after Reed filed the complaint in July. But Johnson filed an appeal for a variance in late August — which costs $800 — to keep the building there, claiming a hardship if it had to be torn down.

But board members agreed there was no hardship. In reviewing land documents submitted by the people involved in the appeal, they came to the conclusion there were other parts of the property where the structure could’ve been built.

Johnson said he would take his issue to court next.

“I can’t tear down an expensive building,” he said.

But Cole acknowledged before the appeal hearing Wednesday that if Johnson takes it to court, it’s unlikely a judge will order the building torn down, citing similar past cases. He said a fine could be in order for Johnson, but it’s up to the judge, Cole said.

The board of appeals has no authority to order a structure torn down. But the members still said it was important to enforce the zoning code and deny the variance.

“This gets to the root of the zoning code,” board member Larry Riffe said. “If we allow this, anyone could challenge our zoning.”

And now…your opinions?  Email me at: PoleBarnGuru@HansenPoleBuildings.com

I will give you my opinion once the “jury” is in…so stay tuned.

Waste Farmland or Pole Barn Variance?

Let’s Waste More Good Farmland

It has been awhile since I got off on a good rant.

Rural FarmlandMy belief is a person should be able to do whatever they want with their property, as long as the value of your neighbor’s property is not degraded by it. The less government interference, the better.

I live in an area of the country where, to me, zoning makes little or no sense. Years ago, too much of the best farmland got carved up into five to 20 acre tracts, with one dwelling only allowed per parcel. Somehow, preserving farms and instead using high density housing just didn’t cross the minds of those who supposedly should know better.

I recently read an article by Rebecca Geller on Readingeagle.com:

“The Jefferson Township Zoning Hearing Board has granted John Hartranft a variance to build a pole barn on his agricultural property at 130 Bricker Road.

Hartranft, who previously had been denied a permit for the barn, needed a variance because he plans to build the barn 27 feet from his property line. Ordinarily, the setback requirement is 50 feet.

“I want to save as much farmland as I can,” explained Hartranft, who uses his property for raising crops and dairy farming.

Board members had questions about how Hartranft would access the barn. Hartranft said he intended to use an existing driveway.

The board granted the variance on the condition that the barn only be used to store farm machinery; no livestock may be kept there.”

The waste of valuable farm land, to meet some plucked from the air requirement for setbacks is pretty difficult to defend, at least in my humble opinion. Mr. Hartranft appears to be trying to be the best possible steward of his property, and its best use.  He even goes to the extent of using an existing driveway for the new pole barn, instead of altering his land to put in another road.

In the 50 plus years I’ve lived in the same “rural” area, I’ve seen hundreds of acres of beautiful wheat fields chewed up. When and where will it all end?

Run Amok: Pole Building Prohitibion?

In the iconic 1984 movie Footloose, Kevin Bacon’s character has moved to the small fictional town of Bomont. As a result of the efforts of a local minister (played by John Lithgow), dancing and rock music have been banned.

How outraged the viewing public was when the rights of freedom of expression had been taken away, in the movie.

Small towns sometimes have small minds, and they try to take away things more than just what happened in Footloose. On occasion, I have run across jurisdictions which, for whatever reason (usually it is just not being educated of the benefits), try to ban post frame construction.  In other words, they “don’t allow pole buildings”.

Pole Building Prohibition
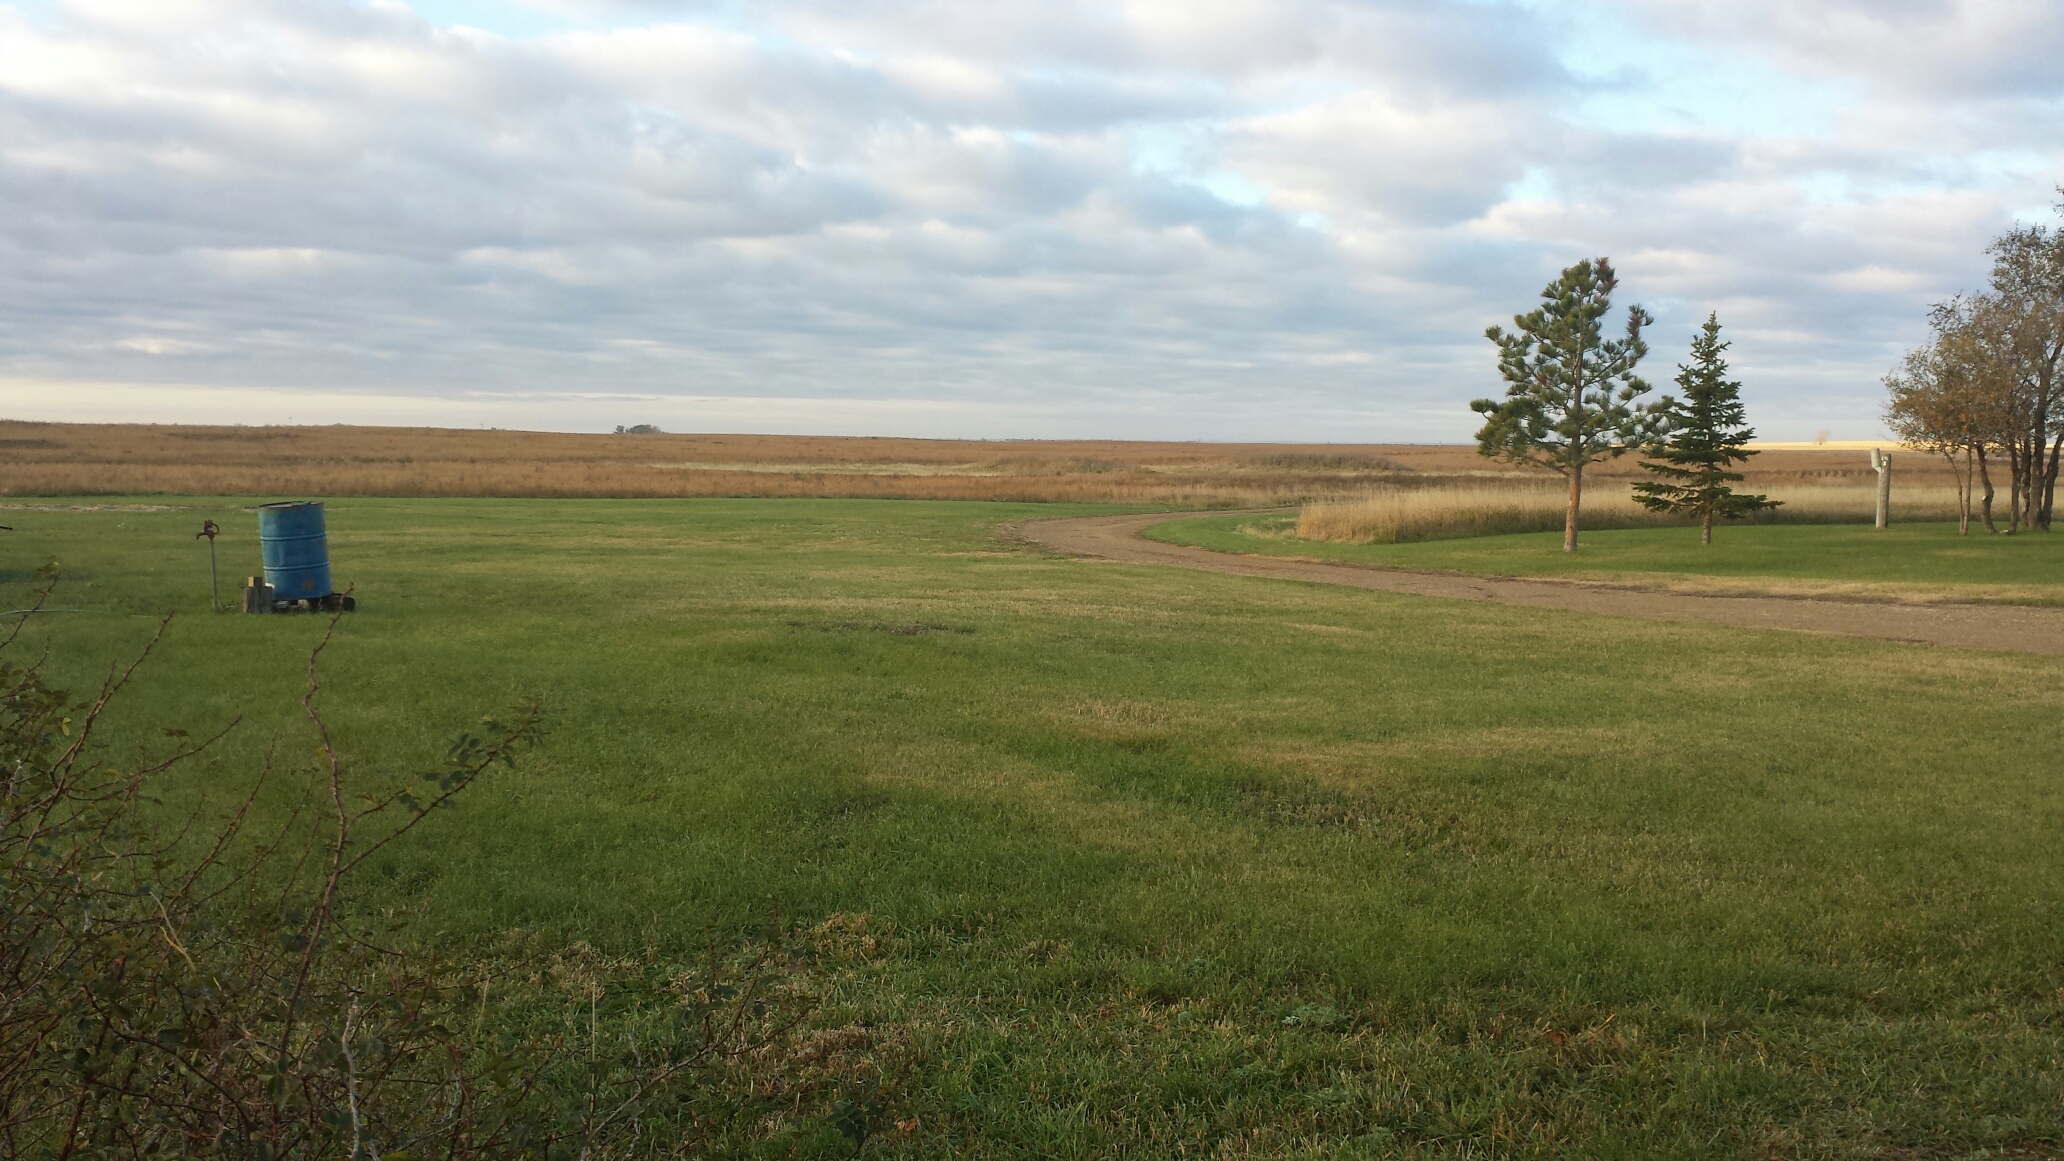
This just happened in Fowler, Indiana, and here is an excerpt from the letter I wrote to defend pole buildings:

Post frame (pole) buildings are Code conforming buildings and the methodology for their structural design is outlined and/or referenced in every edition of the International Building Codes.

It is within the legal scope of a Planning Department or Commission (after following whatever processes are in place for public notifications, etc.) to be able to place limitations on the size of structures, their placement on a given property, as well as the appearance (e.g. restrictions on type and or color of siding and roofing materials). Any appearance restrictions must be applied uniformly to any Code conforming structural system.

In order to legally preclude the use of post frame construction (or of any other Code conforming structural system), the onus would be upon the jurisdiction to somehow prove their structural inadequacy. It would be both arbitrary and capricious to deny the utilization of post frame construction, which could easily leave open the door to a plethora of probably indefensible lawsuits – resulting in undue costs to the jurisdiction, as well as the taxpayers.

While I am not an attorney, nor profess to offer legal advice, I have been involved in similar circumstances with other jurisdictions, each of which has made the determination to NOT LIMIT the use of post frame buildings as a structural system. I would encourage the same decision in your jurisdiction.”

Anywhere in America, where an unjust system tries to take away the rights of a citizen to construct a pole building, look to me to be involved to protect those rights.

Construction Freedom

american-flagMost people who have ever considered construction of  any type of building in the United States have had to deal with their local jurisdiction’s Planning Department. Most of those same people may report this as being less than a fun experience. We Americans are fiercely independent, we value the ability to have the freedom to use our things, in the manner in which we feel would be best – without the intrusion of government.  We also tend to get a bit “bucky” about construction…wanting to build exactly what we want…where we want.

Come journey with me….as you remember from yesterday, we’re in Ecuador.

Where anything can be built – anywhere. No apparent zoning here.

Hmmm, one might say, “freedom, I am liking this idea”.

Venture down an average street in Quito, the capitol city. On the corner may be a vacant lot, however it has a ten or 12 foot high fence built of concrete block, topped with broken glass bottles (this is their idea of a “security” fence), so is it actually even vacant?

Next to this, is a six story hotel. Very narrow and deep, with dimensions which run right to the property lines, the street face looks like it should – must be a multi-million dollar building, however the other three walls are plain concrete block (which does match the neighboring fence nicely).

Also in the same block are several single family homes, a repair station for buses, several small retail shops, a tire store, a restaurant and a school. Each one plastered directly against the neighbor, as the mandatory three foot setback from lot lines is totally ignored.

Seeing how this much construction freedom may prove to be a problem?

Apply this type of planning (or lack thereof) to the United States and a million dollar home could have an oil refinery, or just as easily a chicken ranch right next door.

Oh – across the street from the hotel – a pasture with horses in it!

Pre application Conference

construction planning meetingConsidering construction a post frame building for commercial use? If so, many jurisdictions offer a pre application conference which will greatly ease the overall permit process, as well as providing a total view as to all of the requirements necessary to be met.

Why should I go through a PAC?

In my humble opinion, if a pre application conference is an available option – take advantage of it, It can save boatloads of future grief, not to mention unexpected pitfalls and costs.

What does a PAC involve?

A Pre Application Conference (PAC ) is a preliminary evaluation of a project by staff from various the various departments and divisions, which will be involved with a potential project. Staff represented may be from several departments, which may include: Planning, Building, Fire, Public Works, Health, and Water and Power. In some instances a Case Manager is assigned who will facilitate the PAC and provide a single point of contact to help navigate through the entire review and approval process.

PAC Meeting Agenda

At the PAC meeting, the staff will meet to discuss project issues and requirements of the proposed project according to current regulations, guidelines and policies. It is an opportunity for the staff to identify any discretionary reviews and approvals necessary, inform of any possible conflicts with policies and regulations, and, if necessary, offer other options to pursue in lieu of those proposed. A flow chart outlining the course the proposed project will need to take through the review and approval process is also provided. All documentation, including applications, brochures, submittal requirements, fee estimates, a flow chart, and review comments related to the project are provided often in an organized packet called the Development Guide. The information derived from a PAC does not constitute any approval of a project. PAC meetings are not public hearings.

What sort of things might be brought out at a PAC?

Highway/roadway/public works people will advise if the street may need to be widened, turn lanes added, as well as requirements for curbs and sidewalks. Having had to pay for all of these items in projects I was personally involved in, it is best when they are known about upfront.  After the fact… they can be potential budget breakers.

Fire – how close can a proposed new pole building be from other structures or property lines before fire walls need to be considered? Does the property have adequate water flow available for fire prevention? In some cases, an alternative water reservoir may need to be added. A hydrant (or hydrants) may need to be included for the development. If fenced or gated, a Knox-Box® will probably be required.

What else do I need to do?

Planning will deal with percentage of the property which can be covered with structures, dimensions of the building(s) as well as heights, setbacks from property lines, roadways and easements. They may require an engineered site plan, as well as provisions for storm water runoff. Requirements for parking spaces can be determined.

While these are just a few of the involved parties, the areas which may be covered and potential costs can be extensive and expensive. Structural building plans are not required in a Pre application Conference.  This is the opportunity to find out what the real costs for the entire project will be.  Not just the building structural costs, which are usually just a fractional portion of the entire project.

Good luck, and let me know if this process helped to speed things along to get your permit!

Can a Pole Barn Garage be Built onto an Existing House?

A reader writes:

I’m thinking of building an attached garage. I know the pole barn type garages seem to be a bit cheaper and quicker to install. My question is can you attach these to the house or can you only build these separately? I live in northeast Tennessee. I am just asking if this is generally done, or if there are problems/cons to doing this. I know building codes vary, and eventually I plan to get estimates. But right now I’m just in the consideration of my options phase.”

Pole buildings are Building Code conforming structures, so there is no reason why one could not be attached to an existing home. There are some considerations to keep in mind, which may make it more affordable to build a free standing garage instead. But whether it’s “stick built” or a pole building, the pole barn garage will win hands down in overall construction cost.

When I was a builder, we first did one of these nearly 20 years ago. In my humble opinion, it could have been done in a more aesthetically pleasing manner than this first one. The existing home had wood T1-11 siding, a shingled roof and eave overhangs. To the client, saving dollars and being functional was more important than looks, so we attached a steel covered post frame garage without overhangs to his house. While it met his needs, I imagine it posed some challenges for eventual resale.

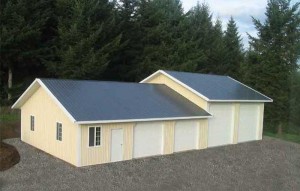
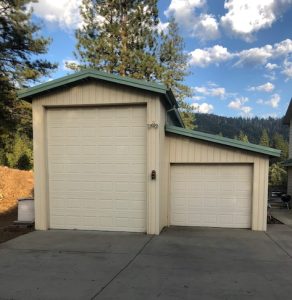
Pole buildings have changed tremendously over the past 20 years in overall “looks”.  Unless you can see the inside framework, from the outside they look every bit as attractive as the “stud wall” framework type.  Overhangs, cupolas, ridge or gable vents, wainscot, and every type of roofing or siding imaginable is now seen on pole barn garages.

Other than speed and ease of construction, the big savings in pole building construction comes in the footings/foundation/concrete phases. By having isolated columns supporting widely spaced roof trusses, holes can be augured for the holes and backfilled with minimal amounts of concrete. Even with a relatively modest two-car pole barn garage, this can amount to saving thousands of dollars on the project.

Personally, I’d always try to go for matching the looks of the existing home. Pole buildings can support a myriad of siding and roofing choices to match what was previously used.

Consideration to be aware of – as a mixed use occupancy (dwelling and a garage), a minimum one hour fire wall must be created between the living space and the garage. This usually entails adding a layer of 5/8” Type X gypsum board, fire taped to the garage side of the jointly shared wall. In some cases, the Building Official may require the removal of existing sidings from the house (most certainly if the siding is vinyl).  If the house is stud wall framed (as most are), the wall will probably be more than structurally capable of carrying the weight of the attached building by adding appropriate dimensional lumber nailers to the home. Whether the garage is stick built or pole barn framed, either one may require this fire wall.

Any windows, which would have looked out of the house and into the garage, must be removed – as they will not be allowed by code.  Again, this applies to any type of garage you are adding.

One more consideration when attaching a garage to a home is to check with your local real estate tax folks on whether your taxes on the addition will be higher or lower depending on whether the garage is attached or free standing.  When my wife added a garage to her home in South Dakota, the taxes were actually less having it attached.  If more, is the convenience of not having to go outside to access your garage well worth the extra dollars each year?  For some, the convenience wins, especially if you expect to go in and out of the house with snow piled high and temperatures below zero.

Good planning on the client’s part – considering all the options and then making an informed decision.  The short answer to can she attach a pole barn garage to a house?  Without a doubt for savings and aesthetics…yes!

Letter From a Building Official

A fair number of Building Officials are readers of my blog. This is not meant to offend any, but is an example of what pole building providers are faced with on a regular basis.  The following is a letter to one of our clients:

“Mr. Fxxxxxx,

This is the list items that need to be addressed;

  1. The footings supporting the “Girder Loads” (any footing with the truss bearing on the posts) will need to be 24” wide x 12” deep at a minimum of 30” below grade. Any footing supporting a “non-point load or concentrated load” will need to be a minimum of 18” in width.
  2. The posts cannot be “encased” in concrete footing.
  3.  The proposed Roof Trusses “Girder Trusses” will need to be certified by a Professional Engineer registered in the State of Maryland. I will need a copy of the sealed drawings for our file and a copy will need to be at the job site during the framing inspection as well.
  4. The use of “Ledger Locks” has not been approved by our jurisdiction for use in Pole Buildings. You will need to use 2 pcs. (min) ½” carriage bolts at each post to Girder/Beam connection.
  5. The concrete slab cannot be tied into the posts as specified on the building plans. The posts must be isolated from the concrete slab by use of a minimum ½” expansion joint.

You may want to forward this info to the Pole Barn Company so they can make any changes to your plans.”

To begin with, the Building Official is now putting himself in the position of being “Engineer of Record”, as he is spelling out how he wants the building to be constructed. Chances are the county attorney would not be pleased by his taking on this liability.

Jumping past opening up this can of worms….as far as we can find from our research there is no justification for a footing of 24 inch width, having to be 12 inches in depth. One engineer’s table we found online, does not specify a 12 inch thick concrete pad footing for a column – until the footing would be supporting 48 kips (a kip is 1,000 pounds of force) and be 6 feet in diameter!

The posts cannot be “encased” in concrete footing? I hate to point out 1805.7.3 of the International Building Code (IBC)….which directly contradicts this Building Official statement.

Number three on the list – a non-issue.

Plans Examiner seems to be “stepping out” a little on this one. “Ledger Locks” happen to have an ICC-ES approval number (#1078). With proven published values, as well as International Building Code approval….he’s not looking good on this one. Assuming both the truss and the column were Southern Pine, those ½” bolts are good for only about 350# of resistance each.

Now we will get to “the posts must be isolated from the concrete slab”. IBC 1805.7.2.2 has the formula for the embedment of a constrained column…”where constraint is provided at the ground surface, such as a rigid floor or pavement”. The National Frame Builders Association “Post-Frame Building Design Manual” in Section 8.2.2 specifies, “An example of a constrained post foundation would be when the post is installed immediately adjacent to a concrete slab floor in the building”.

The client ends up being faced with either complying with these ridiculous requirements or paying for an engineer to fight the battle. This, in my humble opinion, is a public servant, who is not serving the public.


OM – I Failed the Plan Check!

Life has now ended….nothing worse could ever happen…..ever….send my money back.

No – failure to get through an initial plan check is not a reason for suicide planning, or to be jumping up and down screaming.

Whether the building (or just plans) were provided by us, or anyone else – the first step is to get a copy of why the plans were rejected – in writing, and forward to whomever the responsible party is. In the case of Hansen Pole Buildings, send the checklist to us, not the RDP (registered design professional, aka engineer).

Why get it in writing? Ever play the “sit in a circle and whisper a secret to your neighbor” game as a child? The same applies to a plan check. Don’t leave anything to interpretation – get it in black and white.

While the great majority of plans sail through on the first try, it is not always the case. And why not?

Reason #1 – The client failed to verify their Building Code version and load conditions with the Building Department prior to ordering their building. I cannot speak for anyone else, but we DO REQUIRE our clients to verify this information.

Reason #2 – Failure to submit all required documents. Besides the building plans, a plot plan is a requirement. Where is the building located in regards to lot lines and other structures? If the plans are sealed by an engineer, the engineer’s calculations must be submitted as well. Engineer sealed truss drawings don’t come with the plans necessarily and the plans checker will kick the plans back without them.  Often, they come directly from the truss manufacturer.

Reason #3 – Didn’t discuss the proposed building with the Planning Department in advance. The Planning Department has the power of life and death. They could care less about how the structure is built. BUT – if your planned building is too tall, too large, too close to something they value and everything gets thrown into a blender on puree.  This is probably the most difficult of plan check failures to fix….after the fact. Heed my advice: don’t use the old adage “better to feign ignorance and beg forgiveness later”.  Trust me – this is not how to get your building to pass the plan check!

The least likely reason for failure to pass a plan check – is the structure itself, especially if the plans are sealed by an RDP. It is not just our engineers who are brilliant, it is engineers who have had to spend years of education and work experience to be able to perform their duties responsibly.

Verifying Design Wind Speed

A client from Florida and I have been discussing wind speeds. The data we show in our system for his county was for the design wind speed to be 120 mph.

Now where do we get our data? In many cases, direct from Building Departments. In other cases, we use the wind speed maps published in Chapter 16 of the International Building Codes, or the maps from ASCE (American Society of Civil Engineers) 7. The Metal Building Manufacturers Association (MBMA) also lists design wind speeds, by county.

This particular client had also gotten a quote on an all steel building, and they used a design wind speed of 138 mph. At these speeds 18 mph can make a significant difference in structural design.

Now I know 18 mph does not sound like much, but in the formula to convert from miles per hour, to pounds per square foot of load, the wind speed is squared! While 138 is only 15% faster, the effective load placed on the building is over 32% more. Huge difference.

I asked the client if he had discussed the design wind load with his Building Department. He had, and his Building Department did have a solution which I was unfamiliar with. I like learning new things. I learn new “stuff” every day.

His Building Official had him go to: https://www.atcouncil.org/windspeed/ which finds the design wind speed for any given latitude and longitude in the country. What if you do not know the latitude and longitude? On the same website is information on how to look it up! Technology is so great when it works.  Many thanks to this Building Official for this new “tool” I can add to my internet reference toolbox.

When Building Departments establish design criteria, those are the “minimum” design loads. When it comes to wind, I would recommend everyone use the link above to check their own actual design wind speeds. In the event the speed shown happens to be greater than your Building Department’s requirements, we would strongly recommend using the higher speed.

Many times it costs very little to increase the wind resisting ability of your new pole building. As more buildings fail due to wind, than any other cause, this is not a place to be penny wise and pound foolish.

Why Won’t You Check Design Criteria for Me?

If you had a chance to think over the weekend of why we don’t check Design Criteria for you (see Friday’s Blog), the obvious reason would be “we just don’t know where your building site is”.  This is the “down and dirty” answer.

Ultimately the more specific question clients ask me is, “will you pull my building permit for me?” The easy answer is: No.  Not today and not ever.  Why not?  When I was a building contractor, I didn’t pull permits for folks.  So let me tell you why.  When I say we “don’t know where your site is”, I mean, we don’t know anything about it.

Let’s pretend for a moment I am going to go ahead and get your design criteria along with whatever else is needed to pull a building permit for you. I’ll need to ask a few questions.  Choosing all the “right” questions to ask, of you and your Building Department, could mean the one important question I should have asked, didn’t get asked.  Don’t just assume your Building Department will hand over brochures and a list of helpful information outlining every possibility. Some jurisdictions have great websites, and some I wonder why they even bothered to put one up. And when was it last updated?  I can’t assume anything on a website is 100% up to snuff.  The person behind the county doesn’t memorize all the information specific to your building site.  And while most Planning/Building Departments are great at helping clients, there are a few who leave too much to the imagination.  They expect you (or me) to ask questions before supplying important information.  Some of them just plain don’t understand the building code.  Most Building Departments do not have a registered professional engineer behind the desk.

A few questions for you and eventually your jurisdiction’s planning department.  What are the “set-backs” from streets, alleys, other structures or anything else?  Are there restrictions as to what can be built due to zoning? How about underground septic and sewage systems or other underground utilities? Do you have watershed or wetlands issues?

If a separate department, the Building Department will have more information. Will an engineered soils test be required?  What is your wind exposure?  If you don’t know wind exposure, stand in the center of your property and extend your arms and then turn to all directions.  Is there any direction the wind can blow from where it is not stopped by hills, trees, other buildings? (This is an overly simple explanation of wind exposure by the way). Have you ever had a fire on your property, or near to your property?  Are you in a hurricane zone?  What is your elevation above sea level?

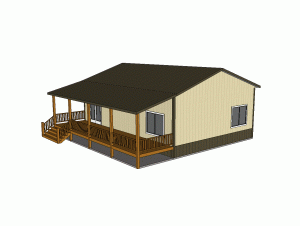
One of the most important considerations to you may be where on the property you are placing your building.  You may be able to deal with your Planning Department on exactly where your building “sits”. You intimately know your own property and the tree your great grandfather planted is just not going to be moved.  I am constantly amazed at pictures of buildings which are emailed to me, and they have a huge tree (or several) very close to the building they just put up.  I am thinking, “It must have been a bear to construct a building with a big ol’ tree right next to the site. Why didn’t they just take the tree down?”  But if the “big ol’ tree” Great Grampa planted is “not going anywhere”, you need to be the one to take this issue up with your local planning department to come up with an agreeable solution.

Why won’t I verify your design criteria or pull your permit?  Because I want to meet you on the street someday and have you smile at me, shake my hand, and we will still be friends.  Your building ended up being what you needed, and better yet, it ended up exactly where you wanted it.  Life comes in a rainbow of colors, not just shades of black and white.

Why Design Criteria are Important

Last October Mr. W of Park County Colorado ordered a new pole building kit package from Hansen Buildings.

Just like every quotation or Invoice we prepare, it lists specifically the “Design Criteria” for his specific building.

Included in this were:

The Building Code and edition (every three years a new edition of the code is published, often with significant changes from the prior edition).

Flat Roof Snow (also known as Pf) – which is calculated by applying a series of factors to the Ground Snow Load (Pg). In some cases, in exception to the way the codes are written, a Pf value is stated by a particular Building Department.

Design Wind Speed in miles per hour (mph) as a three second gust, as well as Wind Exposure.

Allowable Foundation Pressure, as well as the general soils types which the given pressure would be applicable to.

Seismic zone.

Maximum frost depth of this design.

Thermal factor (Ct) and whether the building is heated or unheated. This factor is one of the influencing values in the calculation of Pf from Pg.

Occupancy Category (I, II, III or IV) – each of which corresponds to a factor which will influence the magnitude of snow, wind and seismic forces which the building much be designed to withstand.

Every quote we provide includes this statement directly below the design criteria:

You must confirm all code/design criteria with your Building Department prior to placing your order.

We recommend taking this page to your building department for them to verify all design criteria listed above.”

In ordering the building, the Purchaser must agree to the following as a portion of the terms and conditions:

Purchaser acknowledges verification/confirmation/acceptance of all Building Code, Plan and Design Criteria included on Instant Invoice. Information Purchaser has verified includes, but is not limited to: Applicable Building Code version, Occupancy Category, Ground (Pg) and Flat Roof (Pf) Snow Loads, Roof Snow Exposure Factor (Ce), Thermal Factor (Ct), basic Wind Speed (3 second gust) and Wind Exposure, Allowable Foundation Pressure, Seismic Zone and Maximum Frost Depth, as well as obtaining for Seller any unusual code interpretations, amendments or prescriptive requirements for non-engineered buildings which could affect this structure. If purchase is a non-engineered building, reasonable efforts have been made to assure structural adequacy, however no guarantee or warranty is made or provided by Seller as to whether this design actually meets with any applicable code or structural requirements. The ultimate responsibility for verification rests with Purchaser. Any costs due to changes or requests by Purchaser, Purchaser’s agents, or Building Officials to non-engineered plans will be borne by Purchaser, including any and all of Seller’s staff time for research, or any other reason, even if no changes are ultimately made. Staff time is billable at a minimum of $120 per person hour, with a one hour minimum.


Seller’s designs are all per specified Building Code and include the use of NDS Table 2.3.2 Load Duration Factors (Cd) as well as ASCE 7-05, Eq. 7-2 for slippery surfaces. Seller’s designs rely solely upon occupancy category and structural criteria for and at specified job site address only, which have been provided and/or verified by Purchaser. It is Purchaser’s and only Purchaser’s responsibility to ascertain the design loads utilized in this Agreement meet or exceed the actual dead loads imposed on the structure and the live loads imposed by the local building code or historical climactic records. Purchaser understands Seller and/or Seller’s engineer(s) or agents will NOT be contacting anyone to confirm.


Now if the above sounds harsh, keep in mind, we have provided buildings in all 50 states. There are over 7000 building permit issuing jurisdictions in the country and to keep absolutely current with any and all changes, is an impossible task.

Remember our good friend Mr. W from the beginning of this story? Mr. W’s county has on their website a form to complete, where they will verify the snow load criteria for anyone’s particular piece of property. While a pretty handy tool, it seems Mr. W did not use it.

He ordered a building, which we designed to the loads Mr. W confirmed he had verified. The plans were submitted and a permit to build was issued.

Now Mr. W has his building up and has called for final inspection. The inspector, in the field, notices the trusses are designed for a Pf of 50 psf (which matches what Mr. W ordered as well as the values on the approved plans). The problem…..the site is one where the flat roof snow load should have been 73 psf!

Mr. W now has a beautiful new building, which he cannot use. At least as it is presently built. The ultimate solution is going to involve a significant (as well as costly) repair to the trusses, as well as adding roof purlins between each purlin currently installed on the roof.

This is a case where an ounce of prevention (Mr. W having actually verified his loads as instructed) would have been well worth the pound of cure.

The question we sometimes get is, “why don’t you verify the loads for me?”  Come back Monday and I’ll tell you why.  Until then, think of the reasons we may or may not want to do this for you.

Pole Building Prescriptive Requirements

In a misguided effort to make things “easier” for potential building owners and builders, some Building Departments have prescriptive requirements for non-engineered pole buildings.

This means if someone walks in the Building Department door and wants to construct a pole building, as long as the building owner (or builder) agrees to build to match the prescriptive requirements, they will be issued a structural permit. This is, of course, with the caveat of being able to meet the requirements of other departments, such as Planning.

WHY IS THIS BAD?

Prescriptive requirements are often based upon, “the way things have always been done”, rather than having a basis in the sound fundamentals of structural design. Every three years a new version of the Building Code is published, sometimes with sweeping changes in structural design. Many highly qualified design professionals, including many engineers, are involved in revisions of the Building Code.

A classic example of this came when the International Building Codes were first adopted in 2000. Prior Codes did not have deflection criteria for wall members in those cases where the members did not support a rigid finish (like plaster or gypsum board). The new Code limits the deflection in all cases. In order to meet the new requirements, in many cases, pole building wall girts can no longer be installed “flat” on the outside of the wall columns.

Many times materials are included in the prescriptive requirements which do nothing but cause more work for whoever is doing the actual construction, as well as using materials which either are not necessary, or are larger than what an engineer would have specified.

On occasion, these prescriptive requirements do not actually meet the Building Codes. In my spare time, I have challenged more than one of them and gotten Building Departments to make changes. The prescriptive requirements resulted in a building which was under designed.

The scary part….if you build to prescriptive requirements, and have a collapse, the Building Department is absolved from any structural liability!

THE SOLUTION – IF a Building Department has PRESCRIPTIVE REQUIREMENTS for Pole Buildings – invest in an engineered building kit. It is less expensive to pay for the engineering and it guarantees a building which will be designed to actually meet the building codes.  Your bonus is the sealed plans are your “insurance’ – the engineer is now liable to for the safety and integrity of your new building.

Pole Barn Plans – Goin’ For A Plans Check

Pole Barn Plans – Goin’ For A Plans Check

You did your homework….you have been through the hoops of your local planning department, and they have told you the dream pole building you want can indeed be constructed on your property, where you want it. After their blessing, you have stopped in at the building department and verified all of the required building code and loading information. This has been passed along to your pole building provider, who has given it to their engineers to produce the plans for your building.

Pole Barn Plans

Pole Barn Plans

Finally, plans in hand, you head to apply for your building permit. Somehow, this all feels like waiting for a new baby to arrive. The fears pop up in your head – what if my plans will not pass?

In some cases, building departments have prescriptive requirements for pole barns. This means, as long as your building fits within the dimensional limitations (width, length, height) and you construct the building “their way” you will be issued a structural permit. Some problems with this scenario – rarely are the prescriptive methods the most practical or cost effective way to construct your new building, but even a worse danger may lie hidden within them!

The danger is – often prescriptive requirements have inherent structural deficiencies, some of them enough so as, (under extreme load conditions), your new building could fail.

If your building department has prescriptive requirements, the best solution is to have your new pole building plans produced by a registered professional engineer. The engineer’s seal overrides any prescriptive requirements.

Back to fighting the fears – as long as you have provided the correct code and loading information to the engineer, you will obtain a structural permit for your pole barn.

In some instances, the plans you submit will not be reviewed at all, and a permit will be issued “at the counter”. In most cases, a plans examiner (or plans checker) will look over the plans to make sure the required information is stated on them (correct snow load, wind load, etc.). In many cases, your local building department does not have an engineer on staff. Only in rare circumstances will a design professional be reviewing your plans for structural adequacy. In fact, usually when your building permit is issued it includes a statement which absolves the building department and its staff of any liability, in the event your building fails structurally!

Do your homework in advance and have your pole barn plans produced by a registered design professional, and the process will be relatively painful – other than having to write the check for the permit fees.

Verify, Verify and….Verify! Confirm Local Building Codes

Did I happen to mention verify?

So, you have a problem, or are trying to reach a goal – with the solution being a new building.

Now, with the solution in mind, what to do first?

Call around or shop online to get a price? Wrong answer.

Verify Building Codes

Verify Local Building Codes

The correct answer is to visit your planning and building departments to confirm local building codes, as well as what design criteria are to be followed.

Doing anything else, can end up burning up time for you, as well as anyone quoting your proposed project, besides leaving everyone with hurt feelings.

Every client who orders a new pole building from Hansen Buildings does so with these verification requirements:

“Purchaser acknowledges verification/confirmation/acceptance of all Building Code, Plan and Design Criteria included on Instant Invoice. Information Purchaser has verified includes, but is not limited to: Applicable Building Code version, Occupancy Category, Ground (Pg) and Flat Roof (Pf) Snow Loads, Roof Snow Exposure Factor (Ce), Thermal Factor (Ct), basic Wind Speed (3 second gust) and Wind Exposure, Allowable Foundation Pressure, Seismic Zone and Maximum Frost Depth, as well as obtaining for Seller any unusual code interpretations, amendments or prescriptive requirements for non-engineered buildings which could affect this structure.”

“Seller’s designs are all per specified Building Code and include the use of NDS Table 2.3.2 Load Duration Factors (Cd) as well as ASCE 7-05, Eq. 7-2 for slippery surfaces. Seller’s designs rely solely upon occupancy category and structural criteria for and at specified job site address only, which have been provided and/or verified by Purchaser. It is Purchaser’s and only Purchaser’s responsibility to ascertain the design loads utilized in this Agreement meet or exceed the actual dead loads imposed on the structure and the live loads imposed by the local building code or historical climactic records. Purchaser understands Seller and/or Seller’s engineer(s) or agents will NOT be contacting anyone to confirm.”

Sound like a lot of mumbo jumbo?  Not really – read on to find out how to make this simple.  And save yourself a lot of grief when you order a new building – of any kind!

We have a client who ordered his building in May under these very same requirements. The client confirmed they read and understood all of them when the order was placed.

Our engineer did his job, producing plans and calculations for the client, based upon the information client agreed to verify.

This morning client went in to apply for his building permit. The Building Official loved the engineered plans.  However the incorrect code version was on them (their jurisdiction has gone from a 2003 to a 2007 version) and the ground snow load on the design was 70 pounds per square foot (psf), and at client’s site it actually needed to be 105 psf! In the client’s particular state, for every 100 feet the site is above sea level, the ground snow load is to be increased by 2 psf, above the basic map values.

Client is not happy – and we are none too pleased.  We now have an unhappy customer before we have even shipped his pole building kit.  Added to this, redoing his plans is like starting all over for us.  And the fees we require don’t begin to cover the hassles of making all the changes.

However the onus for verification IS on him.

Now, why is it we or our engineer would not verify for the customer?

Here are some actual circumstances for past projects:

  1. A client gave an incorrect address for building site, resulting in wrong loads.
  2. We (or our engineer) have no way of knowing the actual elevation of where the building is to be situated. At times, a relatively small parcel of land can have hundreds of feet of elevation change (case in point – my own home is on a lot 60’ x 225’ with nearly 300 feet of grade change).
  3. County is contacted to confirm loads for an address, which they do. When client goes to apply for building permit, they find their address has been annexed by a nearby city (clients were sure surprised). The bad part – the “new” city was operating under an older version of the code and (even though entirely surrounded by the county) was using much higher snow load requirements.

According to Ben Franklin, “An ounce of prevention is worth a pound of cure”.

In all fairness to yourself and those, like us, who are trying to assist you in meeting your goals…..do your advanced verifications with your city or county’s Planning Department – confirm the local building codes and everyone will be far happier!