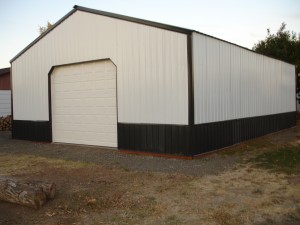
Why Your New Barndominium Should Be Post Frame
For those who follow me – you know I am all about people loving their end results. As long as one has a fully engineered building they love, I couldn’t be more pleased, regardless of the structural system.
In My Humble Opinion – fully engineered post frame buildings are your best design solution in nearly every case. My exception would be if one desires a clearspan over 80′ or a very low slope roof – then I would recommend PEMB (red iron).
PEMBs do have some of their own unique challenges – a foundation engineer must be hired, they take lots of concrete and foundation bolts must be precision placed, Requires heavy lifting equipment to erect, when shell is done – have to frame a house inside. Thermal bridging is a concern and how does one hide those big steel frames?
But, what about stick frame?
 Perhaps stick built construction’s biggest advantage is builders and tradespeople are very comfortable working in and around stick framing. All registered architects and most building inspectors are very familiar with stick framing. International Residential Code (IRC) provides a prescriptive ‘cook book’ to follow for adequate structural assembly, within certain limitations. These limitations include, but are not limited to, no story height of greater than 11 feet 7 inches (R301.3), no hurricane prone areas with a design wind speed of 130 mph or greater located south of Virginia, or 140 mph elsewhere (R301.2(5)B), and no ground snow loads over 70 psf (R301.2.3).
IRC802.10.2.1 further limits truss spans to a maximum of 36 feet and building lengths to 60 feet (measured perpendicular to truss span). Trussed roof slopes must be at least 3:12 and no greater than 12:12.
Want a 40’ x 72’ x 14’ shop/house barndominium? Sorry, outside of what IRC allows.
And because IRC tables cover up to a worst case scenario (given maximum design parameters), it creates overkill, wastefulness and redundant framing members. Translated to – it takes more pieces than might be necessary in a fully engineered structural system.
Fully engineered post frame buildings include foundation plans, PEMBs require one to hire another engineer to provide foundation design. Plan upon a grand or more just for PEMB foundation engineering and this can quickly escalate should a Geotechnical Engineer need to perform soils testing.
Post frame does not require precision placed anchor bolts, and requires no use of cutting torches or welding.
Post frame requires minimal concrete to resist settling, overturning and uplift. Any slabs on grade do not need to be thickened or have continuous footings/foundations.
Post frame can be erected D-I-Y without a need for heavy equipment (although I do appreciate a skid steer with an auger to dig holes). Any physically able bodied person, who can and will read step-by-step instructions can successfully erect their own beautiful post frame building.
Post frame has no highly conductive steel frames to thermally isolate and attempt to conceal.
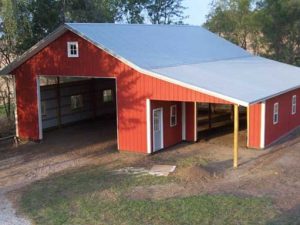
Post frame is easily adaptable to more complex rooflines, and can be done in any combination of alphabet letter shapes. Fully engineered post frame can easily be erected over crawl spaces as well as full, partial or walkout basements.
When properly designed (with bookshelf wall girts), exterior walls are ready for wiring, insulation and interior finishes – no need to frame a home inside of a building shell.
Post frame provides deep wall insulation cavities and with raised heel trusses, any depth of attic insulation can be blown in above a finished ceiling.
Post frame can readily be done multi-story, with up to 40′ sidewalls and three stories (or 50′ and four stories with fire suppression sprinklers).
 Starting with your door end (which I will assume is uphill), I would add enough fill so this end could have holes dug to 40″, filling balance of site accordingly. All fill should be compacted in no less than six-inch lifts to a minimum of 90% of Modified Proctor Density (you may need to invest in a Geotechnical Engineer to verify compaction).
 My own particular site was once shallow lake bottom – probably closest to silty clay. In order to build upon it, we removed several feet of native soil, then built the site up using roughly five feet of compactable fill, in lifts of no greater than six inches. Exterior was graded to slope away from the building for 10 or more feet at a 5% or greater grade. As the site has a natural grade from left rear to front right, we should have also added french drains along left sidewall and rear endwall to divert underground water flow (although we have not experienced challenges with this over nearly 20 years of service). We used glu-laminated columns, embedded in ground, with concrete bottom collars and have had no column deterioration or movement problems.
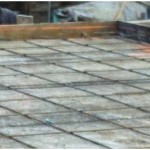 For slab reinforcement, necessary rebar can usually be obtained from a big box store (like The Home Depot®) or your local building supply. Should your specific application be more involved, it may behoove having a fabricator supply rebar. A fabrication supplier can review your building’s engineered drawings and produce a shop drawing with details and identifying tags for each type of rebar to be used in your building. For simpler projects, your building plans should provide spacing requirements and bar sizes. Use these documents to determine where and what rebar is needed in individual locations.
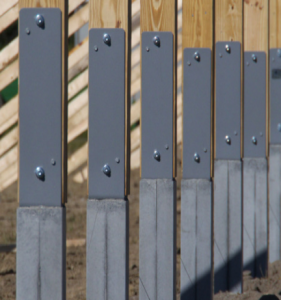
 My recommendation – invest in engineered plans. It becomes an assurance a registered design professional has verified your building will meet Code mandated loading requirements. In some cases, insurance companies offer discounts for buildings designed by an engineer. It’s certainly worth asking your agent for one!
 Your Building Department wants an engineered soils report for your site, not an unusual request in much of Colorado, as there are some fairly unstable soils. You will need to contact a Registered Professional Engineer in your area who specializes in geotechnical work (Google – Geotechnical Engineers near me). They will visit your site and do an analysis to determine if it is even capable of being built upon. With this report in hand you can then take this soils report and your proposed building plans to yet another RDP (Registered Design Professional – architect or engineer) who can prepare a set of sealed drawings for your building. “Truss report” being asked for are engineer sealed drawings for prefabricated trusses you will be utilizing to support your building’s roof. You will need to provide your RDP sealed plans to your choice of truss providers, so they can design trusses adequate to support loads detailed within your sealed plans.


