Post Footing and Site Leveling
Reader KEVIN in PAOLA writes:
“I’ve been working with Cory on my building design and had a question regarding leveling my site and setting my posts. The plan is a 40′ x 60′ building with a 17′ eave height. On the south side, there will be a 12′ attached shed that is open. Based on the elevations I’ve shot, I’ll have to add approximately 4′ of fill on the east end of the building and it gradually tapers all the way to the west end. Now, rock on the property is rather shallow. I dug a test hole on the east end which will require the most fill and the rock is about 2′ below native ground level. I’ve encountered solid limestone that is approximately 2′ thick when digging corner posts and I’ve found locations where the rock is fractured and can be dug out with an excavator. The county requires poles be installed at a minimum depth of 4′, but will allow 30″-40″ if due to rock and if the holes are backfilled with concrete.
· How would you design the foundation for the poles?
· Does the 4′ of backfill count when measuring post embedment?
· Would you set the posts first and then add the fill?
· Do you change post foundation design as you move from the deeper fill for elevation on the east end to fill on the west end that is replacing the top soil?
· Does the post foundation design change for the open shed on the south side?
I’m attaching the design doc from the county. Foundation information is listed on pages 8 and 9.
I hope all of this makes sense and thank you for the help.”
Thank you for reaching out to me. With your permission, I would like to treat your building as if it was my own (in other words, What Would the Pole Barn Guru Do?).
 Starting with your door end (which I will assume is uphill), I would add enough fill so this end could have holes dug to 40″, filling balance of site accordingly. All fill should be compacted in no less than six-inch lifts to a minimum of 90% of Modified Proctor Density (you may need to invest in a Geotechnical Engineer to verify compaction).
Foundation would be embedded columns to 40″ depth and would be same for all areas (our engineers will seal holes at 40″ depth) Properly compacted fill can be relied upon to be equal to undisturbed soil Fill first – it is so much easier than trying to work around columns.
On door end, you will want to grade away from doors, so water coming down hill does not end up running into your building.
 Most post frame buildings have shells erected then slab poured, so this should not be an issue. A pressure preservative treated splash plank should be in place around this building’s perimeter. It will become forms for your slab. Snap a chalk line on the inside of splash planks up 3-1/2″ from bottom, this will be top of your slab.
  Contrary to popular opinion, there’s more than one type of gravel and selecting proper size and style is crucial to project success. One most commonly used and versatile type of gravel is #57 crushed.
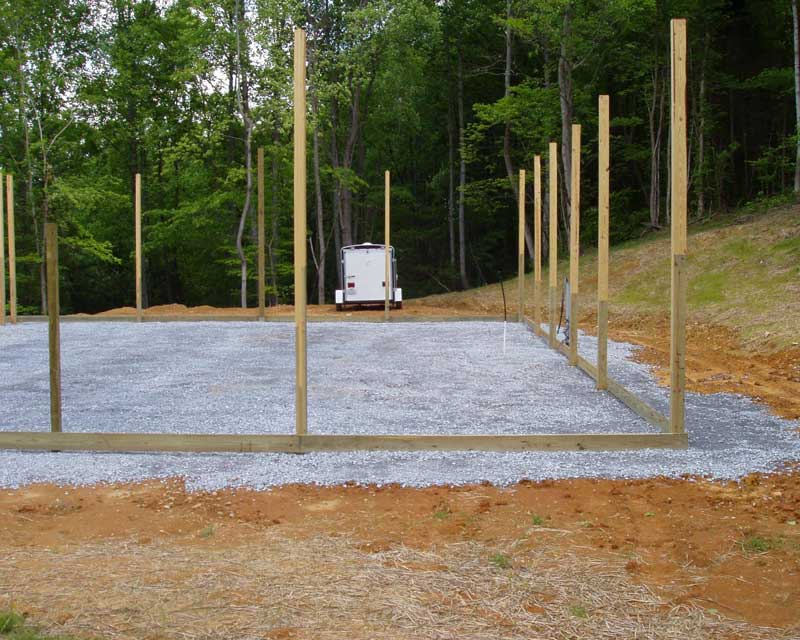 At a minimum, site preparation includes:


