This is day two in several where I am discussing all kinds of issues with site preparation, mostly what to do with the…dirt.
So what actually is soil? Soil is formed in place or deposited by various forces of nature – such as glaciers, wind, lakes and rivers – residually or organically. The important elements in soil compaction are soil type, soil moisture content and compaction effort required.
There are five principle reasons to compact soil: to increase load-bearing capacity, prevent soil settlement and frost damage, provide stability, reduce water seepage, swelling and contraction and reduce settling of soil.
 The Leaning Tower of Pisa would have benefited from a soils engineer and a soil compaction test. The tower was in trouble before it was even finished. after the tower reached its third floor construction in 1178, they had to stop the work as the structure started to sink in the ground. This was due to weak and unstable soil where the foundation was being constructed. The work was halted for almost 90 years after that. The halt in the construction gave time for the soil to settle; otherwise the tower would’ve definitely collapsed. As there was a tilt in the building, the engineers had to build the next 4 floors, with one side taller than the other. Thus it manipulated the tower to lean in the opposite direction.
Soil can be compacted by vibration, impact, kneading or pressure. These different compaction efforts can be accomplished by the main types of compaction force, static or vibratory.
Static force is simply the deadweight of the machine, applying downward force on the soil surface, compressing the soil particles. The only way to change the effective compaction force is by adding or subtracting the weight of the machine. Static compaction is confined to upper soil layers and is limited to any appreciable depth. Kneading and pressure are two examples of static compaction.
Vibratory force uses a mechanism, usually engine-driven, to create a downward force in addition to the machine’s static weight. The vibrating mechanism is usually a rotating eccentric weight or piston/spring combination (in rammers). The compactors deliver a rapid sequence of blows (impacts) to the surface, thereby affecting the top layers as well as deeper layers. Vibration moves through the material, setting particles in motion and moving them closer together for the highest density possible. Based on the materials being compacted, a certain amount of force must be used to overcome the cohesive nature of particular particles.
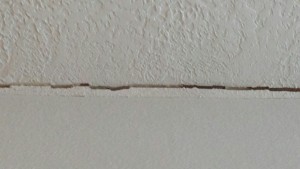
Poor, improper or no compaction can result in concrete slab cracks or frost heaves, foundation erosion and/or building settling. Proper compaction can ensure a longer structural life.
Every soil type behaves differently with respect to maximum density and optimum moisture. Therefore, each soil type has its own unique requirements and controls both in the field and for testing purposes. Soil types are commonly classified by grain size, determined by passing the soil through a series of sieves to screen or separate the different grain sizes. Soils found in nature are almost always a combination of soil types. A well-graded soil consists of a wide range of particle sizes with the smaller particles filling voids between larger particles. The result is a dense structure which lends itself well to compaction. A soil’s makeup determines the best compaction method to use. There are three basic soil groups: cohesive, granular and organic. Organic soils are not suitable for compaction.
Cohesive soils, such as clays or silts have the smallest particles. Cohesive soils are dense and tightly bound together by molecular attraction. They are plastic when wet and can be molded, but become very hard when dry. Cohesive soils feel smooth and greasy when rubbed between fingers. Clay soils are less than ideal to construct your new pole building upon and should be removed and replaced.
Granular soils range in particle size from .003″ to .08″ (sand) and .08″ to 1.0″ (fine to medium gravel). Granular soils are known for their water-draining properties. Sand and gravel obtain maximum density in either a fully dry or saturated state. Granular soils feel gritty when rubbed between fingers. When water and granular soils are shaken in the palm of your hand, they will mix, when shaking stops, they will separate. When dry, a soil sample will crumble.
Gravel and sand can be compacted either by vibration (using a vibrating plate compactor, vibrating roller or vibrating sheepsfoot) or kneading with pressure (using a scraper, rubber tired roller, loader or grid roller). Both are good to excellent in terms of foundation support and as a subgrade. They are easy to compact and are not expansive (expansive soils tend to be prone to frost heave issues).
Whew! That’s a mouthful and then some in talking about compaction. Too bad the contractors working on the Leaning Tower of Pisa didn’t know all of this! The good news is, in 1990 efforts were made to correct the angle from 5.5 degrees to 3.99 degrees, and engineers have determined it stopped sinking since about 2008 and will continue to be stable for another 200 plus years. If I ever get the chance to see it (my bride is determined we will!), I’ll be sure to have my picture taken outside…with my feet planted firmly on the ground
 Having a barndominium built? You may anticipate a few things going wrong, but you’d expect your builder to erect your house on solid ground, right? Don’t be so sure.
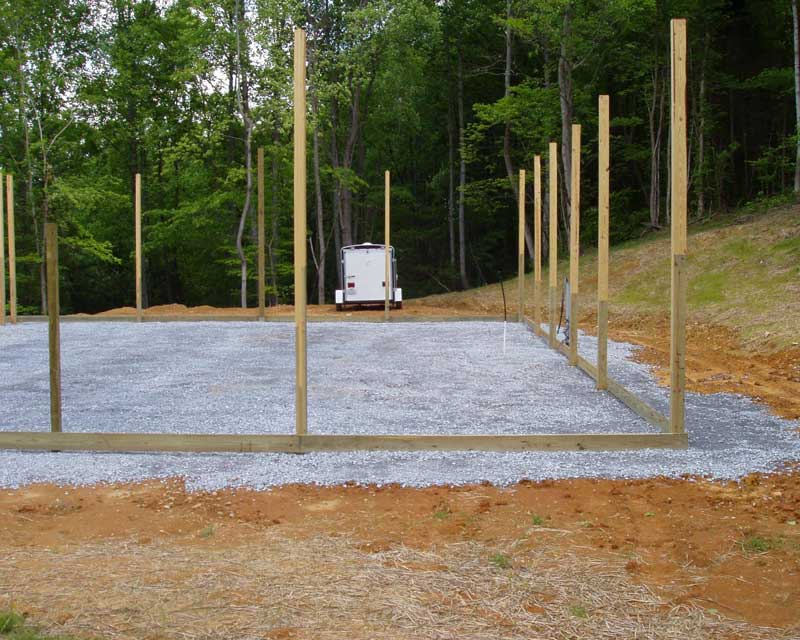 At a minimum, site preparation includes:
 This week, students installed engineered wood structural beams onto posts that will be supporting the roof trusses of the building. They are learning how to set up and move scaffolding platforms and accurately measure, mark, then cut the beams with saws and fasten beams in place with nail guns. This provides experience working from elevated platforms and the use of some of the most common tools used in framing carpentry.
 In your property purchase you have inherited someone else’s lack of planning which has become your problem. The great majority of frost heave potential can initially be solved by proper site preparation – and your building is fairly obviously not on a properly prepared site.


