Hansen Building has seen a recent uptick in structure over crawl spaces and thought it would be wise to revisit this guest blog post.
11 Reasons Why Barndominium Crawl Space Encapsulation is Important
 Today’s Guest Contributor is Joseph Bryson. Joseph was born in Alberta, raised in NYC and is living in New Zealand. He has been working in 4 different industries and helped numerous businesses grow. Now, he is focused on writing as his next career from home and lives a peaceful life with his family and a whole pack of dogs.
No matter what kind of a barndominium you will have, if there is a crawl space present then it can potentially cause you a whole host of problems. People tend not to realize this because they don’t think too much about crawl spaces.
Like it’s not a place people generally venture to in their own homes. It’s just down there beneath your elevated wood floor, out of sight and out of mind. And so various issues can arise in your house you don’t know how to fix because you don’t realize they’re originating in your crawl space.
In a post-frame building, crawl spaces are set up a little bit different. Instead of having a perimeter of concrete and a concrete slab, it is instead a wooden framework on short pressure preservative treated timber or glu-laminated columns.
It’s a style of crawl space allowing for much better access to plumbing, ventilation ducts and electrical wiring, but without a concrete slab. It also makes it somewhat more susceptible to some of these problems.
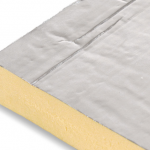
This leads us to crawl space encapsulation creating an unvented crawl space. A process involving installing a vapor barrier in your crawl space to cover ground, walls and seal up all vents and seams. Air is then conditioned using a humidifier or HVAC system.
International Residential Code (IRC) R408.3 addresses unvented crawl spaces. Exposed earth is covered with a continuous Class I vapor retarder. Vapor retarder joints shall overlap at least six inches and be sealed or taped. In post frame buildings, this vapor retarder must extend up perimeter walls to floor level and be attached and sealed to floor. One of four possible options outlined in IRC R408.3(2) must also be met.
Let’s have a look at what issues a crawl space encapsulation will help to prevent and why it’s so beneficial:
- Controls Pests
One very important thing you’ll be doing by sealing up all openings is removing access to your crawl space for a wide variety of pests. You can get mice, rats, cockroaches, racoons and even birds have been known to find their way into crawl spaces.
Once pests find their way in, it can be a nightmare getting them out but an encapsulated crawl space removes a primary entry point for pests so you would be reducing possibilities significantly.
Roaches can be disastrous for a wooden framework and so you should be very serious about keeping them out of your crawl space and your home in general.
- Improves Air Quality
Because air coming up through your crawl space will be going through HVAC or a humidifier, you can rest assured it will be much higher quality than if it was just blowing in unfiltered. A crawl space is a hot bed for low quality air, but not if it’s encapsulated.
- Allows for Better Energy Efficiency
One thing you will probably notice after encapsulation is your energy bills will be lower. Your heating and air conditioning won’t have to struggle against crawl space damp air, meaning they’ll be doing less work.
And this will of course result in you having to spend less on utilities. While encapsulation might cost a bit, it is Code required and will be financially beneficial over time.
- Keeps Floors Warm
As we just mentioned, the normal state for a crawl space is to be full of damp air. It’s exposed to elements and especially during winter months, this just means there’s consistent moisture and low temperatures blowing through.
All of this is prevented with encapsulation meaning the only thing rising from below will be heat. And while it won’t necessarily be equivalent to under floor heating as such, it will make floors more warm and comfortable to walk on, especially in a post-frame home where there isn’t concrete separating heat from floors.
- Prevents Mold
Mold is very problematic. For some people it’s just an irritant causing things like coughing, sneezing and sore throats, but it can also be toxic if left to grow for too long. And for anyone with a compromised immune system or who suffers from asthma, it’s dangerous.
Mold and mildew are further consequences of dampness and moisture retention and most crawl spaces are full of it. It’s much more likely to build up on wood than it is on concrete meaning this is more common in wood frame structures.
- Improves Storage
Not everyone opts for using their crawl space for storage, even after it’s been encapsulated, but it can be done. If your encapsulation is neat, you should definitely have some room down there to store a few boxes.
If you did this with an unencapsulated crawl space, then anything you store could be potentially damaged by moisture or mold. So it’s basically a really safe storage space once encapsulated.
- Prevents Flooding
I’ll start this point by saying crawl space encapsulation doesn’t necessarily prevent floods entirely, but it can help in a lot of cases. Excess rainwater and runoff can build up down below and can result in flooding, but not if everything is sealed and blocked up.
Flooding takes a much greater toll on wood than it does concrete and although your post-frame home will be sturdy by design, too much water over time could do some serious damage.
- Protects Structural Integrity
If left for long periods of time without intervention, moisture and mold will slowly eat away at untreated wood under your home. This will eventually destroy structural integrity and you won’t have any idea it’s happening because it takes so long.
Just another reason why you should be slowing down, or entirely stopping mold growth and retention of moisture.
- Keeps Allergens at Bay
Spread of allergens is primarily caused by moisture and dust. We’ve discussed to death how moisture is controlled by encapsulation, but because air coming through is unfiltered, dust shouldn’t be a problem either so if you’re prone to allergies you will benefit.
- Can be Done Without Professional Help
Key word here is ‘can’. Crawl space encapsulation can be done without professional help. Before hiring a professional it’s worth looking into how you would do it yourself.
If you have an interest in DIY and are particularly adept at this type of handiwork, you could for sure give this a try. Again, not everyone will be up to this task, but if you are then it will save a lot of money.
- Enhances Longevity of Your Home
With all of these different things considered, it’s clear crawl space encapsulation will help make sure your barndominium is in livable condition for a long, long time. Every issue we’ve discussed here will gradually build up until it becomes potentially disastrous.
Crawl space encapsulation is a big job, but fairly easily accomplished DIY.
 Air spaces within wall cavities act as conduits for convective loops, where warm air from interior is replaced by cold air from outside or unconditioned zones. This circulation bypasses intended performance of insulation materials, effectively short-circuiting thermal envelope and forcing heating or cooling systems to work significantly harder to maintain stable temperatures. Convective air currents moving within a wall assembly can render high-quality insulation nearly useless by providing a path for heat to travel around material. Unsealed electrical boxes and plumbing penetrations frequently serve as entry points for these currents, creating localized drafts often misidentified as insulation thickness problems. Increased moisture risk occurs because these circulating air loops transport water vapor from warm interior finishes to cold exterior surfaces, where it condenses into liquid water.

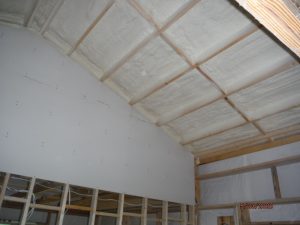
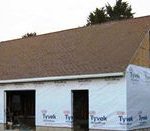 Unless you are going to have HVAC provisions to dry the inside of your heated shop space, you want to dry your space to the exterior . As such, you should have a WRB (like Tyvek) on your shop exterior, then either unfaced batts with 6mil poly on inside, or kraft faced batts. Your ceiling insulation should be unfaced without a vapor barrier. You will probably want to have some sort of exterior sheathing or other barrier to keep rodents from nesting in your insulation. In answer to where Reflectix should go – probably not on this space you are creating.
 DEAR POLE BARN GURU: Can fireplaces be added to your barndos? DARLENE in FROST
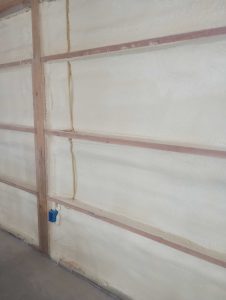
 Using two inches of closed cell spray foam directly inside steel siding panels not only air seals exterior walls, as it is an effective vapor barrier, but also provides approximately a R-14 level of insulation. Effective applications also require installing form fitted inside closure strips at top and bottom of every wall steel panel – including window and door openings. Closure strips keep spray foam in your walls rather than oozing out and keeps small crawling and flying critters out.
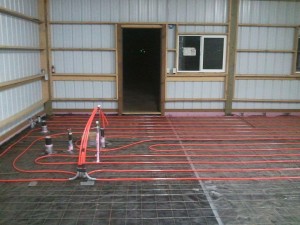 When placing under slab vapor barriers, run up inside of pressure preservative treated splash planks and sealing to top and around columns. Install seal gasket under pressure treated base plate (mud sill) and caulk inside edge to concrete slab.
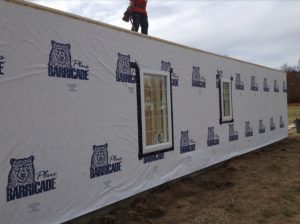 Without a well-sealed high qualify Weather Resistant Barrier (building wrap) between framing and siding, humidity inside wall will follow along with exterior relative humidity to a large extent.
 If you are adding rigid foam boards, in Climate Zone 5, you should have no less than R-20 (IRC Table 806.5) in order to prevent condensation. Once you have installed R-20 (or more) is where your air sealing should occur to create an air impermeable surface. Any added insulation below this should be air permeable (like Rockwool batts) and remain unfaced without a vapor retarder or barrier below.
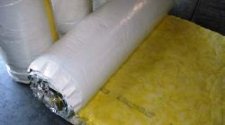 DEAR MARK: You are now finding one of many “joys” of using vinyl backed metal building insulation. You will want to read my personal metal building insulation story:
  DEAR RON: Problem #1 is dry set (bolted) brackets are not rated for moment (bending) forces, unlike wet set brackets. This becomes problematic, especially in areas of high wind.
 Best guess is it is coming from your concrete slab – either moisture from it being poured has not fully exited or (and more likely) there is not an adequate vapor barrier under it.
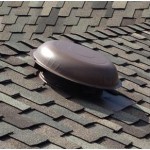 DEAR POLE BARN GURU: We have a pole barn it was purposely built to have an apartment upstairs; it originally was a stable below. It’s all living quarters now. We have had issues with the steel roof. We are switching to class 4 shingles. The building has no eaves as it has porches off both sides. We are working with a roofer. They are suggesting we use some ridged vent at the lower edge of the roof, by cutting a notch in the edge and installing it under the shingles and decking. That’s my understanding. Also, it will have a full ridge vent. The steel was applied on decking with tar paper under it. We have had leaking and condensation with it, as it is. Just wondering if you have any other ideas, or if the ridged vent at the lower edge of the roof will be a problem? It has 16″ deep trusses with blown in insulations above the sheet rock ceiling. Thanks for any input or ideas. JENNENE in RAPID CITY
 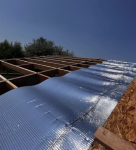 DEAR JUSTIN: In most instances a reflective radiant barrier is a waste of your hard- earned dollars. They can be (when properly sealed) an excellent vapor barrier, however using a perforated product takes away even this as a possible benefit. Walls – from out to in…. Siding, Omnidirectional housewrap over bookshelf wall girts, fill entire cavity with Rockwool insulation batts, well-sealed clear poly vapor barrier, interior finish. Roof – Order raised heel trusses (at least an inch taller heel than depth of blown in fiberglass (not cellulose) insulation). Order roof steel with an Integral Condensation Control factory applied. Vent eaves and ridge in correct proportions. No ceiling vapor barrier.
 DEAR POLE BARN GURU: I have an existing pole barn on property that I would like to insulate. I would like to steer away from spray foam but am worried as there is no Tyvek or vapor barrier on external side. What are my best options to void off any moisture issues and create a well insulated wall. JAMES in LAKE VILLAGE
  DEAR POLE BARN GURU: I built one of your barns (project 24-0503F). It’s 36 x 48, so has 4, 12′ bays. 3 of the bays will have a ceiling, so the ceiling will be insulated. The remaining bay will remain open with no ceiling. How do I insulate the roof of the open bay? It has 2×6 purlins on edge. As the purlins run parallel to the soffit vent, they block off air flow from the soffit to ridge vent. Does this air flow need to be maintained, or just insulate the purlin bays and finish off the underside of the purlins? Thanks in advance. TROY in HONEOYE FALLS
  DEAR TOM: Indeed, where you are there are less than 8000 degree days.
 DEAR POLE BARN GURU: What gauge metal do you use? JIM in AMSTERDAM
  DEAR POLE BARN GURU: If I have a manufactured home that has been bricked in all around can I add a Pole Barn Home onto it? EDWARD in TENNILLE
  DEAR POLE BARN GURU: How many bedrooms will fit in your largest residential barndominium. Thinking about using it as a dorm-type or assisted living. PHILLIP
  DEAR NICK: Properly pressure preservative treated columns (UC-4B) should outlast anyone alive on our planet today, especially in climates (such as yours) not prone to termite infestations. As for improving ability to heat – dig a trench around outside of building at least two feet wide and two feet deep. Invest in 2′ x 8′ (or 4′ x 8′ to be cut in half lengthwise), R-10 EPS insulation boards. Attach vertically to exterior side of pressure treated splash plank with top of insulation even with top of interior concrete slab. Run another 2′ horizontally out away from building at bottom of vertical. Any portion of vertical insulation above backfill will need to be protected from UV rays. This should keep your slab from getting so cold, as well as help to avoid frost heave. If you are in an area prone to burrowing rodents, you should further protect insulation
 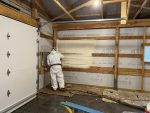 DEAR POLE BARN GURU: I am trying to decide whether to go with open cell or closed cell spray foam on my bare metal pole barn walls. I will be enclosing the walls with some material, most likely plywood. What are your opinions regarding the pros/cons (is one or the other worse for corrosion, condensation, other pertinent factors, etc.) of the two foam approaches? Thanks so much! TERRI in CHESTER
  DEAR CHRIS: If your existing pole building was indeed built for commercial use, then it should be in Risk Category II for wind, snow and seismic loads – same as residential. You will want to ascertain if roof trusses were fabricated to an adequate bottom chord (ceiling) dead load to support your choice of interior finishes. Typically you will want to see a 10 psf (pounds per square foot) load to support sheetrock. You will want to examine truss drawings prior owner should have. If these are not available, reach out to your local permit issuing authority, as many jurisdictions now have digitally archived plans and specifications. Another source would be whomever fabricated your trusses. Each truss should have a quality control stamp with fabricator’s name on it. Contact them, with your site address and approximate year built and they may be able to assist you. Worst case is you should be able to pay fabricator to send a representative out to gather specifics of your trusses (web configuration, lumber dimensions and grade, steel connector plate sizes). They can run it on their computer program to determine adequacy. If a structural repair is required for an upgrade, for a nominal fee, they should be able to provide.
 DEAR POLE BARN GURU: I am a little confused on this vapor barrier situation as some say yes and some say no. I am building a residence in Missouri. Metal roof with reflective bubble wrap radiant barrier. I have Soffit venting with a thermostat controlled ventilation fan in one gable end. Is vapor barrier needed when attaching metal to bottom of trusses when using R38 blown in fiberglass. RANDY in MISSOURI
  DEAR HECTOR: In “frost country” a sub-base 6” or thicker should be first placed across site. To maintain frost-free soils sub-base should be such as no more than 5% (by weight) will pass through a No. 200 sieve, and it is further desired no more than 2% be finer than .02 mm.
 DEAR MICHAEL: When installing drywall panels between walls and ceilings, it’s generally recommended to butt them tightly against each other without leaving a gap. This approach minimizes the amount of joint compound (mud) needed and helps create a smoother finish. Leaving gaps can lead to issues such as cracking, as the mud may shrink and not adhere properly. I spent a summer taping drywall as a teenager, and this is exactly how we were trained. Here is some extended reading:
  Commonly (when addressed at all during construction) solutions to this problem have often involved creating a thermal break. A thermal break reduces contact between a structure’s warm interior air and cooler metal roofing, thereby reducing or eliminating overall condensation. Installing a reflective radiant barrier, often termed Vapor Barrier, involves laying rolls of faced ‘bubble wrap’ across your building’s purlins prior to roof steel installation. Ideal weather conditions are required for this as even a slight wind can make this a challenging or altogether impossible task. This can cause jobsite delays and may bring progress to a halt while a structure remains unprotected to weather. Even when ideal weather conditions are present, installing a reflective radiant barrier can be a very dangerous task, requiring builders to expose themselves to awkward material handling on a building’s bare roof framing. These risks and delays often generate additional costs for both owners and builders, but have often been necessary with reflective radiant barrier being the only relatively affordable option to prevent interior dripping.
 DEAR POLE BARN GURU: I have a 1000sf metal building with Galvalume roof (on 2×10 purlins, no deck) built in 1999 with gasketed nails. I’m experiencing some small leaks from some of the nails. The metal is still good. Do you know someone that can replace the nails with screws, approximately 800. MIKE in CINCINNATI
 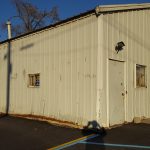 DEAR POLE BARN GURU: The bottom 3′ of our metal sided maintenance shop has been rusted out by salt. Do you know of an organization that could replace the bottom sections? MARK in ROCHESTER
  DEAR POLE BARN GURU: Hello Mike, Our monitor style home has been designed by your staff and we are putting together financing and logistics details edging closer to ordering our materials package. Still a bunch of questions to ask of the Guru. We will be using an AIB under the steel siding with rockwool insulation in the cavities. I believe we will need a vapor barrier on the inside. I will be working alone on a lot of this construction and don’t look forward to wrestling with plastic sheeting for our vapor barrier. I would like to use a rigid insulation board such as r-tech or r-max with taped seams to accomplish this. I’m thinking it will much easier to seal electrical boxes and such with something rigid. What’s your take on this approach? Do you feel it is a safe and effective way to accomplish this? Thanks as always for your great information! RUSS in TILGHMAN
 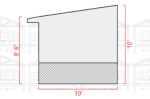 DEAR POLE BARN GURU: I purchased a 24′ x 36′ pole barn from Hansen in 2016. I has an 8′ lean-to on one eave side making its total dimensions 32 x 36. I would like to add a 10′ enclosed lean-to on the other eave side. Since my building is one of yours, can you design and price it with the same siding colors and account for snow load and the pitch of the new roof? KEVIN in FORT WAYNE


 “Greetings I’m writing to discuss the best practice for what to place under a metal roof. I am building a post frame, for shop use and will eventually be insulted. I had initially intended to install a WRB, like Tyvek, under the sheet metal roof. My thought was that the inside of the shop will have a vapor barrier and insulation, thus the warm air would not come in contact with the steel and create condensation. Is this thinking flawed?”
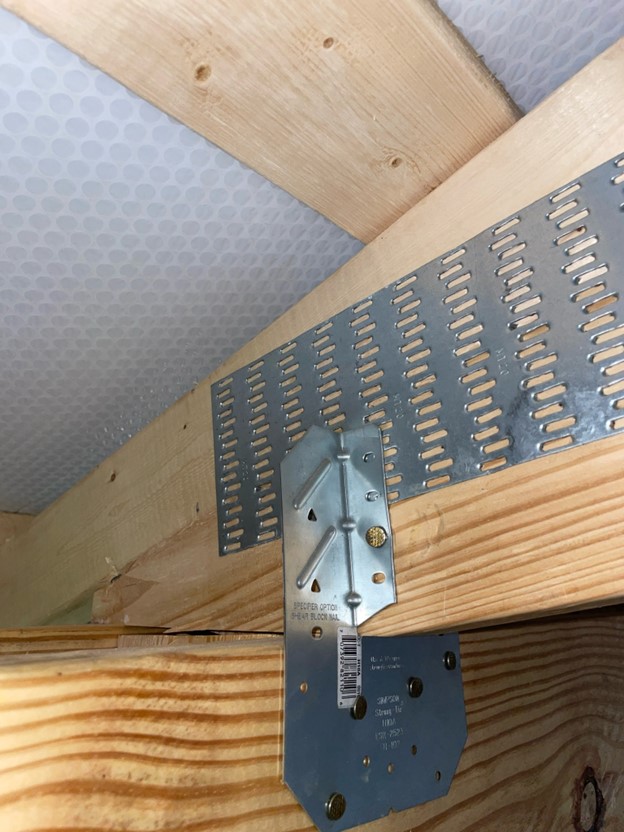
  DEAR CHAD: ACQ is highly problematic as, if water is added to the connection, a chemical reaction is created literally “eating” steel. This was found to be a huge issue with deck construction. Code requirement would be for HDG (hot dipped galvanized) fasteners into pressure preservative treated lumber. We would recommend Simpson SDWS screws (it is what we provide for all of our buildings).
 DEAR POLE BARN GURU: I am looking to build a 20ft x 24ft pole barn garage. The footings are going to be drilled and filled with concrete now, with the structure being completed at a future date. My city engineer requires 30″ deep footings. He was not able to say for sure what diameter footing I needed to drill. Do you have any insight to what diameter footing I should expect to need for this size structure? JOE in CINCINNATI
  DEAR POLE BARN GURU: I was fortunate to have acquired enough columns for a building. My question as these are not ground contact columns and I prefer at this time to not pour a concrete floor is it allowable to pour a perimeter of concrete ( 2’x2′,3’x2′?) thickened edge if you will and set the columns to keep them off the ground? I was thinking partially setting rebar perpendicular in the concrete leaving 1-2′ protruding towards the buildings center to tie a future slab possibility into what would be the existing edge ( foundation). This is a cost driven situation as you may have already surmised. Really appreciate your knowledge and time. RICK in TWO RIVERS

 DEAR ROBERT: All of these recommendations are based upon meeting energy code requirements for conditioned buildings. Washington State will be a stickler for these.
 DEAR POLE BARN GURU: What size posts should be used for 30′ x 40′ x 10 with 6/12 pitch in southern lower Michigan??? Storage/ garage / shop. STEVE in MARSHALL
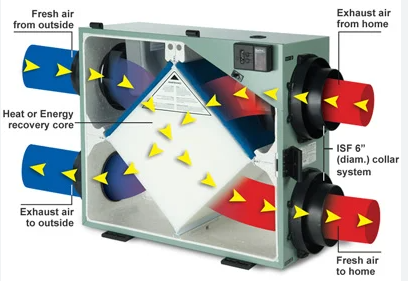
 “I read your blog often and I truly appreciate the wealth of knowledge you openly share. I am in the process of starting construction on a hybrid steel shop that will house a small apartment that the wife and I will move into once its finished. We will sell our current home and then build a smaller house adjacent to the shop. 50 X 80 with 24′ wide mezzanine on one end. My questions are centered around wall/roof construction as well as proper insulation. Roof: I plan to install a standing seam roof with ice/water shield over 5/8 plywood. As you are aware, with hybrid steel it is hard to ventilate the roof with this type of construction. This downfall didn’t outweigh some of the benefits so this is what I am stuck with. Would like to understand some insulation options. Note: I do have the building designed to handle the loading of a couple of cupula’s and have considered making these passive and active ventilation points. (Exhaust fans with some louvers that I have yet to get the details figured out on)Walls (2 options): (Note: I prefer not to plan or have to always be fully conditioning the shop to 72 degrees…..I plan to have that ability by mechanical means but I don’t want to consistently have to be conditioning that much space, therefore I think i prefer the building to be able to breath out to the perimeter. I realize this may be tricky between the roof type and wall type)Option 1: metal siding – would like some input on wall and insulation construction based on the above notes of conditioning. Option 2: Hardie board vertical board and batten walls. Same as above, would like your input. There will be components on the first floor and second floor that make up the apartment space. Our approach on insulation and wall construction may change within those enclosed spaces may vary as they will be conditioned separately from the open shop space. Hope you can help shed some light on this approach and again thank you for your time and knowledge. Thanks!”
 Spent many a winter day on Mount Bachelor’s slopes back when I lived in Oregon (even 4th of July one year), so am familiar with your turf (my step-brothers also live in your immediate area).
 DEAR KAL: You are in Climate Zone 5A, so a ceiling vapor barrier is not required by Code. Building scientist and founding principal of Building Science Corporation Joe Lstiburek states, “Plastic vapor barriers should only be installed in vented attics in climates with more than 8,000 heating degree days.” (More on degree days here:
  DEAR JONATHAN: We have had several clients provide their own pre-cast Permacolumns and they can be incorporated into our engineered designs. There is, however, a less costly option to explore:
 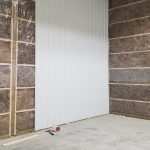 DEAR POLE BARN GURU: Hello, my question, which I can’t seem to find a straight answer anywhere online. Is anything needed between interior PVC panels, closed cell spray foam and the exterior metal siding? The pole barn is located in southern Indiana. It’s used as a shop and being heated occasionally with a wood stove. BENJAMIN in INDIANA
 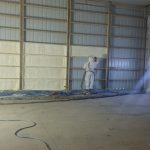 When it comes to insulating a building envelope, there are various methods that can be used depending on the building’s purpose and the required level of insulation. However, combining metal roof and wall panels with spray polyurethane foam insulation (SPF) is widely considered one of the most effective ways to achieve secure, strong, and long-lasting insulation. Utilizing this method of insulation offers numerous benefits including the sealing of panel joints, creating a vapor barrier, providing thermal insulation, and producing air barriers.
 The thickness of the initial pass fillet during picture framing should be at least 0.5 inch and should not exceed the maximum pass thickness recommended by the foam manufacturer. The minimum thickness of the initial pass is specified to provide enough material to activate the blowing agent and initiate the cure. After picture framing the perimeter of the area, the applicator fills in the center of the cavity using the maximum thickness recommended by the foam manufacturer. Maximum pass thickness varies by foam formulation and is listed in the technical data for each SPF product. Excessive pass thickness can result in inferior quality due to the increase in foam temperature during curing. For most closed-cell SPF, the maximum pass thickness is 1.5 to 2 inches. It is important for applicators of closed-cell SPF to follow manufacturers’ installation instructions on pass thickness limits and proper cooling times between subsequent passes made if they wish to develop the desired total thickness of the insulation.
 Reader ERICA in WEST COLUMBIA writes: “Is there a specific bubble insulation brand you recommend? We will be using this as our vapor barrier in the roof. I’ve seen posts about this type of insulation disintegrating, so I’m wondering if the claims are exaggerated or if in fact it could be a certain brand. Also we are wanting to have cathedral ceilings throughout our building. Our roof is made with metal trusses and wood purlins. We are using bubble insulation and some type of batt insulation. What is the best method to vent if we are not going to have an attic space?”
 Instead, look at spraying two inches of closed cell spray foam directly to underside of roof steel (between purlins), then fill balance of purlin cavity with unfaced rockwool batts. This will get you a higher R value and save on material and labor for a lot of 2×4. You should not vent either eaves or ridge in this case.
 DEAR MICHAEL: Internal sweating is a function of many more things than how you detail your wall insulation (you are correct in having Tyvek on exterior, vapor barrier on interior). As your building shell gets tighter, moisture is going to be trapped inside and you may need to mechanically dehumidify in order to prevent condensation. Some considerations – have a well-sealed vapor barrier under your slab, grade outside of building at no less than a 5% slope for at least 10 feet. Properly vent eaves and ridge, in correct proportions. You may want to consider your choice of blowing fiberglass into your walls, as it will settle over time, leaving a cold spot at top of wall. It is also affected by moisture. I would recommend using Rockwool batts instead.
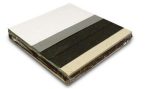 DEAR POLE BARN GURU: What’s your experience with Rich-e board insulation? TERRY in NORTHPORT
  DEAR TERRY: Hansen Pole Buildings’ warehouse had a 40 plus year old steel roof, it leaked water like a colandar. We also wanted to add overhangs to eaves and endwalls. In order to overlay our old roof (building is 96′ x 96′), we placed 2×8 rafters at each existing truss, fastening through into truss top chords. We then joist hung 2×6 purlins between each rafter. Although we did not insulate (building is cold storage), we could have placed R-30 Rockwool batts between purlins. As long as your underlying old steel roofing is able to withstand any shear loads imposed, then pretty much any well thought out design solution would work. Ideally, you should engage a Registered Professional Engineer to evaluate your current structure and design a best structural solution. Least expensive, provided you can access underside of roof, your least expensive will be a tear off. If you have an attic space, order roof steel with an Integral Condensation Control factory applied. Any contractor who you would consider hiring should be booked out for at least a year, if not longer, and will want a premium unless they just happen to live nearby.
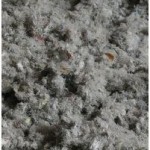
 I would look at design solutions allowing moisture to pass out of your workshop, and not in. For those interior walls, unfaced Rockwool batts, with a housewrap on the cold storage side of studs. Ceiling, if you can find it, use blown granulated Rockwool, as it is unaffected by moisture. Otherwise use Rockwool batts, overlaying layers 90 degrees to each other.
 “
“ 

 DEAR KAITLIN: Most pole barns are built either without being engineered or to Risk Category I. For residential purposes, it would need to meet more stringent structural requirements of Risk Category II. You will probably have to add some perimeter slab insulation in order to meet Energy Code requirements. My best recommendation is to engage a Utah Registered Professional Engineer to do a physical evaluation of your existing building and to design needed structural upgrades.
 DEAR WESLEY: I have seen many far less well thought out wall systems without exterior sheathing not experience issues with condensation. As far as air sealing, you could get a blower door test done to find out exactly what your situation is. For extended reading, please see
  DEAR TRIPPE: We always suspend our columns eight (8) inches above bottom of holes and mono-pour footing and concrete encasement in a single pour (saves on paying for short haul charges). While concrete typically reaches 75% of compressive strength in seven days, when I was building we would pour one day and start building next day. For slabs on grade, it is recommended to not walk on them for 24-48 hours after a pour. Keep in mind, concrete compressive strength is in psi (pounds per square inch) and soil bearing capacity under footing is in psf (pounds per square foot). Most soil will support a maximum of 2000 psf or 13.88 psi, so your concrete (at 2500-3000 psi) is going to be much stronger, even after a very short time span, than soils beneath. You can increase concrete strength by ordering a higher cement mix and speed curing time by use of hot water (avoid use of chemical additives to speed curing).
 “Hi guru, I need your guidance. I am looking to build a 30x135x14 commercial building for dog daycare. I have no experience in building/ordering a pole barn and want to get it right.
  Under 2021’s IECC (International Energy Conservation Code) for commercial buildings Ceilings should be R-49, Walls R-20 plus R-3.8 continuous, slab R-15 three foot down at perimeter and R-5 under slab itself.
 DEAR POLE BARN GURU: Can I remove my knee bracing from the pole barn and put up interior ceiling and wall steel. I have a 60×104 pole barn on an 8″ wide 4′ high concrete wall with wet set braces (6×6 laminated beams. 8′ on center) ceiling is 16′ from floor my knee bracing takes up too much wall storage space. They brought them too far down the wall. About 6′. SEAN in MONTPELIER
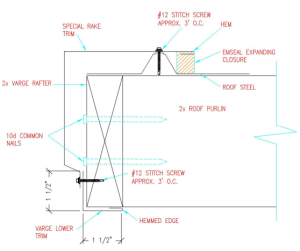 DEAR POLE BARN GURU: How do I trim out a metal ribbed roof panel on a barn with a widows peak? How do I make it match up with the rake trim? While maintaining proper drainage. KEVIN in LINCOLN
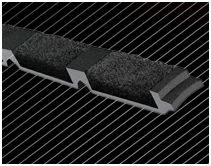 DEAR GREG: Hopefully you have vented eave soffits and ridge cap in correct ratios as lack of ventilation or too much or too little in wrong places can cause challenges (please read more here:
  I have been scouring insulation, vapor barrier and building envelope sources for months now, trying to get to truthful data I can rely upon. Let me tell you – it has been a task, and there are moments when I felt blood would squirt from my eyeballs!
 DEAR POLE BARN GURU: Hello, I am building a 36x50x12 shop with 5:12 roof pitch, that will be conditioned space. The plan is to build out the interior with 2 small bedrooms and a bath then the rest open floor. I am putting in a ceiling at 12′ and will insulate the walls and ceiling leaving the roof uninsulated. Building is located in South Central Texas near La Grange. Does the roof need sheathing and felt or can I just lay the metal roof directly on the purlins? What about adding house wrap to entire building, walls and roof? Being in Texas, heat is biggest factor and with the a/c pumping inside I want to keep attic space vented correctly to keep moisture from building up. I plan to have large soffits to allow for soffit venting then ridge vent on roof. One of my biggest concerns is keeping out all the elements, including creep crawly bugs and concerned the garage doors will be source intrusions. It is my understanding that a sectional garage door is best for keeping out the elements vs roll up type. Can a garage door be truly sealed from all elements including bugs from crawling in? STEVEN in SUGAR LAND
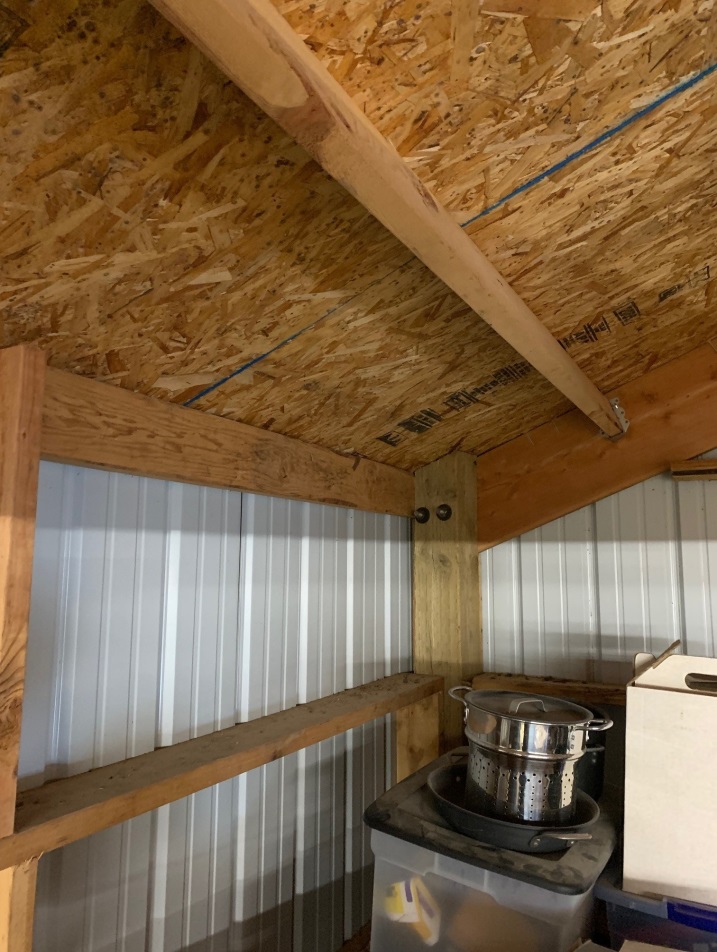
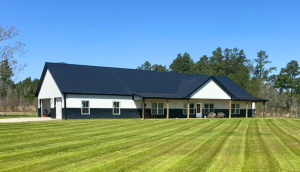 Welcome to challenges of trying to get adequate insulation when finishing the underside of roof purlins.
 You could condition your crawl space – this would require a 6mil or thicker, well-sealed vapor barrier to cover underlying soil and up perimeter walls to floor joists. There would be no vents with this method, however an air-circulating device must be provided. Perimeter walls should be insulated using either closed cell spray foam or rock wool batts.
  DEAR POLE BARN GURU: Good afternoon! Looking to see what trim to use on the corners?
  DEAR POLE BARN GURU: How much more difficult would it be to put the metal roof on if you can’t square the roof trusses. Because the posts were not cemented in properly. We are 8′ out of square on a 24’x50′. Would it be possible to square being that far out? TOM in BLOOMSBURG
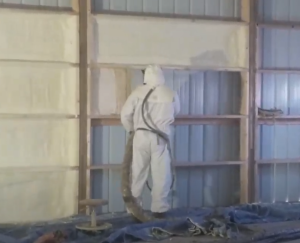
 DEAR POLE BARN GURU: Do you do 6 bedroom Barndo’s? I’m looking for a 6 bed, 4 bath barndominum floor plan. I have an idea of what I like in my head but 6 bedrooms one story are difficult. HEATHER in CLEBURNE
 DEAR POLE BARN GURU: I would like to build a 20 foot wide x 40 foot long pole barn house in Fredericktown, Ohio. Do you know if the local building department would give a permit for a residential pole barn house, & what are the steps to obtaining that permit, who to call, & etc.? I’m at the beginning of that building process & would like to begin this summer. Thanks. RENEE in MOUNT VERNON
 Building codes in many climate zones (3 or greater) require a minimum R-10 thermal break at concrete slab edges, where up to 60% of heat loss occurs. Compared to concrete, however, a plywood slab-on-grade has very little thermal loss at edges because it’s only 1-1⁄2 in. thick, and it’s wood. One could reasonably argue standard level of slab-edge insulation isn’t as necessary with a plywood slab-on grade. However, making this argument to your local building inspector might not be worth the accompanying headaches; as code has no guidance on anything other than concrete slabs.
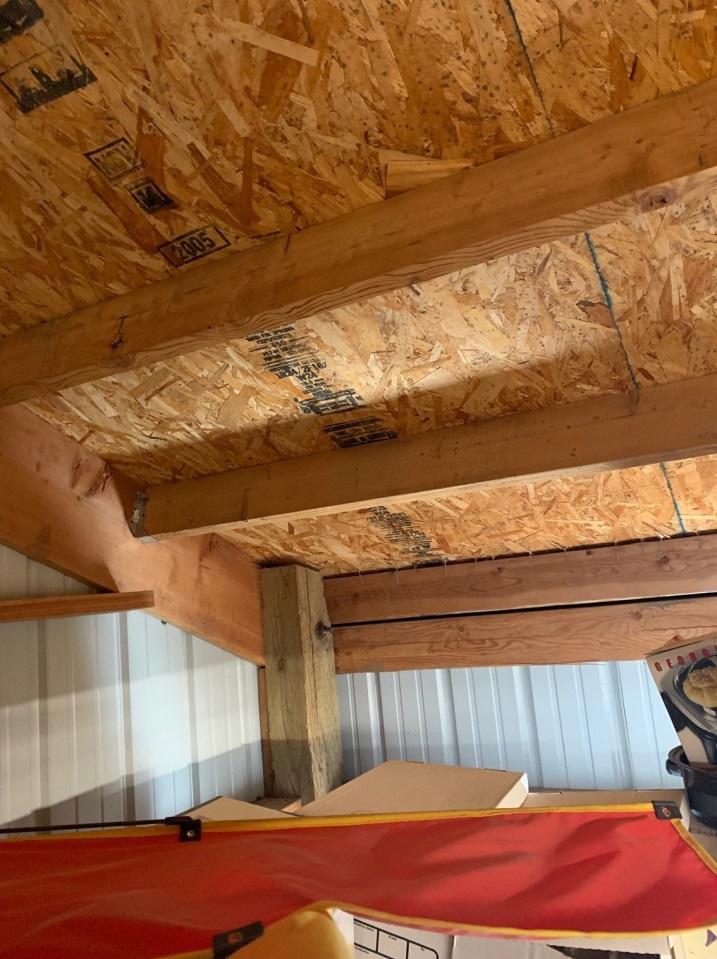

 “Mike, I have an existing pole barn (6×6 post with 2’ on center girts ) that has a 4” concrete floor with 10 mil plastic under it. The side walls have 1” XPS insulation on the outside of girt then steel siding with no wrap or barrier. My thought is put Tyvek on inside of girt ( facing same direction as if on outside application ) then put inch and a half XPS DOW insulation against that ( because there’s two bunks already there) then 2×4 frame with batten insulation between them, then 6mil or heavier vapor barrier then OSB. The floor has PEX tubing in it but not hooked up. Is this a proper install? Also I will have to have an engineer check the BCDL as I want to put OSB on the ceiling but would like to know how to insulate the ceiling. There is a one foot fully vented overhang with a ridge vent also. Thank You for the info in advance.
 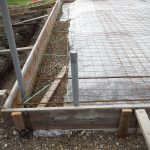 My educated guess is your building’s concrete slab on grade does not have a well sealed vapor barrier underneath. If this is indeed true, you need to start by removal (or minimization) of your moisture source – put a good sealant on your slab’s surface. There are other things to be done once ground thaws, we will get to them in a moment.
 Kudos to you for doing a D-I-Y. Sadly you were lead to a product (Prodex) claiming to be insulation, however in reality it is a condensation control, and only if totally sealed.
 As time allows, remove roof Prodex, have two inches of closed cell spray foam applied to roof steel underside, and increase thickness of blown in attic insulation to R-60.
 DEAR AMANDA: Thank you for your interest in a new Hansen Pole Building. These would be included items:
 Last questions. I found a 36×36 square gable vent that has a NFVA of 585. I need 576 on both sides of my building so this vent should be sufficient, correct? Also, with me using the 1/300 ventilation rule the gable vent company who has this vent recommended using a vapor barrier in the attic too. I believe he said that it needs to be no more than 1 perm and to install it on the warm side of the attic. He said this is needed because I’m not using the 1/150 rule. He said if I have 16 sq ft on ventilation instead of 8 I wouldn’t need a vapor barrier. That’s not really an option though. That many gable vents wouldn’t look good. So what do you think? Do I really need a vapor barrier using the 1/300 rule? My roof panels have a felt-like material on the underside of them that I believe is called “drip x”. I was under the impression that this was a vapor barrier and when warm air rises and hits those cold roof panels the “drip x” keeps it from condensing. Do I really need a vapor barrier along the warm side of the attic too? That sounds like overkill to me but I want to do it right too. The plan is to fully finish the inside of my outbuilding eventually with a ceiling that will be white ribbed panels with a r-38 blown in fiberglass. I only plan on heating the building to about 55-60 degrees and that’s only if I’m out there working. The thermostat will be set to 45-50 if I’m not out there. Also, this outbuilding doesn’t currently have air conditioning but I may consider adding it down the road. You’ve been a big help so far. Thank you and I look forward to your response. “
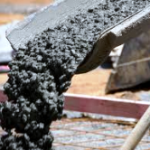 Most post frame buildings have shells erected then slab poured, so this should not be an issue. A pressure preservative treated splash plank should be in place around this building’s perimeter. It will become forms for your slab. Snap a chalk line on the inside of splash planks up 3-1/2″ from bottom, this will be top of your slab.
 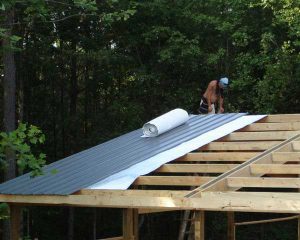 For walls – siding, weather resistant barrier (aka house wrap), unfaced batts, clear poly, interior finish works fine. On your roof, house wrap allows moisture to pass through and be trapped between it and roof steel – possibly causing premature degradation of your roofing. You need a thermal break directly below roof steel. I would recommend an Integral Condensation Control (
 DEAR POLE BARN GURU: Combination business and residential? Square footage of 7000. Can it be done? KEVIN in FLORISSANT
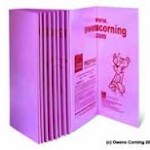 On the walls I plan to cut-to-fit the 1.5″ closed cell rigid foam board and install between the girts. After foam board is installed I intend to line all interior walls with painted OSB.
  It was always our intention to build a pole barn or barndominium on the property but with the requirement of having such in place to qualify, we now need to consider doing this as part of the loan process.
 DEAR POLE BARN GURU:
  DEAR POLE BARN GURU:
  DEAR JODY: First step is to take care of your source. Pour a concrete slab on grade with a well sealed 10-15mil vapor barrier underneath. As you have no thermal break between your warm moist air inside building and roof steel, have two inches of closed cell spray foam insulation applied to underside of roofing. You would be better served to vent eaves and ridge, than just gable vents. If gable vents are your choice, look for vinyl vents with a snap ring as they can be installed on ribbed steel siding.
 DEAR NANCY: Thank you for your interest in a new Hansen Pole Building. Every building we provide is custom designed to best meet the wants, needs and budget of our clients. We offer a floor plan design service for folks just like you:
 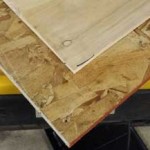 Rated at 44NG (2/3rds of a perm), 7/16 inch OSB sheathing can be a reasonably good vapor barrier, however you may want to consider instead using 3/8″ CDX plywood as it has a 57 NG rating. Do not seal it (paint is a seal) or tape seams and your wall is probably okay.
 DEAR CRAIG: While Building Codes do not require one – if it is absent you are likely to have periods (especially in Spring and Fall) where it will rain inside of your building. Most people erect new buildings with an idea of protecting contents from climactic conditions such as rain, so this result may be less than desirable.
 DEAR POLE BARN GURU:
  Help would be appreciated. EVERETT in DUCHESNE
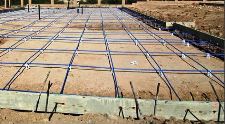 DEAR NICK:
 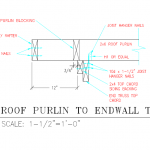 DEAR BRYCE: By Code you are unable to count any contribution from gable end soffits and areas between overhanging end purlins should be blocked solid to prevent airflow (and to properly create a load path to transfer shear forces from roof to ground). A construction flaw (such as daylight coming in under trim, probably should be fixed, rather than counted. By Code requirement is 3.84 square feet or 552.96 square inches of net free ventilating area located in upper 1/2 of your building’s attic space. My recommendation would be to install gable vents sufficient to provide airflow requirements.
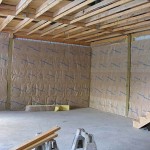 Plastic vapor barriers should only be installed in vented attics in climates with more than 8,000 heating degree days. You can forego the plastic and use a vapor retarder (kraft-faced insulation or latex ceiling paint) in all other climates except hot-humid or hot-dry climates. In hot-humid climates, attics should not be vented and vapor retarders should not be installed on the interior of assemblies.
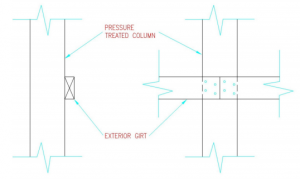 Wall girts flat on column exteriors are inadequate to carry imposed loads and will not meet deflection limitations. I would suggest you reinforce each of them to create either an “L” or a “T”. Assuming you have 6×6 wall columns, you could place a 2×8 bookshelf style girt on top or bottom of each girt, nailing through 2×8 into existing girts with a 10d common nail at say 12 inches on center. This will create an insulation cavity and allow for easy interior finish.
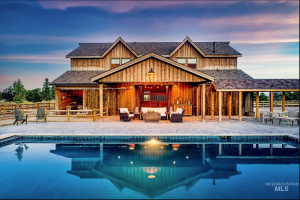 Mike the Pole Barn Guru responds:
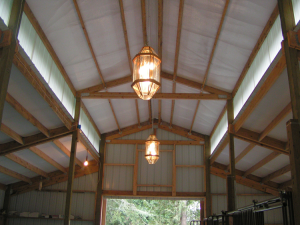 DEAR POLE BARN GURU: I have a pole shed 1972? with skylights that need replacing where do I find . DAVE in COLFAX
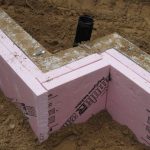 Thank you, CHRIS in NEW HOLLAND
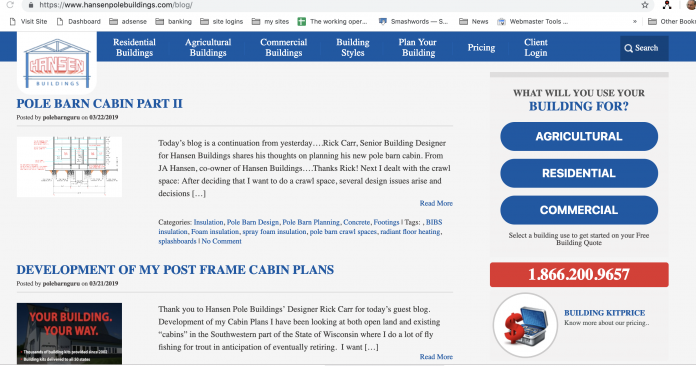
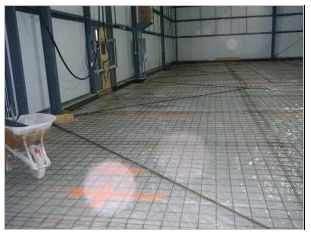
 DEAR SAM: Chances are good you can use a sealant upon your concrete floor to keep some or all ground moisture from migrating through.
 As only incidental heat will be provided into crawl space areas, using rigid foam insulation boards beneath a thin concrete slab might very well prove to be an undue expense.
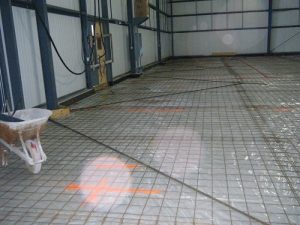
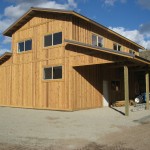 DEAR POLE BARN GURU:
  DEAR JIM:
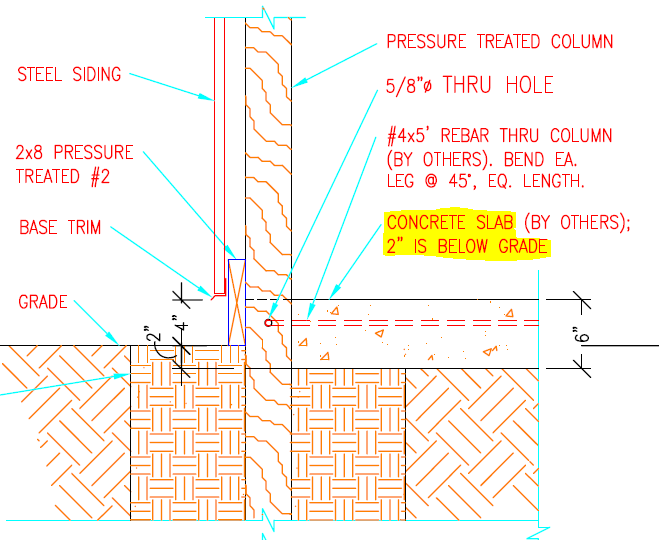
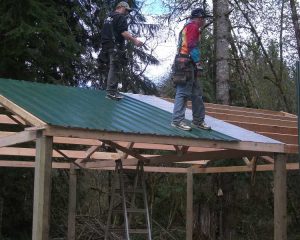 Vapor barriers can help to keep condensation under control if installed in right places. Ceiling level vapor barriers are a bad idea, because they keep water vapor trapped inside the building, rather than allowing it to exhaust through a continuous ridge vent. Wall vapor barriers, can prevent condensation from penetrating your building’s drywall and insulation. Look for an insulation product with a built-in vapor barrier (e.g. fiberglass batts with a kraft paper facing), or consider installing plastic vapor barrier sheets directly over your existing unfaced insulation.
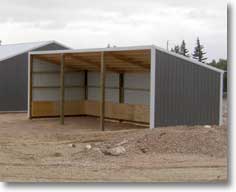 Why would I do this? Comparing “apples to apples”, I know our price will beat theirs, every single time. I am doing this for your peace of mind. I guarantee other prices will be higher. And I will provide you with documentation to prove it!
 Reader DAVE in ROBERTS apologizes for buying from a competitor and writes:
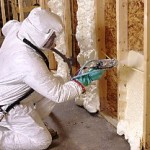 DEAR JASON: I usually recommend using a Weather Resistant Barrier between siding and wall framing (
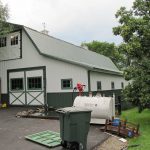 DEAR MICHAEL: Sliding doors are not going to seal anywhere near air tight. How about going with an insulated carriage house style overhead door? It will give you a great look and be functional. Hansen Pole Buildings can provide a broad variety of carriage house doors with our complete post frame building packages.
 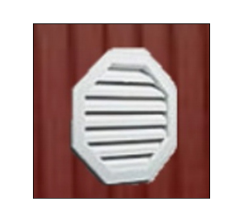 If this does not resolve problems, then you need ventilation. I will surmise your building does not have enclosed vented soffits and a vented ridge. Can’t go back and correct lack of overhang issues now, but you can add gable vents – a minimum of 242 square inches net free ventilation area in each endwall with vents located in top half of each gable.
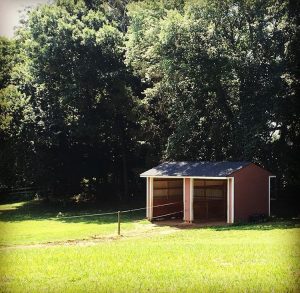 Detached cold storage buildings are constructed with a sole purpose of producing or storing goods in low temperatures. Think of them as typical heated buildings turned inside out. Instead of keeping heat in during cold weather, they keep heat out during warm weather.
 Building access should be through a wide 14 foot tall insulated overhead door in each endwall. Industry standard storage bins are four feet square and three feet tall. Bins can be stacked five high, leaving room for mechanical equipment above with a 20 foot interior clear height.
 Metal siding and roof, and the underbelly of the roof has a vapor barrier. There are also two ceiling fans in here.


