Welcome to Ask the Pole Barn Guru – where you can ask questions about building topics, with answers posted on Mondays. With many questions to answer, please be patient to watch for yours to come up on a future Monday segment. If you want a quick answer, please be sure to answer with a “reply-able” email address.
Email all questions to: PoleBarnGuru@HansenPoleBuildings.com
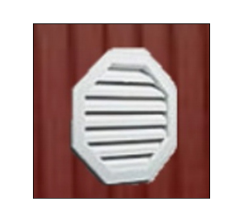
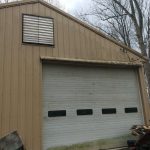
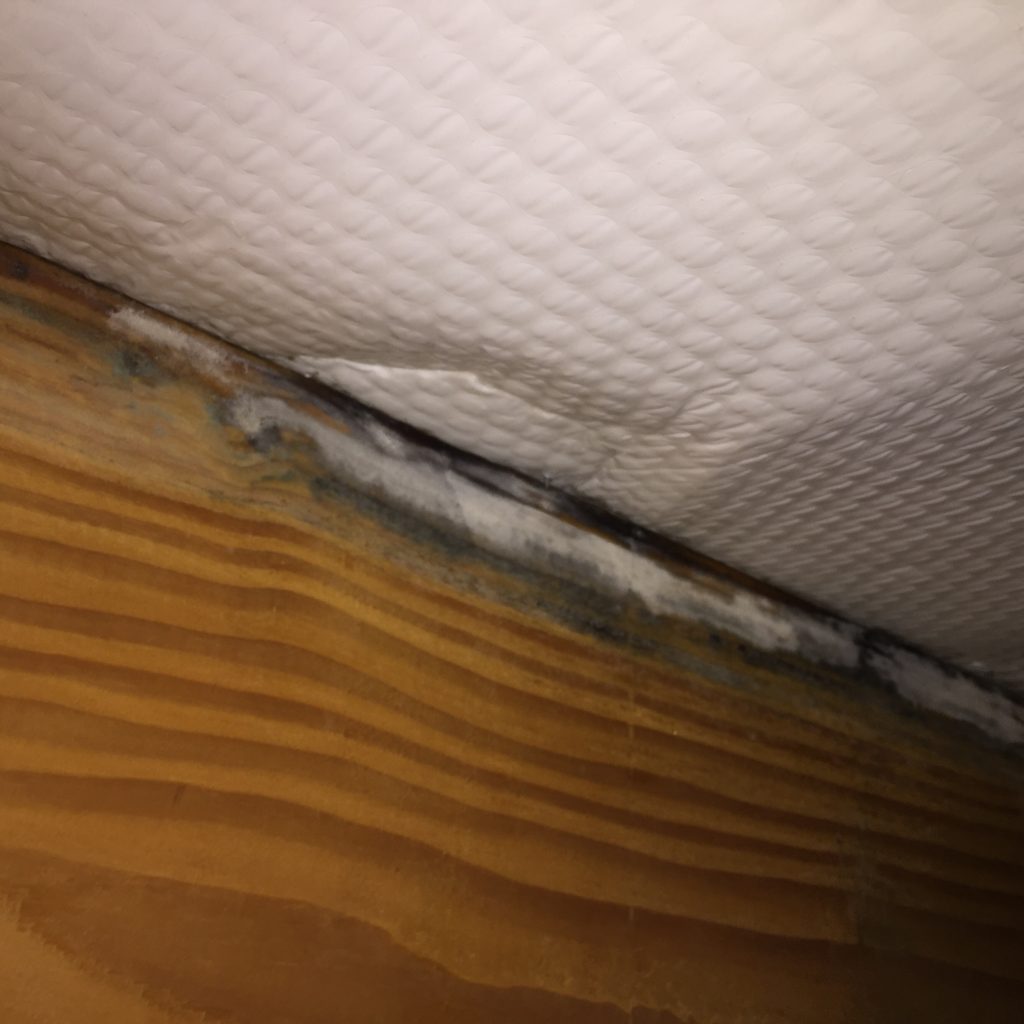
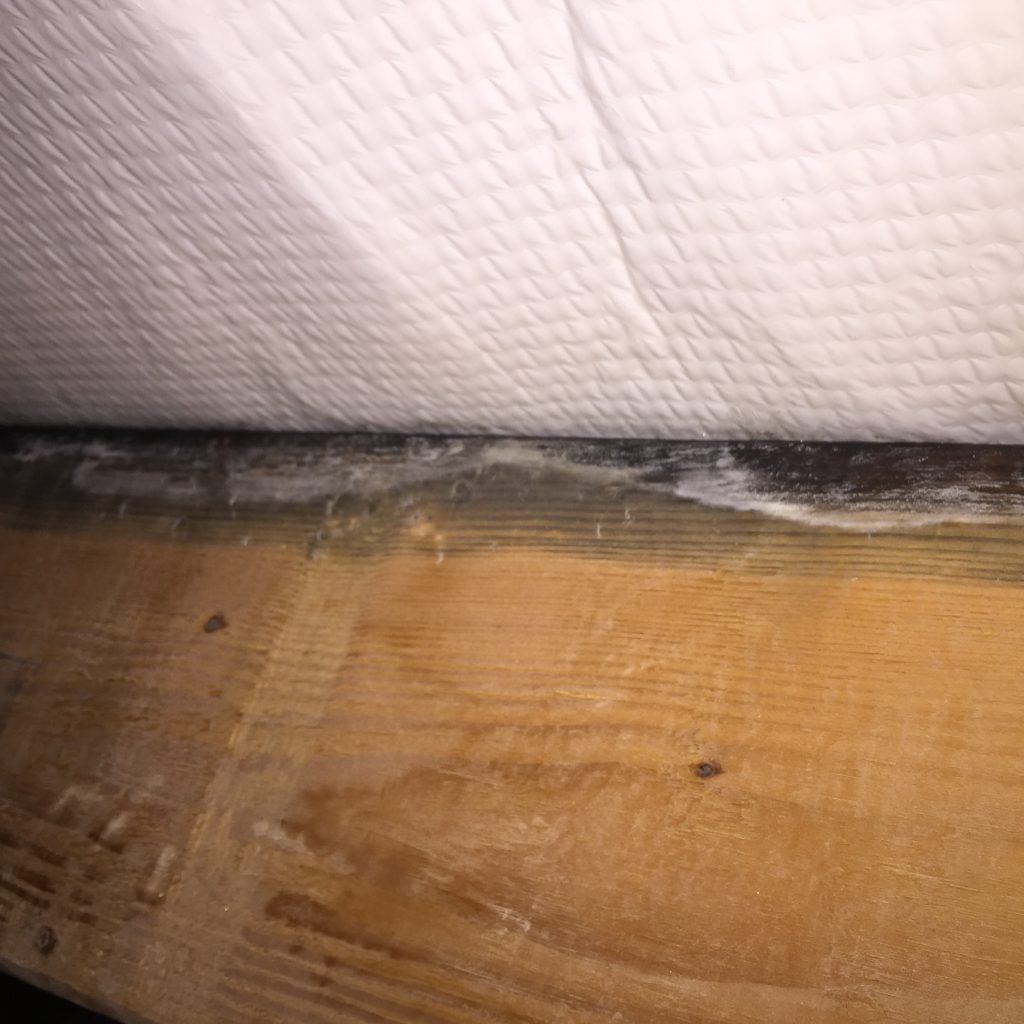
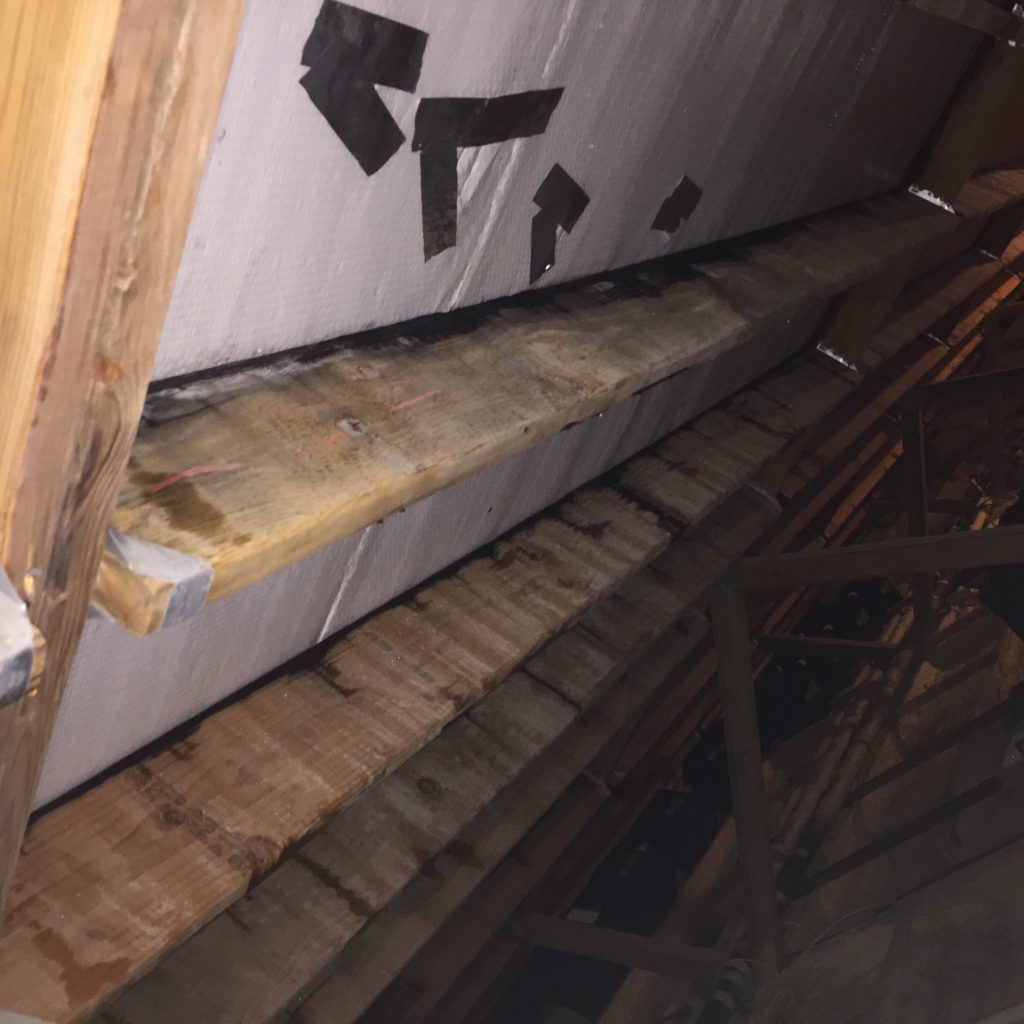
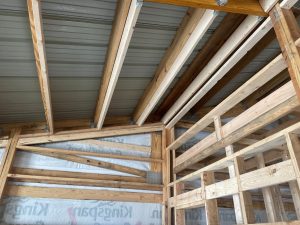
DEAR POLE BARN GURU: I am getting ready to insulate and heat an older pole barn so I have signed up here for some help and advice. So, I have an older pole barn that really has no eave/soffit vents or ridge vents. It’s pretty crude built. I want to insulate and add a ceiling. My concern is condensation in the attic after insulating. I plan on adding some sort of full ridge vent. Then I need some eave venting or add gable vents. The idea of adding gable vents makes me nervous because I don’t know how to seal them properly with the ribs in the metal siding. I will attach pics. Is there a way I can build in some eave vents? The metal roof just comes down the sides of the barn and there is an air gap between the rood and the siding that is covered by the white trim/flashing as seen in the pictures. Any ideas on what to do with this old barn before I start finishing it would be a big help. I also thought about attic fans in the ceiling. CB MAN
DEAR CB: You asked for advice, so here it is….your old building has some challenges when it comes to attempting to heat. The ventilation issue is just one of many. The building has no insulated vapor barrier under the roof steel to prevent condensation, which you have touched upon. Two other factors, either of which could be deal breakers – the building has horizontal sliding doors, which are impossible to properly insulate and seal, without them becoming permanently affixed, and the roof trusses are probably not designed to support the weight of a ceiling.
With all of this said, you have two really good solutions – the least expensive is to just put up another new pole building, designed properly to be climate controlled, using your existing building for cold storage. The other – knock this building to the ground and rebuild at the same location.
Assuming you may not be interested in either of these, and want to pour lots of money into a building you refer to as “crude built”; I will give you some solutions.
Toughest first – the trusses. As they are prefabricated wood roof trusses, there should be a manufacturers stamp on every truss. The design loadings might be stamped on the trusses (due to the age of your building the “might” is the operative word). With this information and the location of your building, I could probably give you an idea as to adequacy. If the truss manufacturer’s name can be found – see if they are still in business. If so, they can determine adequacy for you (for a small fee) and get an engineered repair if they are not adequate. If those fail, hire a registered engineer to do an evaluation for you.
Condensation under the roof steel…as the steel is nailed on, it cannot be removed and an insulated vapor barrier (something like A1V reflective insulation available from www.buyreflectiveinsulation.com) added. The best solution is probably going to be to spray foam insulate the underside of the roof steel.
Adding a ceiling – with the trusses verified for the ability to take the load (and correctively upgraded if needed), 2×4 ceiling joists can be placed between the bottom chords every two feet, with LU24 or similar joist hangers at each end.
Screw on 5/8” Type X gypsum board to the underside of the ceiling joists and trusses (it won’t span four feet, so don’t even attempt to). Leave an attic access hole somewhere close to the center, so insulators can blow in the desired thickness of insulation. Do NOT place a vapor barrier between the ceiling drywall and the framing above.
Ventilation – the new codes do not allow for gable vents to be mixed with eave and ridge vents. It is…use one or the other. Take the square footage of the footprint of your building, and divide by 300. This gives the net square inches of ventilating area which must be provided in each gable end of the attic. Hansen Pole Buildings has vinyl gable vents, in a myriad of colors, with snap rings. A hole is cut in the steel (using the snap ring as a template), the vent is pushed through from the inside, and the snap ring is then pushed on from the outside (this is a two person job). These vents are designed to accommodate ribs on steel panels.
Now the roof is taken care of, the walls are the next challenge. Remove the sliding doors and frame the openings down in size to fit insulated steel sectional overhead doors. You may be able to salvage the steel off the sliding doors, and if done carefully, use the pieces to fill in the gaps.
Again, the nailed on wall steel becomes a limiting factor….spray foam for the walls is probably the best solution. Keep in mind, you will need to put either drywall or a steel liner panel on the inside of the columns, as Code does not allow spray foam to be left exposed to heated areas.
Good luck – and let me know what choice you make and how it turns out.
DEAR POLE BARN GURU: We just made a phone call to Menard’s to order over a hundred bags of blown-in cellulose. While talking to the guy in the building department, he asked if this is for a pole barn, Told him yep. He then strongly emphasized to NOT use blown-in cellulose above the metal ceiling because the flame retardant material will rust and eat up the ceiling. This is the first I have heard of, so I did some quick research online and it looks like they have some kind of acid that act as a flame retardant.
Right now, our 30×48 gambrel pole barn with loft are being built. The shop will be finished with R-19 fiberglass in the walls and then T1-11 panelings will be installed. The ceiling is going to be a metal liner, obviously. The loft will be used for storage and man cave, so half of the loft would be finished in the future. There will be Low-E condensation barrier below the roofing, so the contractor told us there is no need for a vapor barrier in the shop ceiling where I would be blowing the cellulose.
Right now I am not sure what to think. Several months ago I did some research and have decided to plan on blown-in cellulose. Is this something I should be concerned about? What should I do to avoid the rusting issue the guy told me about? BTW, he told me to instead use blown in fiberglass which is something I am not thrilled about. Thanks. PERPLEXED
DEAR PERPLEXED: If the fiberglass and cellulose insulation people would spend more time promoting what each of them do as good, and less time shooting broadsides at each other, life would be so much better and they would probably each sell more product.
There have always been concerns about insulation causing corrosion when in direct contact with metal building components such as sweaty pipes, electrical wires or metal boxes, etc. Consequently, ASTM (American Society for Testing and Materials) standards for every insulation material contain testing which specifically addresses these concerns. In addition, in 1979, the CPSC (Consumer Product Safety Commission) promulgated a law, which regulated the fire and corrosive characteristics of cellulose insulation. A statement of compliance with these requirements is required on every bag of cellulose insulation. The types of metal tested with all insulation materials are copper, aluminum, steel, and additionally in Canada, galvanized steel. The test requires placing soaking-wet cellulose insulation with an imbedded .003-inch thick metal coupon inside a humidity chamber under conditions that are ideal for promoting corrosion. After 14 days, the metal coupons are removed, cleaned, and examined under a light to detect the smallest pinhole. In all, there are two coupons of each metal and all must be free of even one pinhole. This is a very strict test!
My recommendations are to make sure your attic area is adequately vented (no less than 1/300th of the attic footprint area in venting, provided at least ½ of the vent area is in the top ½ of the attic), make sure the insulation stays dry (no roof leaks), and do not have a vapor barrier between the ceiling and the insulation. Whether you choose fiberglass or cellulose, either should be fine.
 Air and water are similar, their flow follows a path of least resistance. In a properly designed and installed attic ventilation system air flow travels from intake vents to exhaust vents, flushing out warm, humid air along roof deck (think underside of roof steel). However, if two or more different types of exhaust vents (gable and ridge) are used above a shared attic air space, one exhaust vent will likely to interrupt air flow to the other. In this arrangement it becomes another intake vent for a primary exhaust vent – leaving large sections of attic space incorrectly vented.
 Your ridge vents will only “work” when you have properly sized and placed air intakes. In your case, you will be limited to gable end vents. Gable vents are not nearly as effective as eave/soffit vents, so you are likely to experience poor air flow as you approach center of your building (and could have some condensation issues there as well). Tyvek would not have been my first choice in your roof, as it allows moisture to pass out and become trapped between it and your roof steel. This could potentially cause some premature degradation, over time.
 DEAR POLE BARN GURU: I recently moved into a house with a 40×30 pole barn (wood post and wood trusses) with a metal exterior. The building has a reflective foil radiant barrier between the metal and wood structure. It is extremely hot in the summer and cold in the winter. I want to insulate and cannot afford spray foam. I also don’t have the ability to remove the walls to remove the foil barrier that way. I do have some Silvercote insulation that has an attached vapor barrier. It is just a fiberglass roll insulation that has an attached vapor barrier to it. It is sold around here for use as insulation in metal buildings. I was given enough to insulate the whole shop from someone that had left overs. I would like to install this insulation to help with temps in the shop. I have tried to research to get an answer on the best way to go about this. The shop builder said just put it up but I feel that would create a double vapor barrier. Is my best route to cut the foil radiant barrier out and then install the fiberglass insulation with vapor barrier facing the interior of the building? This would basically take the foil barrier out and install the fiberglass against the metal with the attached face vapor barrier to the inside of the building. I want to make sure I do it right. Thank you. DAVID in OKLAHOMA CITY
 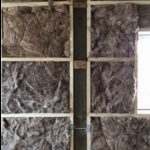 DEAR DAVID: If you are dead set on using this Silvercote insulation then you should cut out any foil radiant barrier. You never want to have a double vapor barrier situation as any trapped moisture will have no method of escaping. Downside of this is you do not have a Weather Resistant Barrier (aka housewrap) between framing and siding. An option to consider would be to resell your metal building insulation, then use unfaced Rockwool batt insulation, as it is unaffected by moisture.
 DEAR POLE BARN GURU: I plan to build a 28×48 metal pole barn, concrete floor, 12′ eave with 8/12 pitch. Barn will have 6 3×4 windows, and two 10×10 roll doors, one roll door on each gable end. For now, the roof will be insulated with 3in closed cell foam. I plan to insulate the walls down the road with rigid foam board. The building will not have A/C. Question: Do I need vents or exhaust fan in the gable ends of the roof with the high heat/humidity of Alabama? There will be no ridge vent or soffit vents. I may not have the building open every day, either. Thank you. JASON in MONTGOMERY
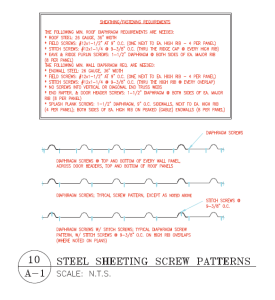
 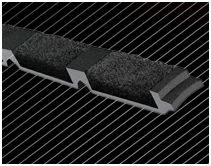 While ridge cap is off, replace solid foam closure strips with vented ones. Use 1-1/4″ long #12 stitch (metal-to-metal) screws to reattach ridge caps.
 Reader BOB in GRAHAM writes: “I have a 40 x 60 pole building. There is a ridge vent along the 60′. I recently installed Sheetrock on the ceiling and blew in insulation. My question is what size fresh air intake vents do they need to keep the attic cooler. I was thinking I need Air vents on each side of the end wall at the lowest points. The other thing is I can only pull fresh air in at one end of the building. As the other end is open to the ridge vent, separate from the other 60′. Should I put an electric intake fan rather than just an air vent?”
 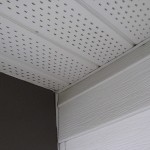 Your 40 x 60 building would therefore require at least eight square feet ( 40 x 60 = 2400 / 300 ) or 1152 square inches of NFVA, with at least 50% of this been at eaves (vented sidewall soffits) or gable vents located in lower half of attic space.
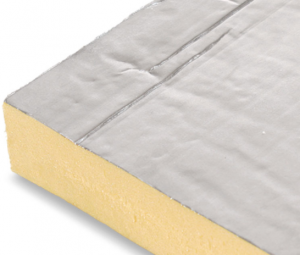 “I’ve moved into a house that also has an existing 30’x40′ (uninsulated) pole barn. I want to insulate and am considering 2″ thick polyiso foam boards attached to the bottom cord of the roof truss. The roof trusses are 4′ spacing. 1) Do you feel that is a good choice? 2) Do I need to add any type of vapor barrier (or anything else) above the polyiso boards?”
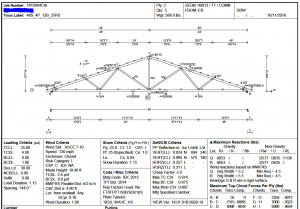 Most pole barn trusses are designed for a one psf (pounds per square foot) bottom chord dead load (BDCL) – inadequate for any type of ceiling. On truss spans of up to and including 40 feet, we include a five psf BCDL as a matter of practice (too many clients decide later on they want a ceiling) and if we know in advance a ceiling is to be installed, we use 10 psf BCDL. You have been fortunate to have at least a five psf BCDL. Your 10 psf bottom chord live load is a non-concurrent (assumes no other live loads are being applied such as snow) one and basically is there to provide a minimum degree of structural integrity allowing for occasional access to an attic space for maintenance purposes.
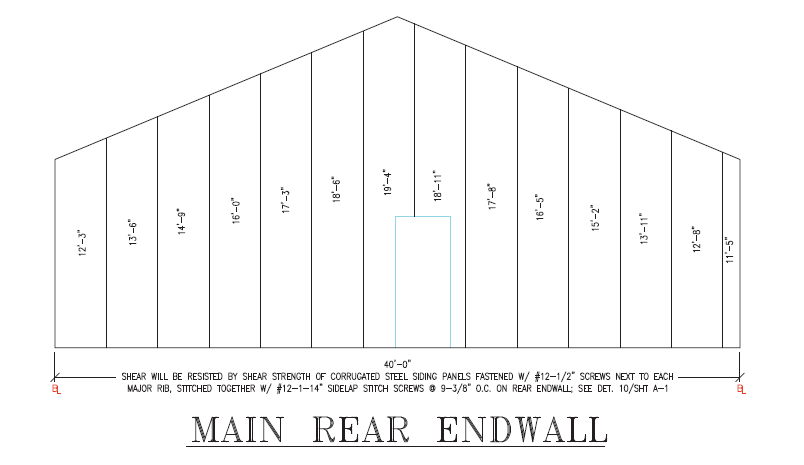
 First – you are putting a 58 foot wide door in a 64 foot endwall. This leaves only three feet of solid wall on each side of your door opening. These areas need to be shearwalls and maximum aspect ratio for a shearwall is 4:1 (four feet of height for every foot of width). With a three foot wide shearwall your maximum opening height would be 12 feet. You are likely to experience some tremendous racking problems (if not a failure) on your door endwall.
 Kudos to you for doing a D-I-Y. Sadly you were lead to a product (Prodex) claiming to be insulation, however in reality it is a condensation control, and only if totally sealed.
 As time allows, remove roof Prodex, have two inches of closed cell spray foam applied to roof steel underside, and increase thickness of blown in attic insulation to R-60.
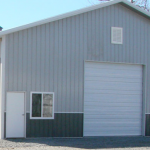 Last questions. I found a 36×36 square gable vent that has a NFVA of 585. I need 576 on both sides of my building so this vent should be sufficient, correct? Also, with me using the 1/300 ventilation rule the gable vent company who has this vent recommended using a vapor barrier in the attic too. I believe he said that it needs to be no more than 1 perm and to install it on the warm side of the attic. He said this is needed because I’m not using the 1/150 rule. He said if I have 16 sq ft on ventilation instead of 8 I wouldn’t need a vapor barrier. That’s not really an option though. That many gable vents wouldn’t look good. So what do you think? Do I really need a vapor barrier using the 1/300 rule? My roof panels have a felt-like material on the underside of them that I believe is called “drip x”. I was under the impression that this was a vapor barrier and when warm air rises and hits those cold roof panels the “drip x” keeps it from condensing. Do I really need a vapor barrier along the warm side of the attic too? That sounds like overkill to me but I want to do it right too. The plan is to fully finish the inside of my outbuilding eventually with a ceiling that will be white ribbed panels with a r-38 blown in fiberglass. I only plan on heating the building to about 55-60 degrees and that’s only if I’m out there working. The thermostat will be set to 45-50 if I’m not out there. Also, this outbuilding doesn’t currently have air conditioning but I may consider adding it down the road. You’ve been a big help so far. Thank you and I look forward to your response. “
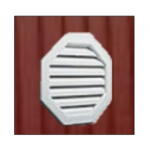 DEAR POLE BARN GURU:
  DEAR MATT:
  Your best practice is to have even airflow from eave intakes to ridge exhausts. If your building will have sidewall overhangs, you might as well take advantage of this. You COULD (as an alternative) utilize gable vents. Provided at least half of your gable venting is located in the upper half of the attic, you can get by with as little as 576 square inches of NFVA (Net Free Ventilation Area). To achieve this would require (3) three 20″ x 30″ gable vents in each endwall. This could prove unsightly, difficult to install and is unlikely to result in being less of an investment than ridge vents. NOTE: a 20″ x 30″ gable vent provides roughly 106 square inches of NFVA (not 20″ x 30″ for 600″).
  Provided your building has roof trusses designed to adequately support a ceiling load, your best bet will be to blow in insulation above a flat level ceiling. If you do not have original truss drawings available to determine if they have a bottom chord dead load (BCDL) of three or more, then you will need to find the manufacturer’s stamp placed on truss bottom chords and contact them with your site address. With this information they should be able to pull up records and give you a yes or no. If you are yet unable to make this determination, a Registered Professional Engineer should be retained to evaluate your trusses and advise as to if they are appropriate to carry a ceiling and if not, what upgrades will be required.
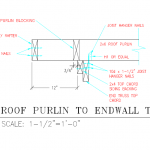 DEAR BRYCE: By Code you are unable to count any contribution from gable end soffits and areas between overhanging end purlins should be blocked solid to prevent airflow (and to properly create a load path to transfer shear forces from roof to ground). A construction flaw (such as daylight coming in under trim, probably should be fixed, rather than counted. By Code requirement is 3.84 square feet or 552.96 square inches of net free ventilating area located in upper 1/2 of your building’s attic space. My recommendation would be to install gable vents sufficient to provide airflow requirements.
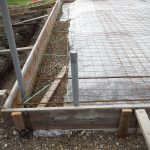 You should install a well-sealed vapor barrier under your slab while Code requirement is 6mil, however 15mil is far less likely to be damaged during a pour. Run vapor barrier up sides and onto top of 2×8 splash planks Overlap seams by at least 6″ and tape. Most often we see 1/2″ rebar on a 16″ grid.
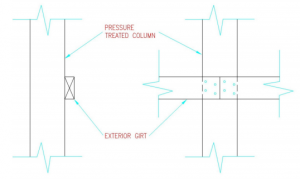 Wall girts flat on column exteriors are inadequate to carry imposed loads and will not meet deflection limitations. I would suggest you reinforce each of them to create either an “L” or a “T”. Assuming you have 6×6 wall columns, you could place a 2×8 bookshelf style girt on top or bottom of each girt, nailing through 2×8 into existing girts with a 10d common nail at say 12 inches on center. This will create an insulation cavity and allow for easy interior finish.
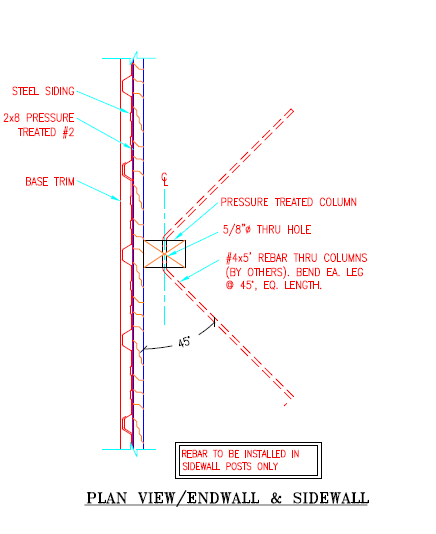
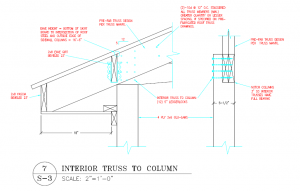 DEAR WAYNE: I will do some interpreting and guess your “rafters” are actually trusses and you have a building with trusses every two or four feet resting on truss carriers. With no overhangs, truss ends are capped by an “eave strut” or eave purlin – usually a 2×4 or 2×6 placed vertically. Top edge of your eave strut should be bevel cut to match your roof slope and installed so top beveled edge is in same plane with tops of adjacent uphill roof purlins (e.g. raised up to match purlins).
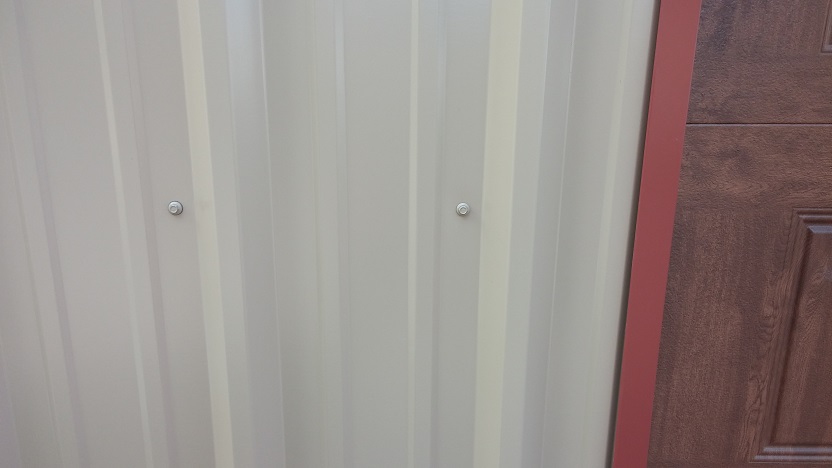
 Metal siding and roof, and the underbelly of the roof has a vapor barrier. There are also two ceiling fans in here.
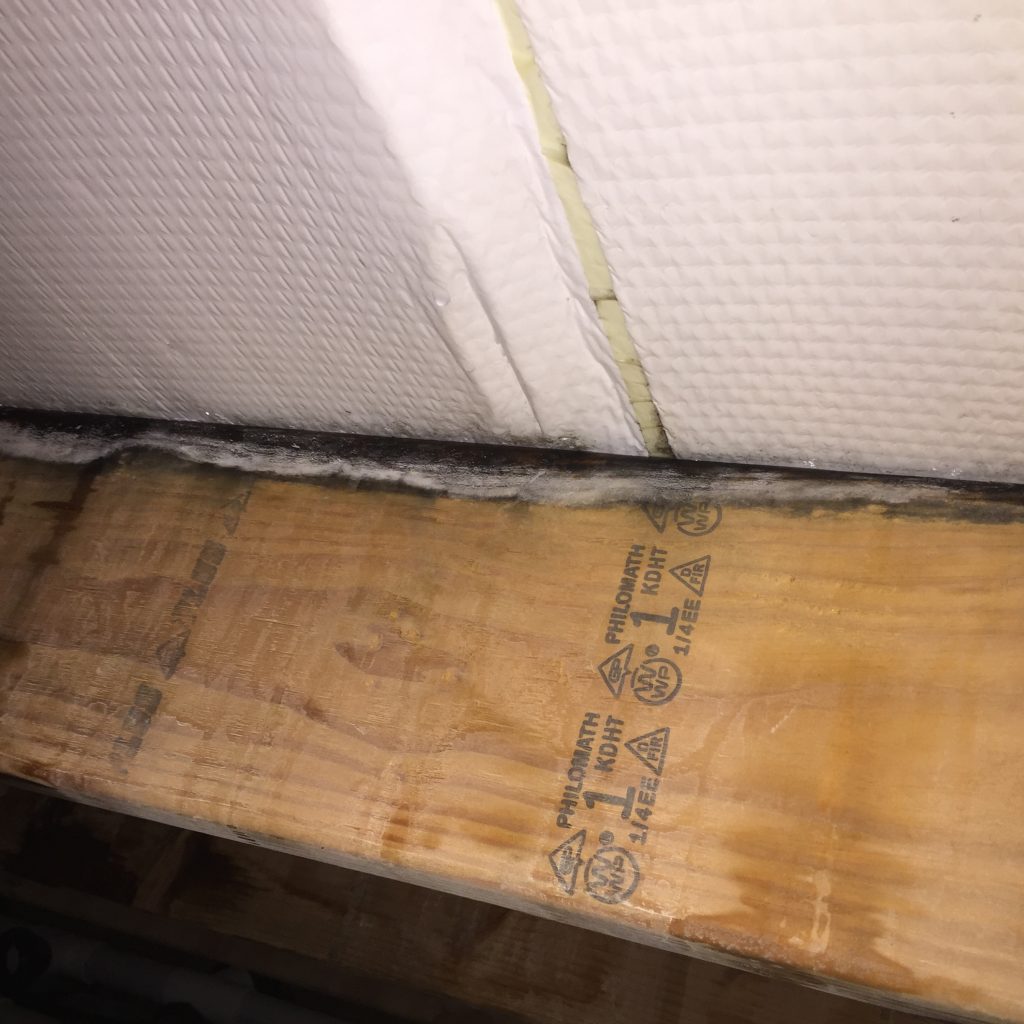
 “Hello, I have a question about venting of my building. I currently am in the process of building a shop myself. I had an existing foundation of 75 x 42 that had 8ft concrete walls all the way around. I’m building my building on top of this to give myself 17’ sidewalls. My concern is about my venting. I’m planning to have soffit installed along the building and am not sure if I should go with Gable vents or ridge vents. The building will be insulated with 3” fiberglass with a poly vapor barrier on the walls and with 1” 4×8 sheets of foam board on the roof with all the joints taped. My concern with ridge vent is will moisture condense on the exposed ridge cap and drip since it has to be left uninsulated for venting or will it be ok? I would rather not have any drips. My gut feeling tells me I need to have plenty of venting since 3 sides of the concrete are covered with dirt and already show condensation pretty regularly when the temp changes. With my soffits do I need to run vented soffit the full length of the building? Thanks your response will be greatly appreciated!”
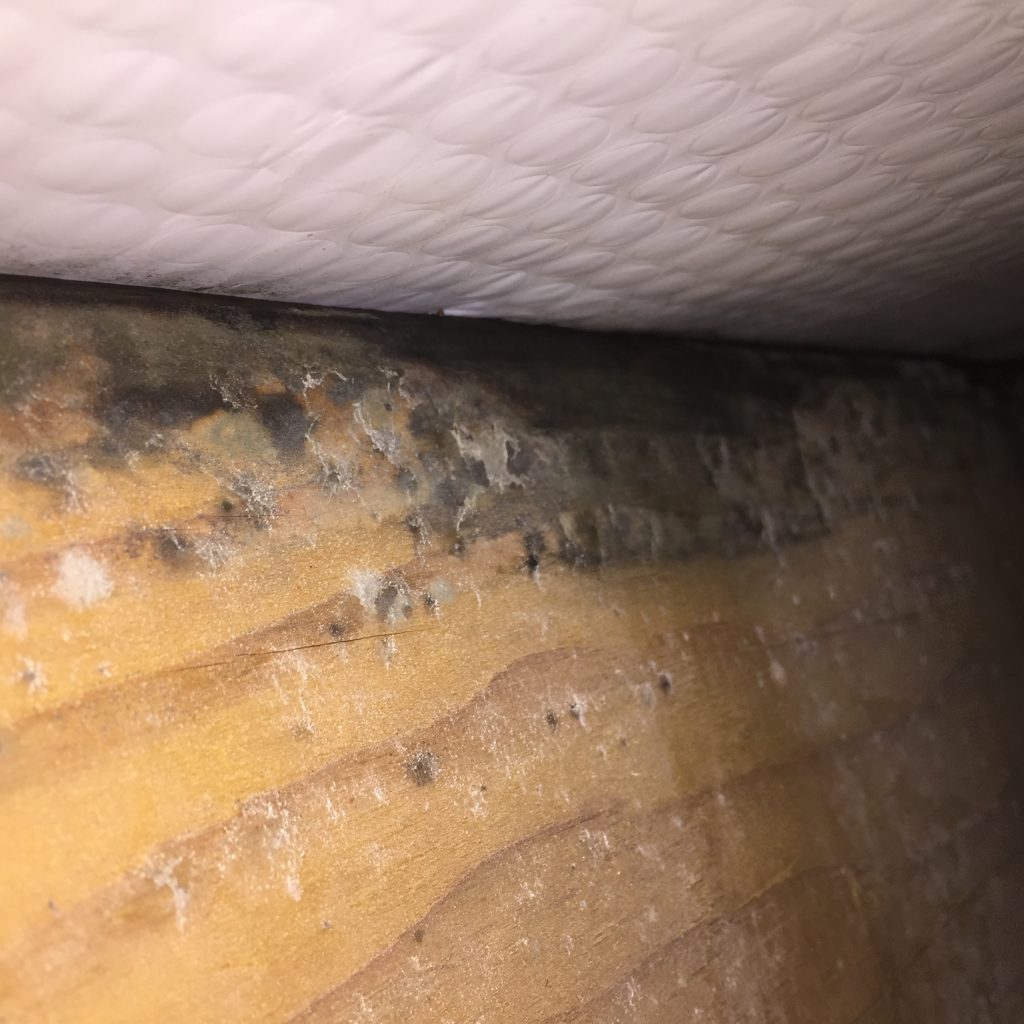
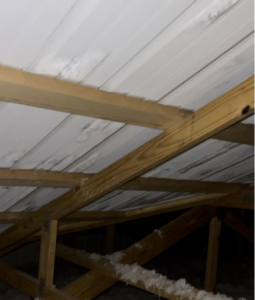 If mold is already a problem, scrub the affected areas with a diluted bleach and soap solution. Once clean and dry, a mold resistant paint can be applied.


