This Thursday is another bonus ” ask the Guru” answering questions about proper air intake with no overhangs, replacing sliding door trolleys, and most cost effective footing solution.
 DEAR POLE BARN GURU: I am in preliminary stages of designing a post-frame building, that will serve a multitude of functions such as a home gym, work-shop, and area to host family parties. It is a 30′ x 76′ x 20′ tall, with 2 fully enclosed leans 64′ long on each side that span out 16′. I really like Scandinavian style, which utilizes no overhang. My main concern is how to allow for proper air intake if I do zero over-hang since there will not any soffit. Curious for your thoughts. Would you recommend against ‘zero over-hang’? Or do you think there is some work-around for air intake and gutter attachment? Hoping for a quick answer! Thanks in advance : ) SHANE in HARTLAND
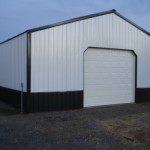
DEAR SHANE: In my humble opinion – I would personally go without doors, before I would go without overhangs. For me it is about looks (no overhangs look too industrial for my tastes), functionality (besides being a perfect location for air intake, they do keep your walls much cleaner, provide protection of windows from summer sun, pushes rainfall/snow away from base of building). You can meet Code requirements for air intake via gable vents, however they do not afford nearly as even airflow as to eave intake vents combined with a vented ridge. Gutters can be hung off from eave struts (aka eave girt or eave purlin), however it does increase possibilities of having water back up into one’s wall if an ice dam were to occur.
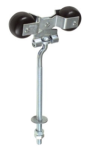 DEAR POLE BARN GURU: I have a quonset with (2) 15’x14′ sliding doors with 4 cannonball style rollers each that need to be replaced. I’m thinking I’ll have to remove the doors, but what is the best way to do this? CODY in MAYNARD
DEAR CODY: If these are one piece doors and not bi-parting, you can remove any end stops and slide door out of rail on one end, replace trolley, then repeat in opposite direction. If doors are bi-parting, you will need to remove doors to replace trolleys (and have plenty of help, as doors will be unwieldy).
DEAR POLE BARN GURU: I been debating on what foundation to go with. I’m in Texas 1.5 hours west of Houston. I noticed some going with piers and slab or the wall footing with slab. It’s going to be a post frame house. Possibly shingle roof. What is the best foundation system that will not fail? ANGEL in SEALY
 DEAR ANGEL: Your strongest and most affordable foundation will be to use true glulaminated columns, embedded in ground. Regardless of what you pick, it will only be as good as ground it is placed upon. A well prepared site, where clays and organic materials have been removed and proper fill has been placed and compacted every six inches, will greatly improve your chances of having a solid foundation. I would encourage you to consider a steel roof, as shingles have a very short life span (read more here: https://www.hansenpolebuildings.com/2018/10/ask-the-builder/.
 Spent many a winter day on Mount Bachelor’s slopes back when I lived in Oregon (even 4th of July one year), so am familiar with your turf (my step-brothers also live in your immediate area).
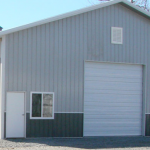 1202.2.1 Ventilated attics and rafter spaces. Enclosed attic and enclosed rafter spaces formed where ceilings are applied directly to the underside of the roof framing members shall have cross ventilation for each separate space by ventilating openings protected against the entrance of rain or snow. Blocking and bridging shall be arranged so as not to interfere with the movement of air. An airspace of not less than 1 inch shall be provided between the insulation and the roof sheathing. The net free ventilating area shall be not less than 1/150 of the area of the space ventilated. Ventilators shall be installed in accordance with manufacturer’s installation instructions.
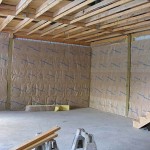 Plastic vapor barriers should only be installed in vented attics in climates with more than 8,000 heating degree days. You can forego the plastic and use a vapor retarder (kraft-faced insulation or latex ceiling paint) in all other climates except hot-humid or hot-dry climates. In hot-humid climates, attics should not be vented and vapor retarders should not be installed on the interior of assemblies.
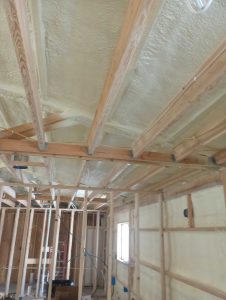 Energy efficiency concerns have literally become a “hot” (pun intended) topic in new construction, and post frame construction methods are no exception to inclusion. Traditionally buildings have had insulation placed or blown into dead attic spaces, directly above a ceiling. Unvented attics have entered fray as an alternative.
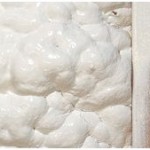
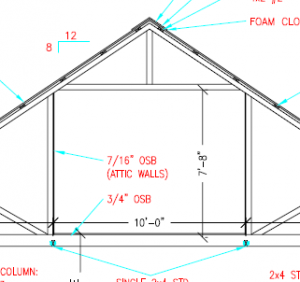
 Metal siding and roof, and the underbelly of the roof has a vapor barrier. There are also two ceiling fans in here.
 Once a ceiling has been installed, blow in attic insulation.
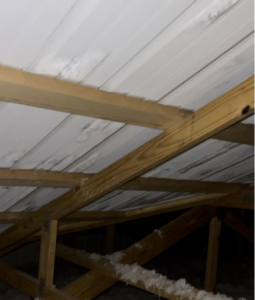 There are more than a few challenges when it comes to utilization of attic space for a bonus room. Highest amongst them are the space is neither free nor inexpensive. The lack of accessibility becomes another factor. At our home outside of Spokane, Washington, my lovely bride and I have our office in a bonus room above our garage. Now a paraplegic, due to her motorcycle accident in 2015, my wife will probably never be able to access our office there again. Our offices have moved to a handicapped accessible space in our home, and the attic space now becomes a catch all for overflow of what I endearingly call “stuff”.