Tag Archives: ridge vents

Lack of Adequate Attic Ventilation

Lack of Adequate Attic Ventilation is Sadly Becoming a Recurrent Theme

If only providers of poorly designed pole barns could be keel hauled…..

Reader AARON in CASPER writes:

“Hi there, I have a 40×104 pole barn. It has 16 foot sidewalls with rafters every 4 foot on center for snow load. The entire interior of the building is spray foamed to about 1 inch thickness. I want to install a ceiling under the rafters and put in r 38 insulation on top. I know that there were ridge vents when the building was put together, however the guy who spray foamed sprayed over the vents. I plan to clean that out. My question is are just those ridge vents enough for ventilation or do I need additional intake vents. The building does not have an overhang or soffits so they would not be easy to install. Do you have any suggestions?”

Mike the Pole Barn Guru says:

You certainly have a challenge at hand.

Here are requirements for adequate ventilation: https://www.hansenpolebuildings.com/2018/03/adequate-eave-ridge-ventilation/

You could add 1000 square inches of NFVA (Net Free Ventilating Area) vents in each gable end and it would meet Code (along with cleaning out your ridge vents for an exhaust), however this would prove to be a very poor design solution as your attic air flow will be highly constricted once you get past first truss in from each end.

Short of a major rework to add enclosed ventilated soffits, your best design solution if going to be to have a conditioned attic – besides, one inch of closed cell spray foam is not adequate to control condensation (it usually takes no less than two inches).

To get to R-38, you could increase closed cell spray foam to a total of 5-1/2″ or add another inch of closed cell plus 6-1/2″ of open cell.

Before considering adding a ceiling, confirm your roof trusses are adequate to carry extra weight. They need to have a minimum BCDL (Bottom Chord Dead Load) of 5 psf to support ceiling joists 24 inches on center and 5/8” sheetrock.

Gable Venting a Post Frame Attic

Gable Venting a Post Frame Attic

Reader ALLEN in KIRBY writes:

“30×50 13 foot walls roof is 4-12 pitch I need to vent the attic. What size vents do I need to order? Two, one for each gable end what size do I need?”

Mike the Pole Barn Guru says:
From the 2021 IBC (International Building Code)

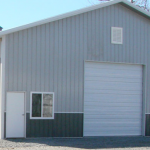
1202.2.1 Ventilated attics and rafter spaces. Enclosed attic and enclosed rafter spaces formed where ceilings are applied directly to the underside of the roof framing members shall have cross ventilation for each separate space by ventilating openings protected against the entrance of rain or snow. Blocking and bridging shall be arranged so as not to interfere with the movement of air. An airspace of not less than 1 inch shall be provided between the insulation and the roof sheathing. The net free ventilating area shall be not less than 1/150 of the area of the space ventilated. Ventilators shall be installed in accordance with manufacturer’s installation instructions.

Exception: The net free cross-ventilation area shall be permitted to be reduced to 1/300  provided both of the following conditions are met:
1. In climate zones 6, 7 and 8, a Class 1 or 2 vapor retarder is installed on the warm-in-winter side of the ceiling.
2. At least 40 percent and not more than 50 percent of the required venting area is provided by ventilators located in the upper portion of the attic or rafter space. Upper ventilators shall be located no more than 3 feet below the ridge or highest point of the space, measured vertically, with the balance of the ventilation provided by the eave or cornice vents. Where the location of wall or roof framing members conflicts with the installation of upper ventilators, installation more than 3 feet below the ridge or highest point of the space shall be permitted.

You are not in a Climate Zone 6 or higher. As long as 50-60% of your venting area will be in the lower portion of your attic and 40-50% in the upper three feet, you can meet Code with a NFVA (Net Free Ventilation Area) of five square feet (720 square inches), half of which should be at each end. To give you an idea, www.airvent.com offers 14″ x 24″ rectangular wall louvers with a NFVA of 92.4 square inches each. It would take four of these in each gable end to provide adequate NFVA.

Ventilation, planned in advance, with air intake from enclosed vented soffits and exhaust at ridge yield a better airflow, at lower investment, with far superior aesthetics.

I Think I Have Made Some Errors!

I Think I Have Made Some Errors!

If you are a post frame building kit provider or a builder reading this article – please STOP SELLING ONLY ON A CHEAP PRICE. You are leaving dissatisfied clients in your wake and doing a disservice to our industry.

Reader RICK in IDAHO writes:

“Hello Sir! I think I have made some errors when I had my PB built regarding insulation plans. 30×40 with 12’, 8” side walls on the inside. Cement floor. No Tyvek or other barriers on walls or roof, just steel on wood all around. Soffit vents all the way around and vented roof cap. Was planning to have insulation blown in walls and ceiling, with a vapor barrier (reinforced plastic?) facing interior occupied area. Did not use closure strips but used canned spray foam to insulate/seal the ribs and edges walls, top and bottom and roof. Trusses were engineered for sheet rock ceiling. Won’t have temps above 50 F in winter on occasion But will try to keep above freezing in winter. No AC in summer. South East Idaho- hot summers and some -10/20 degree nights in winter with generally low humidity year around. Edge of the Idaho desert. Any advice? Thanks for sharing your knowledge with us!”

Thank you Rick for your kind words.

I cannot fault you – an average person having a post frame (pole) building built doesn’t know what they don’t know. I see this situation occur over and over when building providers or builders do not thoroughly explain options and their benefits to clients, instead relying upon a cheap price.

If your concrete slab on grade does not have a vapor barrier under it, seal the top of your floor. https://www.hansenpolebuildings.com/2019/02/how-to-properly-apply-post-frame-concrete-sealant/

Use two inches of closed cell spray foam against your wall and roof steel – if not, you run a high risk of condensation troubles. If you are going to blow insulation into your walls, use a product such as BIBs. https://www.hansenpolebuildings.com/2011/11/bibs/
Do not use a vapor barrier inside of either your walls or ceiling. Make sure the spray foam applicator does not spray over your eave or ridge vents.

All of these things are manageable, they just could have been solved far more economically if they had been done right to begin with.

Minimizing Condensation When Building Over an Existing Foundation

Minimizing Condensation When Building Over an Existing Foundation

Reader ROSS writes:

enclosed overhangs
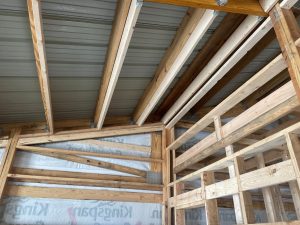
“Hello, I have a question about venting of my building. I currently am in the process of building a shop myself. I had an existing foundation of 75 x 42 that had 8ft concrete walls all the way around. I’m building my building on top of this to give myself 17’ sidewalls. My concern is about my venting. I’m planning to have soffit installed along the building and am not sure if I should go with Gable vents or ridge vents. The building will be insulated with 3” fiberglass with a poly vapor barrier on the walls and with 1” 4×8 sheets of foam board on the roof with all the joints taped. My concern with ridge vent is will moisture condense on the exposed ridge cap and drip since it has to be left uninsulated for venting or will it be ok? I would rather not have any drips. My gut feeling tells me I need to have plenty of venting since 3 sides of the concrete are covered with dirt and already show condensation pretty regularly when the temp changes. With my soffits do I need to run vented soffit the full length of the building? Thanks your response will be greatly appreciated!”

Mike the Pole Barn Guru Responds:

I’d start with excavating around the foundation and properly sealing it from the outside, as well as sealing the slab floor. It sounds like you propose to place foam insulation board between the roof framing and the roof steel – not a good structural idea, as you are significantly reducing (if not eliminating) any shear strength afforded by the steel panels, as well as eventually contributing to leakage from the screws being able to “work” between the framing and the steel. You would be ahead to either use a radiant reflective barrier (less expensive, more labor intense) or Condenstop/Dripstop (read more here: https://www.hansenpolebuildings.com/2014/07/condenstop/) beneath the roof steel. Either one of these products can be adhered to the ridge caps as well.

The Building Codes do not allow for gable vents to be combined with eave or ridge vents. Your best bet is to run full vented soffits on both eaves, combined with ridge vents the entire building length. https://www.hansenpolebuildings.com/2014/02/pole-building-ventilation/


Pole Sizes, Adding On a Shed Roof, and Ridge Vents

DEAR POLE BARN GURU: We live in Pacific county in Washington state and wondering what size of truss pole we would be looking at needing for a 60 ft truss. We are in a wind exposure “C” and trusses will be on 12′ centers. The building we are planning will be 60’w x 48’d with 15′ eve height. Any help will be appreciated.

Thank you,CRAIG in RAYMOND

Concrete slab in a pole barnDEAR CRAIG: There are a plethora of factors which will go into determination of what size columns will work for your or anyone else’s new post frame
building. These include (but are not limited to):

Soil bearing capacity
Embedment depth
If columns will be tied into a concrete slab
Spacing of wall girts
Is building fully enclosed, partially enclosed or a roof only
Slope of roof
If building has a ceiling
Roofing material

When you order your new post frame building package, all of these variables will be factored into the design of not only the columns, but all of the components and your building plans as well as the supporting calculations will be sealed by the engineer of record.


DEAR POLE BARN GURU: I want to attach a shed roof along the side of my 40 foot pole barn. The span is 12 feet and I plan on the outside of the roof being on 10 ft. high 4×4’s and raising it to a height of 12 ft. on the pole barn. There are 5 6×6’s to line up the 4×4’s to. I was wondering the most cost effective way to attach the metal for the shed roof. I plan on enclosing the sides when funds permit, but for now help with what type of construction, be it wooden trusses or just 2×6 or 2×8 rafters.

Thanks in advance for all your assistance. BEN in TONEY

DEAR BEN: The most cost effective method (as well as structurally correct) will be to discuss your project with a Hansen Pole Buildings’ Designer. With your investment in a new post frame building will come plans which correctly size and locate all members as well as detailing all of the connections.

With this said….

The 4×4 columns you propose using will not be adequate to carry even the most minimal of loads which will be imposed by Code.

Your shed will be designed with a single rafter on each end, and rafters on each side of the interior columns. Depending upon the load conditions at your site, expect to see 2×10 or more probably 2×12 rafters. Purlins on edge will be joist hung between the rafters and the roof steel will attach to the purlins with screws.

DEAR POLE BARN GURU: I paid for continuous roof venting and I got plain 14 in ridge cap can you look in to this? JOE in CLEARWATER

vented-closure-strip


DEAR JOE: The steel ridge cap itself does not change for a vented ridge – the foam closure strips beneath the ridge cap provide the ventilation. According to our records, you were shipped the correct vented closures. Please advise if by some chance you did not receive them.


Post Frame House Quote? Design Recommendations, and A1 Insulation!

DEAR POLE BARN GURU: Is it possible to get a quote from you guys?

Do you just deliver material or build too?

Hansen Buildings TaglineI am looking to build a house pole barn in Belle Plain MN

Do you have to have a 36″ frost wall to build on a concrete slab?

JOSHUA in BELLE PLAIN


DEAR JOSHUA: Certainly it is possible to get a quote from us.

Hansen Pole Buildings provides complete custom designed and engineered post frame building kits, delivered to your site anywhere in the continental United States. We include full 24″ x 36″ structural blueprints as well as complete instructions for installation. Our buildings are designed for the average do-it-yourselfer to successfully construct a beautiful new building.

Most post frame buildings are constructed with the slab on grade being poured after the building shell has been completed. For a home, you can do a protected shallow foundation, (https://www.huduser.gov/publications/pdf/fpsfguide.pdf) however the thickened slab at the edges can be replaced by backfill such as clean sand on the inside (heated side) of the perimeter insulation.

One of the Hansen Pole Buildings’ Designers will be in contact with you shortly.

DEAR POLE BARN GURU: I am interested in a turnkey package. I would like to build a pole shed

36×48  – 10ft walls / 4×12 pitch or so. One 10×8 door or larger if possible. 1 side door 2 std window.

Is there a contact I can make? I am in the 55358 area. MIKE in MAPLE LAKE

DEAR MIKE: Thank you for your interest in a new Hansen Pole Building. We supply complete post frame building kit packages which include highly detailed engineer sealed plans specific to your building, complete step-by-step installation instructions and delivery of your materials to your building site.

Hansen Buildings Construction ManualWhile our buildings are designed for the average person who can and will read instructions in English to successfully construct their own building, we realize some folks just do not have the time or desire to do the work themselves.

Hiring a general contractor to “turnkey” your new building will result in your paying probably 1/3rd more for your building than if you purchased your complete post frame building kit package from us, and then hired a technician to assemble. We can assist you in finding one or more possible builders.

As to contact – the quickest way to get design assistance and pricing is to either call (866)200-9657 and speak with one of our Building Designers, or request a quote at: https://www.hansenpolebuildings.com/freequote/.

I also encourage clients to try to avoid preconceived notions of dimensions, as what one thinks they might need, might actually not be the best design solution. As an example, per your request, you are creating a fairly good sized building with an overhead door which will only accommodate a single vehicle. By going to either two overhead doors, or a single door which is wide enough for two vehicles, your building will have an appraised value several thousand dollars higher than the one vehicle door (for only a few hundred dollar investment).


DEAR POLE BARN GURU: I am building a pole barn which will be wooden framed and metal siding and roofing and a poured concrete floor. I do not plan on enclosing the trusses with a ceiling. At this time I also have no plans for insulation. I was also not planning on having any overhangs on the eaves. My question is on ventilation, should I install a ridge vent? Would a ridge vent serve any purpose without vented soffits. The building is for storage, but If I were to put heat in the building wouldn’t a open soffit and ridge vent just serve to allow all the heat to escape? Would I need to install a ceiling if I added heat? Will I have moisture issues. Thanks, Mike. MICHAEL in DINGMANS FERRY

DEAR MICHAEL: The ridge vent would only be effective with vented soffits. In any case, you need to have a thermal break under the roof steel, if you have not ordered the roofing yet, get it with condenstop (https://www.hansenpolebuildings.com/2014/07/condenstop/). If you have ordered the roofing, then add a reflective radiant barrier between the roof framing and the roof steel. Either of these should alleviate condensation issues.

If you are going to heat the building, you are best to install a ceiling (gypsum wallboard is my choice). This means trusses need to be ordered to support a ceiling load and they should be designed with a raised heel to allow for full thickness insulation from wall to wall.

This creates a dead air space, which can be ventilated by adding appropriately sized gable end vents at each end.

Pole Building Ventilation

Ridge vent without soffit vent

One of the most overlooked areas of pole building construction is proper ventilation. Lack of proper pole building ventilation becomes even a greater issue when an enclosed attic space is present. The International Building Codes require any dead attic space to be ventilated. Without adequate ventilation, moisture from condensation will begin to accumulate on top of the ceiling. Mold and mildew can form on the underside of the roof sheathing and on the roof trusses.

One of the least expensive options for a new pole barn, especially with steel roofing, is to have a vented ridge. Very easily installed at time of construction, if there is ever a possibility of a flat, level ceiling being installed in the building, a vented ridge is a must.

A ridge vent without a soffit vent doesn’t work, and here’s why. By virtue of their design and location on the roof, ridge vents are predominantly exhaust devices. Warm moist air from inside the building rises, passes through the ceiling material and attic insulation and out through the highest point – the ridge.

The attic space will get makeup air to replace the air the ridge vent has exhausted along the path of least resistance. If there is plenty of soffit venting and if you have a relatively tight ceiling, then the makeup air will come from outside, which is desirable, summer and winter. However, without soffit vents, the makeup air comes from indoors, a situation which is not desirable in any season.

So what to do if you have a building with an attic space, and little or no ventilation?

attic ventilationIf mold is already a problem, scrub the affected areas with a diluted bleach and soap solution. Once clean and dry, a mold resistant paint can be applied.

I’ve heard others suggest a roof design without ventilation, an issue that is volatile and multifaceted. Basically – doing away with the dead air space in the attic. As I see it, the choice to go or not to go with attic ventilation does not in itself ensure good performance. The bottom line with attic assemblies, whether vented or not, is that they be done properly.

Filling the attic space with cellulose insulation may be an option, although expensive and is not a 100% guarantee to solve the problem. Cellulose insulation is dense, blocks airflow and contain salts which inhibit mold growth. In my opinion, many of the innovative uses I’ve seen for cellulose are experimental, but those experiments seem to be working well. If conditions permit, you could find a way to blow in cellulose at the gable ends of the trusses. Better yet, you could fill the truss cavity from the ridge. In any case, with cellulose insulation as a “total fill”, I recommend the use of a vapor barrier, such as plastic sheeting on the underside of the trusses and/or ceiling joists or a vapor-barrier paint applied over the drywall.

Only without a dead air space should a ceiling vapor barrier be utilized.

Maintaining low indoor humidity may be also effective, but it may require wintertime humidity below 25%, which could be uncomfortable, as well as near impossible to achieve.

Add Pole Building Ventilation.

If your pole building does not have enclosed vented overhangs, it may be possible to add ventilation along the top of the building sidewalls. However, each individual case should be examined, as drilling holes or cutting into a structural member could compromise the building’s integrity.

If a continuous ridge vent is not present, install one. Make certain there is a clear air flow from the attic space through the ridge – which may entail the removal of any sheathing (oriented strand board – OSB or plywood), vapor barriers, or other insulations directly beneath the ridge.

Although the newer versions of the Code prohibit the combination of gable vents and ridge vents, gable vents may be installed in each end of the building – to provide an intake for outside air.

The real solution – is to build it right in the beginning. Prudent design with vented soffit overhangs and a vented ridge may involve some initial investment, but prove to be an insignificant cost over the life of the building. And trust me, no one I’ve ever talked to had a “fun” time dealing with mold.

Happy Horse Barn Ventilation

If common sense was common, then articles like this one would not have to be written. One of the least expensive in upfront cost is also the most cost saving, when it comes to horse health and veterinary bills. Sadly, it is most often either an afterthought, or a “never even thought of” for horse barn ventilation.

Every horse stall should have some sort of sidewall openings which are permanent, they are left open year around. The best location for these openings is at the eave line – where the sidewall meets the roof. These openings should extend the entire length of the barn sidewall. This provides every stall with fresh air, as it is equally distributed along the length on both sides of the barn.

As the opening will be 10 to 12 feet above the floor (no, an eight foot eave height is not appropriate for a horse stall barn), the incoming cold air is mixed with warmer stable air before reaching the horses.

During cold weather, the full length ventilation provides a thin stream of cold, fresh air, as opposed to a large draft from an open door or window. In cold climates, the minimum guideline is to provide at least one inch of continuous-slot permanent opening for each 10 feet of building width.

Enclosed sidewall overhangs; using vented vinyl soffit panels provides an intake solution which is affordable, practical and attractive. The most popular vented soffit panel is what is known as a “triple 3 center vent”. These panels have perforated openings in 1/3 of each panel. Depending upon the manufacturer, the panels deliver from four to five square inches of net ventilating area, per square foot of panel.  A two foot wide overhang, across a 12 foot width stall, would therefore gain 96 to 120 square inches of net ventilating area, using the center vented soffit. Going to fully vented soffit panels, would triple the amount of air intake.

Along with air intake from the eaves, a continuous vented ridge must be provided. The ridge ventilation should be at least equal to (in square inches) the intake area provided for at the eaves. Properly designed ridge vents, allow for the warm moist air to exhaust at the ridge, without allowing the weather or debris into the building. At least a square foot of ridge vent should be provided, per horse. This may cause the need for additional venting, such as functional vented cupolas, to have to be added.

In order to encourage proper horse barn ventilation airflow, it is best to avoid having ceilings, or loft storage areas above stalls.

During warm weather, large doors can be opened to allow for cross ventilation – provided doors are on opposite walls.

I’ve never been a fan of windows in horse stalls. They tend to provide all too promising targets for young miscreants. If horses are to be kept in stalls during warm weather, outside openings of at least five to 10 percent of the floor area should be provided into each stall. For a typical 12 foot square stall, this means as much as 14-1/2 square feet. If outside runs are provided for each stall, a 4’ x 7’ sliding door will easily allow convenient access and adequate ventilation (and be affordable). With no run outs, a 4’ x 3’6” bale door, for each stall, may be a solution.

Open grill work on stall fronts, also help to aid in good stall ventilation.

One clear rule to follow – when in doubt, over ventilate. The costs will easily be gained in reduced vet bills, with healthy horses…who require adequate horse barn ventilation.