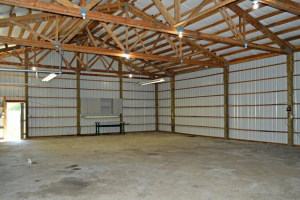
Today the Pole Barn Guru answers reader questions about moisture control, insulating a building with a ridge vent, and a solution for replacing posts that have rotted out.
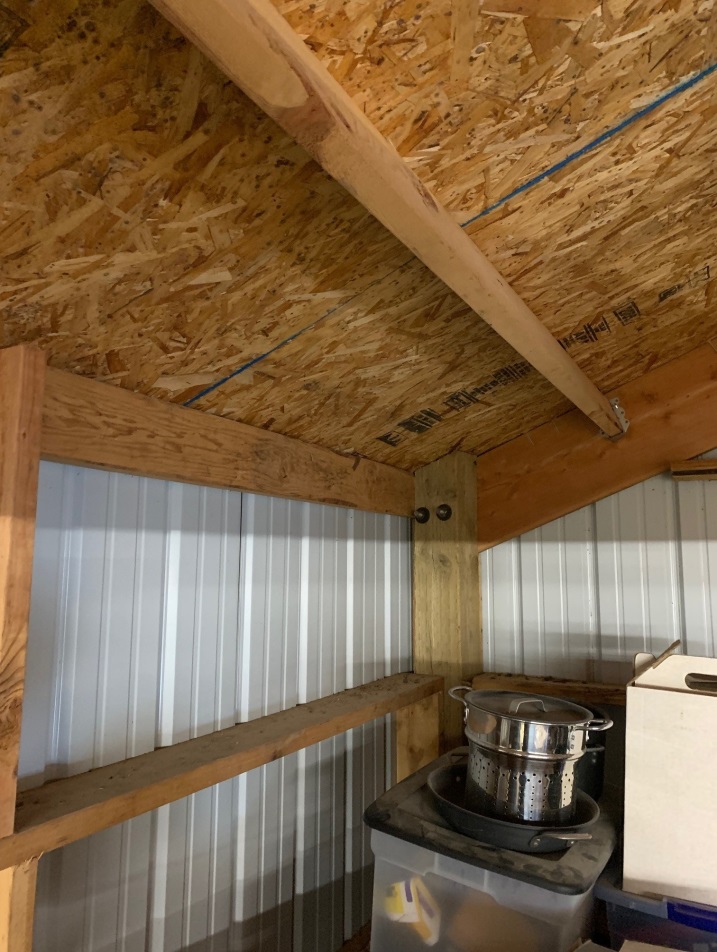
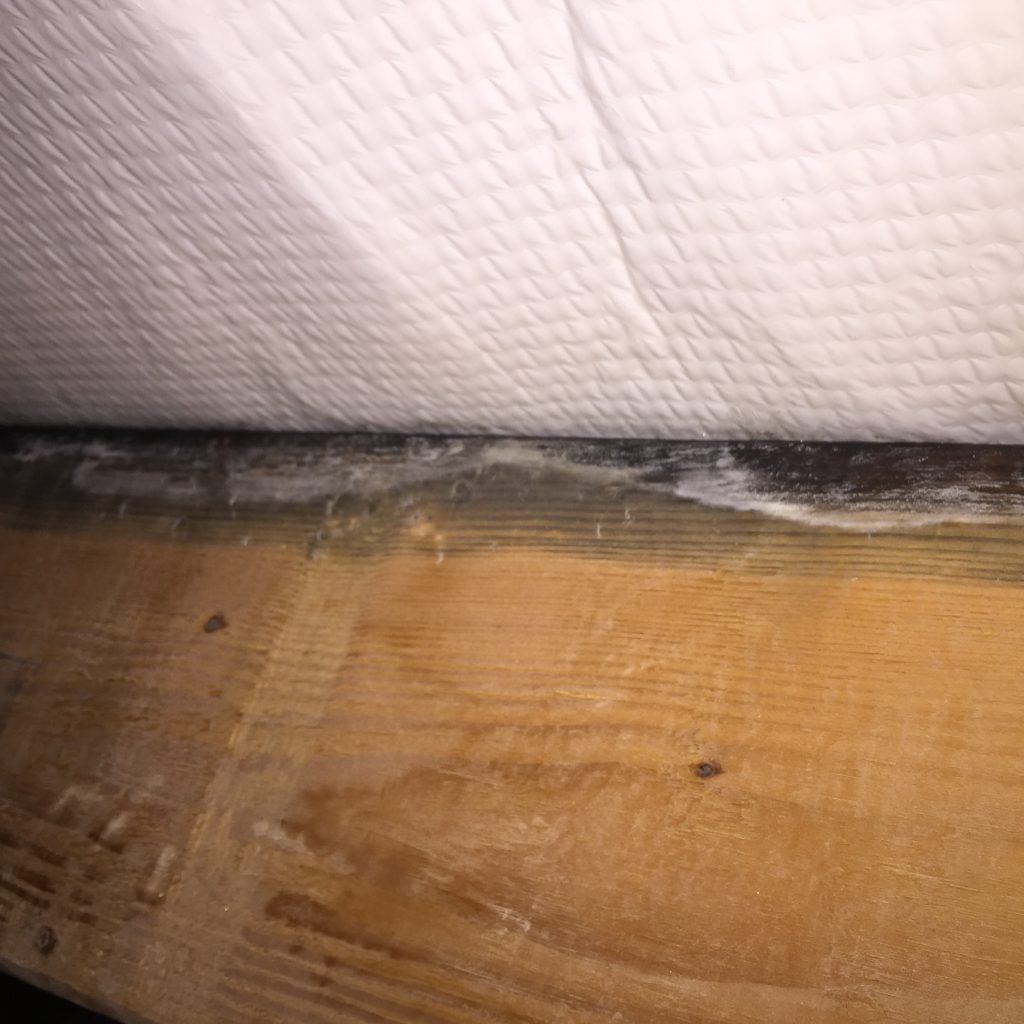
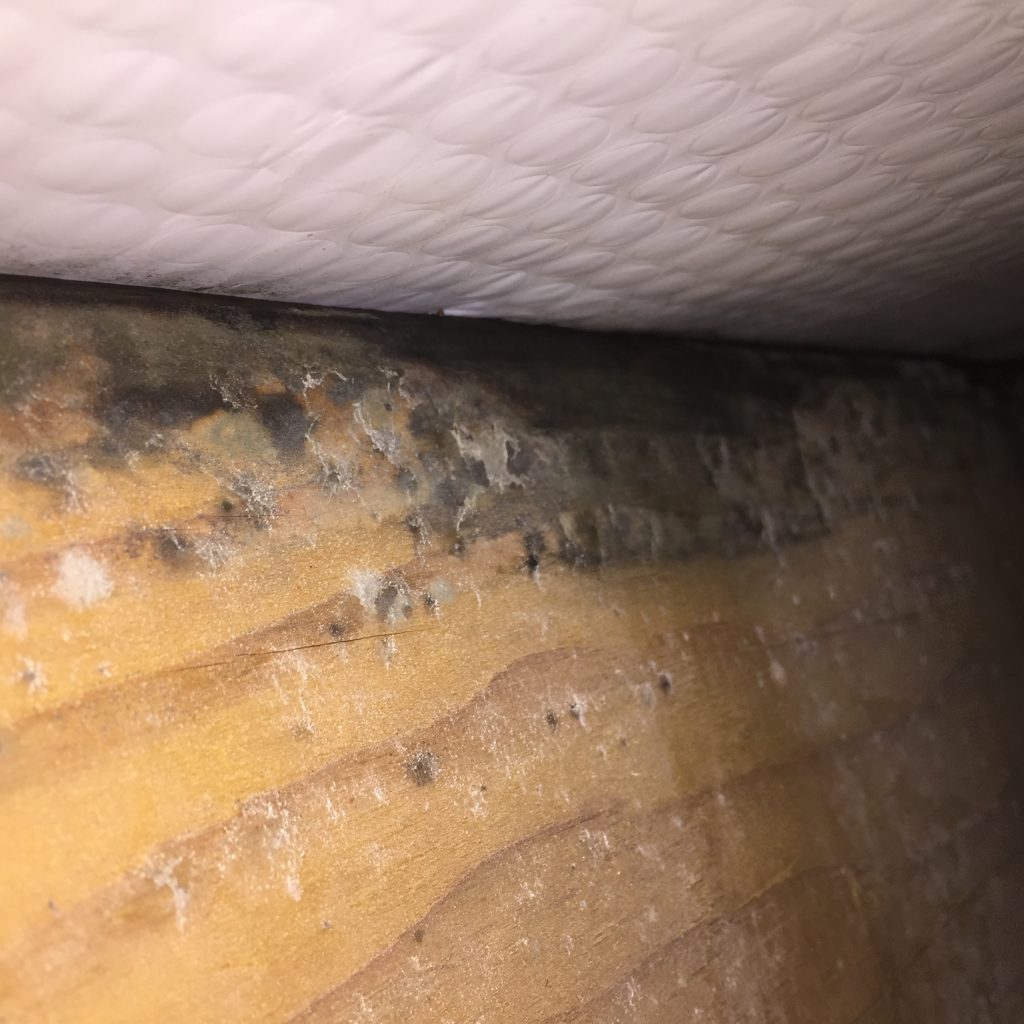
 DEAR POLE BARN GURU: Thanks for the abundance of technical information you provide your readers. Like many of them, I inherited a pole barn with the same ceiling sweating, heat, cold issues and need a post construction solution. The slab sweats only in some places. I have a typical wood post with 2×4 horizontal purlins, wood truss and purlin roof, and metal skin walls and roof. My goals are, #1 stop the moisture inside, #2 insulate for moderate comfort (no codes to comply with and I can heat with a wood stove and abundance of wood) , and #3 if I can afford it, skin the walls with T-111 or other wood for an attractive look inside. I did not see any suggestions about double-faced radiant barriers in your other articles. Do you think expanded polystyrene cut to fit in the 1.5 inch cavities to flush with purlins, and then add the radiant barrier (bubble type) stapled over that directly to purlins would be appropriate and not trap moisture? If so, should I allow and air space between the polystyrene and radiant barrier? Many thanks, Mr. Retired…finally! JOHN in CHEROKEE VILLAGE
DEAR JOHN: Thank you for your kind words. If your slab sweats at all, it is likely there is no vapor barrier under it and it would behoove you to apply a sealant. 1.5″ expanded polystyrene (EPS) boards cut to fit tightly and with all seams tightly sealed would give you some degree of insulation (roughly R-7.5 other than at girt and purlin locations). You could add unfaced rock wool batts to increase insulation. Radiant barriers provide next to no insulation value and only function if seams can be perfectly sealed, we’ve actually opted to no longer offer them to our clients.
Unless you want to heat area in triangle of trusses, you may want to consider insulating at ceiling level, then vent dead attic space above.
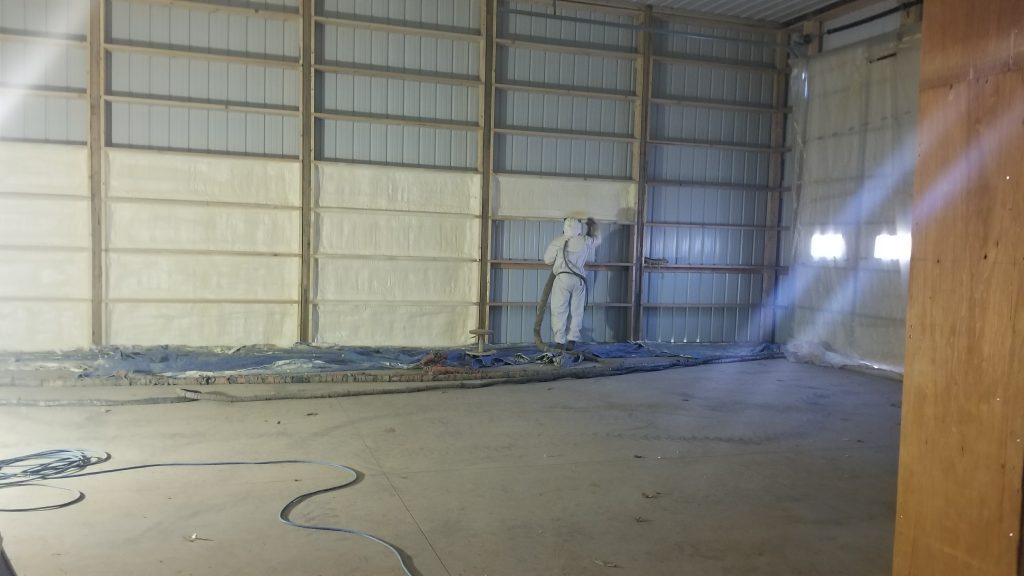
DEAR POLE BARN GURU: Hello Mike. I came across your website while trying to learn more about what to do with the ridge vents in a pole barn when you plan on insulating it with closed cell foam. My wife and I purchased a property that has a 36w x 48L unconditioned pole barn with 8 skylights, a couple of ridge vents and (2) sets of huge doors on each end. While we know this will never be a tight building, we need to insulate it for our pets (10) dogs and (11) cats, and for a hangout area for us to spend time with them rather than inside our home.
We have a high-end American Standard heat pump split system that will condition the entire space.
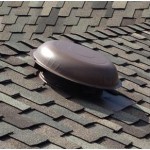
Would you be able to give me any advice on what you recommend I do regarding the existing ridge vents? I’m not sure if I should insulate around them and leave them as they are…open. Or, should I temporarily trim out around them and seal them for the time being?
Any information you could provide me on this topic would be greatly appreciated. ROGER in HOUSTON
DEAR ROGER: With those large sliding doors, your investing in closed cell spray foam may be for naught. If your expectation is to be able to control any sort of heat loss/gain you should consider replacing them with insulated steel sectional overhead doors.
On to your question – seal off ridge vents and spray foam across skylights (or, even better) replace them with steel roofing before insulating.
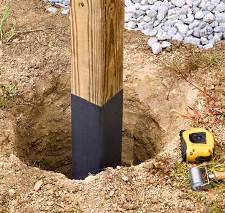
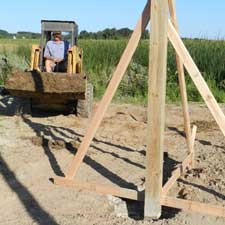
DEAR POLE BARN GURU: What are my options on repairing 32×40 all 6×6 posts are rotted off ground level. Floating slab, perma colum, helical peir, or strongway sleeve. CHAD in GREAT BEND
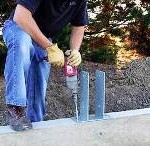
 DEAR CHAD: I would repair one column at a time. Temporarily support roof system being supported by a column. Cut column off above point of decay. Excavate embedded portion of column and remove – hole being dug to be at least below frost line. Insure bottom of hole is firmly compacted. Place a sonotube in hole, attach an ICC approved wet set bracket to bottom of column and backfill with premix concrete. Compact granulated fill around sonotube in six inch lifts. Repeat at each column.
 Without a well-sealed high qualify Weather Resistant Barrier (building wrap) between framing and siding, humidity inside wall will follow along with exterior relative humidity to a large extent.
 Today’s Guest Contributor is Joseph Bryson. Joseph was born in Alberta, raised in NYC and is living in New Zealand. He has been working in 4 different industries and helped numerous businesses grow. Now, he is focused on writing as his next career from home and lives a peaceful life with his family and a whole pack of dogs.
 Best guess is it is coming from your concrete slab – either moisture from it being poured has not fully exited or (and more likely) there is not an adequate vapor barrier under it.
 DEAR POLE BARN GURU: I live in a tiny house and would like more space. Adding on a 16 x 16 foot room to the back of my house would give me more living space. My question is can this room be customized to look like a family room cheaper than a stick built add on? Thank you very much. P.S.:I don’t have any photos because I am in the thinking stage of this idea. REBECCA in CHANDLER
 DEAR POLE BARN GURU: We have a pole barn it was purposely built to have an apartment upstairs; it originally was a stable below. It’s all living quarters now. We have had issues with the steel roof. We are switching to class 4 shingles. The building has no eaves as it has porches off both sides. We are working with a roofer. They are suggesting we use some ridged vent at the lower edge of the roof, by cutting a notch in the edge and installing it under the shingles and decking. That’s my understanding. Also, it will have a full ridge vent. The steel was applied on decking with tar paper under it. We have had leaking and condensation with it, as it is. Just wondering if you have any other ideas, or if the ridged vent at the lower edge of the roof will be a problem? It has 16″ deep trusses with blown in insulations above the sheet rock ceiling. Thanks for any input or ideas. JENNENE in RAPID CITY
 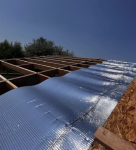 DEAR JUSTIN: In most instances a reflective radiant barrier is a waste of your hard- earned dollars. They can be (when properly sealed) an excellent vapor barrier, however using a perforated product takes away even this as a possible benefit. Walls – from out to in…. Siding, Omnidirectional housewrap over bookshelf wall girts, fill entire cavity with Rockwool insulation batts, well-sealed clear poly vapor barrier, interior finish. Roof – Order raised heel trusses (at least an inch taller heel than depth of blown in fiberglass (not cellulose) insulation). Order roof steel with an Integral Condensation Control factory applied. Vent eaves and ridge in correct proportions. No ceiling vapor barrier.
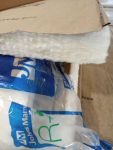 DEAR POLE BARN GURU: I have an existing pole barn on property that I would like to insulate. I would like to steer away from spray foam but am worried as there is no Tyvek or vapor barrier on external side. What are my best options to void off any moisture issues and create a well insulated wall. JAMES in LAKE VILLAGE
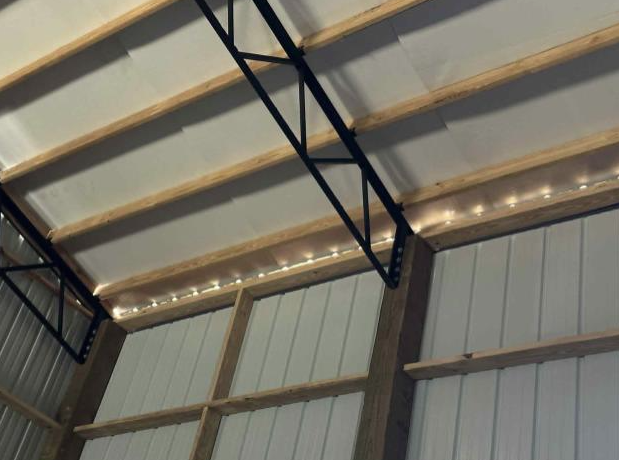

 DEAR POLE BARN GURU: I have one more question for you I have a cabin that has 2×6 stud walls 12′ high that I put 2″ foam under slab and 2″ on the side walls so from under slab to top of walls on the exterior is completely covered in foam with 2″s of closed cell spray foam sprayed to the interior of the 2″ pink. Then 5″s of closed cell sprayed on the roof for a hot roof. My problem is I’m heating this building with electric boiler and my bills have been quite high. In the house side I have vaulted ceilings so not much I can do there but my garage ceiling is 12′ with no insulation at that level because of the hot roof in your opinion if I blew in insulation at the 12′ ceiling height what would you do between the blown in and hot roof I’m worried about creating a moisture problem and mold and thinking I should vent that area above the garage too the outside what’s your thoughts thanks. CHRIS in HIXTON
  DEAR ERIC: 4 foot on center makes for an awful lot of holes to dig and posts to set, not to mention becoming very limiting on width of openings like windows. We would recommend (of course with engineer’s approval) glulaminated columns every 12′ or even 16′). Outside of this, it is an acceptable approach, provided you can attach your splash plank to adequately transfer shear loads. We always recommend insetting roof purlins between trusses using engineered hangers.
 DEAR POLE BARN GURU: If I have a manufactured home that has been bricked in all around can I add a Pole Barn Home onto it? EDWARD in TENNILLE
  DEAR POLE BARN GURU: How many bedrooms will fit in your largest residential barndominium. Thinking about using it as a dorm-type or assisted living. PHILLIP
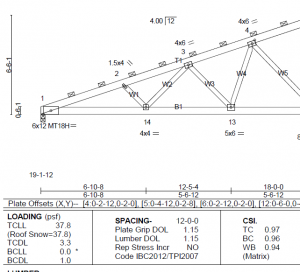
  DEAR CHRIS: If your existing pole building was indeed built for commercial use, then it should be in Risk Category II for wind, snow and seismic loads – same as residential. You will want to ascertain if roof trusses were fabricated to an adequate bottom chord (ceiling) dead load to support your choice of interior finishes. Typically you will want to see a 10 psf (pounds per square foot) load to support sheetrock. You will want to examine truss drawings prior owner should have. If these are not available, reach out to your local permit issuing authority, as many jurisdictions now have digitally archived plans and specifications. Another source would be whomever fabricated your trusses. Each truss should have a quality control stamp with fabricator’s name on it. Contact them, with your site address and approximate year built and they may be able to assist you. Worst case is you should be able to pay fabricator to send a representative out to gather specifics of your trusses (web configuration, lumber dimensions and grade, steel connector plate sizes). They can run it on their computer program to determine adequacy. If a structural repair is required for an upgrade, for a nominal fee, they should be able to provide.
 DEAR POLE BARN GURU: I am a little confused on this vapor barrier situation as some say yes and some say no. I am building a residence in Missouri. Metal roof with reflective bubble wrap radiant barrier. I have Soffit venting with a thermostat controlled ventilation fan in one gable end. Is vapor barrier needed when attaching metal to bottom of trusses when using R38 blown in fiberglass. RANDY in MISSOURI
  DEAR POLE BARN GURU: Are perma columns worth it? JOHN in TRUMANSBURG
  DEAR BRETT: In my humble opinion, you are looking at doing it in a much more difficult fashion than needed. Set glulaminated columns every 10′ (you could easily do wider spacing to reduce number of holes to dig, columns to set, etc). Align prefabricated wood trusses to match columns – single on each end, two-ply on interiors, with trusses notched into columns. This will eliminate need for truss carriers and greatly minimizes amount of truss bracing required (and usually reduces truss costs). Truss carriers are often under designed and rarely adequately connected to properly resist gravitational and wind uplift loads. Use 2×6 2400f MSR (Machine Stress Rated) purlins, joist hung on edge between trusses.
 DEAR POLE BARN GURU: I recently moved into a house with a 40×30 pole barn (wood post and wood trusses) with a metal exterior. The building has a reflective foil radiant barrier between the metal and wood structure. It is extremely hot in the summer and cold in the winter. I want to insulate and cannot afford spray foam. I also don’t have the ability to remove the walls to remove the foil barrier that way. I do have some Silvercote insulation that has an attached vapor barrier. It is just a fiberglass roll insulation that has an attached vapor barrier to it. It is sold around here for use as insulation in metal buildings. I was given enough to insulate the whole shop from someone that had left overs. I would like to install this insulation to help with temps in the shop. I have tried to research to get an answer on the best way to go about this. The shop builder said just put it up but I feel that would create a double vapor barrier. Is my best route to cut the foil radiant barrier out and then install the fiberglass insulation with vapor barrier facing the interior of the building? This would basically take the foil barrier out and install the fiberglass against the metal with the attached face vapor barrier to the inside of the building. I want to make sure I do it right. Thank you. DAVID in OKLAHOMA CITY
 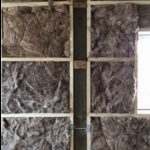 DEAR DAVID: If you are dead set on using this Silvercote insulation then you should cut out any foil radiant barrier. You never want to have a double vapor barrier situation as any trapped moisture will have no method of escaping. Downside of this is you do not have a Weather Resistant Barrier (aka housewrap) between framing and siding. An option to consider would be to resell your metal building insulation, then use unfaced Rockwool batt insulation, as it is unaffected by moisture.
 DEAR POLE BARN GURU: I plan to build a 28×48 metal pole barn, concrete floor, 12′ eave with 8/12 pitch. Barn will have 6 3×4 windows, and two 10×10 roll doors, one roll door on each gable end. For now, the roof will be insulated with 3in closed cell foam. I plan to insulate the walls down the road with rigid foam board. The building will not have A/C. Question: Do I need vents or exhaust fan in the gable ends of the roof with the high heat/humidity of Alabama? There will be no ridge vent or soffit vents. I may not have the building open every day, either. Thank you. JASON in MONTGOMERY
  DEAR POLE BARN GURU: I have a 1000sf metal building with Galvalume roof (on 2×10 purlins, no deck) built in 1999 with gasketed nails. I’m experiencing some small leaks from some of the nails. The metal is still good. Do you know someone that can replace the nails with screws, approximately 800. MIKE in CINCINNATI
  DEAR POLE BARN GURU: The bottom 3′ of our metal sided maintenance shop has been rusted out by salt. Do you know of an organization that could replace the bottom sections? MARK in ROCHESTER
  DEAR ROBIN: In order for Dripstop to work effectively takes an excellent ventilation system – one with both adequate intake and exhaust vents. Outside of ensuring ventilation is doing its job, is reducing possible sources of moisture. Obviously your horses contribute greatly to adding moisture to the air, so not much you can do about them as a source. You do need to make sure your area at least 10 feet wide around your building is sloped away at least 5%. Downspots from gutters need to discharge at least 10 feet away from building. If these measures are ineffective, you may want to contact Dripstop directly at 1.937.660.6646.
 DEAR RUSS: Assuming your building is already up, if you have no means of controlling condensation on underside of your roof steel, you should be doing something. In order to be effective, whatever is used must be totally sealed, else you risk creating problems between roof steel and any barrier if moisture passes through and gets trapped. Your best bet – two inches of closed cell spray foam directly applied to underside of roof steel. Make sure dead attic space is properly ventilated.
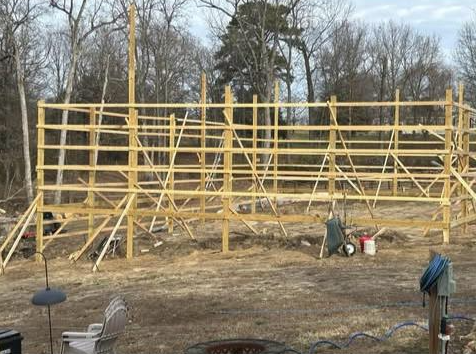

 HOLLY: We can provide 19 pieces of 3′ net width coverage by 3 feet tall polycarbonate panels, as well as steel “z” flashing needed for your transition from polycarbonate to steel siding and appropriate screws to attach. Along with this, you will get a Chapter from our Construction Manual to detail installation. To save on delivery costs, we can have these all available for you at our Browns Valley, MN facility. Please reach out to Materials@HansenPoleBuildings.com for pricing.
 DEAR POLE BARN GURU: Have residential well, need a small building has this been done? CHRIS in ELMGROVE
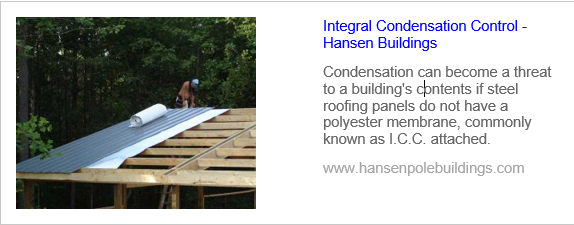
  “Greetings I’m writing to discuss the best practice for what to place under a metal roof. I am building a post frame, for shop use and will eventually be insulted. I had initially intended to install a WRB, like Tyvek, under the sheet metal roof. My thought was that the inside of the shop will have a vapor barrier and insulation, thus the warm air would not come in contact with the steel and create condensation. Is this thinking flawed?”
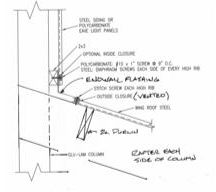
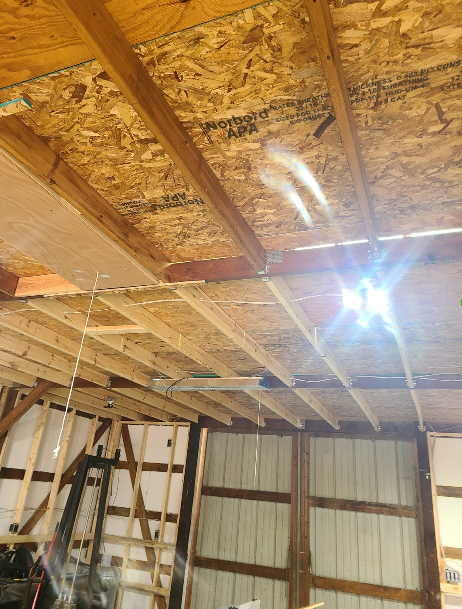
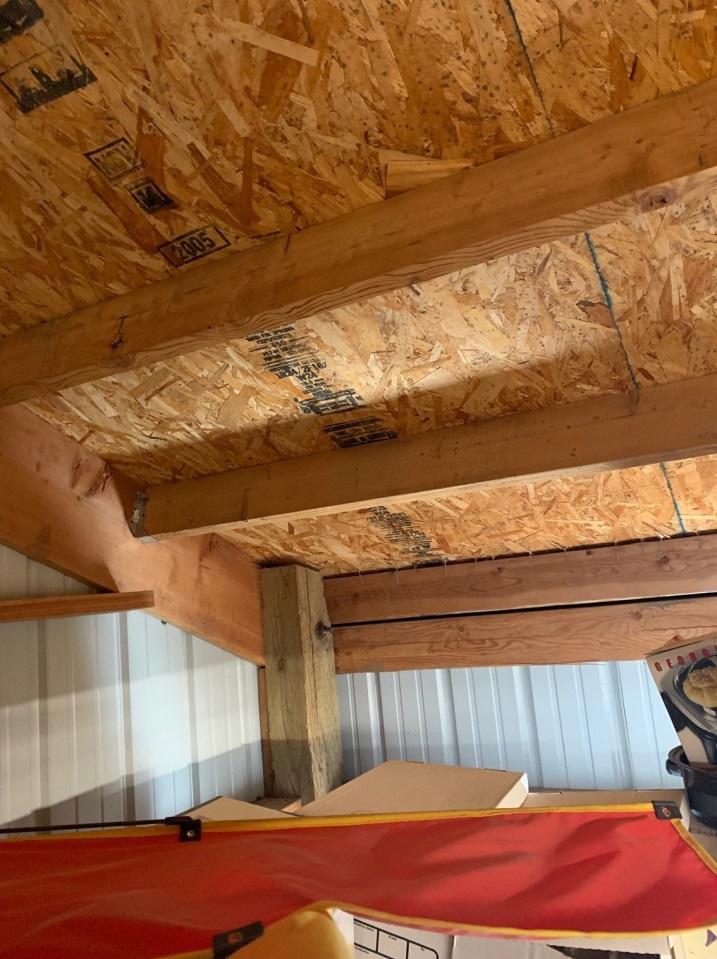
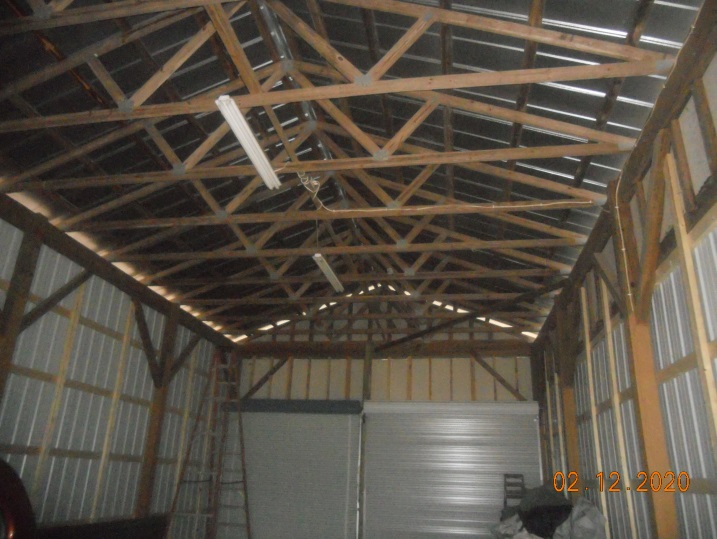
  Purlins are then in perfectly straight lines, allowing for pre-drilling of roof panels (this eliminates misses). Others may try to align purlins over top of trusses using butt end splices. This makes for a very poor connection attempting to get adequate fasteners into 3/4″ (1/2 width) of truss top chords. When purlin joints are lapped, it causes a stagger of the purlins, resulting in inability to pre-drill and a significant chances of screw misses.
 DEAR POLE BARN GURU: What does it include? Just the shell or interior also? ASHLEY in MONROE
  DEAR POLE BARN GURU: I need a 3 1/4″ x 7 1/4″ x 12′ beam. Is this something you can help me with? JAMES in TUCSON
 DEAR POLE BARN GURU: I am in preliminary stages of designing a post-frame building, that will serve a multitude of functions such as a home gym, work-shop, and area to host family parties. It is a 30′ x 76′ x 20′ tall, with 2 fully enclosed leans 64′ long on each side that span out 16′. I really like Scandinavian style, which utilizes no overhang. My main concern is how to allow for proper air intake if I do zero over-hang since there will not any soffit. Curious for your thoughts. Would you recommend against ‘zero over-hang’? Or do you think there is some work-around for air intake and gutter attachment? Hoping for a quick answer! Thanks in advance : ) SHANE in HARTLAND
 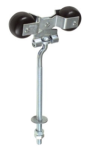 DEAR POLE BARN GURU: I have a quonset with (2) 15’x14′ sliding doors with 4 cannonball style rollers each that need to be replaced. I’m thinking I’ll have to remove the doors, but what is the best way to do this? CODY in MAYNARD
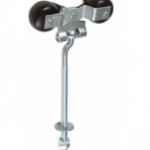
  DEAR ANGEL: Your strongest and most affordable foundation will be to use true glulaminated columns, embedded in ground. Regardless of what you pick, it will only be as good as ground it is placed upon. A well prepared site, where clays and organic materials have been removed and proper fill has been placed and compacted every six inches, will greatly improve your chances of having a solid foundation. I would encourage you to consider a steel roof, as shingles have a very short life span (read more here:
  Screw leaks are caused by either poor installation, wrong placement (on high ribs rather than flats), or entirely wrong parts. Poor installation will show up right away – either in a good rain storm, or by checking weather tightness by running a water hose on roof. I would recommend second of these prior to any interior finishes.
 DEAR POLE BARN GURU: I need a 4×8 siding material that has a Florida Product Approval Code. I was hoping to use Georgia-Pacific Plytanium T1-11, but it does not seem to be approved. What would you suggest for a board-and-batten siding that is approved? The barn is 30×48, 14′ side walls. CHRIS in ORLANDO
  DEAR KRIS: Ultimately, your most effective interior layout should override saving or spending a few extra cents per square foot. While perfectly square, is typically going to be more cost effective (due to having less wall surface), as long as your length to width ratio is under 3:1 it normally is not going to significantly impact your costs (provided you are not in an extreme wind area, or excessively tall). While I have built clearspan post frame to 100 feet in width (and had engineered designs of 140 feet), price per square foot generally starts to ramp up beyond 80 foot wide. This will, of course, depend upon applicable roof loads.
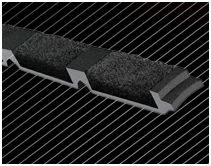 While ridge cap is off, replace solid foam closure strips with vented ones. Use 1-1/4″ long #12 stitch (metal-to-metal) screws to reattach ridge caps.
 Historically, IRC (International Residential Code) ventilation requirements are applicable to one and two family homes and have been based on a ratio of “net free ventilating area” (NFVA) being area of ventilation openings in attic to area of attic space. NFVA is the total unobstructed area air can pass through and it is calculated at the most restricted location through a vent’s cross section.
 DEAR POLE BARN GURU: I’m looking to build a 25′ x 50′ pole barn 16 ft with an open lean-to on each side. I’d like the lean-to’s to be 20′ wide and the same depth (50′).so the total width would be 65′ by 50′ deep. My question is about financing. I’m not sure how financing would work. Do you have a financing co. or if that something I would get on my side? Thanks SHANE in BRIDGETON
 DEAR BRONSON: Thank you for your interest in a new Hansen Pole Building.
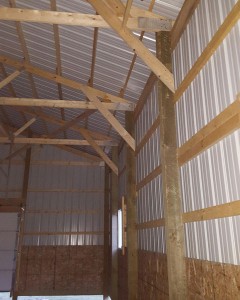 DEAR POLE BARN GURU: Can I remove my knee bracing from the pole barn and put up interior ceiling and wall steel. I have a 60×104 pole barn on an 8″ wide 4′ high concrete wall with wet set braces (6×6 laminated beams. 8′ on center) ceiling is 16′ from floor my knee bracing takes up too much wall storage space. They brought them too far down the wall. About 6′. SEAN in MONTPELIER
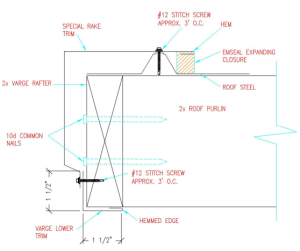 DEAR POLE BARN GURU: How do I trim out a metal ribbed roof panel on a barn with a widows peak? How do I make it match up with the rake trim? While maintaining proper drainage. KEVIN in LINCOLN
 Your builder sadly did you no favors in not having a means to prevent condensation on your roof steel underside. It also requires having an actual thermal break, not just a vapor barrier. Your best solution now is to have two inches of closed cell spray foam applied directly to the underside of your roof steel, making certain they do not block ridge vents. Without this thermal break, expect to end up with damp insulation.
 Most pole barn trusses are designed for a one psf (pounds per square foot) bottom chord dead load (BDCL) – inadequate for any type of ceiling. On truss spans of up to and including 40 feet, we include a five psf BCDL as a matter of practice (too many clients decide later on they want a ceiling) and if we know in advance a ceiling is to be installed, we use 10 psf BCDL. You have been fortunate to have at least a five psf BCDL. Your 10 psf bottom chord live load is a non-concurrent (assumes no other live loads are being applied such as snow) one and basically is there to provide a minimum degree of structural integrity allowing for occasional access to an attic space for maintenance purposes.
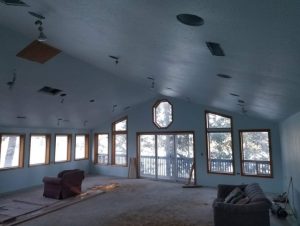 DEAR CHRIS: Saline County is located in Climate Zone 5A. As such conditioned buildings require R 60 attic insulation.
 DEAR MARK: Thank you for your kind words about our YouTube videos.
  DEAR POLE BARN GURU: Do you all have barns with living quarters? Not looking for a barndominium, per se, but a restroom with a shower and a living room in addition to 4 stalls and a tack room. we plan on staying there at first while we build the main house on the property, then use for guests or storage. SARAH in SARASOTA
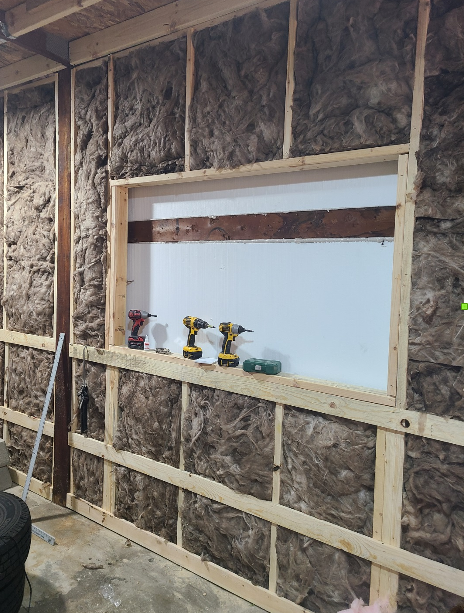
 DEAR POLE BARN GURU: Good afternoon! Looking to see what trim to use on the corners?
  DEAR POLE BARN GURU: How much more difficult would it be to put the metal roof on if you can’t square the roof trusses. Because the posts were not cemented in properly. We are 8′ out of square on a 24’x50′. Would it be possible to square being that far out? TOM in BLOOMSBURG
 DEAR POLE BARN GURU: Just finished 40x60x16 pole barn and am looking to insulate. Building wrap was installed on exterior walls and roof has double bubble. Wondering how to manage moisture inside the building. Slab is insulated under as well as a vapor barrier. Interior walls and ceiling will be finished with steel liner panel. I’d like to spray foam entire building with open cell spray foam walls and roof deck. Would I need to install a vapor barrier between foam and steel liner panels? Building has attic trusses and the room will also be conditioned separately from garage space. Thanks KYLE in COXSACKIE
 DEAR BEN: Code requires a one inch minimum of airflow across your entire roof surface above batt insulation. Air flowing only at steel ribs would be inadequate to meet requirements. Assuming you have 2×6 roof purlins, 5-1/2 inches of blown cellulose would give you roughly R-19.25. You would be better served by using 2-1/2 to 3 inches (R-17.5 to R-21) of closed cell spray foam applied directly to underside of your roof steel, as it does not have to be vented above.
 DEAR KEVIN: Your call happened to be routed to one of our newer Building Designers. Post frame construction is highly complex, with a literal unlimited number of possibilities, this being one your designer was unfamiliar with.
 DEAR FRANCES: Without having to pull off your building’s roof steel, install some fashion of condensation control then reinstall it – there is only one practical solution – two inches of closed cell spray foam applied directly to underside of your steel roofing. This would provide an R-14 insulation value. It is unlikely to have an effect on reduction of noise from rain, as it is not good at blocking sound waves. “Double bubble” offers little to no R-value and would require being installed between framing and roof steel.
 DEAR POLE BARN GURU: What is the standard width of a skylight on a pole building?
 DEAR JOE: I would look at doing bays of 12′ – 14′ – 12′ first, however you should discuss options with whoever is going to engineer your building plans. Depending upon what you will be using this building for, it may be less expensive to cover one or both 24′ endwalls from roof to ground, than to have a roof only. A Hansen Pole Buildings’ Designer will be reaching out to you to discuss your needs, as we have provided roughly 1000 fully engineered post frame buildings to our clients in Washington State.
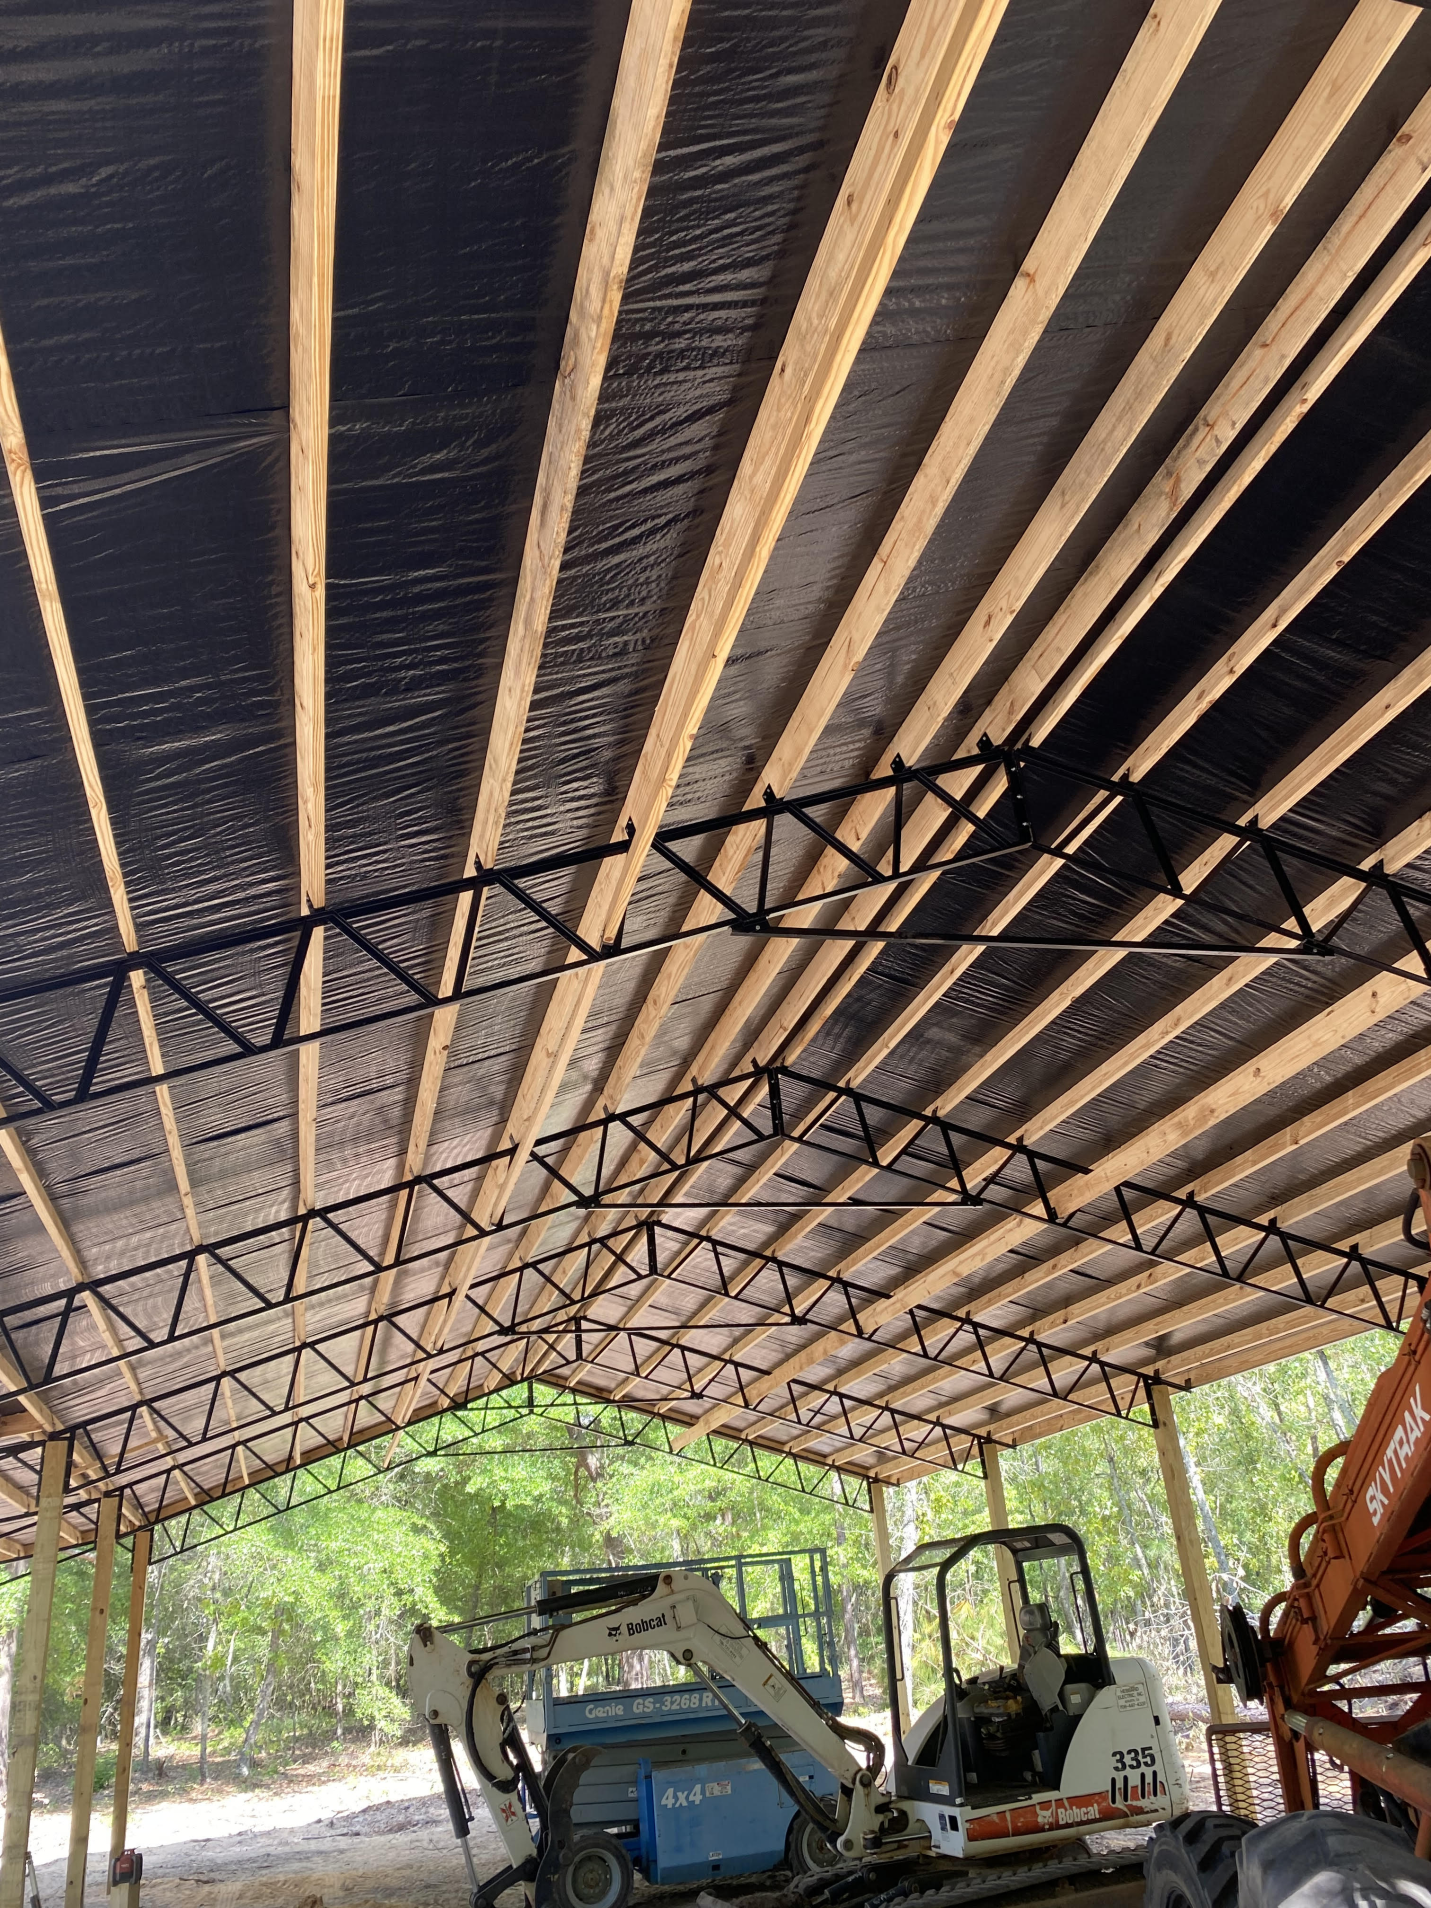
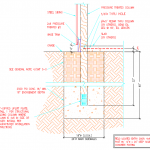 DEAR PETE: Any building is only as strong as its foundation, so this is not a place to be penny wise and pound foolish. Code requires minimum six inch thick concrete footing, or a Code approved alternative (here is an example
  DEAR JOHN: Our floor plan team can add plumbing and electrical for a nominal fee – challenge is, your subcontractors will ignore this entirely. I have always had best results having these subcontract trades submit their own drawings when they apply for their permits (these permits are outside of your structural permit).
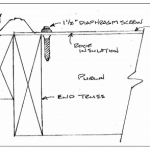
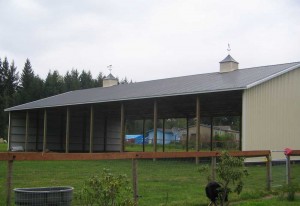 For barns with enclosed sidewalls, enclosed vented sidewall eaves and a vented ridge are critical design elements to allow for passive ventilation. Air enters through eaves and exits through ridge vent with excess moisture.

 DEAR POLE BARN GURU: Should the screws for exposed fastener metal panel roofing COMPLETELY penetrate the 1/2″ plywood decking/substrate? STEVE in WARREN
 DEAR TIM: Header beam (aka truss carrier) requirements can be determined by a Registered Professional Engineer and are based upon this formula:
 DEAR RICK: Code will not allow you to place batt insulation between your purlins unless you have at least an inch of continuous airflow above from eave to ridge. Impossible to do given orientation of roof purlins.


 Last questions. I found a 36×36 square gable vent that has a NFVA of 585. I need 576 on both sides of my building so this vent should be sufficient, correct? Also, with me using the 1/300 ventilation rule the gable vent company who has this vent recommended using a vapor barrier in the attic too. I believe he said that it needs to be no more than 1 perm and to install it on the warm side of the attic. He said this is needed because I’m not using the 1/150 rule. He said if I have 16 sq ft on ventilation instead of 8 I wouldn’t need a vapor barrier. That’s not really an option though. That many gable vents wouldn’t look good. So what do you think? Do I really need a vapor barrier using the 1/300 rule? My roof panels have a felt-like material on the underside of them that I believe is called “drip x”. I was under the impression that this was a vapor barrier and when warm air rises and hits those cold roof panels the “drip x” keeps it from condensing. Do I really need a vapor barrier along the warm side of the attic too? That sounds like overkill to me but I want to do it right too. The plan is to fully finish the inside of my outbuilding eventually with a ceiling that will be white ribbed panels with a r-38 blown in fiberglass. I only plan on heating the building to about 55-60 degrees and that’s only if I’m out there working. The thermostat will be set to 45-50 if I’m not out there. Also, this outbuilding doesn’t currently have air conditioning but I may consider adding it down the road. You’ve been a big help so far. Thank you and I look forward to your response. “
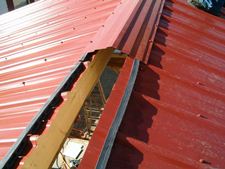 DEAR POLE BARN GURU: I have a barn that doesn’t have soffit vents but it does have a ridge vent. I installed reflective insulation which seems to have dropped the temperature quite a bit. I also have a gable powered fan that does 2000 CFM. However it is about 8 to 10 feet lower than the ridge vent. Are these two things fighting each other do you think or should I take a pipe and vent it up to my ridge vent and to my fan to take the hot air out from the top or should I turn my gable fan off completely.
 DEAR LOUIE: Drives me absolutely bonkers when providers or builders make no true efforts to advise customers on perils of condensation and how to prevent it. So easily, and inexpensively, done at time of construction.
 DEAR DENNIS: Properly pressure preservative treated columns, embedded in ground are unlikely to decay within lifetimes of anyone alive on our planet today
  DEAR MARSHALL: Please keep in mind the Reflective Radiant Barrier under your roof steel is a thermal break designed to control condensation from occurring on underside of your roof steel, it is not insulation and has a R value of roughly one (R = 1). If you block off all vents, you may need to mechanically dehumidify your space in order to reduce moisture inside. Alternatively, should you install a ceiling and insulate above it, you would need to appropriately vent dead attic space to prevent roof system mold and mildew.
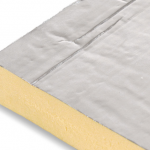 DEAR POLE BARN GURU:
 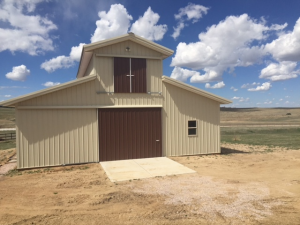 Hansen Pole Buildings are carefully designed and engineered to exacting and stringent standards. Included with these structural design solutions are some components an average individual cannot just go buy off a shelf at your local lumber dealer or big box store. Due to liability issues with materials specified on plans not being able to be readily acquired by general populace members, our third-party engineers are unable and unwilling to put their seals and signatures on plans where we are not providing components. Even if they were to do so (and you could find parts as specified) we have so much buying power, we are able to provide materials at a price level competitive to anything you would be able to acquire on your own.
 DEAR POLE BARN GURU:
  DEAR MATT:
  When it comes to truss space/between truss framing/wall framing, he’s definitely concerned about drywall logistics, OSB logistics (or not), moisture, and labor. And I want to make sure he feels heard and informed before we dump these plans and materials on his plate. I see both sides, but at the end of the day, he’s our builder and I need him to be fully on board before pulling the trigger. Could you help? I’m sure I’m not the first person with this quandary but I’ve also used enough pole barn builders in our area to know that he’s our best option for this project.
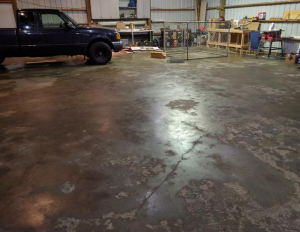
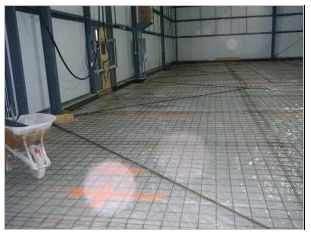
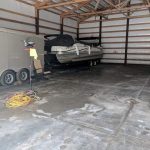 #1 Controlling source – if there is not a well-sealed vapor barrier under your concrete slab on grade, you should be planning on two coats of a good sealant for it. If you do not know if there is a vapor barrier under it or not, leave a wrench on it overnight. Next day, pick the wrench up and if there is a dark place on the floor surface where the wrench was, you have no under slab vapor barrier.
 DEAR POLE BARN GURU:
 DEAR POLE BARN GURU:
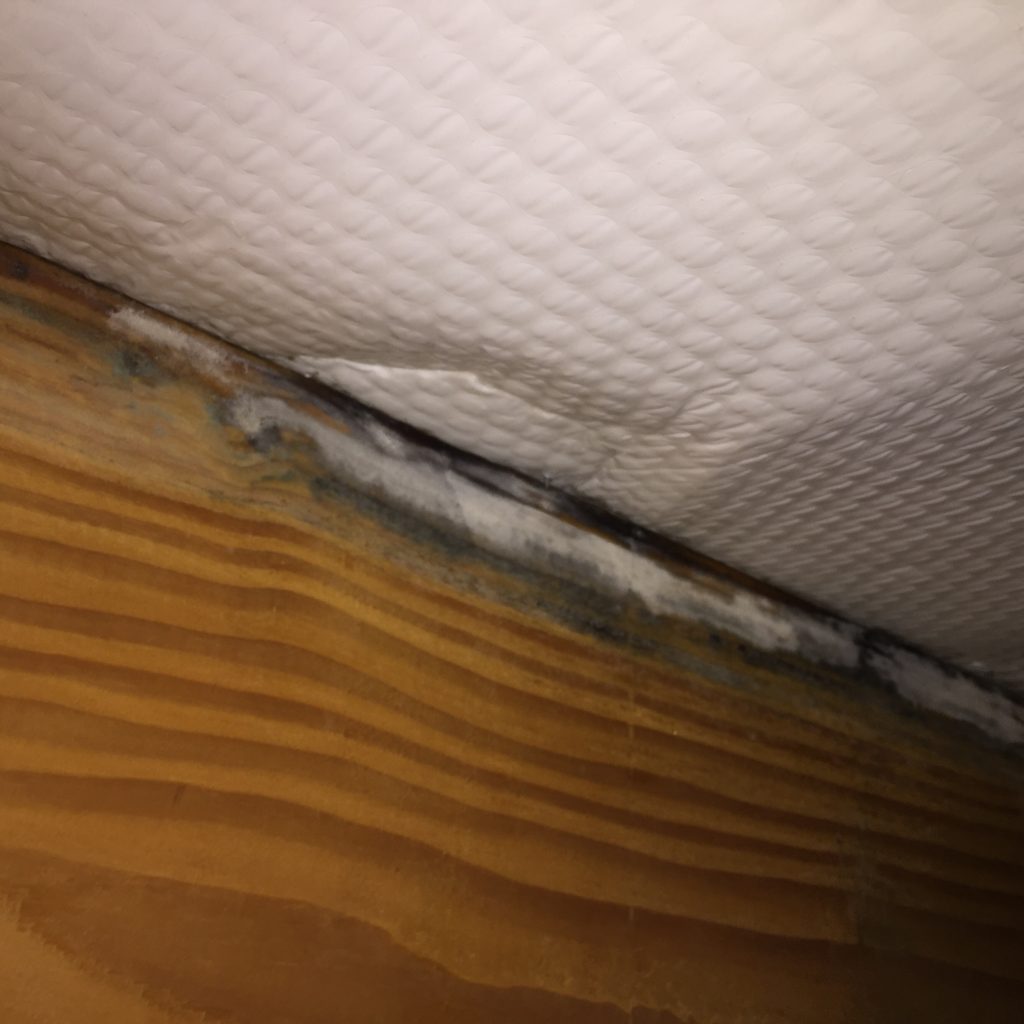
  Condensation is visible evidence of excess air moisture. It may appear as water, frost, or ice on window or door surfaces. This occurs more frequently during winter months because of extreme differences between inside and outside air temperatures. Warmer air holds more water meaning air in any given room center will hold more water than air adjacent to window or exterior door walls, since this area is always cooler. When warm, moisture laden air moves toward cooler window or door walls, it becomes cooler and cannot hold as much moisture as it held when it was warmer. This moisture is dropped and appears as water on glass and frames of windows and doors.
 Mike the Pole Barn Guru responds:
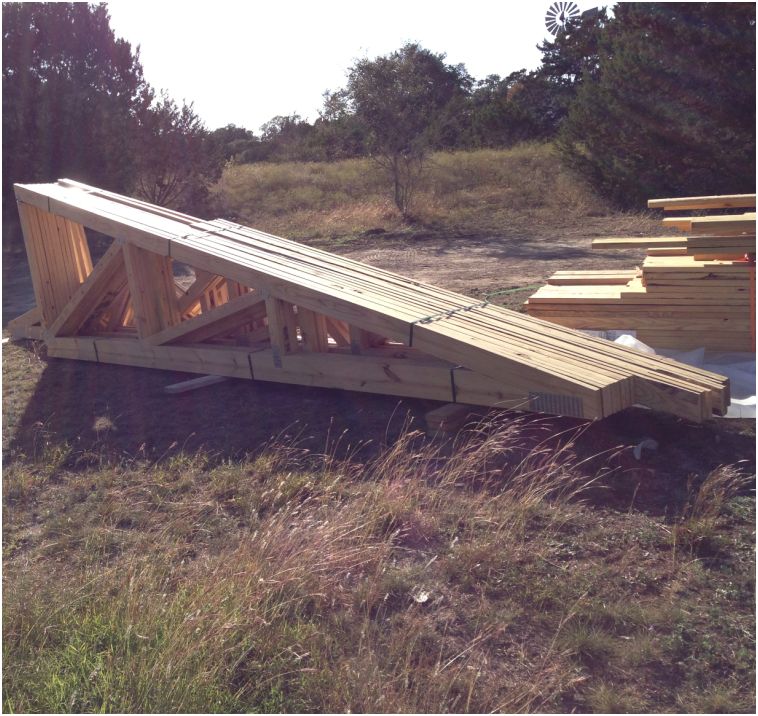
 In order to do this right you have only a couple of choices – you can spend a lot of money on an architect and/or engineer who physically comes to your site (could be as high as 20% of project’s finished costs). Or you can provide lots of information to us on what we are attaching to, as well as conveying your expectations. We will do anything reasonable to assist you in not making a mistake you will regret always. If I thought anyone else could not just actually do it but also do it better than us, with you being able to construct yourself, I would in all honesty let you know.
 DEAR DAN:
  If you spray foamed roof deck and have a dead attic space due to a flat level ceiling (we provided ceiling loaded trusses as well as ceiling joists) then you could experience condensation issues and potentially mold and/or mildew in attic, especially if attic is not made part of conditioned space (heated and/or cooled) with living area. If flat ceiling has also been insulated look out for trouble (keep a close eye on situation by doing visual attic inspections), as attic space could become quite a bit cooler than area below ceiling. Your spray foam contractor should have been talking with you about this prior to doing his or her application.
 DEAR WILLIAM: With proper structural design, probably. There are some downsides of this application, however. You will be extremely limited in your ability to place anything along building sidewalls. Care will need to be given in opening vehicle doors so as not to smash them against each other, or sidewalls.
 2015 IBC (International Building Code) ventilation requirements may be accessed here:
 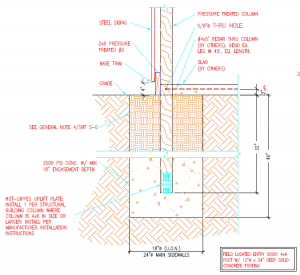 DEAR POLE BARN GURU:
 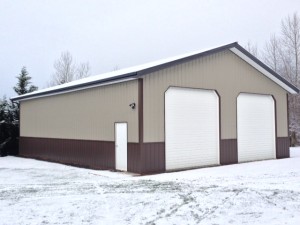 DEAR ROBERT:
 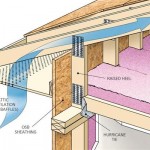 DEAR POLE BARN GURU:
  Why would I do this? Comparing “apples to apples”, I know our price will beat theirs, every single time. I am doing this for your peace of mind. I guarantee other prices will be higher. And I will provide you with documentation to prove it!
 Reader DAVE in ROBERTS apologizes for buying from a competitor and writes:
 DEAR MICHAEL: Before consider this move confirm your trusses are designed to support added ceiling weight across bottom chords. Also, make certain to adequately ventilate dead attic space you will be creating (read about adequate ventilation here:
 “I am having some condensation issues. And I was curious about insulating the building. Also wanted to ask if my building is able to have a ceiling installed. Thanks for the fast reply.”
 If you poured a slab without a well-sealed vapor barrier underneath, it will contribute to excessive moisture challenges. If no vapor barrier, top of slab should be sealed:
  Under ‘Building Features’ I found this gem, “(Our standard roof to eave or gable design creates a fully ventilated structure making boxed overhangs an option, not a necessity)”.
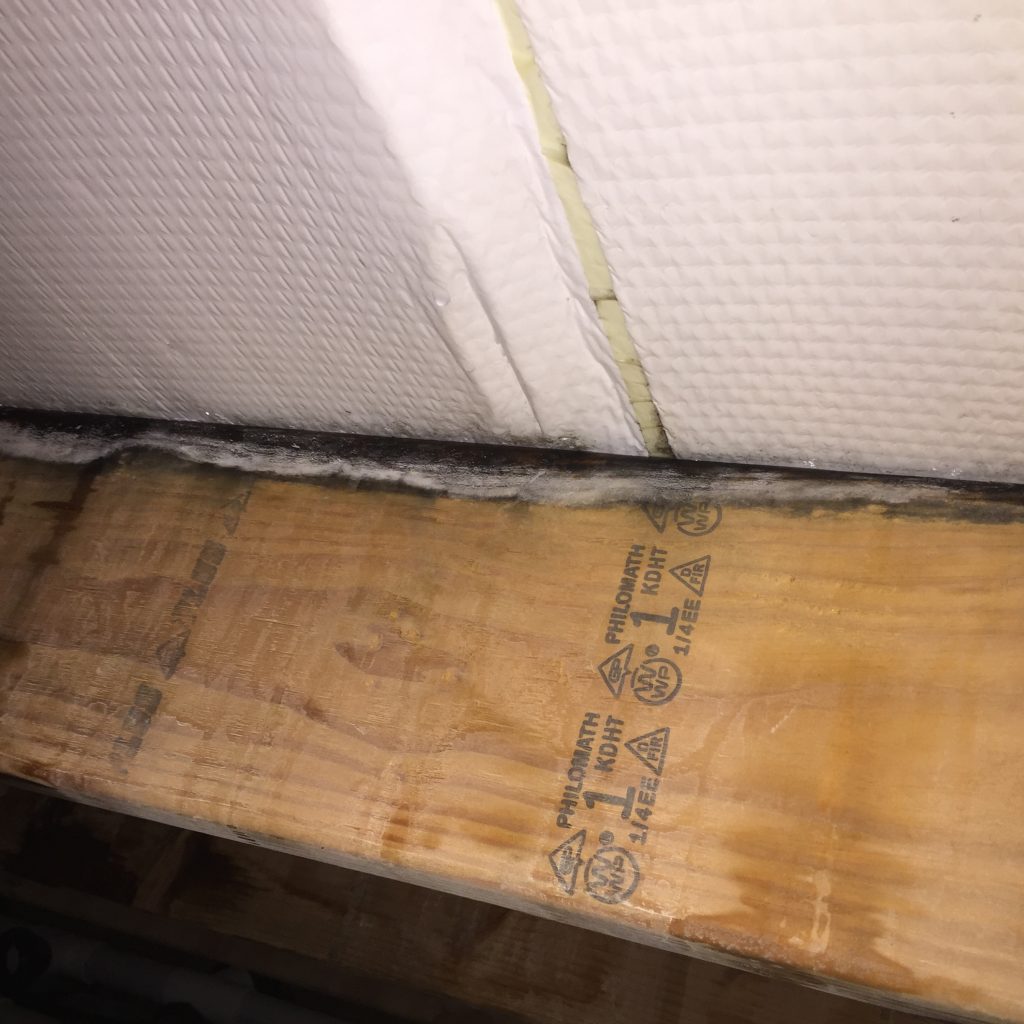
 Always (may I repeat Always) construct only post frame (pole) buildings which are designed by a RDP (Registered Design Professional – engineer or architect) specifically for your building upon your site. You will always get piece of mind and usually the RDP will save you more money than what you invested for their design work.
 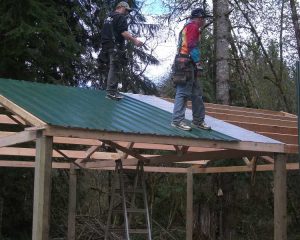 DEAR JIM:
 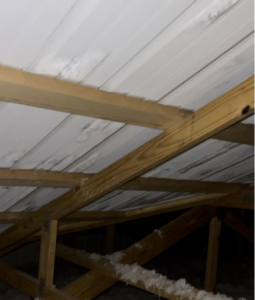 DEAR RICH:
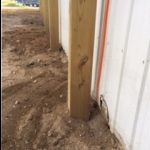


 Now some recommendations – when you have a ceiling, ventilation is required. The best way to do it is to have enclosed vented overhangs and a vented ridge. This gives both an air intake as well as an exhaust and gives smooth airflow throughout the entire enclosed attic space. If you are planning upon insulating the ceiling, raised heel trusses are the way to go (read more on the hows and whys of raised heel trusses here:
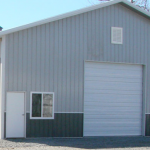
 For this building, windows with built in J channels were ordered, which I always recommend. There is little more time consuming, or more prone to a future leak, than having to cut steel J channels to fit around windows.


