This Wednesday the Pole barn Guru answers reader questions about adding OSB sheathing under new roof steel, as well as more trusses and carriers to support the new loads, a concern about the need for plywood under roof steel to make a building stronger, and if Hansen has a bracket to use with a helical pier in post frame design.
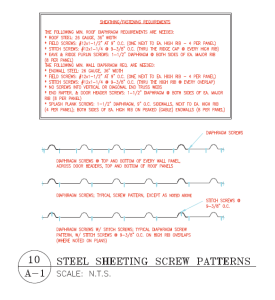
DEAR POLE BARN GURU: I have an older building that was built with 8′ oc trusses. I plan to replace the roof and all of the siding to update it and solve all of the leaks. However, I want to add osb sheathing underneath the roof steel because I have to get on the roof to clean the gutters 4 or 5 times a year. Currently the roof system has the typical on edge purlin with single truss design and I’ve spoken to some engineers who suggest adding large headers between the wall columns then adding 2′ oc trusses to accommodate the sheathing load. My question is: Are there any other options to allow me to add sheathing to the roof such as double truss with joist hangers between them and purlins that are flush with the tops of the trusses? I really like having the 8’oc for the space it gives me overhead and I’d like to keep as much of that as possible. Thanks in advance! JAMES in LA CROSSE
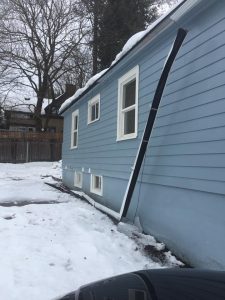 DEAR JAMES: Have you considered investing in a quality gutter system so you do not have to clean them out regularly? Raptor Gutter Guard seemingly is most highly recommended https://www.raptorgutterguard.com/?gad_source=1&gclid=EAIaIQobChMIoY2p2OzLhAMVJlFHAR0G-gzoEAAYASAAEgKrn_D_BwE
With this said 7/16″ OSB weighs all of 46 pounds for a 4′ x 8′ sheet (1.44 pounds per square foot). Chances are better than fair this extra weight is within design capacities of your existing roof system. This would allow for you to add OSB, running it up roof (from eave to ridge) and fastening directly to existing roof purlins.
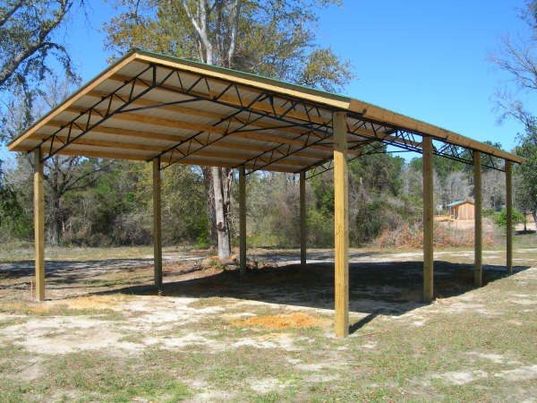
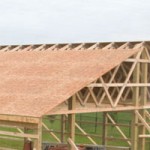 DEAR POLE BARN GURU: Good afternoon, I have been working with Cory in the design department. He has referred me for some additional information. We are looking at building a 30 wide by 60 long 15 foot sidewall 5/12 Pitch roof pole barn. My husband is being insistent on wanting to put plywood on the entire roof, saying it will make the roof stronger. Thus the entire building stronger. I was wondering if you could address that type of construction versus the construction that would be specked for my area which is upstate New York zip 13736. I appreciate your help and answering this question. KAREN in BERKSHIRE
DEAR KAREN: Think of properly fastened steel roofing as performing like very strong, very thin plywood. On a building of your proposed dimensions, with your wind and snow loads, your building’s steel cladding will easily carry all of these with ease. Adding plywood under your roof steel will not increase your building’s load resisting capacity. It could help to minimize damage from a catastrophic hail storm (for extended reading on preventing hail damage in extreme circumstances https://www.hansenpolebuildings.com/2020/11/how-to-minimize-possible-hail-damage/). Best investment to making your building stronger is to order it with greater load capacity than Building Code requirements. Bumping up a flat roof snow load by 5 or 10 psf (pounds per square foot) and/or design wind speeds by 5 or 10 mph, often adds very little to your investment and then every component and connection is engineer verified for those greater loads.
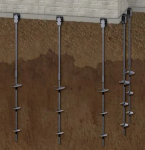 DEAR POLE BARN GURU: I own a helical pier installation company based out of MN, and I have a customer that’s interested in having install helical piers for their upcoming pole shed project. I was reading online that your company has a bracket available and I would like more information on that if possible. I appreciate your time and look forward to hearing from you. CHRIS in ALBERTVILLE
DEAR CHRIS: We had a plethora of discussions with a helical pier provider several years ago and its weak link (one they had not solved) was attaching columns to piers. Neither of us (or anyone else I have found) has developed a structurally sufficient, code accepted transition so far. Post frame has some tremendous reactions at ground line to resolve in whatever connector or bracket is eventually developed.

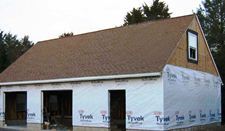 DEAR POLE BARN GURU: Was wondering if I could ask you a question I’m getting ready to build a barndo was going to use wet set brackets do you recommend me using sheeting on it as well or just house wrap? Having problems with this issue thanks. DOUG in INDIANA
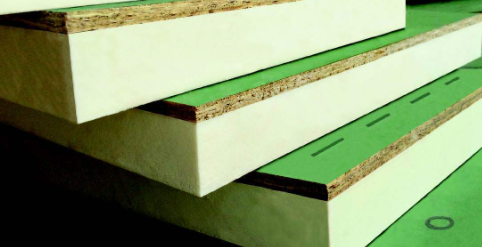
 2019’s average home had 2594 square feet of finished space and a sales price of $485,128. Without lot costs, general contractor’s overhead and profit actual construction costs were $296,652 ($114 per square foot).
 There is no such thing as a “pole foundation engineering calculator” therefore, there is also no link to one. The design of post frame (pole) building foundations is one which is best left in the hands of RDPs (Registered Design Professionals – architects or engineers). When provided with all the pertinent information about your proposed building, they can design not only a structurally sound column embedment, but also your entire structure (which I whole heartedly recommend).


