Today the Pole Barn Guru answers reader questions about moisture control, insulating a building with a ridge vent, and a solution for replacing posts that have rotted out.
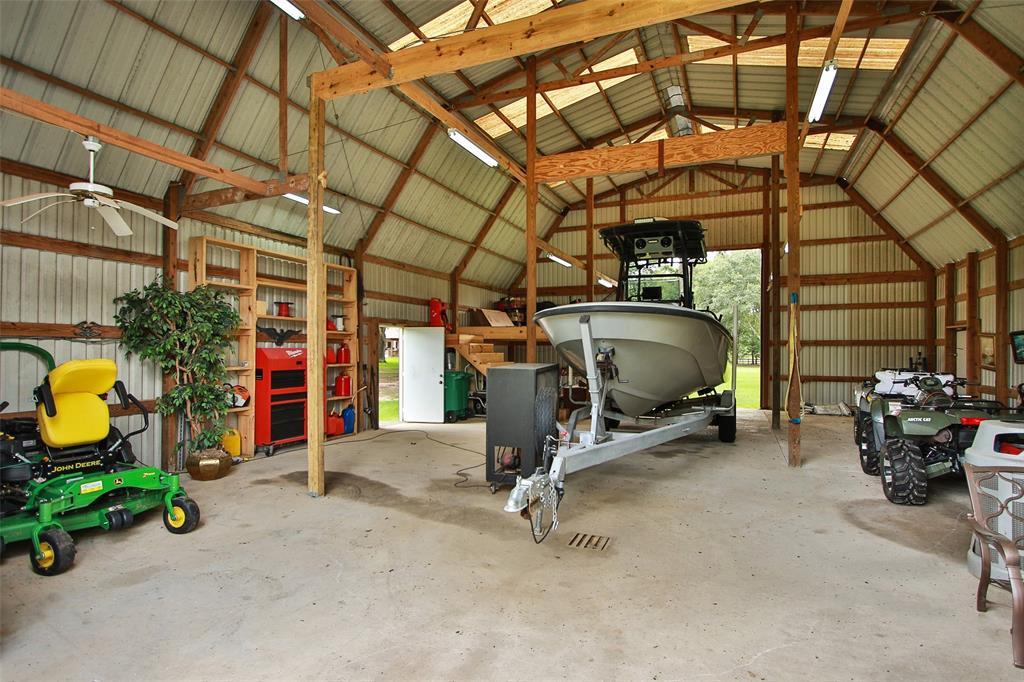
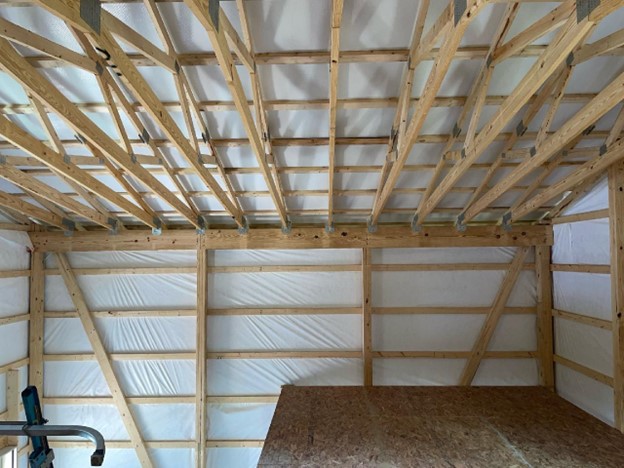
 DEAR POLE BARN GURU: Thanks for the abundance of technical information you provide your readers. Like many of them, I inherited a pole barn with the same ceiling sweating, heat, cold issues and need a post construction solution. The slab sweats only in some places. I have a typical wood post with 2×4 horizontal purlins, wood truss and purlin roof, and metal skin walls and roof. My goals are, #1 stop the moisture inside, #2 insulate for moderate comfort (no codes to comply with and I can heat with a wood stove and abundance of wood) , and #3 if I can afford it, skin the walls with T-111 or other wood for an attractive look inside. I did not see any suggestions about double-faced radiant barriers in your other articles. Do you think expanded polystyrene cut to fit in the 1.5 inch cavities to flush with purlins, and then add the radiant barrier (bubble type) stapled over that directly to purlins would be appropriate and not trap moisture? If so, should I allow and air space between the polystyrene and radiant barrier? Many thanks, Mr. Retired…finally! JOHN in CHEROKEE VILLAGE
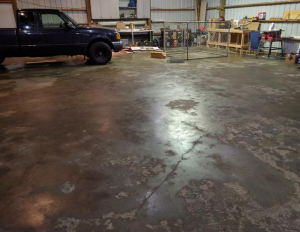
DEAR JOHN: Thank you for your kind words. If your slab sweats at all, it is likely there is no vapor barrier under it and it would behoove you to apply a sealant. 1.5″ expanded polystyrene (EPS) boards cut to fit tightly and with all seams tightly sealed would give you some degree of insulation (roughly R-7.5 other than at girt and purlin locations). You could add unfaced rock wool batts to increase insulation. Radiant barriers provide next to no insulation value and only function if seams can be perfectly sealed, we’ve actually opted to no longer offer them to our clients.
Unless you want to heat area in triangle of trusses, you may want to consider insulating at ceiling level, then vent dead attic space above.
DEAR POLE BARN GURU: Hello Mike. I came across your website while trying to learn more about what to do with the ridge vents in a pole barn when you plan on insulating it with closed cell foam. My wife and I purchased a property that has a 36w x 48L unconditioned pole barn with 8 skylights, a couple of ridge vents and (2) sets of huge doors on each end. While we know this will never be a tight building, we need to insulate it for our pets (10) dogs and (11) cats, and for a hangout area for us to spend time with them rather than inside our home.
We have a high-end American Standard heat pump split system that will condition the entire space.
Would you be able to give me any advice on what you recommend I do regarding the existing ridge vents? I’m not sure if I should insulate around them and leave them as they are…open. Or, should I temporarily trim out around them and seal them for the time being?
Any information you could provide me on this topic would be greatly appreciated. ROGER in HOUSTON
DEAR ROGER: With those large sliding doors, your investing in closed cell spray foam may be for naught. If your expectation is to be able to control any sort of heat loss/gain you should consider replacing them with insulated steel sectional overhead doors.
On to your question – seal off ridge vents and spray foam across skylights (or, even better) replace them with steel roofing before insulating.
DEAR POLE BARN GURU: What are my options on repairing 32×40 all 6×6 posts are rotted off ground level. Floating slab, perma colum, helical peir, or strongway sleeve. CHAD in GREAT BEND
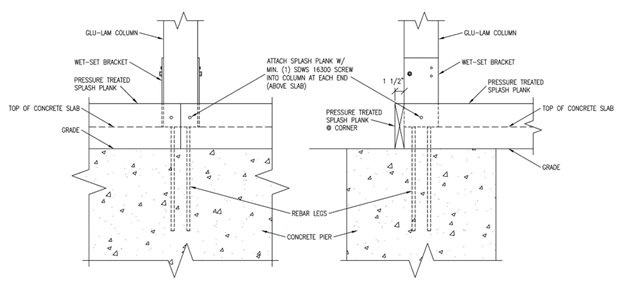
 DEAR CHAD: I would repair one column at a time. Temporarily support roof system being supported by a column. Cut column off above point of decay. Excavate embedded portion of column and remove – hole being dug to be at least below frost line. Insure bottom of hole is firmly compacted. Place a sonotube in hole, attach an ICC approved wet set bracket to bottom of column and backfill with premix concrete. Compact granulated fill around sonotube in six inch lifts. Repeat at each column.
 Mike the Pole Barn Guru writes:
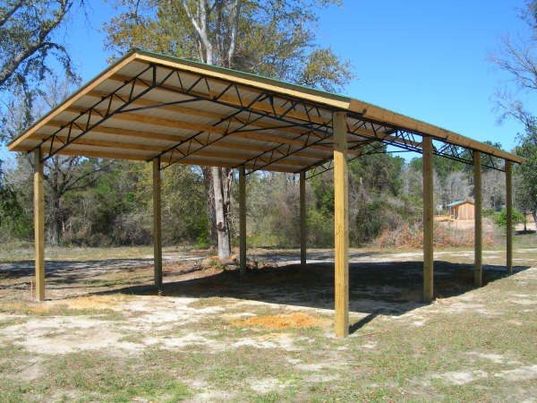
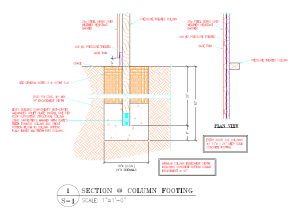 DEAR STEVE: Column embedments and encasements need to be engineered to adequately resist uplift, overturning and gravity and will be determined based upon design wind speed and wind exposure, roof dead loads (plus snow in more northern climates), whether building is enclosed, open or partially enclosed, etc., as well as soil bearing capacity. When columns are effectively constrained by a concrete slab on grade, it helps to potentially reduce depth, diameter and required amount of concrete needed for hole. Due to complexity of these factors, embedment and encasement, as well as any added uplift plates or cleats should only be determined by whatever engineer will be sealing your plans. He or she should also provide verifying sealed calculations to certify adequacy. A consideration – if this will be a roof only structure, Moment (bending) loads on columns are four times as great than on a fully enclosed structure – this results in more concrete being needed for holes.
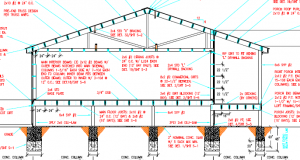 DEAR LONZY: Post frame buildings make for excellent homes! Great choice. My educated guess is your floor is going to be over a crawl space. If so, your top of floor will probably end up being more like two feet above grade, rather than 18 inches. This allows for better access to utilities as well as not requiring all supporting beams and joists to be pressure preservative treated. Concrete stem walls will need to be at least six inches thick and on top of a six inch deep by 12 inch wide concrete footing (for a single story), resulting in a far greater investment in forming and pour (both in materials and labor). Concrete piers are pretty low tech and then sides of your crawl space will consist of (usually) steel siding.
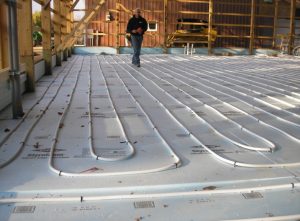 DEAR NICHOLAS: In all reality, chances of a modern plumbing failure under a concrete slab are very, very small. Tens of thousands of homes and apartments are built every year in our country with plumbing under concrete floors, attesting to how rare a failure occurs. Older slab on grade buildings have had challenges from deterioration or perforation of copper pipes or joint issues. Your best prevention is a well-prepared site, as shifting soils are your most likely cause of a plumbing challenge. Remove any expansive soils and compact fill in no greater than six inch lifts. Keep water from being able to run under your home – by grading away from building perimeter at least 10 feet at a 5% slope. Build pad for building up above surrounding property. Use French drains if underground water is suspected. Drain gutters sufficiently away from home. Use PEX for all under slab water lines. All pipes need to be extensively tested for drainage and air pressure in supply lines multiple times during rough-in process prior to slab being poured. Testing should take place once after rough-in is completed and before backfill when dirt is pushed back into trenches to cover pipes. It should be tested once again after backfill has taken place to ensure no damage to pipes, then once again after concrete slab prep has been finished. I have heard of people running their under slab PEX through larger diameter sleeves, however this seems to be an unnecessary expense.
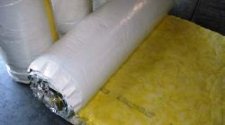 DEAR MARK: You are now finding one of many “joys” of using vinyl backed metal building insulation. You will want to read my personal metal building insulation story:
 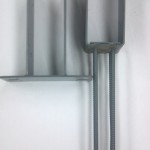 DEAR RON: Problem #1 is dry set (bolted) brackets are not rated for moment (bending) forces, unlike wet set brackets. This becomes problematic, especially in areas of high wind.
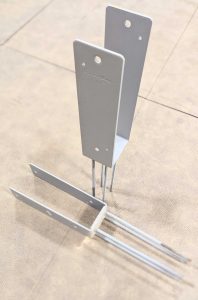 DEAR POLE BARN GURU: Hey I’m on the starting process of building a barn and wanted to ask your opinion on something. The barn I’m building is a 40x60x16 on a 2ft block wall. My question is what is the strongest way to attach my 8×8 post to my sill plate? I’ve looked at many others and it looks like they just “toenailed” the post into the sill plate but I had thought about using these hurricane straps instead…. What do you think?
 DEAR POLE BARN GURU: How can I have a 26 foot span 12 feet off the wall with no poles underneath for an open kitchen areas like this? DOUG in TERRE HAUTE
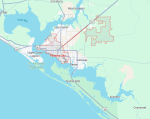 DEAR POLE BARN GURU: Do you do site-specific engineered plans for Panama City Florida? I’m trying to find someone to do our plans, quote them, and erect the building so that we can GC the rest ourselves. Can you help? Do I just tell you what I’m looking for to get a quote or how does it work? BRITTANY in PANAMA CITY
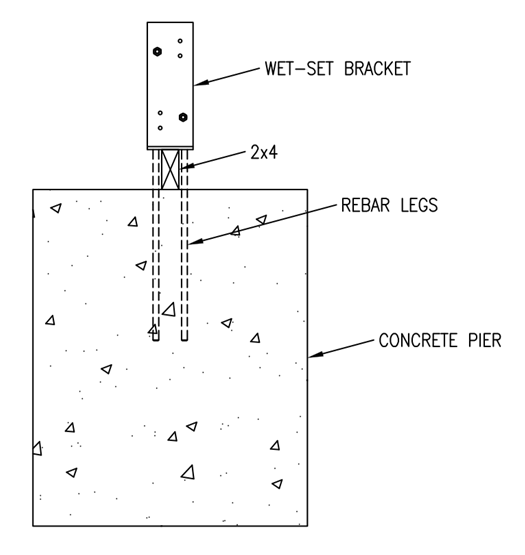
 Because I am not a Registered Design Professional, I can’t engineer your new post frame building for you. And, if I was, I most certainly would not be doing it for free. Typically an engineer should be compensated somewhere in the area of 8 to 12% of the value of the project, depending upon how involved they have to be with it, as well as if a visit (or visits) to the site are included.
  Some commentary – there are wet set brackets made specifically for post frame buildings. I would recommend you invest in them rather than trying to fabricate (or have fabricated) your own, unless they were designed by your RDP and inspected by him or her after production. For Clay soils, the Building Code allows a value of only 1500 psf – any greater values should be used only if an onsite soils test has been done by a registered engineer, else you are at risk of settling issues. See Table 1806.2
  Now we do have a fair number of clients using wet set brackets, keeping their building columns above ground (
 DEAR POLE BARN GURU: Do you supply stamped engineering plans for building inspection purposes? DOUG in BENEZETTE
  DEAR POLE BARN GURU: I see buildings with no foundation what is the code for pole barn foundations in Michigan? ANTHONY in GLADWIN
  DEAR POLE BARN GURU: Which would be more economical, to build a 40x64x12 post frame shouse with attic trusses over a 40 x 32 section for an upstairs or to build a 40 x 72 x 12 with no upstairs needed? BETH in CADIZ
  DEAR SCOTT: Very little drilling, if any, will be needed for holes in order to run electrical wires. Wall framing (girts) extend or are placed so as to leave a 1-1/2 inch space between outside of wall columns and siding.
 DEAR POLE BARN GURU: Can you build on a poured concrete walls for a basement? ZAC in LEIPSIC
  DEAR VAL: Allowable distance between buildings will depend upon how your property is zoned and use classification of your buildings. In most jurisdictions, a residence to a garage (as an example) can be as little as five feet, without requiring added fire protection between them. If you are outside of Oak Harbor Village limits in Ottawa County, a call to your Building Department at 419.734.6767, in the Village of Oak Harbor call Zoning at 419.898.5561. Have your street address and parcel number available.
 DEAR POLE BARN GURU: Do you have an option to put the posts on a concrete wall or pylon? Where the posts don’t go in the ground. DREW in HAW RIVER
  DEAR POLE BARN GURU: Not too sure if you’re able to help answer my question. I’m a homeowner looking to build a 24x24x10 pole barn with a 6/12 roof pitch. Looking to build my rafters for a more open ceiling instead of using trusses. My question is should I use 2×10 or 2×12 for rafters and do you recommend 24” or 48” spacing? I will have 12” over hangs. FRANK in MILFORD
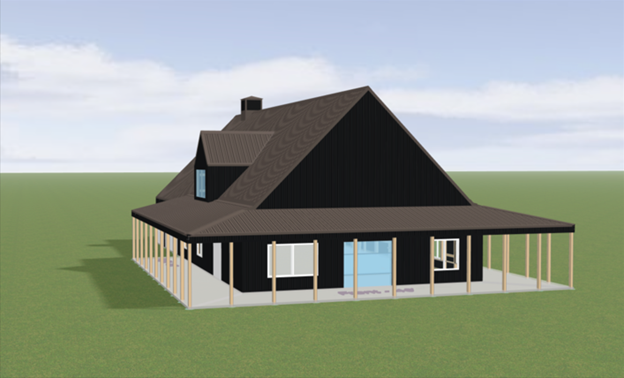
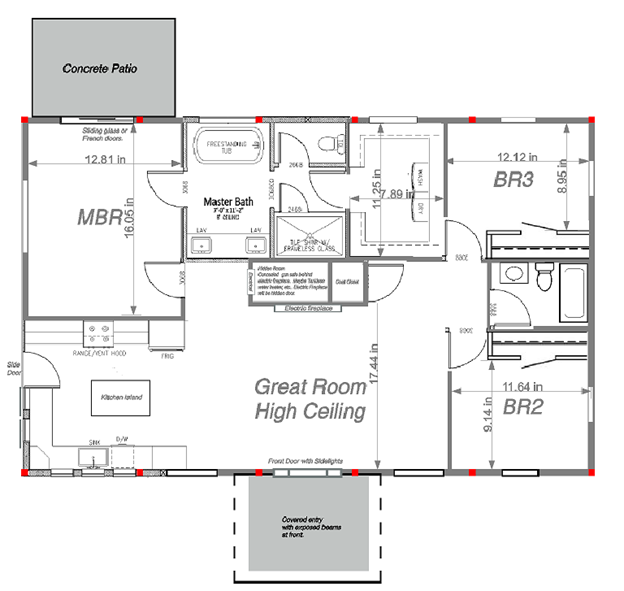
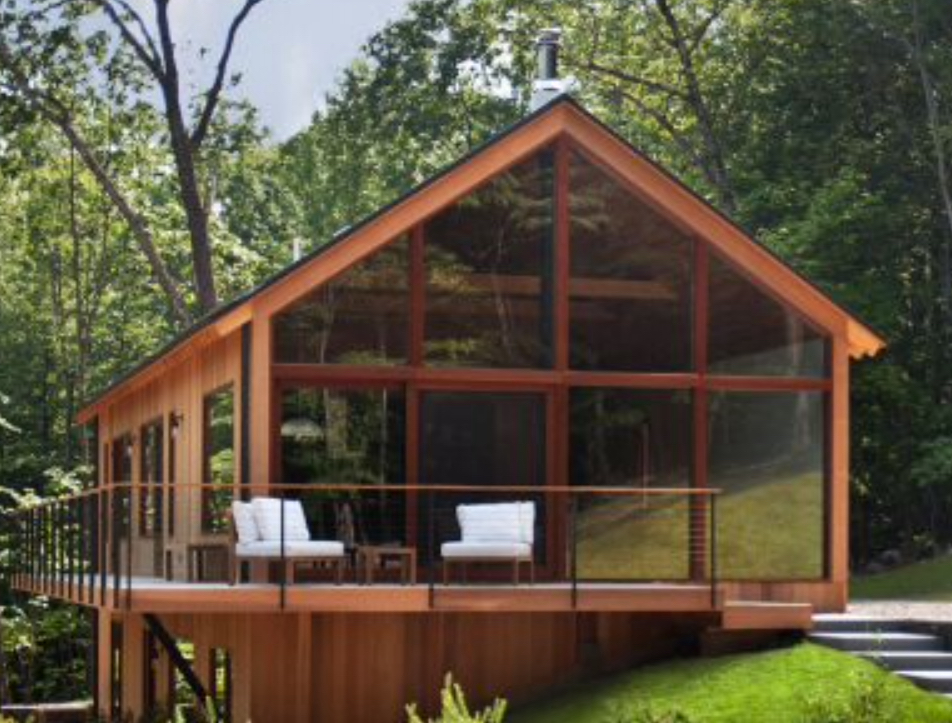
  Good Morning Mike, You may remember that I purchased a 30×36 pole barn kit in 2022, and had a really good experience with Hansen. We’re planning to build our house on the same property, and I have questions: We plan to modify this house plan to fit the site:
  DEAR POLE BARN GURU: We are having a 42x80x18 stick built pole barn being built this summer and I was wondering about the knee braces are they or are they not needed? Especially if it is a stick built on a concrete foundation. The barn will be running in a east to west direction with a 24×16 overhead door on the west side. Does it matter if there is or is not a metal ceiling put into the barn? We will also have a 2 foot overhang on all sides. M in OLBERDING
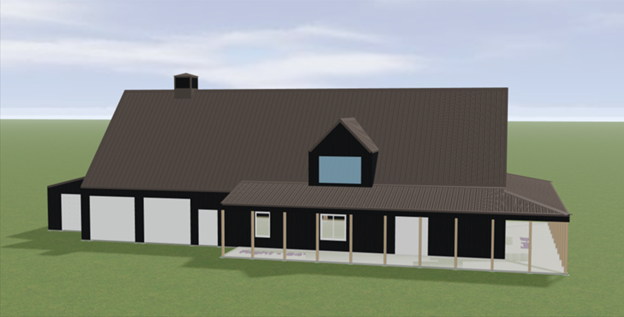
 DEAR POLE BARN GURU: I am looking to build a 20ft x 24ft pole barn garage. The footings are going to be drilled and filled with concrete now, with the structure being completed at a future date. My city engineer requires 30″ deep footings. He was not able to say for sure what diameter footing I needed to drill. Do you have any insight to what diameter footing I should expect to need for this size structure? JOE in CINCINNATI
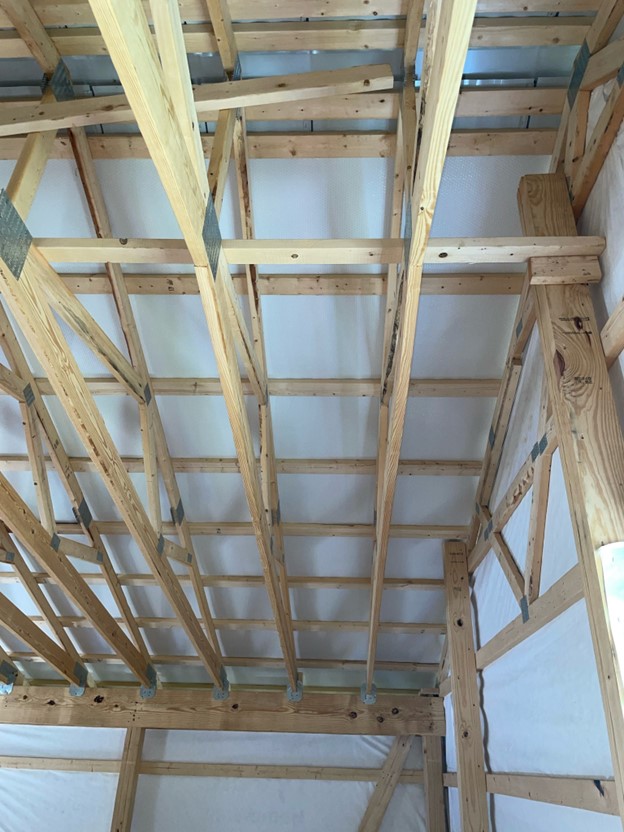

 DEAR POLE BARN GURU: would it be possible to do a dog kennel in a pole barn. Can air conditioning be used in a pole barn? In other words could a pole barn be properly insulated to be efficient enough to make it worth it? RICHARD in NAPLES
  DEAR POLE BARN GURU: What type of kennel designs have you done in a 36×48 or a 30×60? GERARDO in BLUFFTON
 DEAR JASON & ERIN: Your plans did not arrive as an attachment, so I am unable to speak to them. If your concern is with properly pressure preservative columns prematurely decaying when embedded in ground, then Permacolumn Sturdi-Wall Plus brackets are indeed your best design solution. Unlike other, cheaper, brackets, these actually will resist moment (bending) forces and have ICC-ESR approvals as being Building Code conforming. For extended reading on Sturdi-Wall Plus brackets:
 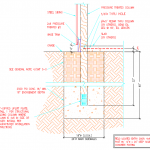 DEAR POLE BARN GURU: Hello, I see your communications on here a lot so figure I would take a shot at asking you some questions. If you’re not interested in wasting your time I understand and disregard. I am trying to plan out a future build for a pole building probably 36x46x16 to heat and store a RV in. My area in Northern MN gets heavy snow and lots of rain so I think posts out of the ground would be best (mounted to slab). So we would do a thickened edge like we did with our home. Is there any semi-basic logic to what kind of thickened edge would be required or does it need to be calculated by an engineer? SHAINE in DULUTH
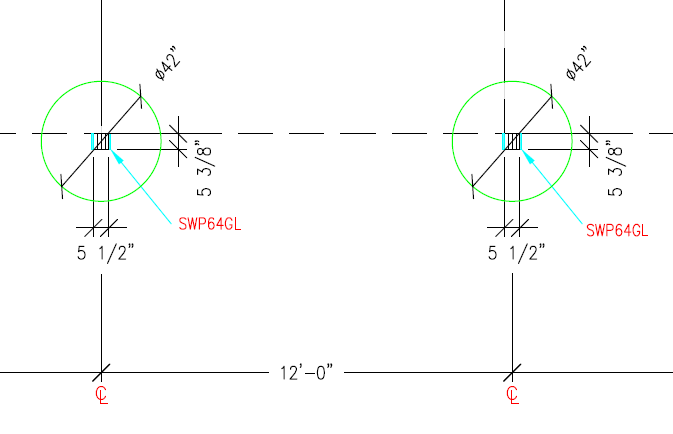
 Growing up, I witnessed my Father forming and pouring four foot squares of concrete for our backyard patio. He would alternate them between smooth finish and exposed aggregate to create a variation in appearance. Oh how he made it look all so easy.
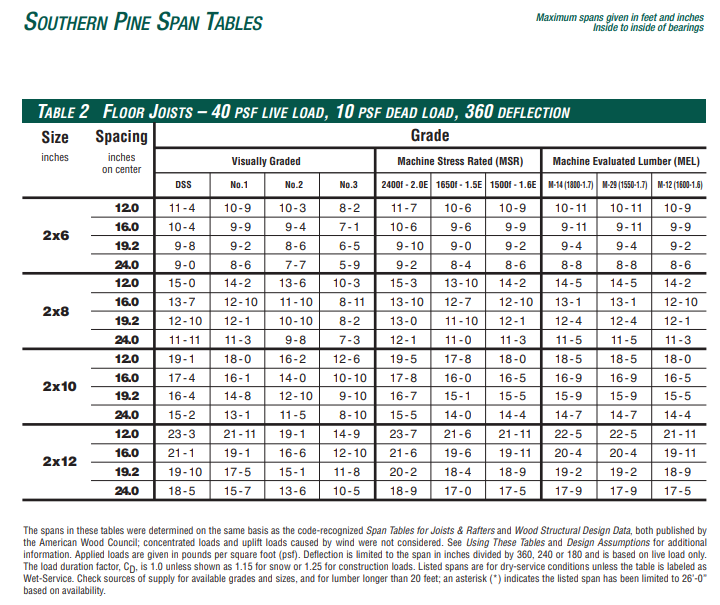
 Mike the Pole Barn Guru says:
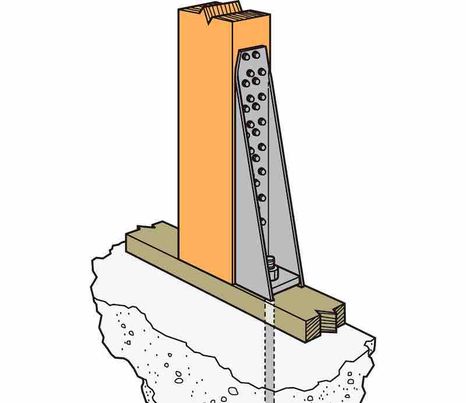
 DEAR POLE BARN GURU: Was wondering if I could ask you a question I’m getting ready to build a barndo was going to use wet set brackets do you recommend me using sheeting on it as well or just house wrap? Having problems with this issue thanks. DOUG in INDIANA
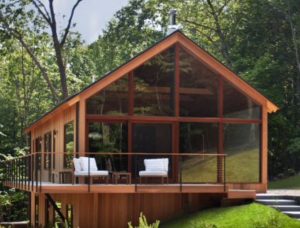
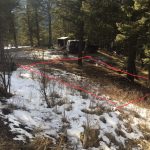 DEAR ASHLEY: A post frame home is certainly an excellent design solution for a slope building site. You do have some options (both of these I used on a personal building site of my own) – you can cut to create a ‘daylight’ or ‘walk-out’, or build on stilts.
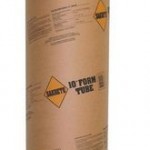 DEAR DAVID: Even building with a slab on grade is going to require excavation, as you need to have footings either extending below frost line, or thermally isolated to prevent frost heaving. Horizontal girts, by themself, provide little or no resistance to racking. Properly engineered, your steel roofing and board and batten siding can provide adequate shear resistance.
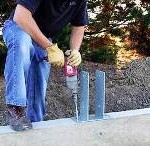 DEAR ALAN: There are plenty of folks out there who would gladly be willing to use dry set brackets to mount pole barn columns to your slab. In most instances, this is a less than adequate design solution as these brackets are not designed to withstand moment (bending) loads. (For extended reading, please visit
 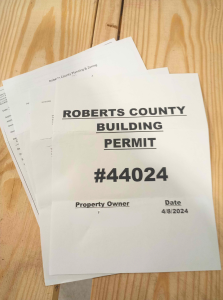 DEAR MICHAEL: As you have realized, your immediate challenge is your columns, their lack of adequate treatment for structural in ground use, and a missing foundation system.
 DEAR POLE BARN GURU: Have a 32’wide by 30’long pole barn garage heated and insulated going to add on for storage only. It will have a concrete floor with vapor barrier and 2 inches of rigid foam. The walls and ceiling will be steel. There will be a 1 foot overhang all the way around to match the existing building, and one garage door at the rear of the building. The eves will be vented along with a rig vent. My question is that normal I would have used OSB for roof and sidewalls cost is an issue, what are your suggestions for the underside of the steel in both the walls and roof? ERIC in IRONS
 DEAR ZOE: It will depend upon how wide your building will be. If 12 feet wide, it may appear okay, if wider, it is going to start to look flat. One thing to keep in mind, most steel paint warranties are void on roof slopes of less than 3/12. Side lap sealants are also required for steel roofing on slopes under 3/12, adding to investment and complexity.
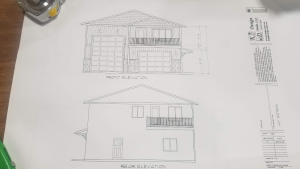 Your new building investment includes full multi-page 24” x 36” structural blueprints detailing the location and attachment of every piece (as well as suitable for obtaining Building Permits), the industry’s best, fully illustrated, step-by-step installation manual, and unlimited technical support from people who have actually built post frame buildings. Even better – it includes our industry leading Limited Lifetime Structural warranty!
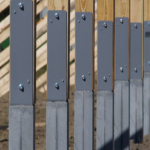 DEAR STACY: Expansive soils always make for a challenge for any building system. Post frame building foundations are, by their nature, a caisson style foundation – eliminating any need for a continuous foundation and footing system. This can be accomplished by either embedded columns, or columns attached by Code approved wet set brackets to concrete piers. For your home section, it would be unusual for stud frame construction to be more effective or efficient than post frame, regardless of shape.
 DEAR KIMBERLY: This brought back childhood memories of my Dad taking me out on a Saturday to a site above Hayden Lake, Idaho where he and my uncles were going to be framing a custom home. Site had been cleared, and there were all sorts of roughly inch and one-half diameter holes drilled into solid rock – they had to blast in order to get a foundation in!
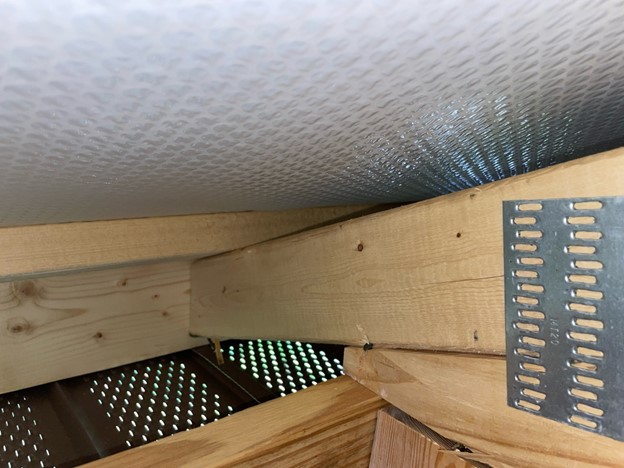
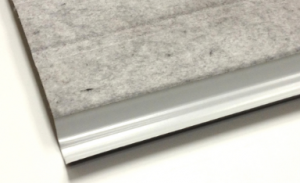
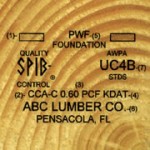 DEAR KRISTEN: Any roof supporting structural columns are pressure preservative treated to UC-4B per International Building Code requirements. This is a greater level of pressure treatment than you can usually find at big box stores or local lumberyards. Any other lumber used in ground contact will be treated to UC-4A and tags will reflect ‘ground contact’. Lumber in contact with steel roofing (roof purlins) are not exposed to the weather, would not typically be pressure preservative treated. We do always recommend a condensation control be used between roof steel and roof framing. The easiest, from an application standpoint, would be a factory applied to roof steel Integral Condensation Control (DripStop or CondenStop). Other alternatives would be a Radiant Reflective Barrier (we can provide this in six foot width rolls with an adhesive pull strip attached for ease of joining rolls together) or to use two inches of closed cell spray foam.
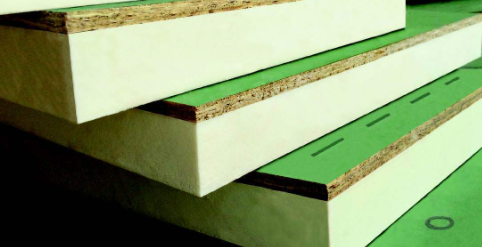
 Roof – order roof steel with an Integral Condensation Control (Condenstop or Dripstop) factory applied. Install a steel ceiling across truss bottom chords, blow fiberglass insulation in above steel ceiling. Vent attic at eaves with enclosed vented soffits and ridge.
 DEAR AMANDA: Thank you for your interest in a new Hansen Pole Building. These would be included items:
 DEAR POLE BARN GURU: Can I put a walkout basement under a steel frame residence?
 DEAR GILES: Placing rigid foam insulation board between framing and cladding is not structurally a good choice. Post frame buildings work due to shear strength of their ‘skin’. When a non-structural sheathing is added it allows for fasteners to deform between cladding and framing, reducing shear strength, causing elongation of holes in siding/roofing and potentially a failure condition. You would be better served to use two inches of closed cell spray foam on inside of cladding after your cabin is erected.
 “When a building of otherwise conventional construction contains structural elements exceeding the limits of Section R301 or otherwise not conforming to this code, these elements shall be designed in accordance with accepted engineering practice. The extent of such design need only demonstrate compliance of nonconventional elements with other applicable provisions and shall be compatible with the performance of the conventional framed system. Engineered design in accordance with the International Building Code is permitted for all buildings and structures, and parts thereof, included in the scope of this code.”
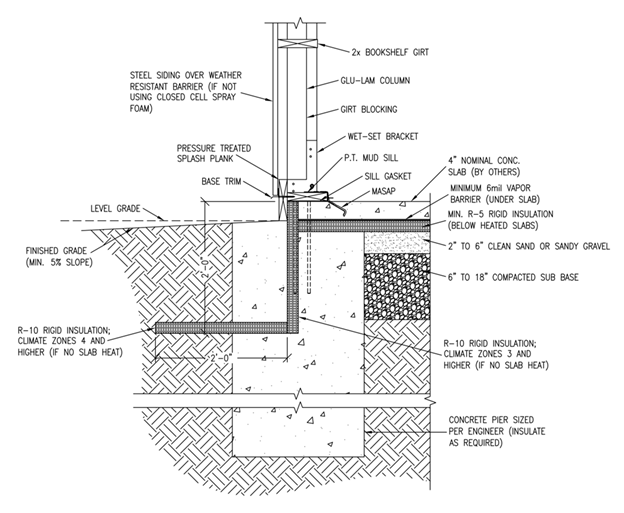
 With this said, Jefferson County is in Climate Zone 6A. As such I personally would follow International Energy Code Table R402.1.2 and place R-10 rigid insulation inside of my splash plank from top of slab (3-1/2″ up from bottom of splash plank) extending downward 48 inches. This can easily be done by trenching at time of construction and would be of benefit should building ever be heated (as most strictly non-agricultural buildings usually are at some point) and be a point in eventual resale.
 DEAR LLOYD: There is no structural reason to pour a “rat wall” between columns (
 In most cases, it is impossible to walk into a lumberyard or big box store and get UC-4B treated lumber, it most usually has to be special ordered in. Our providers know, in advance, of this being our expectation (not to mention minimum requirement by Building Codes).
 DEAR POLE BARN GURU: How thick does the edge of concrete need to be to support a pole barn if using the bolt on top of existing slab? CHRIS
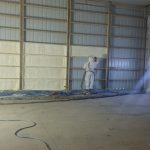 DEAR POLE BARN GURU:
  DEAR RON: I will suspect your dripping issue is due to there being no thermal break between your building’s roof framing and roof steel. If this is your circumstance, your only real solution is to have two inches of closed cell spray foam applied to inside of your roofing. While adding ventilation may remediate some of your challenge, there is still going to be some degree of warm moist air trapped inside.
 I used to take a steel stake used for anchoring concrete forms and a sledge hammer to investigate job sites prior to digging. Once building hole locations were laid out, said stake could be driven in at each hole location to determine if there were challenges ahead which could not be seen on the surface. At least by doing this stake test, we could determine with some degree of accuracy where challenges might lay, and if we thought we were going to have one, negotiate with our new building owner about shifting building location to avoid isolated rock.
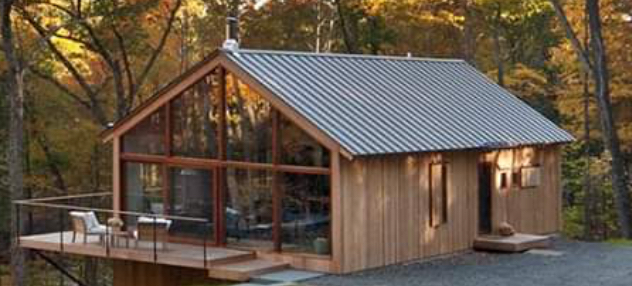
 Keep in mind, all of our buildings are designed for the average person who can and will read English to successfully erect their own beautiful building. Most of our clients do build their own and frankly do beautiful work – better than what they can pay for in most instances. Your Hansen Pole Buildings’ Designer can assist you in finding one or more possible builders, should you not have the time or inclination to assemble yourself. You will want to properly vet them out and follow this guide:
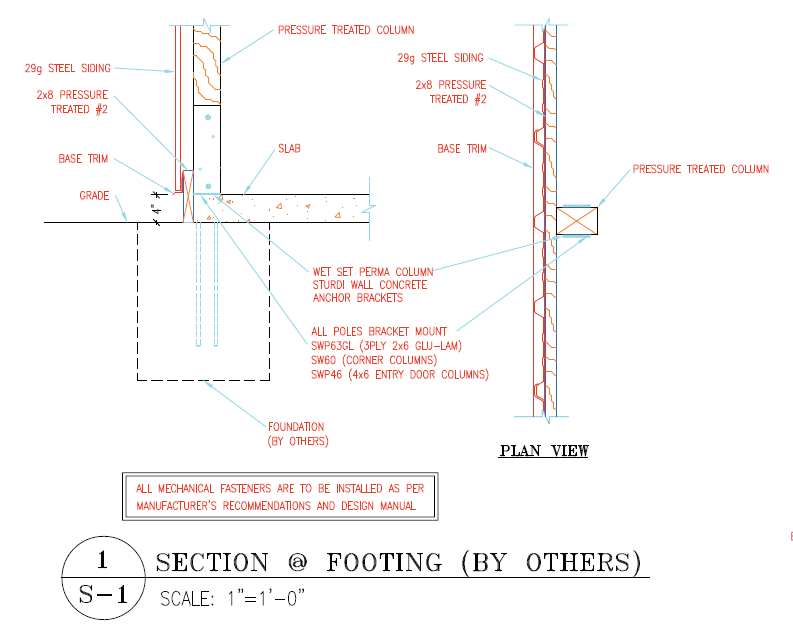
 DEAR DOUG: Before making a decision, I would ask to meet face-to-face with your Planning Department Director and get some clear answers (and in writing). My guess is worst case will be you can replace your old pole barn with a comparably sized new post frame building.