DEAR POLE BARN GURU: Good morning, Mike … I have a question for you.
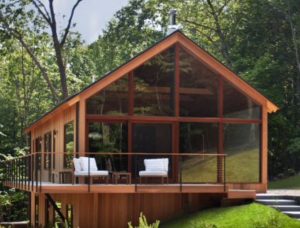
I’m trying to decide between a 30×40 barn and a 60×40 barn. It would have a gambrel roof with a loft. 16′ wide sliding door in the center of the short ends.
All other things being equal, what is the cost difference between 30×40 and 60×40?
Or is there a size that’s more economical?
Thanks, Mike T. in Kershaw, SC
DEAR MIKE T.: Having to design the loft to support hay weight is not so much of a challenge as it is expensive. For sake of discussion the comparison was done a full loft, however it may be more practical to only have the loft in the center.
There is an economy of scale with pole buildings. For practical purposes, the price per square foot is going to decrease as the building footprint increases (until clearspans become very wide). I’ve also never had a client tell me their new building is “just too big”!
In your particular case, you could double the size of the building, while increasing the investment by only about 2/3.
Mike the Pole Barn Guru
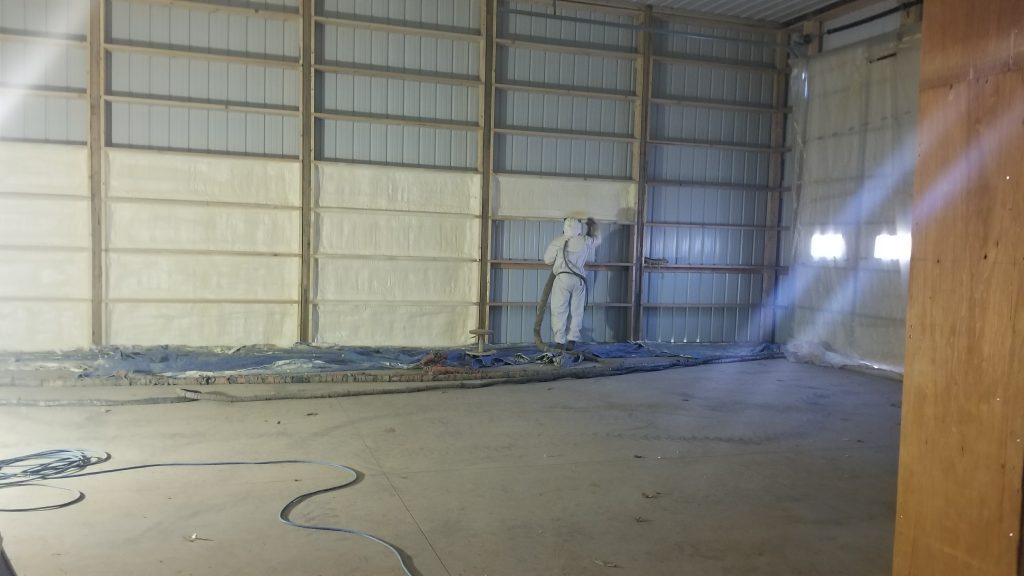
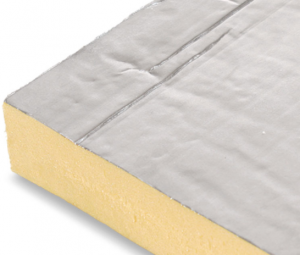
DEAR POLE BARN GURU: Renovating our pole building arena is an undertaking. We were quoted $70k (which included windows to replace the plastic) so we are doing it ourselves. I expect materials to run about $25k in the end. The company that sold me the metal ceiling panels based out of Kentucky told me that people in his area do it all the time and that the best way to go is with blown insulation, as fiberglass batting is a lot more time consuming to install. I decided against spray foam because it is toxic to begin with and then they put fire retardants in the mix which is even more toxic. Plus it is expensive.
What will happen if we don’t have a “thermal break” on the underside of the metal roof? There will be a lot of condensation falling on the blown insulation? We have a roof vent which I guess is correctly installed because we never have water coming in even during the most violent and heavy of rain storms. Isn’t this vent enough to prevent condensation?
If a herd of animals lived in the building, then I would worry about condensation, but there will be maximum 2-4 live beings in there at one time. Removing the roof to install a reflective radiant barrier is not an option. How about covering the underside with “Tyvek” the stuff houses are wrapped in? Are you saying the blown insulation on the ceiling will not do its job without this thermal break on the roof, or is it the condensation you are concerned about? What does the reflective radiant barrier need to reflect? Cold coming from outside, or heat coming from outside?
We have blown insulation in our 14 year old house. I guess it is newspaper. It works a charm. We’re on a hill and it can blow out there and we’re cozy inside. One can buy cellulose from Lowe’s or Home Depot and they lend you a machine to install it. I was worried that wind from the roof vent would blow it around. I was also worried critters would nest in it, although we have covered such access with 1/2″ wire mesh. Nonetheless, critters are very resourceful about getting into things. I was worried that if it got wet it would get moldy. My daughter is very sensitive to mold. Best thing is it stays dry….and like I said, we never had rain come through that vent, although when the conditions were right, we’d get a bit of snow blown in. We have a lot of snow now, and no snow in the arena. So it has to be special conditions. I thought of covering the blown insulation with tarps to protect it from wind or moisture. Is that a good or bad idea?
BTW, we have no intention of heating the arena. The goal is to have it warmer in there than outside….hopefully a little above freezing.
I guess for the walls we will use fiberglass. The plastic panels will be replaced with double glazed “picture” windows (they don’t open) and will run the length of about 2/3 of the arena at 2′ high.
A trainer we met from Maine said he insulated his riding arena and it really helped keep out the cold.
I’m wondering what will happen in summer. Will it keep out the heat, or trap it?
It’s great communicating with someone who knows what they are talking about. I’d be happy to compensate you for your expertise.
P.S. Here’s a fiberglass story. The owner of a horse boarded at our farm had a plumbing leak in her basement. The plumber came and fixed the leak and left. Several weeks later she developed itching sores all over her body. She woke up one morning with arms so swollen she could not bend them and a face twice the size of normal. She went to the ER and they told her a dust allergy, so she threw out all drapes and mattresses, etc. and cleaned the carpet and whole place. However, it didn’t help and she landed in the ER again. Meanwhile they found out that the plumber had pulled away fiberglass insulation from the broken pipe, and because of the leak it was all wet. He didn’t remove the wet fiberglass and so mold developed, and with the furnace down there blowing hot air (with the mold) all over the living space it made her VERY sick. She moved out immediately and had to take a lot of nasty drugs, and she is still not well. Plus, inhaled fiberglass is a known carcinogen, as you probably know.
A GREAT thing to insulate with is wool. But who can afford it? They do make wool “bats” for the purpose though. CINDY
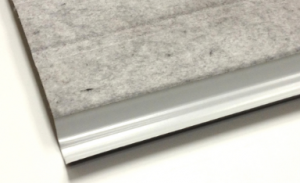
DEAR CINDY: Without the thermal break under the roof steel, there will be condensation on the underside of the roof steel, which will result in rain upon the attic insulation. Ventilation alone may cure some, but not all of the condensation problems.
The major source of the warm moist air rising is the ground under your building (evapotranspiration). According to www.ScienceDirect.com the average value of the moisture evaporation with uncovered ground is 0.33 to 0.53 gallons per hour per square foot. For a fairly typical 60 by 120 foot riding arena, this could be between 57 and 90 thousand gallons per day!!
Housewraps like Tyvek are not vapor barriers – they are designed to allow moisture to pass through.
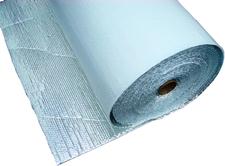
Reflective radiant barriers just happens to be a very cost effective thermal break. The aluminum facing on the exterior reflects radiant heat in the summer, keeping the building cooler.
Insulating your building will keep it cooler in the summer, there is no question there. As to the effectiveness for keeping things warmer inside, without a heat source the air inside will be at or near the temperature on the outside.
And thank you very kindly for your offer of compensation. I do my best to provide quality information for the good of the industry as a whole. If you feel I have been of service, please feel free to share the link to this blog with others.
Mike the Pole Barn Guru
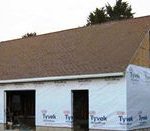 Unless you are going to have HVAC provisions to dry the inside of your heated shop space, you want to dry your space to the exterior . As such, you should have a WRB (like Tyvek) on your shop exterior, then either unfaced batts with 6mil poly on inside, or kraft faced batts. Your ceiling insulation should be unfaced without a vapor barrier. You will probably want to have some sort of exterior sheathing or other barrier to keep rodents from nesting in your insulation. In answer to where Reflectix should go – probably not on this space you are creating.
 DEAR POLE BARN GURU: I recently moved into a house with a 40×30 pole barn (wood post and wood trusses) with a metal exterior. The building has a reflective foil radiant barrier between the metal and wood structure. It is extremely hot in the summer and cold in the winter. I want to insulate and cannot afford spray foam. I also don’t have the ability to remove the walls to remove the foil barrier that way. I do have some Silvercote insulation that has an attached vapor barrier. It is just a fiberglass roll insulation that has an attached vapor barrier to it. It is sold around here for use as insulation in metal buildings. I was given enough to insulate the whole shop from someone that had left overs. I would like to install this insulation to help with temps in the shop. I have tried to research to get an answer on the best way to go about this. The shop builder said just put it up but I feel that would create a double vapor barrier. Is my best route to cut the foil radiant barrier out and then install the fiberglass insulation with vapor barrier facing the interior of the building? This would basically take the foil barrier out and install the fiberglass against the metal with the attached face vapor barrier to the inside of the building. I want to make sure I do it right. Thank you. DAVID in OKLAHOMA CITY
 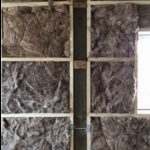 DEAR DAVID: If you are dead set on using this Silvercote insulation then you should cut out any foil radiant barrier. You never want to have a double vapor barrier situation as any trapped moisture will have no method of escaping. Downside of this is you do not have a Weather Resistant Barrier (aka housewrap) between framing and siding. An option to consider would be to resell your metal building insulation, then use unfaced Rockwool batt insulation, as it is unaffected by moisture.
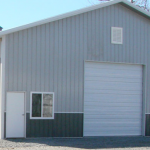 DEAR POLE BARN GURU: I plan to build a 28×48 metal pole barn, concrete floor, 12′ eave with 8/12 pitch. Barn will have 6 3×4 windows, and two 10×10 roll doors, one roll door on each gable end. For now, the roof will be insulated with 3in closed cell foam. I plan to insulate the walls down the road with rigid foam board. The building will not have A/C. Question: Do I need vents or exhaust fan in the gable ends of the roof with the high heat/humidity of Alabama? There will be no ridge vent or soffit vents. I may not have the building open every day, either. Thank you. JASON in MONTGOMERY
 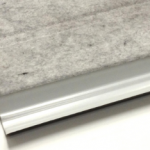 Commonly (when addressed at all during construction) solutions to this problem have often involved creating a thermal break. A thermal break reduces contact between a structure’s warm interior air and cooler metal roofing, thereby reducing or eliminating overall condensation. Installing a reflective radiant barrier, often termed Vapor Barrier, involves laying rolls of faced ‘bubble wrap’ across your building’s purlins prior to roof steel installation. Ideal weather conditions are required for this as even a slight wind can make this a challenging or altogether impossible task. This can cause jobsite delays and may bring progress to a halt while a structure remains unprotected to weather. Even when ideal weather conditions are present, installing a reflective radiant barrier can be a very dangerous task, requiring builders to expose themselves to awkward material handling on a building’s bare roof framing. These risks and delays often generate additional costs for both owners and builders, but have often been necessary with reflective radiant barrier being the only relatively affordable option to prevent interior dripping.
 “I’ve moved into a house that also has an existing 30’x40′ (uninsulated) pole barn. I want to insulate and am considering 2″ thick polyiso foam boards attached to the bottom cord of the roof truss. The roof trusses are 4′ spacing. 1) Do you feel that is a good choice? 2) Do I need to add any type of vapor barrier (or anything else) above the polyiso boards?”
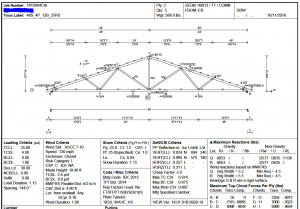 Most pole barn trusses are designed for a one psf (pounds per square foot) bottom chord dead load (BDCL) – inadequate for any type of ceiling. On truss spans of up to and including 40 feet, we include a five psf BCDL as a matter of practice (too many clients decide later on they want a ceiling) and if we know in advance a ceiling is to be installed, we use 10 psf BCDL. You have been fortunate to have at least a five psf BCDL. Your 10 psf bottom chord live load is a non-concurrent (assumes no other live loads are being applied such as snow) one and basically is there to provide a minimum degree of structural integrity allowing for occasional access to an attic space for maintenance purposes.
 DEAR TIM: Thank you for reaching out to us.
 Roof – order roof steel with an Integral Condensation Control (Condenstop or Dripstop) factory applied. Install a steel ceiling across truss bottom chords, blow fiberglass insulation in above steel ceiling. Vent attic at eaves with enclosed vented soffits and ridge.
 DEAR AMANDA: Thank you for your interest in a new Hansen Pole Building. These would be included items:
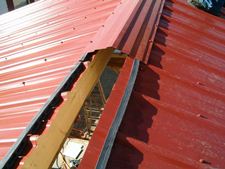 DEAR POLE BARN GURU: I have a barn that doesn’t have soffit vents but it does have a ridge vent. I installed reflective insulation which seems to have dropped the temperature quite a bit. I also have a gable powered fan that does 2000 CFM. However it is about 8 to 10 feet lower than the ridge vent. Are these two things fighting each other do you think or should I take a pipe and vent it up to my ridge vent and to my fan to take the hot air out from the top or should I turn my gable fan off completely.
 DEAR LOUIE: Drives me absolutely bonkers when providers or builders make no true efforts to advise customers on perils of condensation and how to prevent it. So easily, and inexpensively, done at time of construction.
 DEAR DENNIS: Properly pressure preservative treated columns, embedded in ground are unlikely to decay within lifetimes of anyone alive on our planet today
  DEAR THOMAS: In most instances eave and ridge vents are inadequate alone to prevent condensation. Contractors who fail to include some sort of thermal break between roof framing and roof steel are doing a severe disservice, in my opinion. It is so easy to accomplish at time of construction with products such as a Reflective Radiant Barrier or Integral Condensation Control. There is not a good option for an underside of purlins vapor barrier, as it is nearly impossible to adequately seal it. Your only real solution, at this point, would be to use two inches of closed cell spray foam on underside of your roof steel.
 DEAR POLE BARN GURU:
 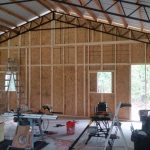 DEAR POLE BARN GURU:
  While there does exist an actual ANSI (American National Standards Institute) definition of Eave Height – most builders and vendors are unawares or just plain choose not to use it. Somewhere your agreement should spell out what is proposed or provided so all have a clear understanding. (Please read more here:
  Entry door width and heights, is door wood, steel, aluminum, vinyl covered, fiberglass? Jambs wood, steel, aluminum, vinyl covered wood? Doors and jambs finish painted or primed only? Crossbucks? Raised Panel? Glass? Wind rated? R value? Keyed lockset, dead bolts?
 DEAR ERIK:
  DEAR MARSHALL: Please keep in mind the Reflective Radiant Barrier under your roof steel is a thermal break designed to control condensation from occurring on underside of your roof steel, it is not insulation and has a R value of roughly one (R = 1). If you block off all vents, you may need to mechanically dehumidify your space in order to reduce moisture inside. Alternatively, should you install a ceiling and insulate above it, you would need to appropriately vent dead attic space to prevent roof system mold and mildew.
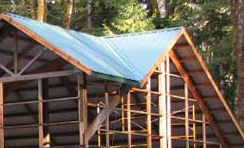 Main roof is framed up, including purlins across area where reverse gable will intersect. 2×12 blocking is then placed between main roof purlins, centered on what will eventually be the middle of the valley. This provides a landing point for intersecting roof purlins from reverse gable (next to be installed). Once these purlins are in place, any reflective radiant barrier (RRB) is installed (I prefer using roof steel with Integral Condensation Control to a RRB). Valley flashing is then installed. We furnish Emseal® self-expanding foam closures to seal between valley flashing and roof steel, following slope of valley flashing. Roof steel is then applied and you are buttoned up tight.
 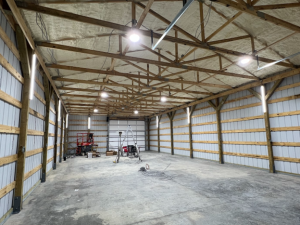 Foam board might be a solution, however you would need to have each panel 100% air sealed between purlins in order to do so. Chances of success range close to zero. You are left with two choices – remove roof steel, install a RRB and reinstall roofing or two inches of closed cell spray foam (roughly $5700). Hopefully you have poured your slab on grade over a well-sealed vapor ba
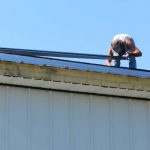 DEAR POLE BARN GURU:
  DEAR KIM: Most existing pole buildings are not structurally adequate for residential purposes, unless they were specifically designed and engineered for R-3 (residential) use. Your Building Official is prudent in requiring you to have a Registered Professional Engineer review your building for structural adequacy. This engineer can also advise you of any non-conforming points, as well as how to resolve them.
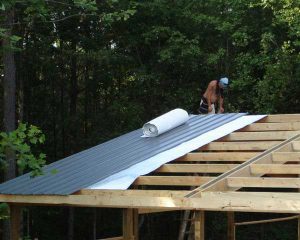 Commonly (when addressed at all during construction) solutions to this problem have often involved creating a thermal break. A thermal break reduces contact between a structure’s warm interior air and cooler metal roofing, thereby reducing or eliminating overall condensation. Installing a reflective radiant barrier, often termed Vapor Barrier, involves laying rolls of faced ‘bubble wrap’ across your building’s purlins prior to roof steel installation. Ideal weather conditions are required for this as even a slight wind can make this a challenging or altogether impossible task. This can cause jobsite delays and may bring progress to a halt while a structure remains unprotected to weather. Even when ideal weather conditions are present, installing a reflective radiant barrier can be a very dangerous task, requiring builders to expose themselves to awkward material handling on a building’s bare roof framing. These risks and delays often generate additional costs for both owners and builders, but have often been necessary with reflective radiant barrier being the only relatively affordable option to prevent interior dripping.
 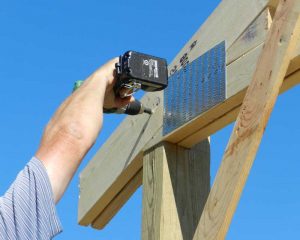 True doubled trusses (not two single trusses spaced apart by blocking) afford many structural advantages (
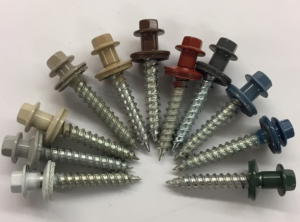 When it comes to steel roofing and/or siding we tested actual steel sheeted assemblies to determine shear strength. Our testing led to development of an entirely new screw design to provide maximum system strength (
 And, something no other post frame building kit provider has – a Written Limited Lifetime Structural Warranty on all non-commercial post frame building kits.
  Least expensive financially, but does take some extra labor hours, especially if it is windy – a single air cell layer reflective radiant barrier. Six foot widths will install much quicker than four foot. Make sure to order with a six foot width NET COVERAGE and an adhesive tab along one edge with a pull strip. Without an adhesive tab all butt edges will require seam tape, not expensive, but adds lots of time. Do not waste your money on adding an extra approximate R 0.5 for double bubble (two layers of air cells).
 I have personally used BIBs (
 Yes we can provide plans with a third-party engineered design for bracket set columns, as well as brackets.
  Although our buildings are designed for an average literate English speaking person to successfully construct their own building (most of them do, and do a wonderful job – because they will read and follow instructions), for those who do need an erector, in many areas we can provide contacts for you to vet.
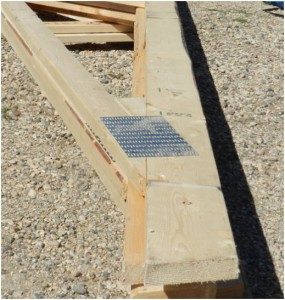 Building plans are drafted prior to receipt of truss drawings, so trusses as drawn on your plans are merely a depiction of what they may look like. Top and bottom chords as well as internal diagonal webs may be entirely different. The roof slopes will be accurate. Your building’s roof purlins certainly may hang below roof truss top chords, as this has no bearing upon your ability to insulate (please refer to Figure 9-5 of your Hansen Pole Buildings’ Construction Manual). As your roof has a Reflective Radiant Barrier, if you intend to use batt insulation between purlins, make sure to use unfaced insulation without a vapor barrier on underside, otherwise moisture can become trapped between two vapor barriers. This can lead to ineffective damp insulation as well as potential mold and mildew issues.

 In most relationships, success (or lack thereof) is created by communication. Lots of clear, concise dialogue makes for a happy marriage (whether a marriage of two partners in matrimony, or between client and pole barn provider). Don’t talk so much, or don’t pay attention to what the other party is saying, and a rocky road can result.