I Like Vaulted Barndominium Ceilings
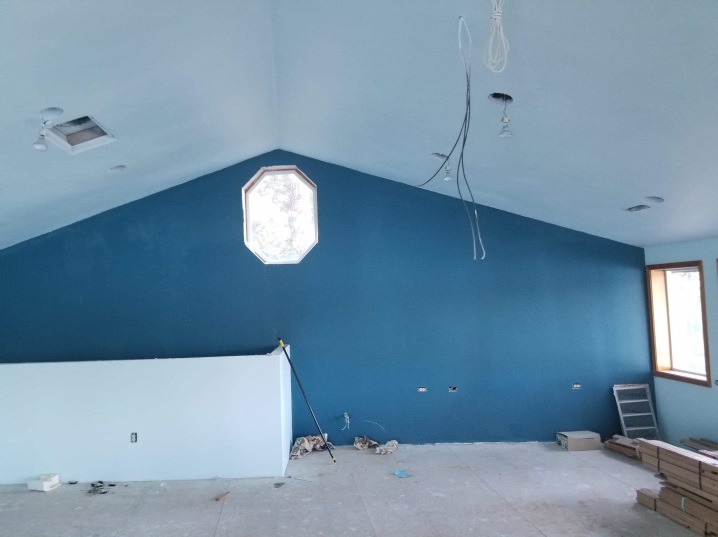
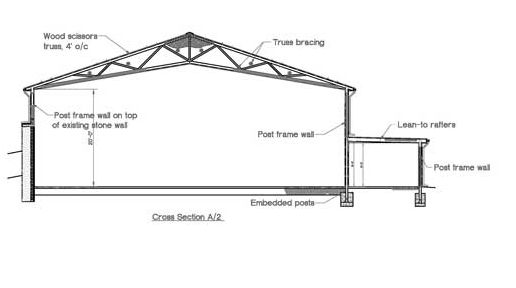
When I built my first personal post frame shop/house, it had a 7/12 exterior roof slope, to match other buildings on the same property. Upper level of this building was designed as an area where we would potentially place a ping pong table. To allow for lobs, I had prefabricated scissor roof trusses built with a 4/12 bottom chord slope. While we never got around to playing ping pong, it did make for a dramatic space.
In barndominium design and construction, new homeowners are faced with a choice of standard room framing on ground level rooms, or opening ceilings up to a sloped roofline. This style of architecture is known as a vaulted or cathedral ceiling.
Many people once considered a vaulted ceiling to be an ultimate in home luxury, but now opinions are strongly divided on this construction style, with many homeowners, builders, architects, real estate professionals, and designers expressing outright hatred for vaulted ceilings, while others continue to champion this style. There is almost no other element of home design earning this kind of strong polarized opinion. So is a vaulted ceiling right for you?
A vaulted ceiling in new construction is no more complicated than standard framing, although it does require special roof trusses, usually built off-site. It is somewhat more expensive, though.
When it comes to finishing a two story barndominium, there can be some modest cost savings to a vaulted ceiling, since a smaller second-story will require less finish material to complete it. Because your second story has less floor space, it requires less flooring, less trim molding, etc.
Creating a vaulted ceiling is easily within skill levels of most DIYers.
Single biggest drawback of a vaulted ceiling becomes evident when you ask yourself how you will clean and paint the ceiling, or how you will change lightbulbs or repair light fixtures soaring 20 or 30 feet over your head. My own current shop house has 16 and 20 foot high ceilings. I change can type light bulbs by means of a telescopic bulb changer (roughly a $20 investment).
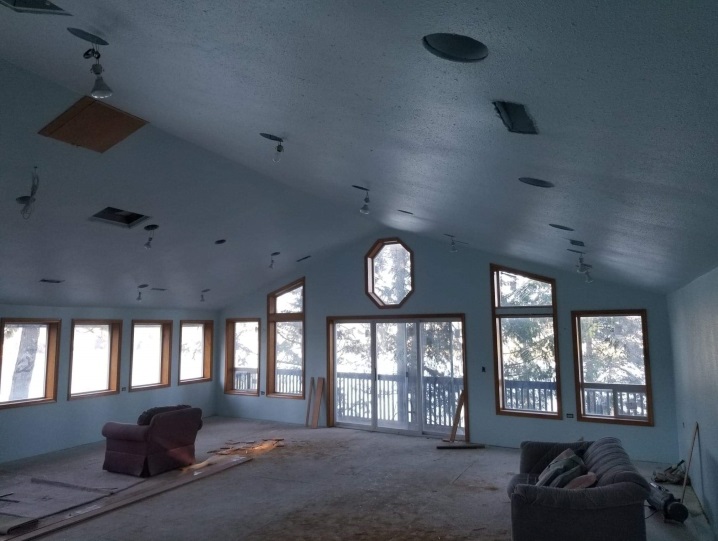
There certainly are design benefits to a vaulted ceiling. They give a room an illusion of far greater space. Vaulted ceilings do indeed make a room brighter, especially when an endwall is fitted with windows above sidewall heights. By contrast, an open-concept “great room” built with ceilings only eight or nine feet high can feel tight, dark, and airless. Appearance of vaulted ceilings can be greatly improved by adding wood beams spanning across open overhead spaces. Such beams can offer a good place to mount directed light fixtures.
A vaulted ceiling in a one-story ranch rambler can be a very effective style to convert a boring entry level barndominium into a vintage home.
For some people, a tray ceiling is a good alternative to a vaulted ceiling. A tray ceiling looks like a conventional, 8-foot, flat ceiling, but with a center flat portion raised about a foot or so above surrounding surfaces. Tray ceilings give an added feeling of airiness, yet allow for maximum insulating value.
Vaulted ceilings are notorious energy wasters since room heat naturally rises into empty space where it offers no benefit. Because rooms with vaulted ceilings are often fitted with many windows, energy loss can be more pronounced. Finally, vaulted ceilings tend to be draftier, simply because of natural convection patterns caused by warm air rising and cool air falling. Some of this can be mitigated by installing extra insulation in ceilings or installing ceiling fans to force warm air down into living spaces. In reality these spaces will often feel chilly and drafty in winter, especially for homes built in colder climates.
But vaulted ceilings do make rooms undeniably brighter and airier. Many people find this merit alone is worth the drawbacks of winter chilliness.
From a new barndominium-building viewpoint, a vaulted ceiling is no more complicated than standard construction framed with two full stories but it does raise construction costs. And remember, vaulted ceilings reduce the amount of livable floor space. Depending on the vaulted room size, the amount of total available floor space can be reduced by as much as 20 to 50 percent, since the second story is greatly reduced in size.
A vaulted ceiling may be right for you if your home style is compatible with look, and if you are willing to accept increased energy costs and winter draftiness coming along with those bright, spacious feelings. It’s worth consulting a real estate professional to determine if a vaulted ceiling will be a good selling feature for your barndominium.
 Generally, R-60 is code requirement for Ottawa county, you can install full height R-60 for areas where there are no height constraints, and then fill areas having constrained heights (but making sure to install eave baffles). Alternatively, you could have a raised heel truss and install a minimum of R-49 across entire attic floor per 2021 IECC R402.2.1 (similar provisions exist in other IECC versions).
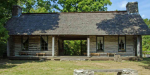 DEAR POLE BARN GURU: Have you ever built a dog trot style like this using metal buildings? Do you have pictures you can share? My husband and I really want to do this dog trot and hope to see pictures. Can you tell me what size the two structures were the you provided? Also can you provide roof pitch? Our plan is to place at least the first structure or both and build the porch in between. REEDE in STAFFORD
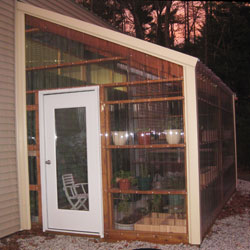 DEAR POLE BARN GURU: My girlfriend and I are looking to start an aquaponic greenhouse system/farm. We are building a polycarbonate gable style greenhouse 30’x96′-120′ and we are needing to attach a post frame building to the greenhouse in an “l” shape off the shop end. We are/were originally looking to keep the house (4bed/3bath) one level roughly 50×100 splitting the post frame building 50/50 shop and house. But after looking at some of your projects we aren’t opposed to building a taller but shorter home with attached shop still 50×50. My question is in attaching the green house have you ever designed or worked with projects like this? CHRIS in FORT MADISON
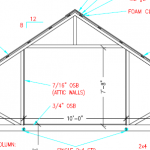 DEAR POLE BARN GURU: If I am building a 30×40 with 10 foot side walls, and I can only have a maximum peak of 17 feet, so roughly a 6/12 pitch, if I had attic trusses, how tall would the open space be in the attic room? If I can go taller and have a 8/12, or 9/12 pitch how tall could the open space be in attic? Thanks. KRISTI in SAGINAW
 DEAR MARK: Your roof purlins appear to be adequate to support this type of a snow load. As to trusses, I would reach out to Morton Buildings with your site address and they should be able to pull up truss drawings for your building. If not, you would need to retain services of a Registered Professional Engineer who could do an actual inspection of your trusses and run calculations to determine exactly their capacity.
 DEAR ANDREW: Can and should are not often same.
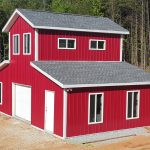 DEAR DAVE: Unless your window’s vinyl frame was actually damaged, in most instances a glass company can do a repair of just broken glazed portions. I would suggest a call to Capital Glass in Reno (775)324-6688 as this appears to be in their wheelhouse and they service Fernley.
 DEAR POLE BARN GURU: What is your best guess at price per square foot range materials and labor to build a Hanson Pole Building these days? STEVE in MAPLE PLAIN
 DEAR JOHN: These trusses may or may not be adequate for your needs, depending upon loads and spacing they were designed for.
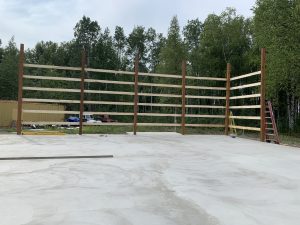 DEAR DAN: You would be incorrect. Poles (actually columns) are inanimate objects and can be spaced at whatever distance their size and grade is capable of supporting using sound engineering practice. Our engineers recently designed a building for one of our clients with columns every 18′ and many years ago, I did one with columns spaced 24 feet on center. In most instances (depending upon climactic loads and door/window locations) columns every 12 feet are most economical.
 DEAR POLE BARN GURU: How long has Hansen (the man himself) been building pole buildings?WESLEY in AUMSVILLE
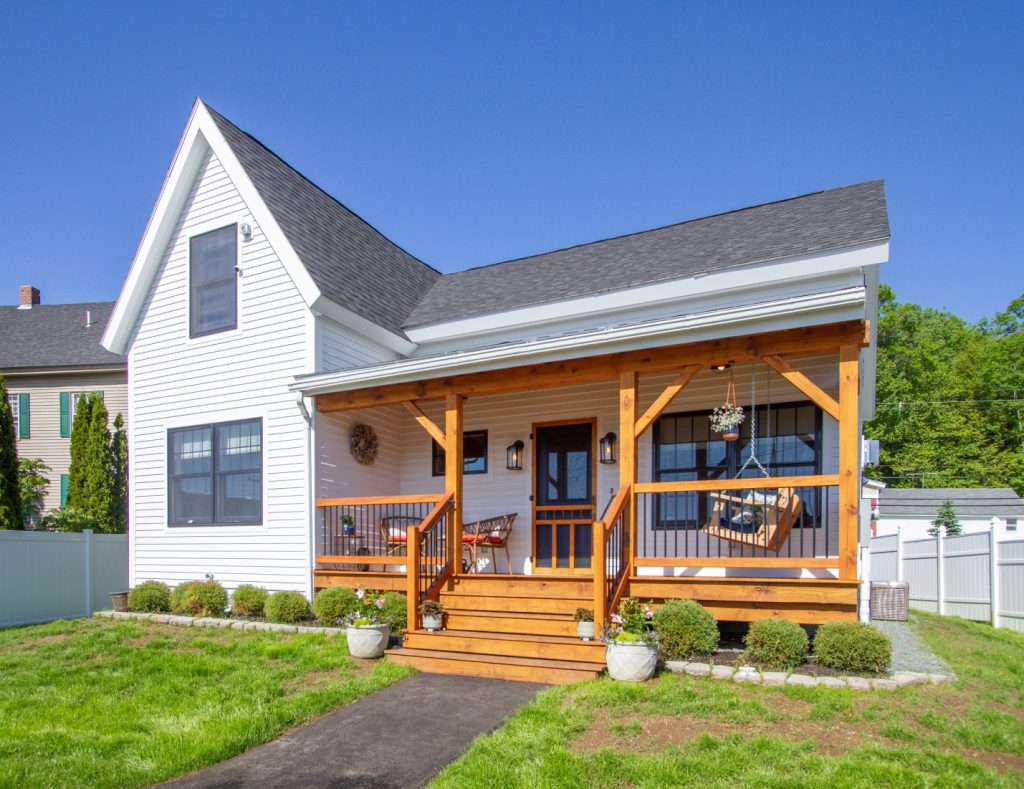
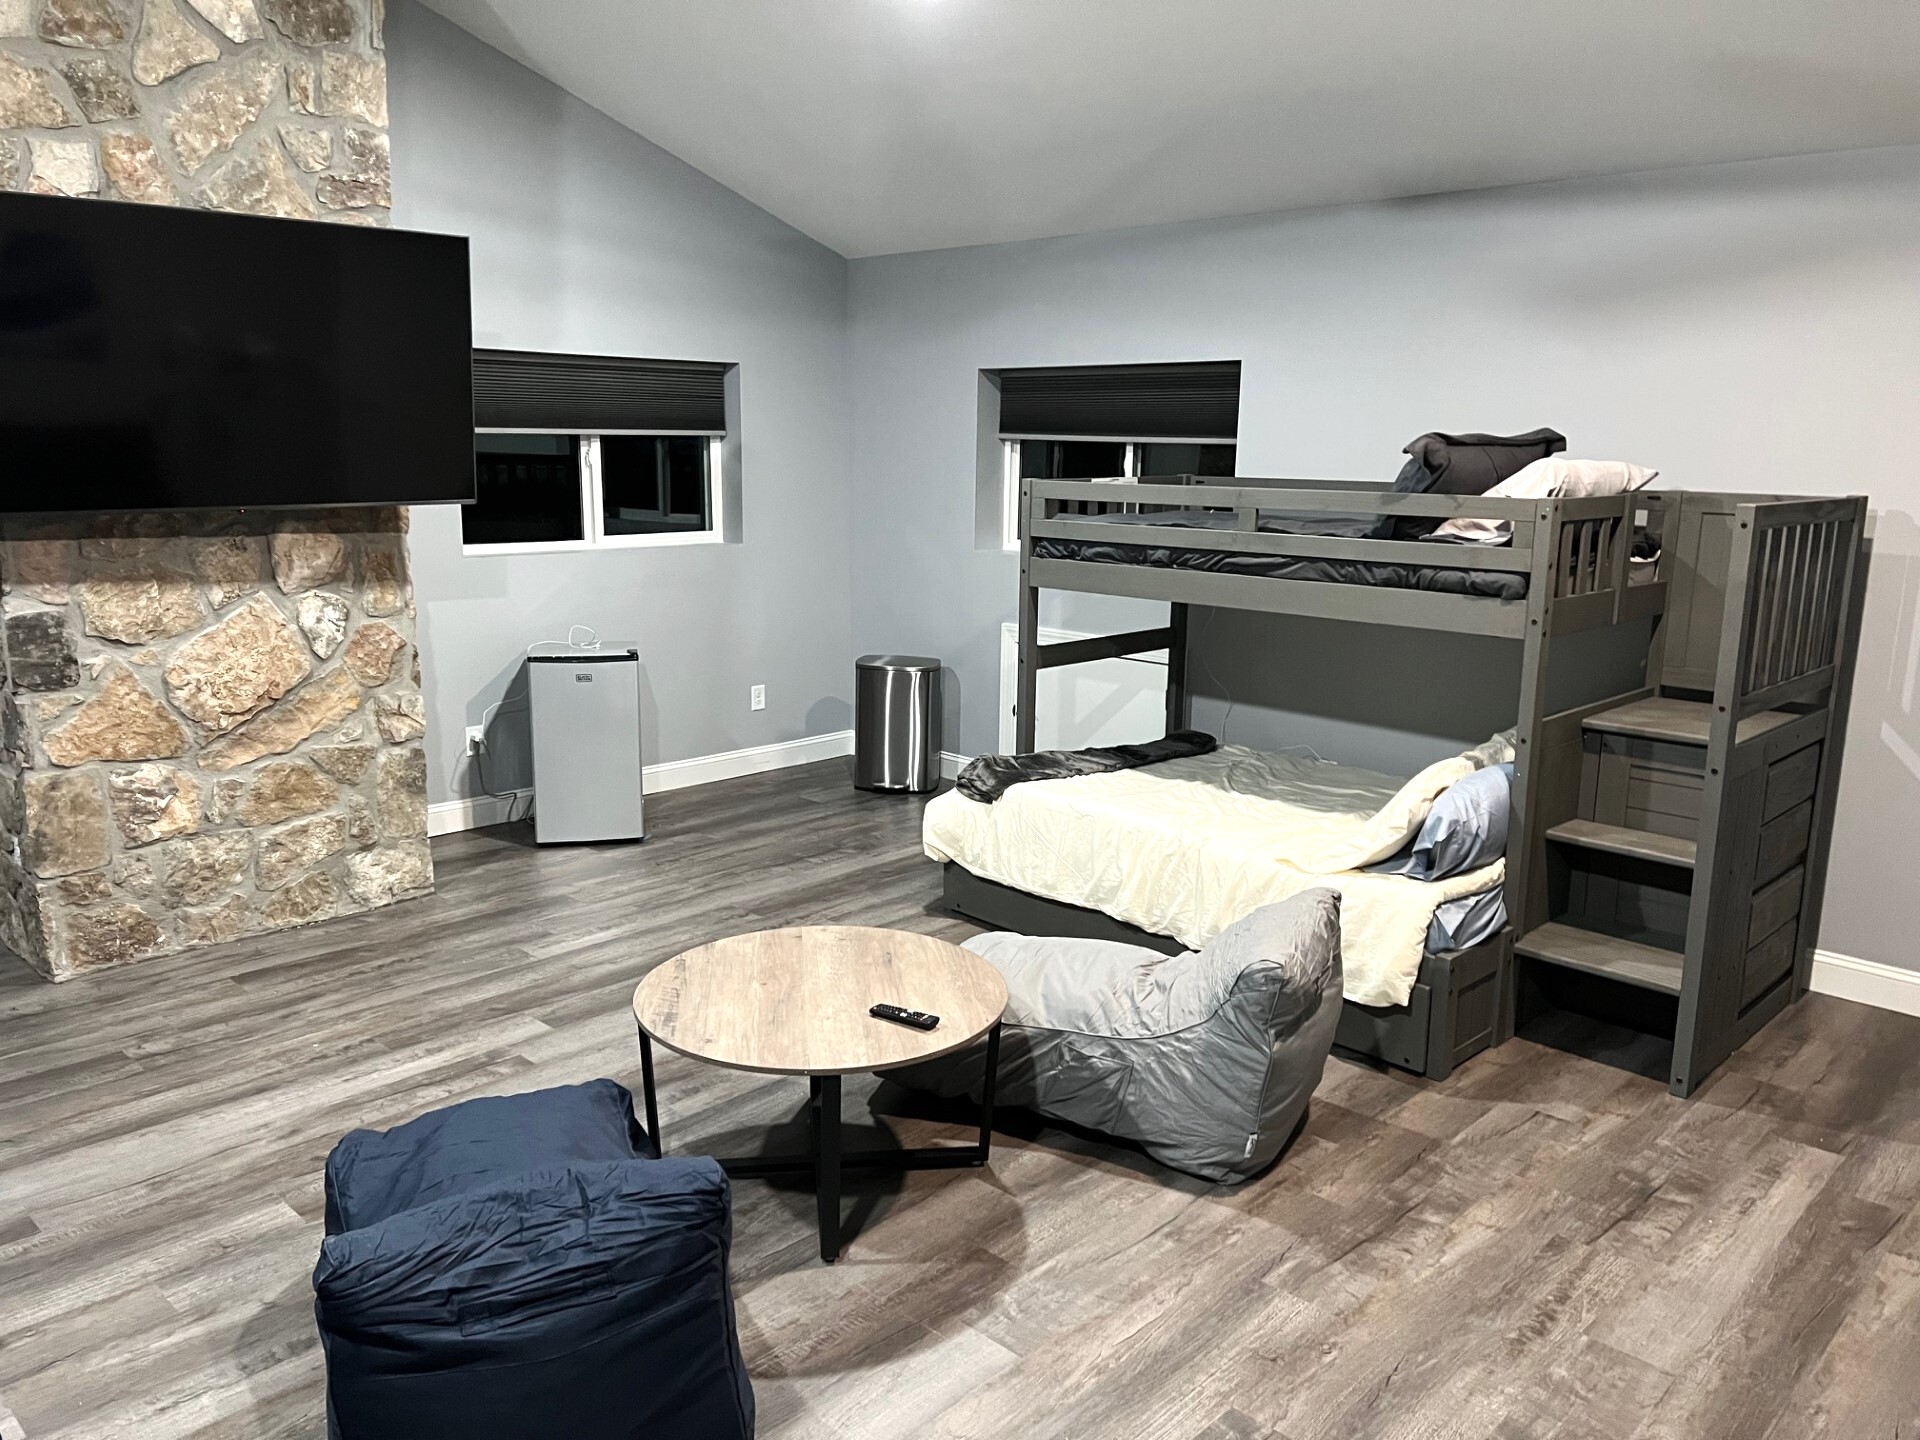
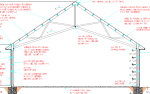
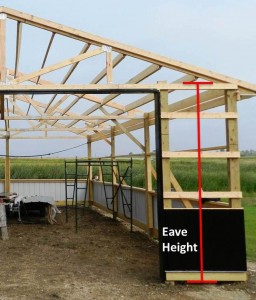
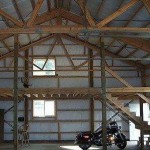 “I am planning a 45×56 pole barn, with ~16ft deep mezzanine on the end wall. The zoning rules limit the building height to 25 ft. It seems the best options are scissor trusses with 1) 4:12 roof pitch and 2:12 ceiling pitch which puts the eave height around 16ft or 2) a 3:12 roof pitch with ~1:12 interior pitch which puts the eave height around 17.5. With a 9′ 4” Mezz Floor height and a roughly 16inch thick floor, the height under the mezz will be just under 8ft, and the min/max heights above the mezz will be roughly 1) 6 -10′ or 2) 8- 10′. The space below will be used for vehicle storage (or possibly a pool table), and the Mezz will be used as a recreation area in the center with offices on either side wall. The whole building will be insulated and climate controlled.
 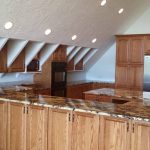 When it comes to truss space/between truss framing/wall framing, he’s definitely concerned about drywall logistics, OSB logistics (or not), moisture, and labor. And I want to make sure he feels heard and informed before we dump these plans and materials on his plate. I see both sides, but at the end of the day, he’s our builder and I need him to be fully on board before pulling the trigger. Could you help? I’m sure I’m not the first person with this quandary but I’ve also used enough pole barn builders in our area to know that he’s our best option for this project.
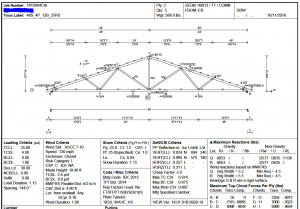 Overhangs on eave sides (measured parallel to ground), as well as beyond endwalls. Why is beyond endwalls important? For sake of discussion assume single trusses placed every two feet, unless specified and designed otherwise and end truss in this scenario can only support a foot of overhang past an end. Single trusses placed every four feet can support a maximum two foot end overhang.
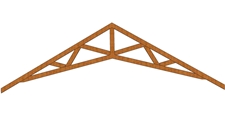 DEAR POLE BARN GURU: I have a 30×40 pole barn. And my lower beam on the trusses is to low for my car lift. Is scissor trusses as strong or stronger then common trusses and I know without a engineer doing the math it’s hard to say. ZACH in ATASCOCITA
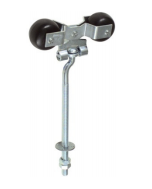 DEAR POLE BARN GURU: The round rail hanger bolt on our sliding door got pulled out of the hole drilled through the 2×6 at the top of the door. We have made angle iron for the top and bottom of the 2×6 with 1/2in holes but are finding it difficult to get the bolt through the holes. Is there an easy way to reinstall the door hanger without removing the entire door from the track? AARON in MARYSVILLE
 DEAR TERRY: Post frame (pole barn) buildings can be permanent residences – I happen to live in one myself, with about 8000 square feet of finished space. They can be built either with embedded columns, or on a partial or full foundation. For more information please visit
  DEAR LEE: We only provide building plans along with an investment into a Hansen Pole Buildings post frame building kit package. We firmly believe every post frame building should be structurally designed and plans sealed by a Registered Professional Engineer. Whether stamped drawings are required or not, if an engineer didn’t design it, who did? It is frankly just not worth risking your life or your valuable possessions in an attempt to save a few dollars.
 DEAR VICKIE: Considering it is only 375 miles from Browns Valley to Hurley, you are almost local! Hansen Pole Buildings provides post frame buildings in all 50 states (yes – even Alaska and Hawaii), so Wisconsin is not an issue.
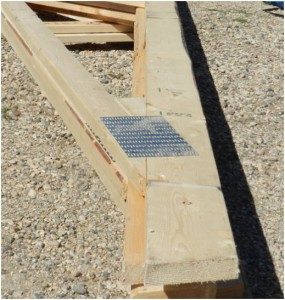 Building plans are drafted prior to receipt of truss drawings, so trusses as drawn on your plans are merely a depiction of what they may look like. Top and bottom chords as well as internal diagonal webs may be entirely different. The roof slopes will be accurate. Your building’s roof purlins certainly may hang below roof truss top chords, as this has no bearing upon your ability to insulate (please refer to Figure 9-5 of your Hansen Pole Buildings’ Construction Manual). As your roof has a Reflective Radiant Barrier, if you intend to use batt insulation between purlins, make sure to use unfaced insulation without a vapor barrier on underside, otherwise moisture can become trapped between two vapor barriers. This can lead to ineffective damp insulation as well as potential mold and mildew issues.
 Knowing this building would be very tall, and there would be a 180 degree panoramic lake view, it was planned all along to have a rooftop deck. Adding to design challenges, we wanted this deck to be capable of supporting weight of a hot tub and its occupants!
 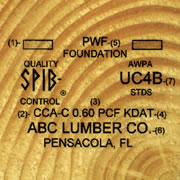 All Hansen Pole Buildings’ structural columns (supporting roof loads) are pressure preservative treated to a minimum UC-4B specification, which is the requirement per the IBC (International Building Code). Even under extreme conditions, these columns should more than adequately support your building not only for your lifespan, but also your grandchildren’s. The longevity of properly pressure preservative treated lumber has been well documented in scientific testing.
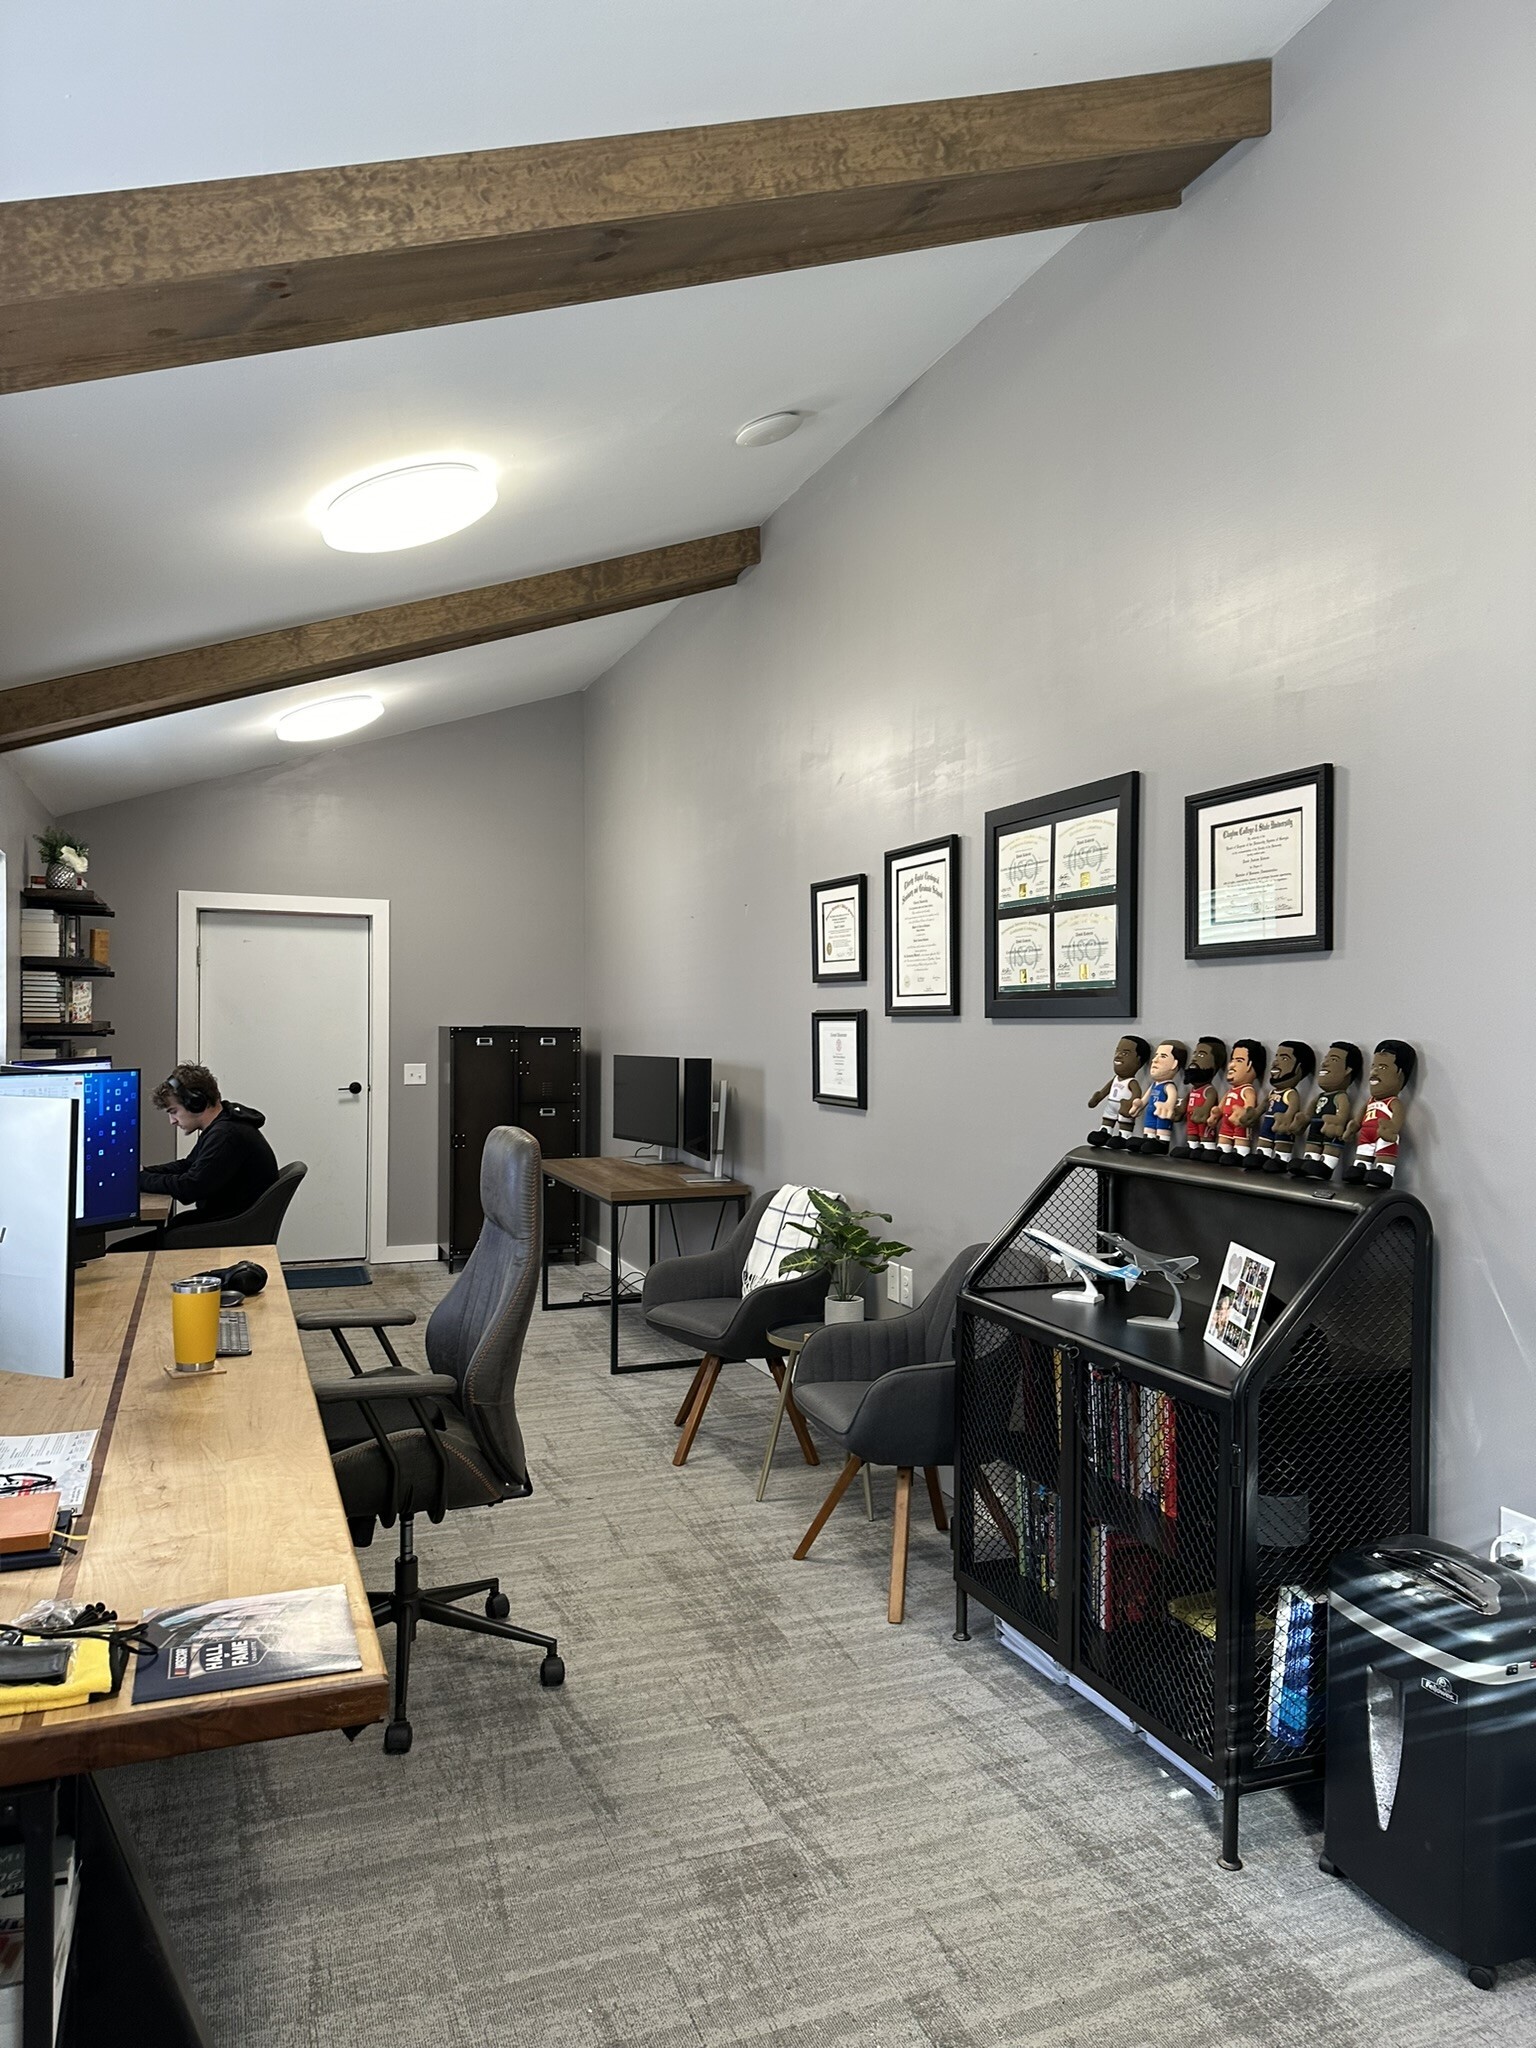
 As pole buildings have gravitated from the farms of the 1950’s into the mainstream of popular construction, their owners have been looking for more appeal than what was offered by the average tractor shed.
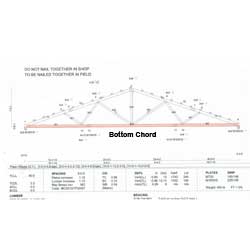 I recently wrote about an article my Uncle Neil had written for the Journal of Light Construction (JLC). Just out of being curious I did a search under “pole barns” and was amazed when I found the thread below (keep in mind these are JLC-Online Expert Forums).


