This week the Pole Barn Guru tackles reader questions about a building set into a slope with use of post brackets, the possible use of “cross bracing” for wall girts, and understanding pressure treated wood.
DEAR POLE BARN GURU: I would like to build a 32′ x 48′ 2 story pole building where two of the sides of at least the lower floor are at least partially set into the hillside on the property. I envision the two sides set into the hill to be concrete foundation walls. Sort of a daylight basement. The lower floor would be a woodshop and the upper floor a two bedroom apartment. I am assuming a concrete foundation with Laminated “poles” mounted in brackets as opposed to buried. the “poles” on the two sides set into the hill would be shorter than on the other two sides. With the available space, the two story concept works better than having everything on a single story. Is this even possible? What would a ROM cost for a kit like that cost?
Thank you BILL in WEST RICHLAND
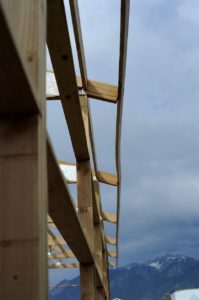
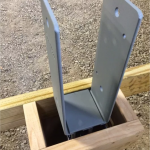 DEAR BILL: Your idea is totally possible. I have done it myself. In my case I had 12 feet of grade change across my building’s 40 foot width. I used ICFs full height on one sidewall and stepping down across rear endwall. Columns on these two walls were mounted using wet set brackets, other two walls had embedded columns. This process could also be used with poured concrete or block walls. We have also developed a system to use columns placed in a permanent wood foundation.
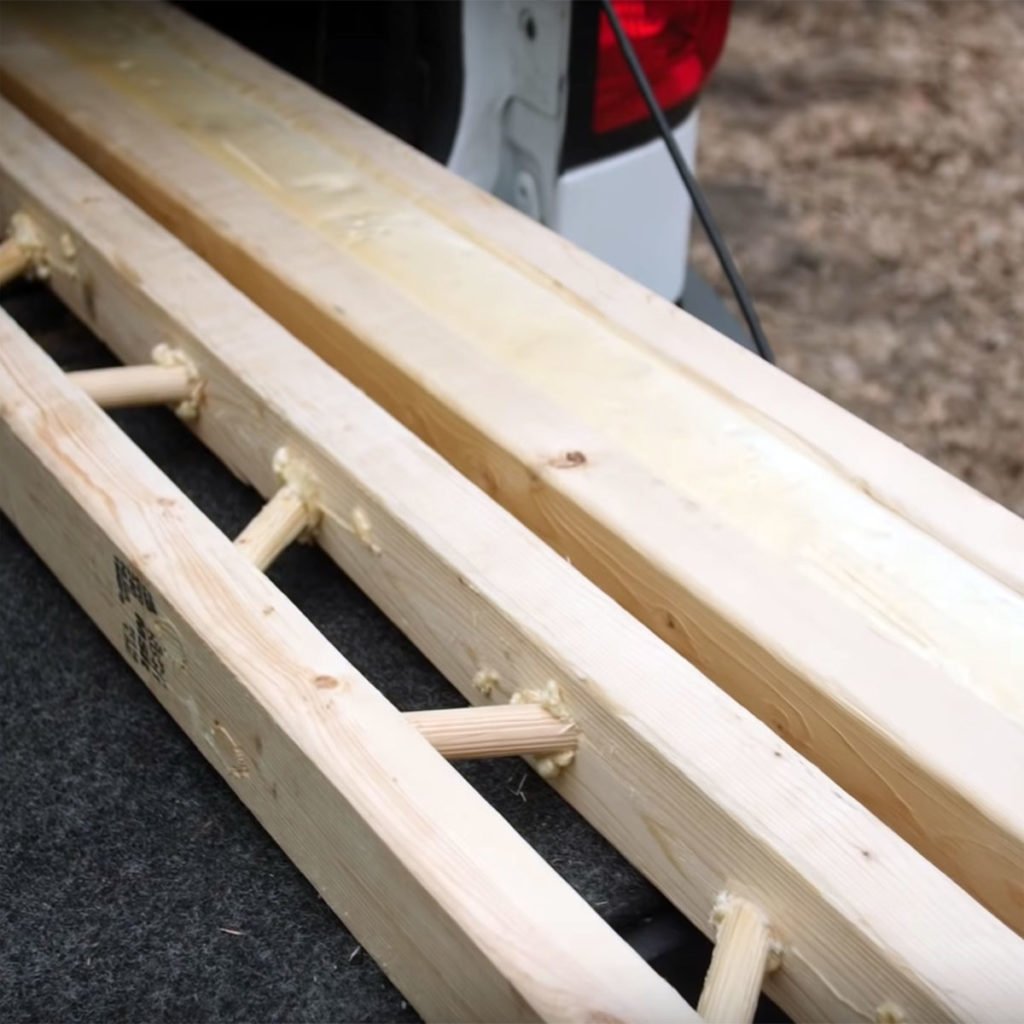
Attached photo is of my own building.
This is being shared with your Hansen Pole Buildings’ Designer who will be reaching out to you shortly.
 DEAR POLE BARN GURU: When using bookshelf girts is cross bracing used between posts or are the girts when blocked provide the support? WINSTON in MOULTON
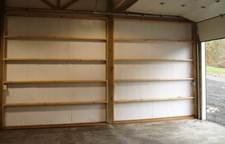
DEAR WINSTON: No cross bracing is required when using bookshelf girts. Once installed (ideally blocked solid to columns at each end) and sheathing (OSB, plywood, structural panels or steel siding) is applied, your wall and girts are more than adequately supported and this assembly is fairly rigid.
DEAR POLE BARN GURU: I read the article regarding treated wood. I am still a little puzzled as to what treating you would use for ground contact purposes, especially the upright poles. Do you have any other articles regarding this subject or have input you could email me? Much appreciated, thank you. KELLY in VICTOR
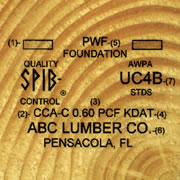 DEAR KELLY: Pressure preservative treated wood standards can be confusing even for lumber dealers, professional builders and building inspectors. For structural building columns, all end tags should have UC-4B marked on them. UC-4B is for “Heavy Duty” use. This American Wood Preservers Association infographic might prove helpful to understanding proper uses for pressure preservative treated wood: https://www.spib.org/uploads/pdfs/ResidentialInfographic2016.pdf
 DEAR POLE BARN GURU: I’m building a barndominium in Iowa and I wonder if I can do a monolithic slab in a freezing area where the typical frost footing is 42″? Thank you. DAVID in KALONA
 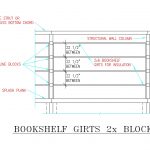 DEAR POLE BARN GURU: I’m looking at a pole barn design that I’d like to do, but I’m considering 10′ OC or 9′ OC post spacing rather than 8′ I’ve run the numbers for the roof and the posts, but I wanted to know if the wall girts could handle that span? Looking at 2×6 girts, any advice on how to make sure they stayed within reasonable deflection limits? Also this pole barn has interior walls, as it’s a “barndominium” so we’re looking at doing residential grade, pulling permits etc. on this project. ALAN in ST. GEORGE
  DEAR POLE BARN GURU: How much does it cost to get a pole barn one car garage with living quarters above fully finished out on my own property. JENNIFER in GRANDVIEW
 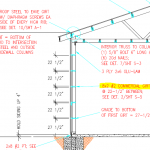 Rather than evenly spacing non-commercial bookshelf girts between splash plank and eave, we now have standardized spacing to fall so measures are evenly divisible into eight (8) feet. Examples are 32”, 24”, 19.2”, 16” all of which are keyed to markings on tape measures. With ends of girts solid blocked to columns, there really should be no need to measure anyhow (other than to cut blocks). Blocks can be cut, in quantity, speedily with a chop saw.
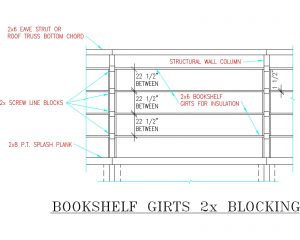 Mike the Pole Barn Guru writes:
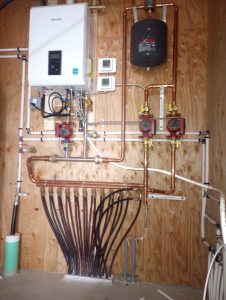
 In order to minimize construction steps, material usage and create a deep insulation cavity, expect to see a design using commercial bookshelf girts. These will be placed horizontally 24 inches on center between columns. (Please read more here:
 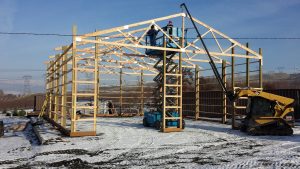 From Chapter 19 of our Construction Manual: “Between initial installation time and wall sheeting bookshelf girts may sag or droop. Relax, bookshelf girts can be easily pushed up or down by hand, to straight, as siding is applied. Once installed, siding is strong enough to hold bookshelf girts permanently in place.” When wall steel panels are properly pre-drilled (as advised in our Construction Manual) it provides for perfectly straight screw lines.
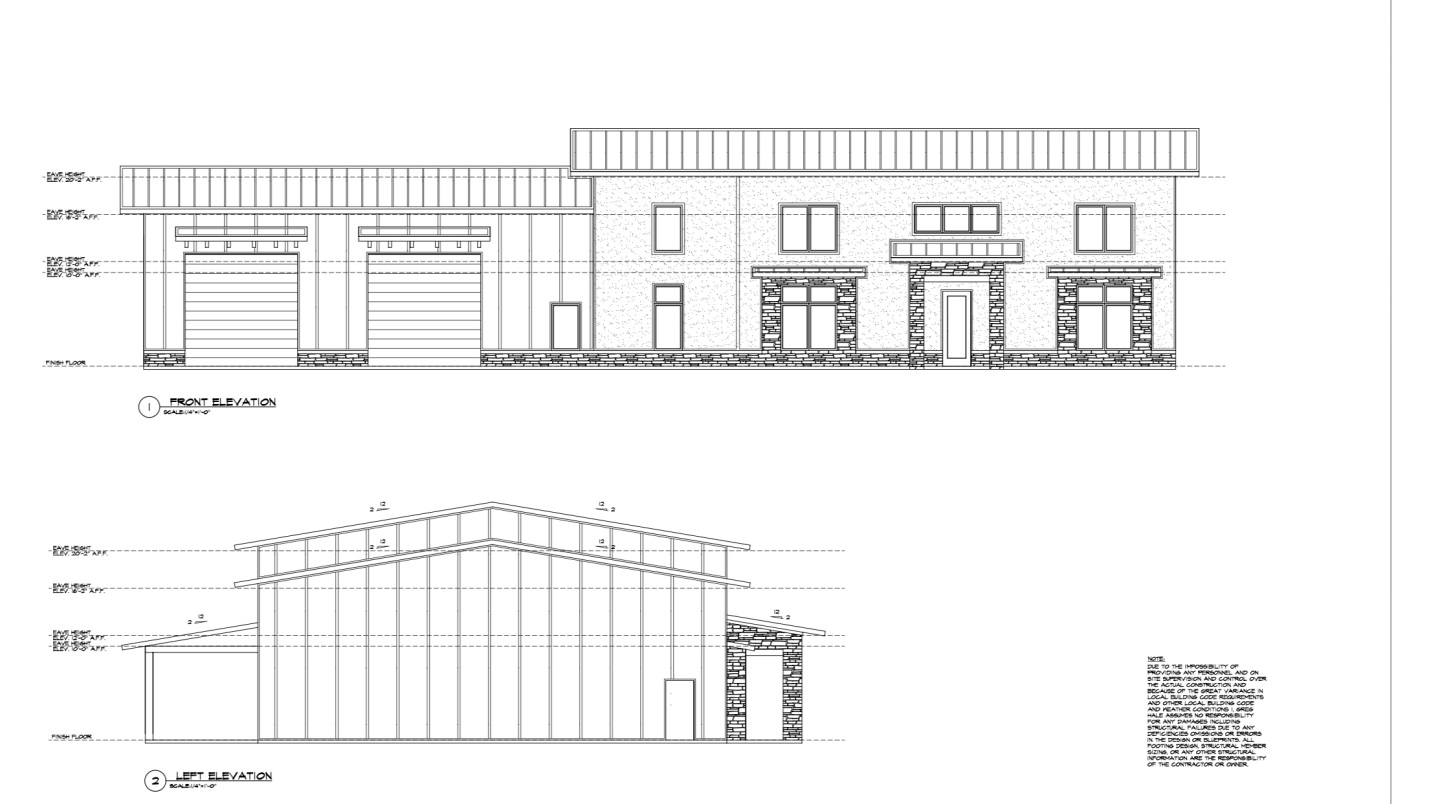
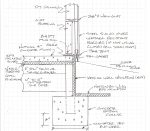 MYTH #8. THERE ARE NO FOOTERS IN POST FRAMES
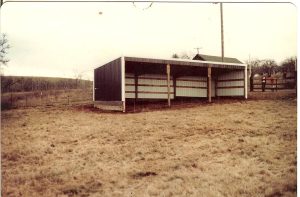
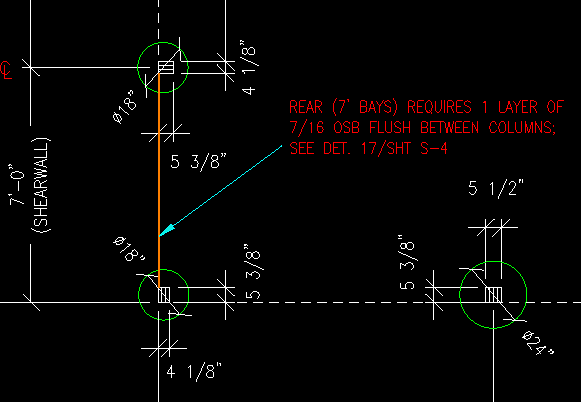
 You will want to carefully review Sheets S-4.1, S-5.1 and S-5.2 of your engineered building plans, as they detail location, orientation and placement of all wall girts and associated framing members. Bookshelf wall girts run from column to column, not continuously around the building perimeter.
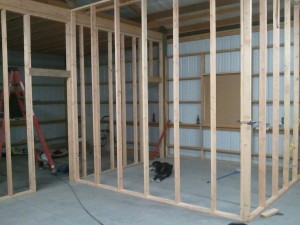 Anecdotally, supposedly the company who first pre-cut studs couldn’t close their 1943 delivery truck’s tailgate with eight foot material – so studs were cut to fit the truck bed.
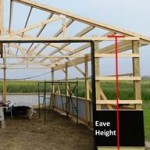 EAVE HEIGHT
 APPROPRIATELY SIZE SPACES
 While there does exist an actual ANSI (American National Standards Institute) definition of Eave Height – most builders and vendors are unawares or just plain choose not to use it. Somewhere your agreement should spell out what is proposed or provided so all have a clear understanding. (Please read more here:
  Entry door width and heights, is door wood, steel, aluminum, vinyl covered, fiberglass? Jambs wood, steel, aluminum, vinyl covered wood? Doors and jambs finish painted or primed only? Crossbucks? Raised Panel? Glass? Wind rated? R value? Keyed lockset, dead bolts?
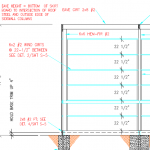 DEAR DAVID: I am a huge advocate of using commercial bookshelf style wall girts for any post frame building where climate control might be anticipated. Bookshelf girts also lend themselves well to best possible application of sheetrock.
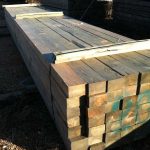 DEAR ROGER: Untreated Cedar, left exposed to weather in above ground situations probably has an expected lifespan of roughly 10 years (
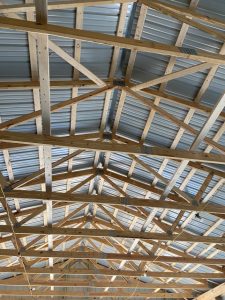 DEAR POLE BARN GURU: H
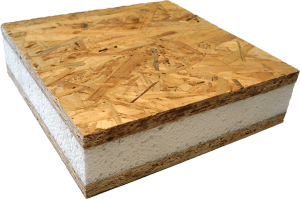
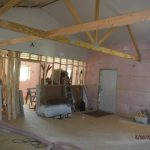 When you create an encapsulated building (spray foam to all interior surfaces), you do not want to ventilate it, as you would then lose your air seal. With your OSB’s underside sealed by closed cell spray foam and upper side protected with 30# felt or ice and water shield, there is no way for your OSB to become moist. If this is still a concern, an upgrade to plywood could be done.
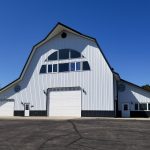 We do have sample building plans available on our website for your builder to review and get a feel for
  My most important advantage was a thirst for knowledge. One of my favorite childhood books was 1967’s “The Way Things Work” by Neil Ardley and David McCaulay. I read it cover-to-cover repeatedly. This same thirst for wanting to know how things work led me to Dr. Frank Woeste at Virginia Tech. He challenged me with learning structural calculations involved in what made post frame (pole barn) buildings work.
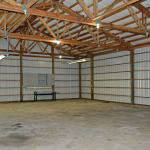 People (both builders and DIYers) do bookshelf girts because they are, at a minimum, over 300% stronger in supporting wind loads than externally mounted girts (based upon 2×6 material of same grade at same spacing). They are also more resistant to deflection by more than 1300%. Moreover, with proper dimensional sizing, they allow for creation of an insulation cavity where clients can do interior finishes without having to add more framing.
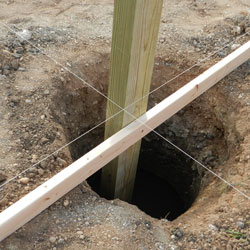 DEAR POLE BARN GURU:
 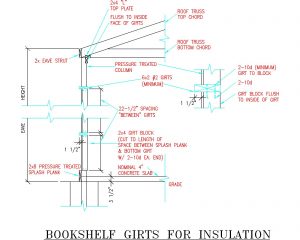 DEAR POLE BARN GURU:
  DEAR POLE BARN GURU:
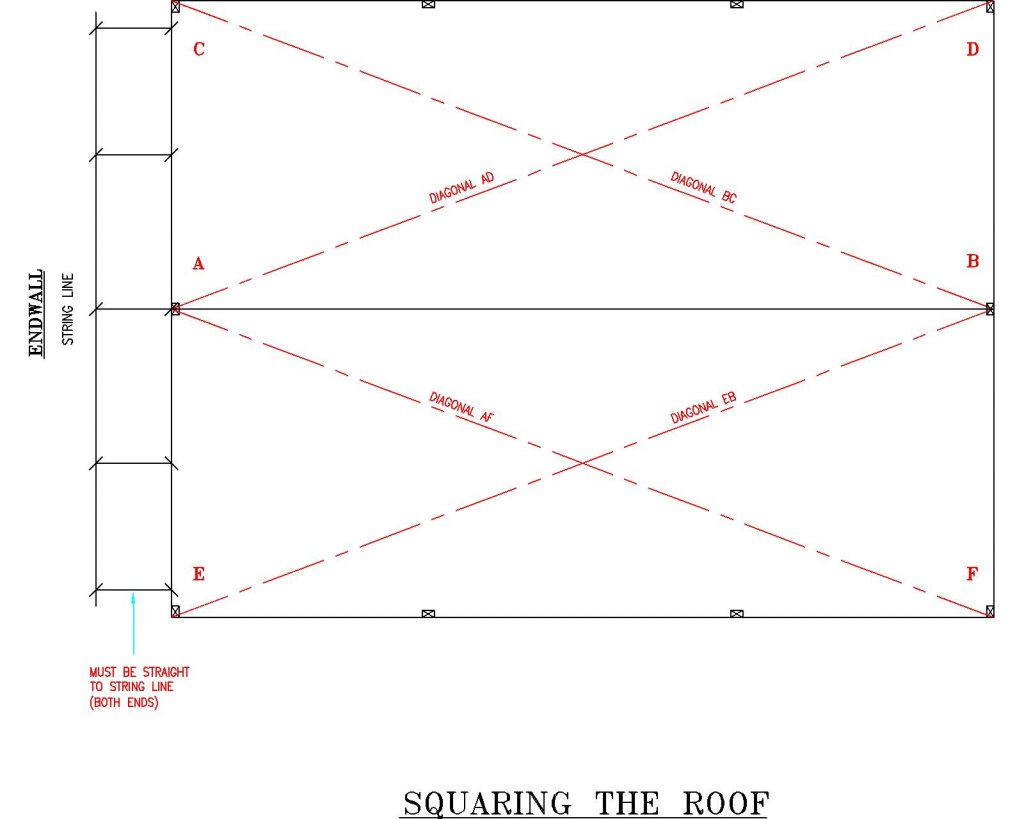
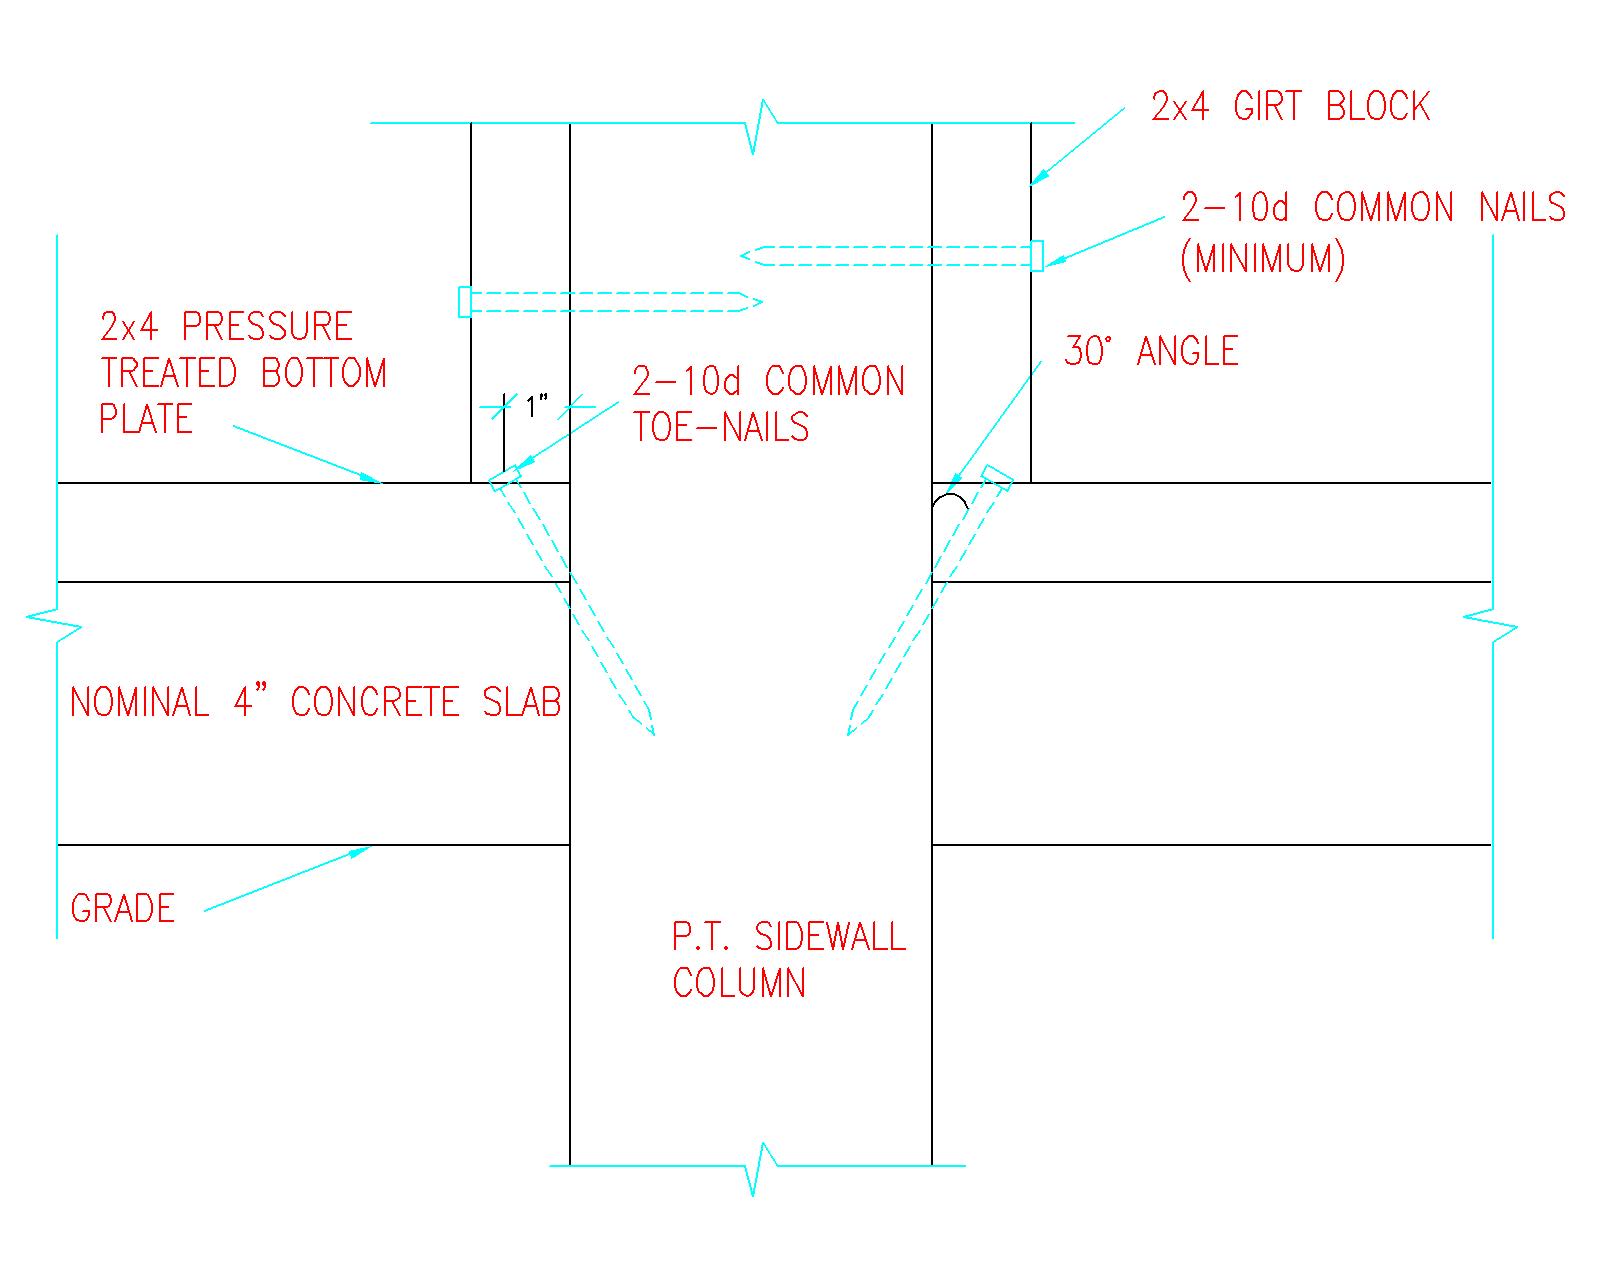
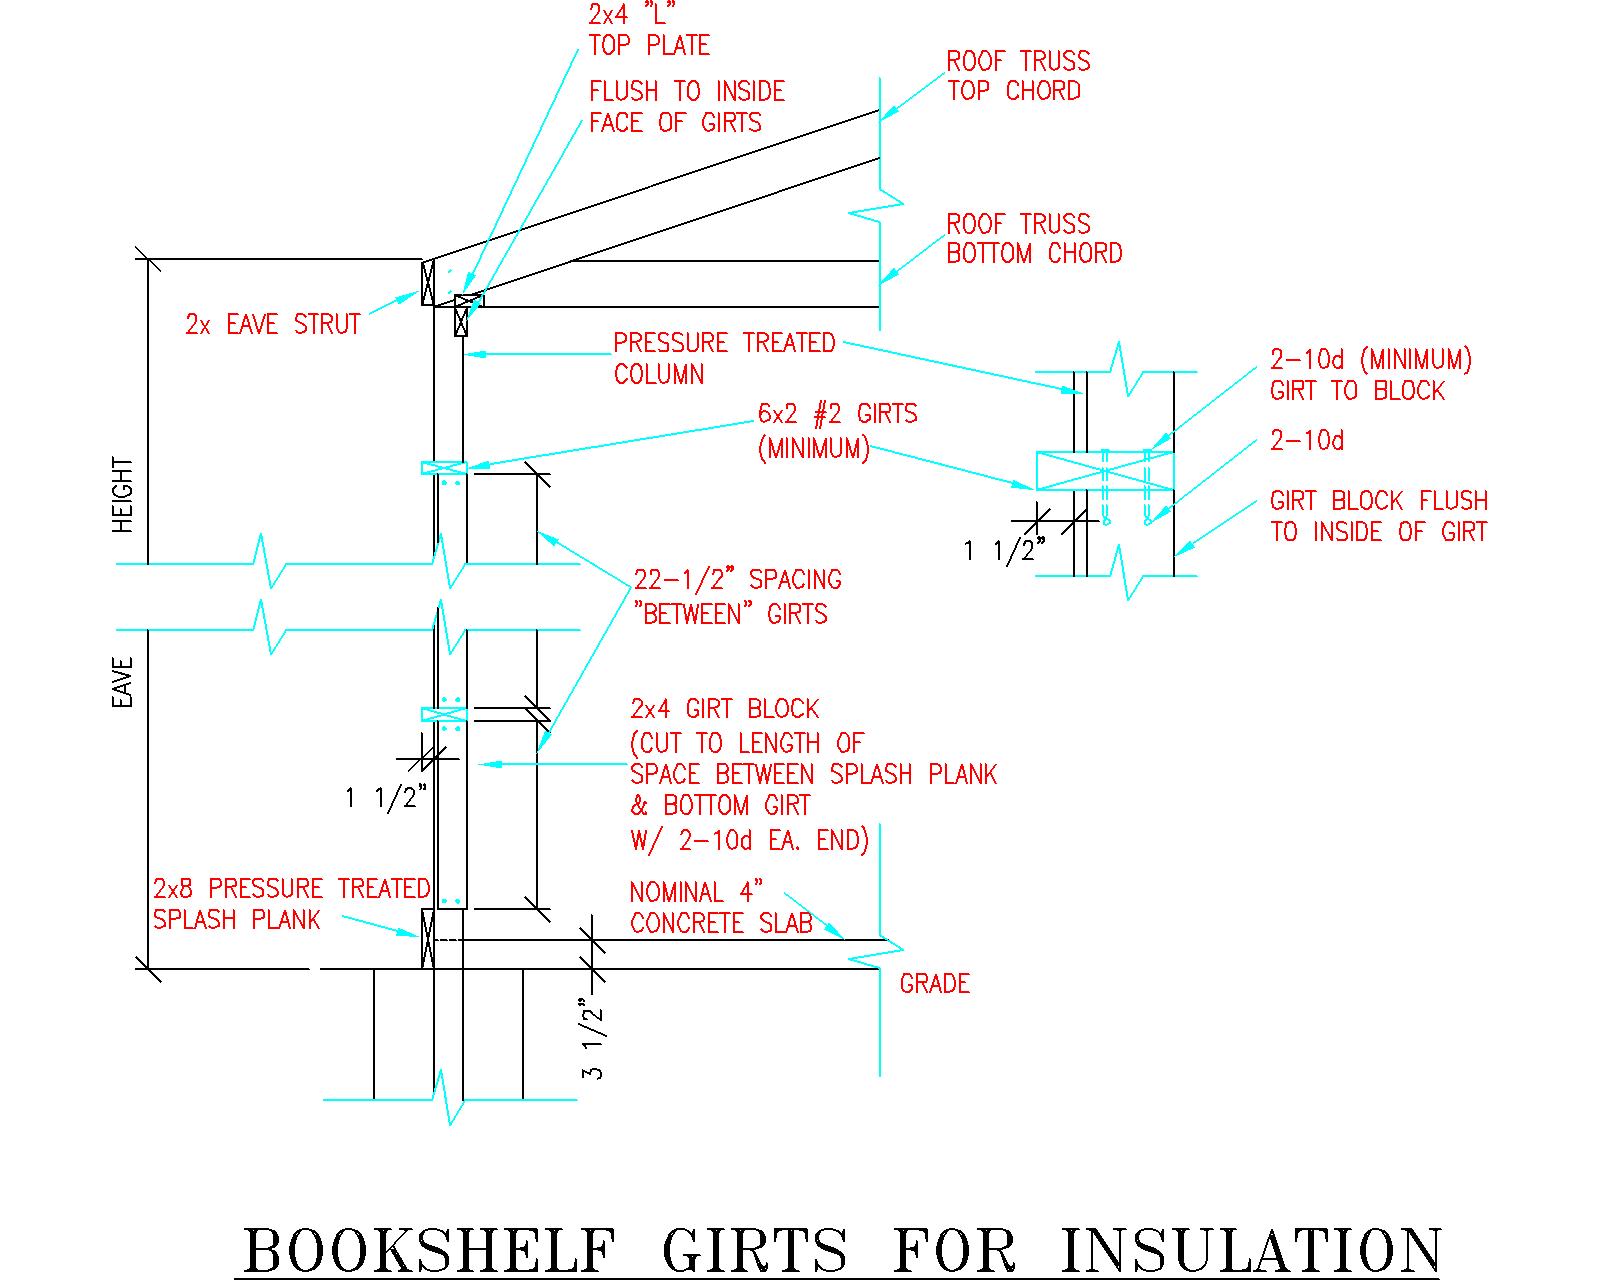
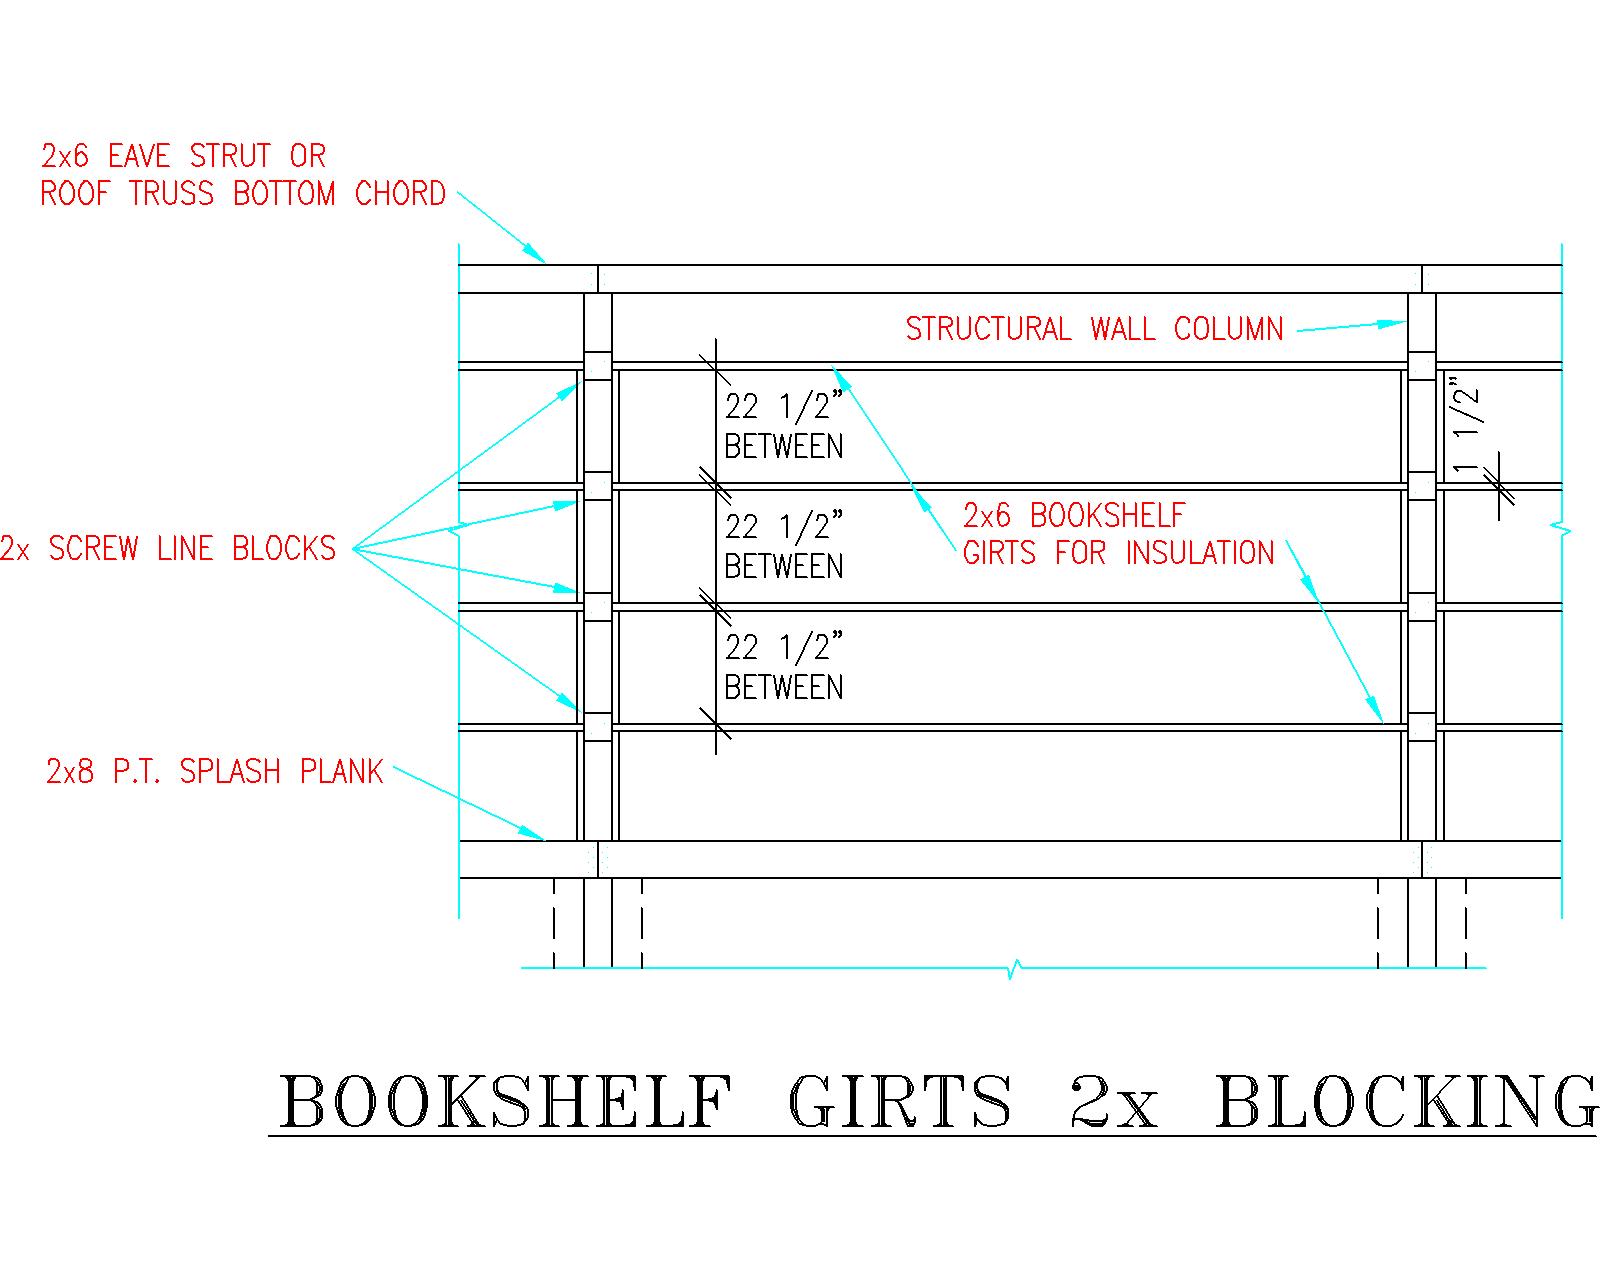
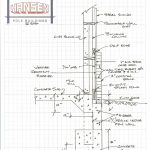
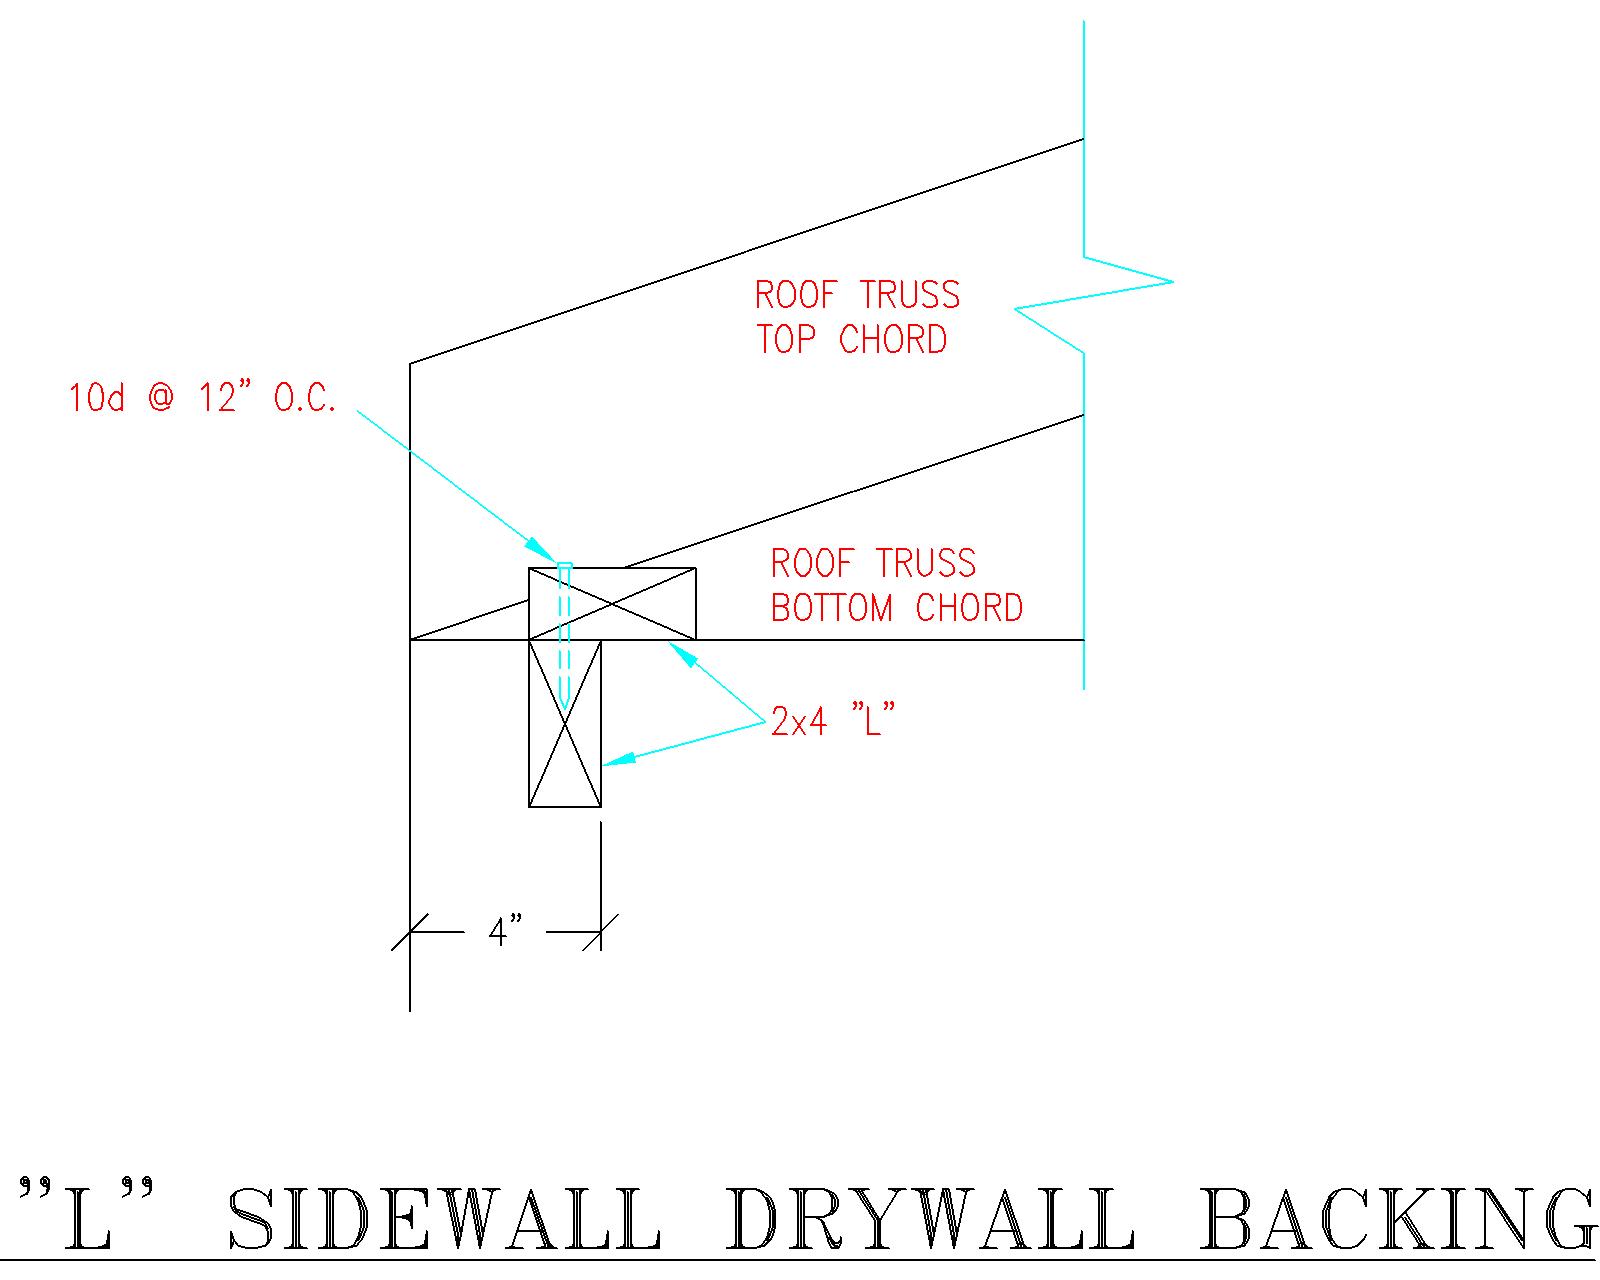 Figure 29-4: L Sidewall Drywall Backing
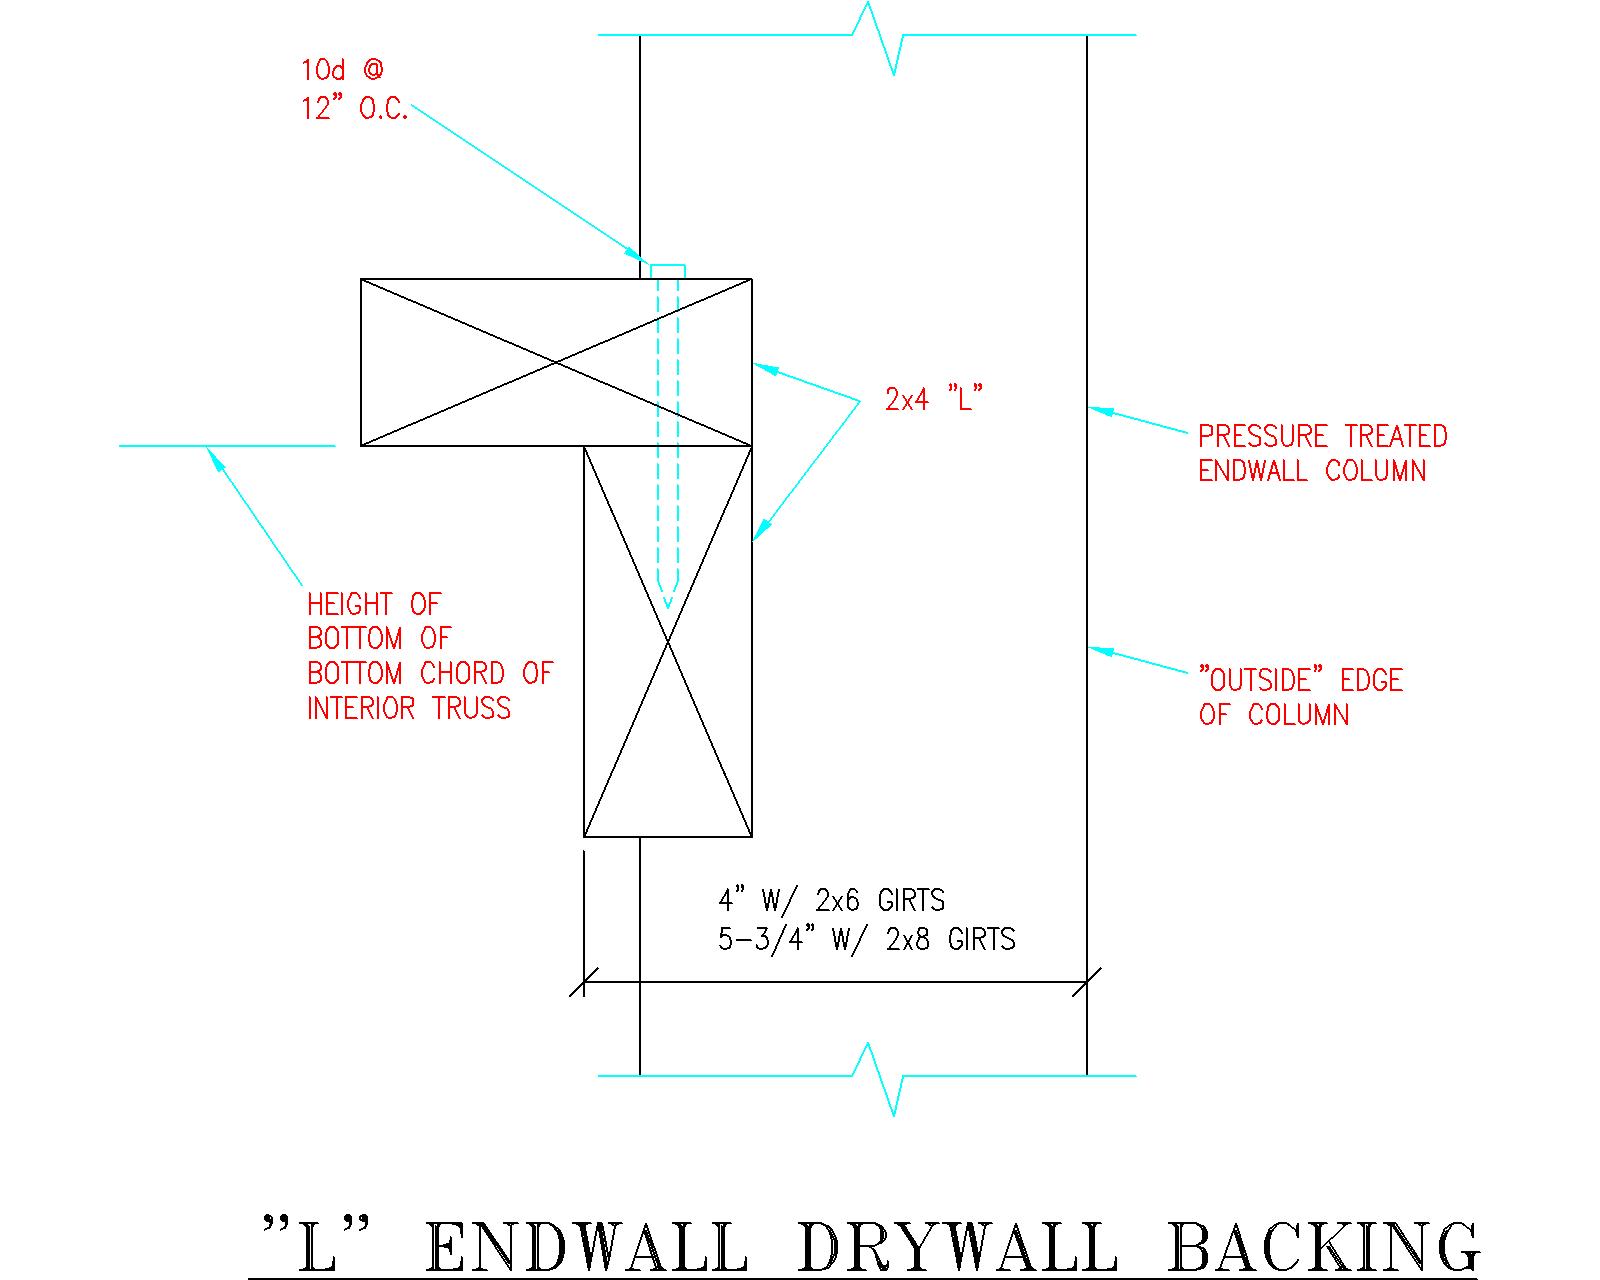
 This myth is created and propagated by post frame kit suppliers and post frame builders who do not understand there is a solution – and a very cost effective one (in both labor and materials).
 Things to consider with this method of mounting columns, rather than embedding them – cost of sonotubes (an 18″ diameter tube 4′ long will run around $20), a little over twice as much concrete will be needed for holes (roughly $15 on an 18″ diameter hole), brackets (roughly $50 plus shipping) and mounting hardware. This will be offset slightly by columns being four feet shorter in length. Due to soil bearing capacities, there are many instances where larger diameter holes will be needed, but for this discussion’s sake – probably $75 per hole in minimum added investment is not unrealistic.
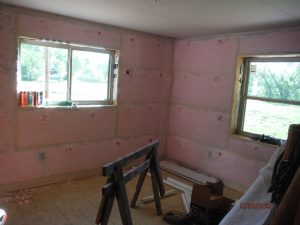
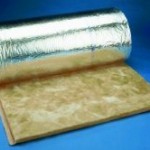 “STEVE would like some advice on insulating. He has a Cleary Building which has blanket insulation in the walls and roof and he would like to insulate over the top of this insulation and wondered if there would be issues.
  Thank you for your kind words. Sadly, most post frame home clients are just not savvy enough to be willing to make an extra upfront investment to super insulate their buildings. I have designed several post frame residential buildings for my own use, so I have learned from mistakes. Also, technologies have improved greatly in recent years, making energy efficient designs more practical.
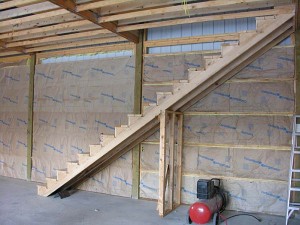 BENEFIT
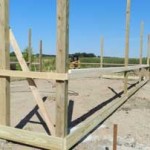 Concept of girts being nailed to column exteriors is they (in theory) do not have to be trimmed therefore saving labor (as well as any need to measure). Being ignored in this is lumber typically comes approximately 5/8 inch over specified lengths, making trimming needed anyhow. Most common column spacings are multiples of exactly two feet – eight, 10, 12, etc., and those 5/8 inches add up across a very long or wide post frame building.
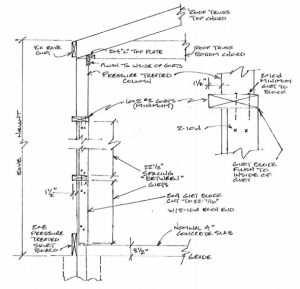 Even if one decided to stud frame to support drywall (there is a one-step framing method for exterior walls:


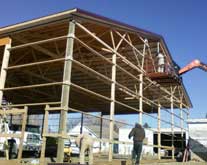
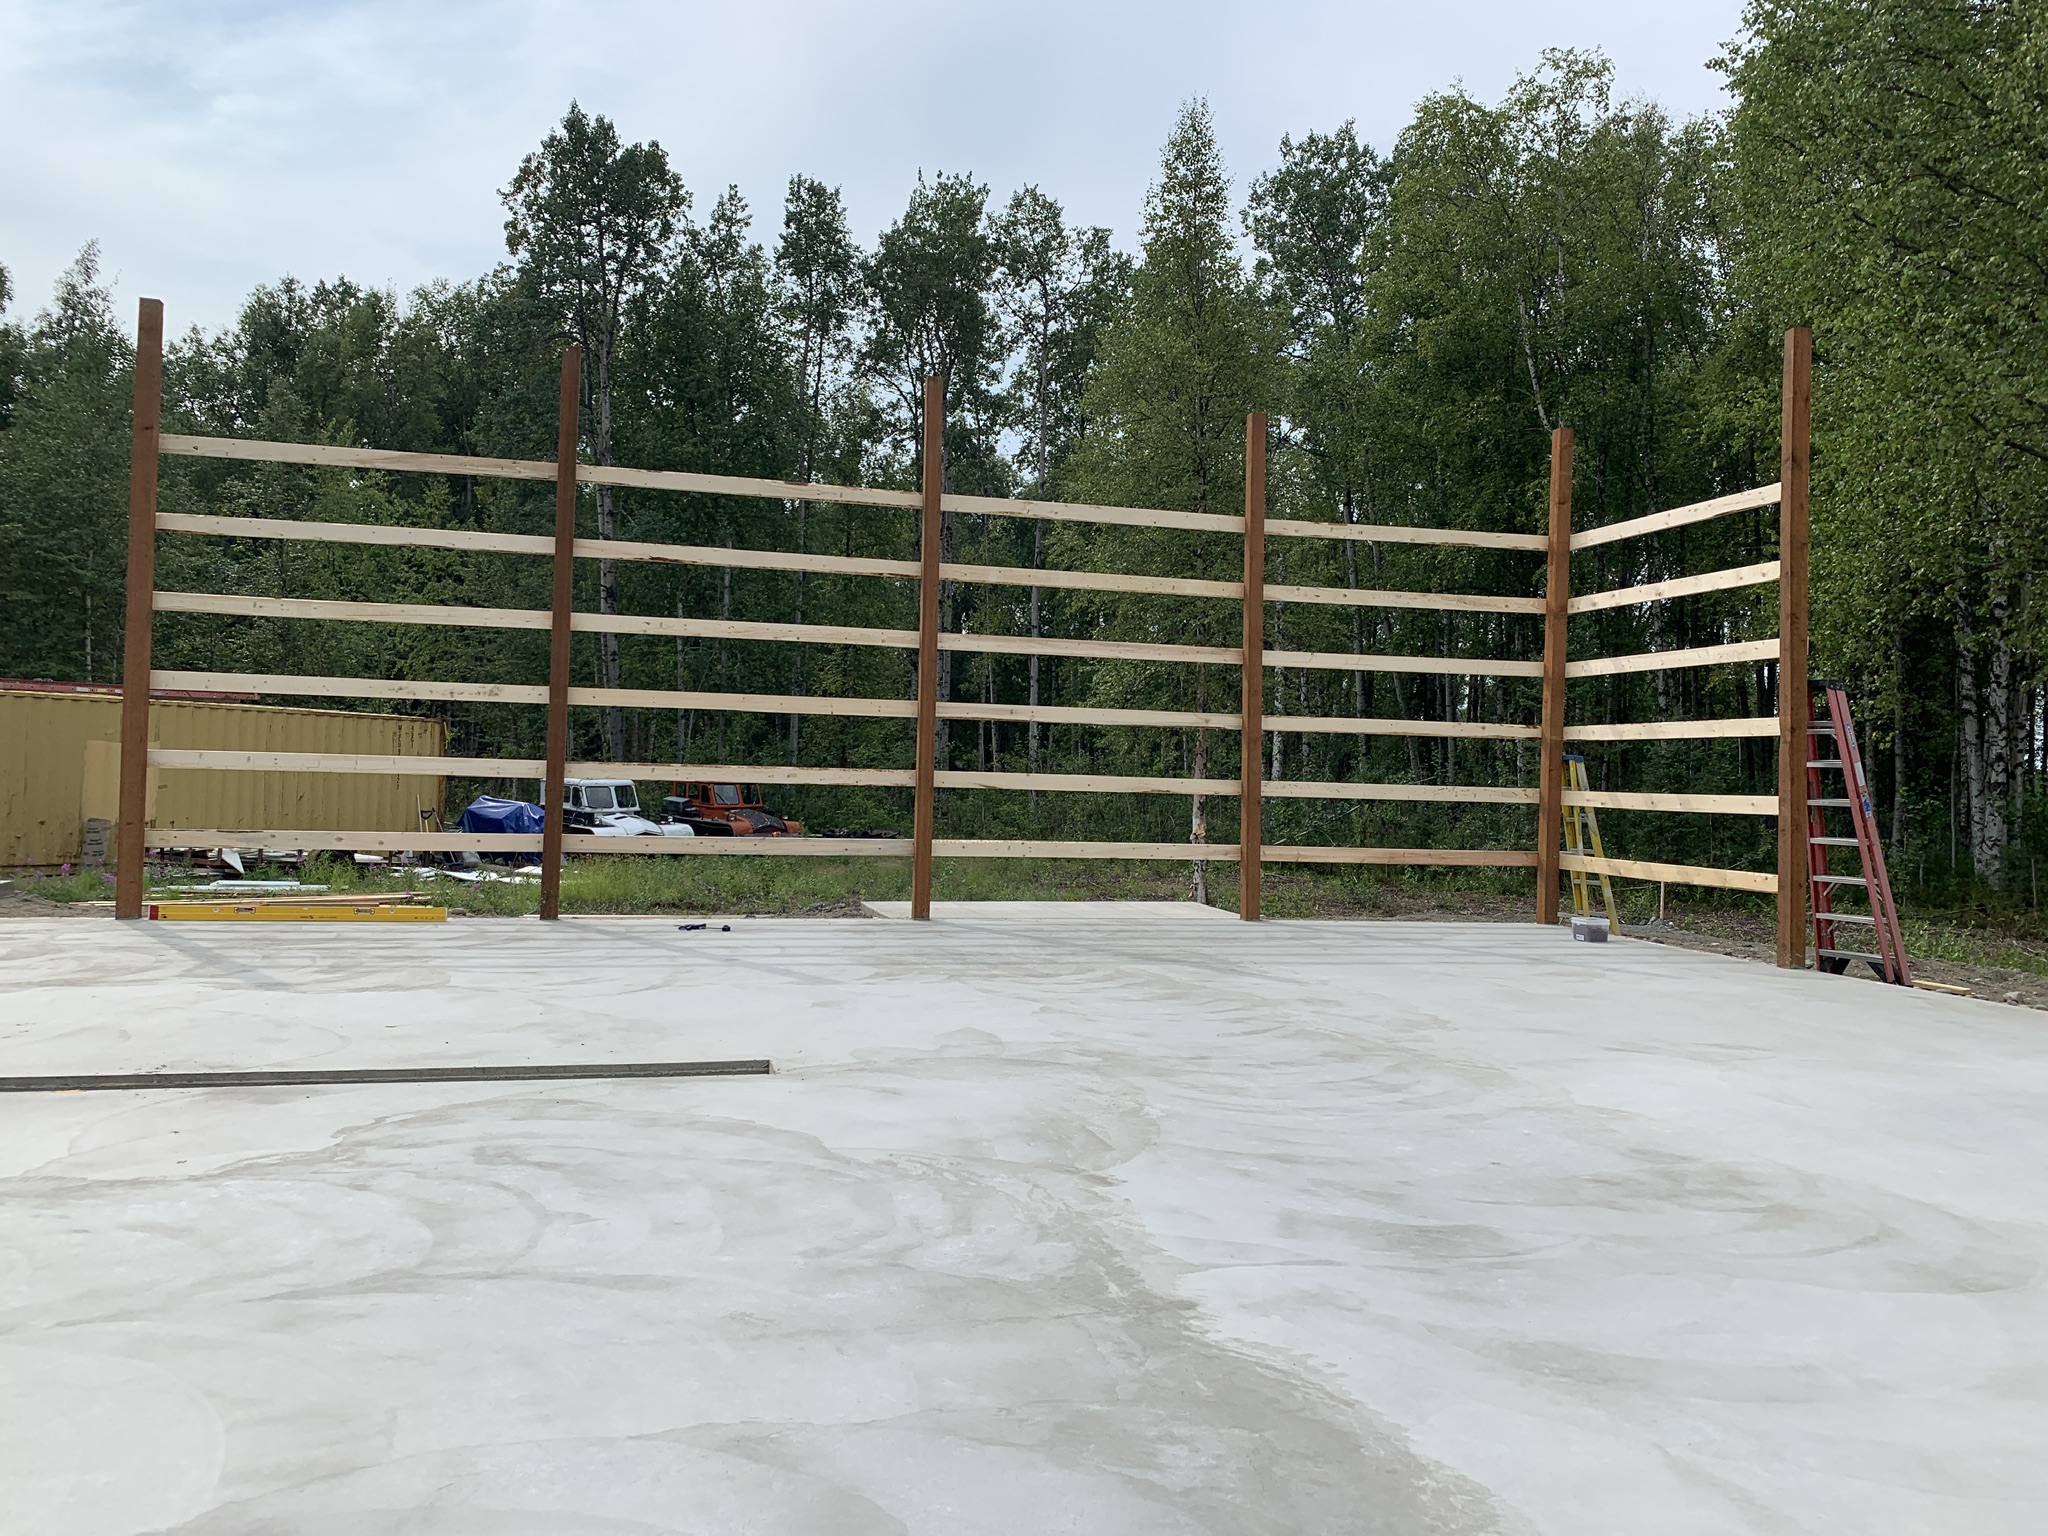
 On this building, the girts were unusually spaced – 31 inches from the top of the pressure treated skirt board, to the bottom of the first girt, then 25-1/4 inches on center above. This means the bottom girt has to carry a tributary load of 29 inches.
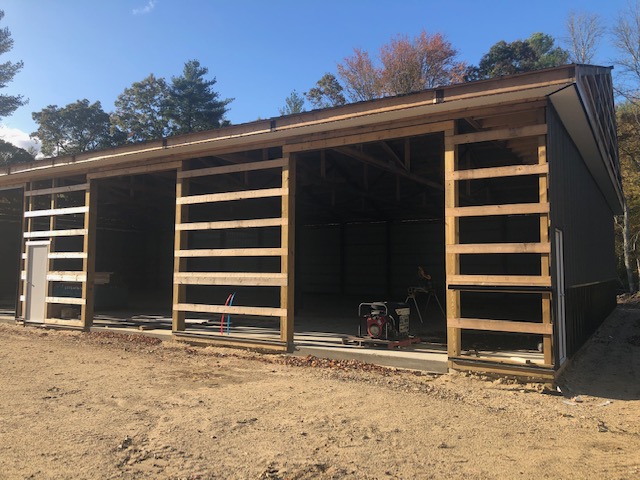
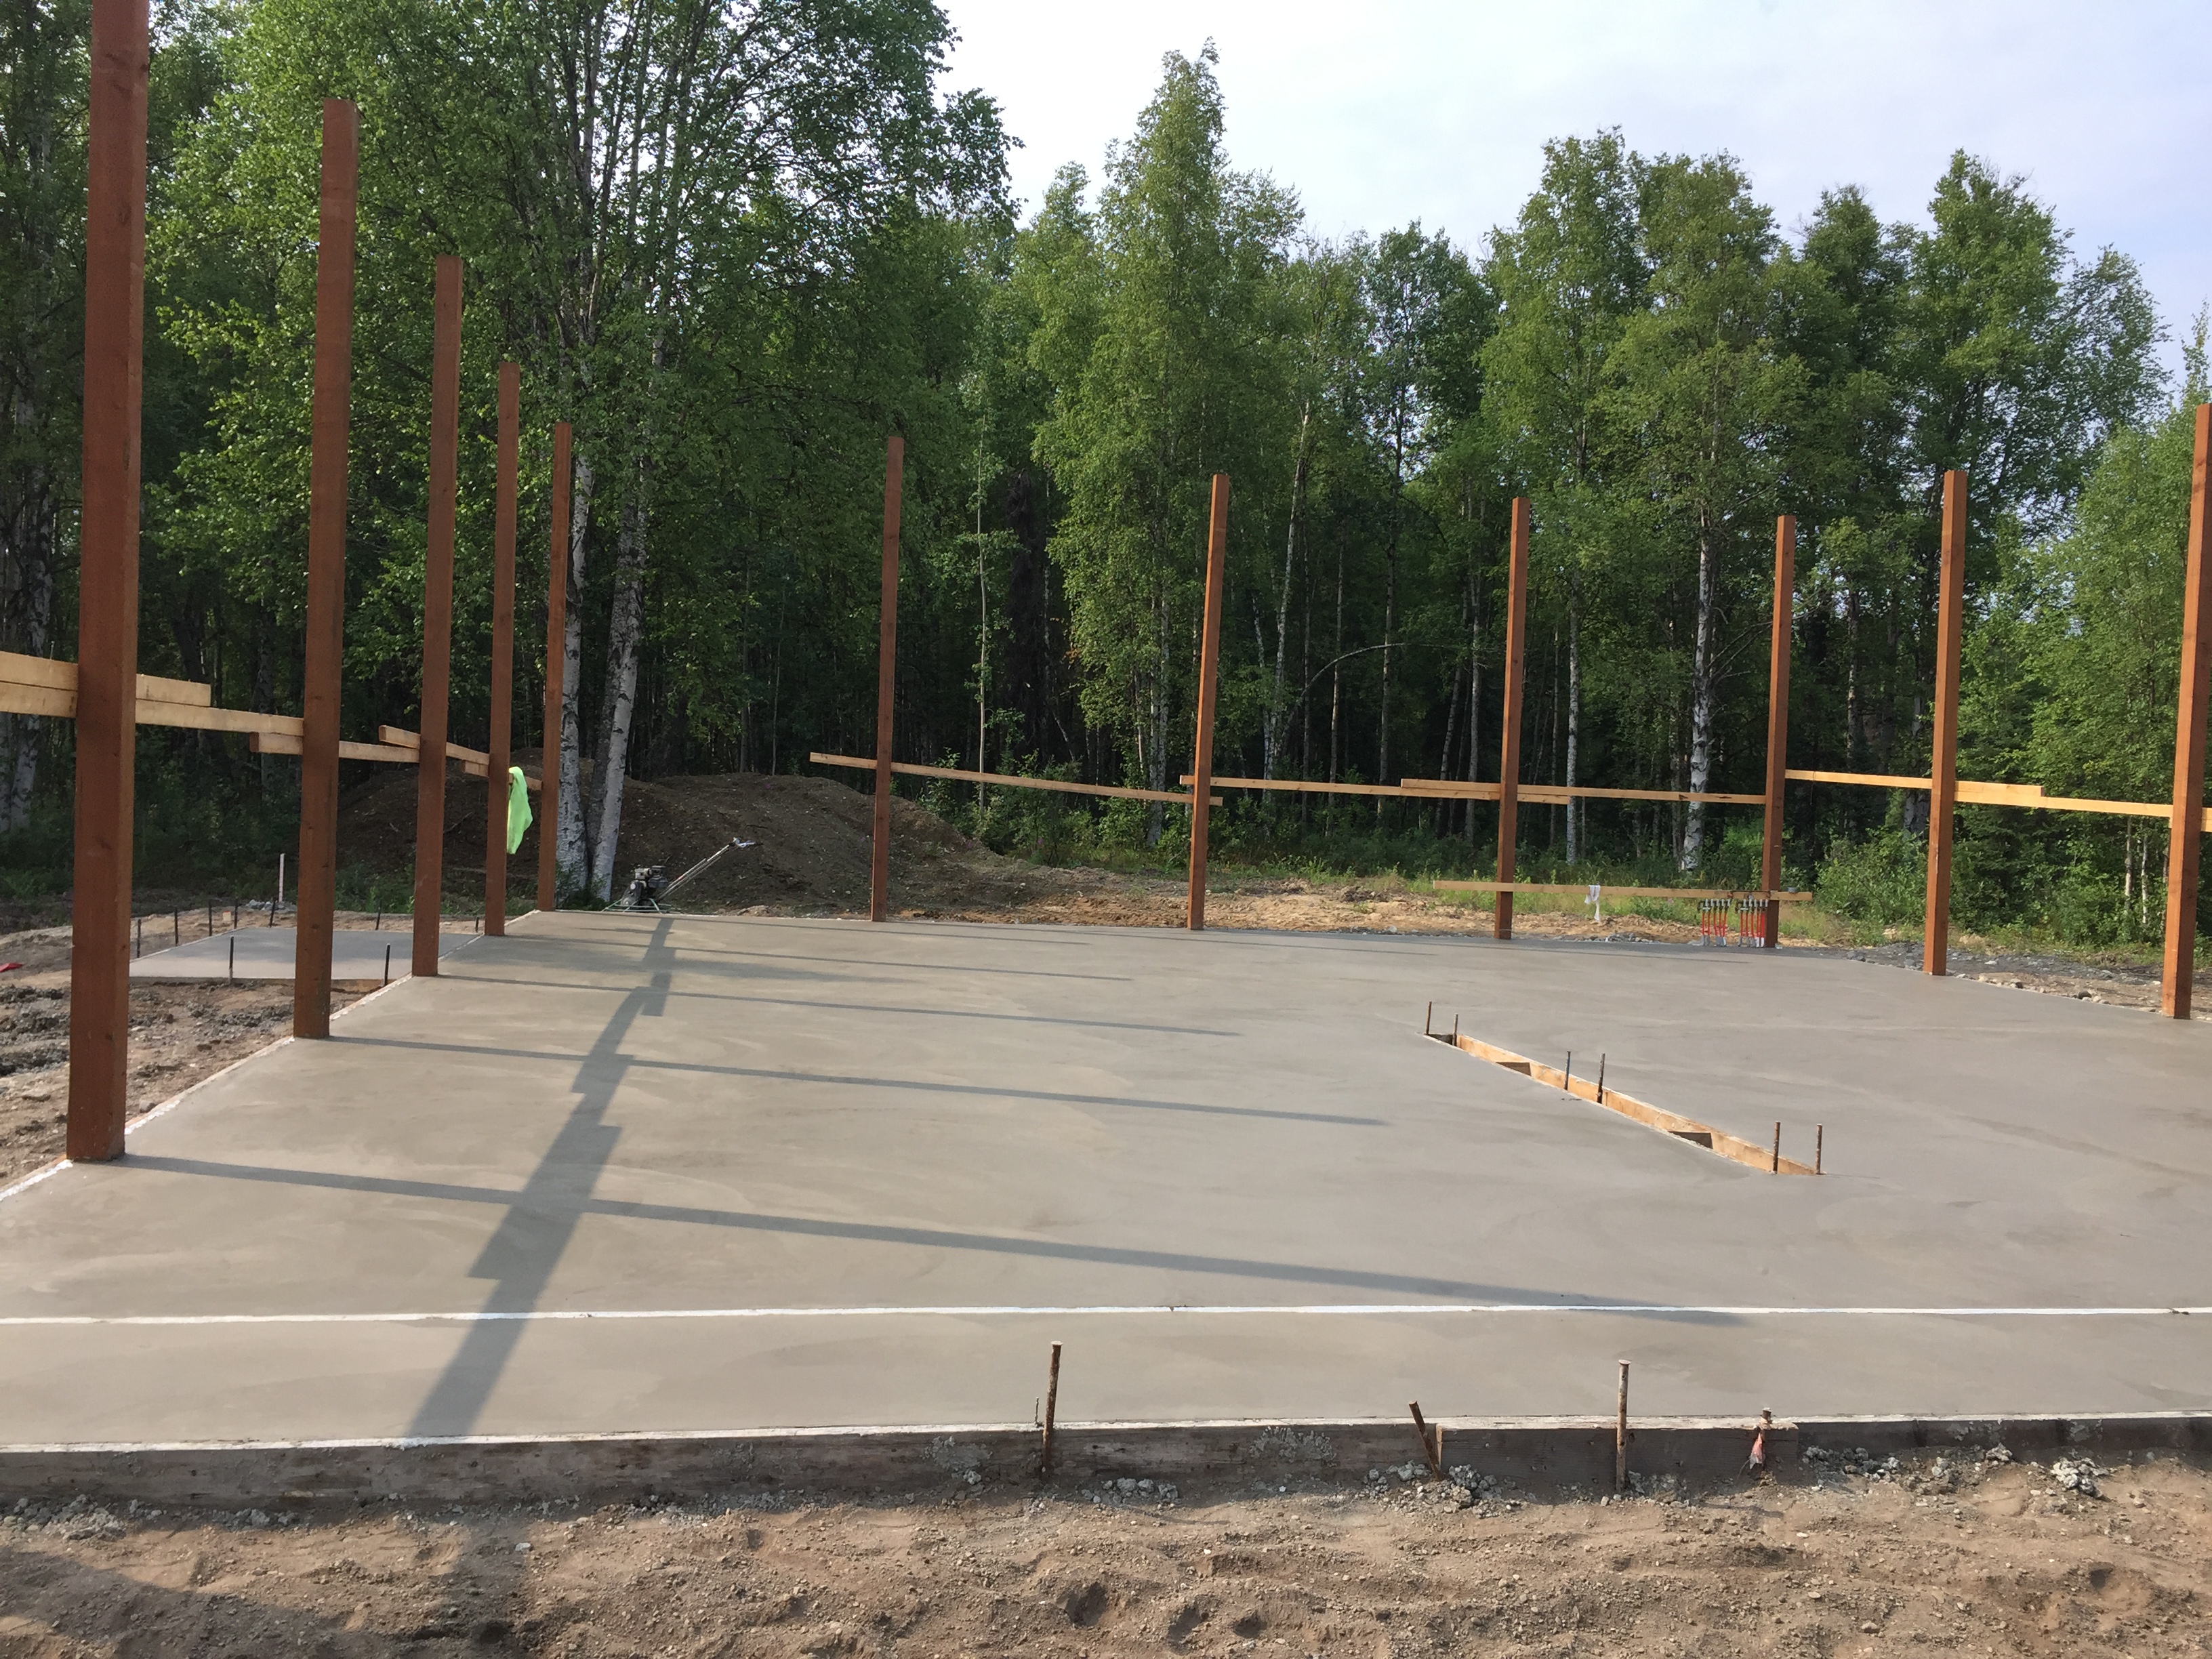
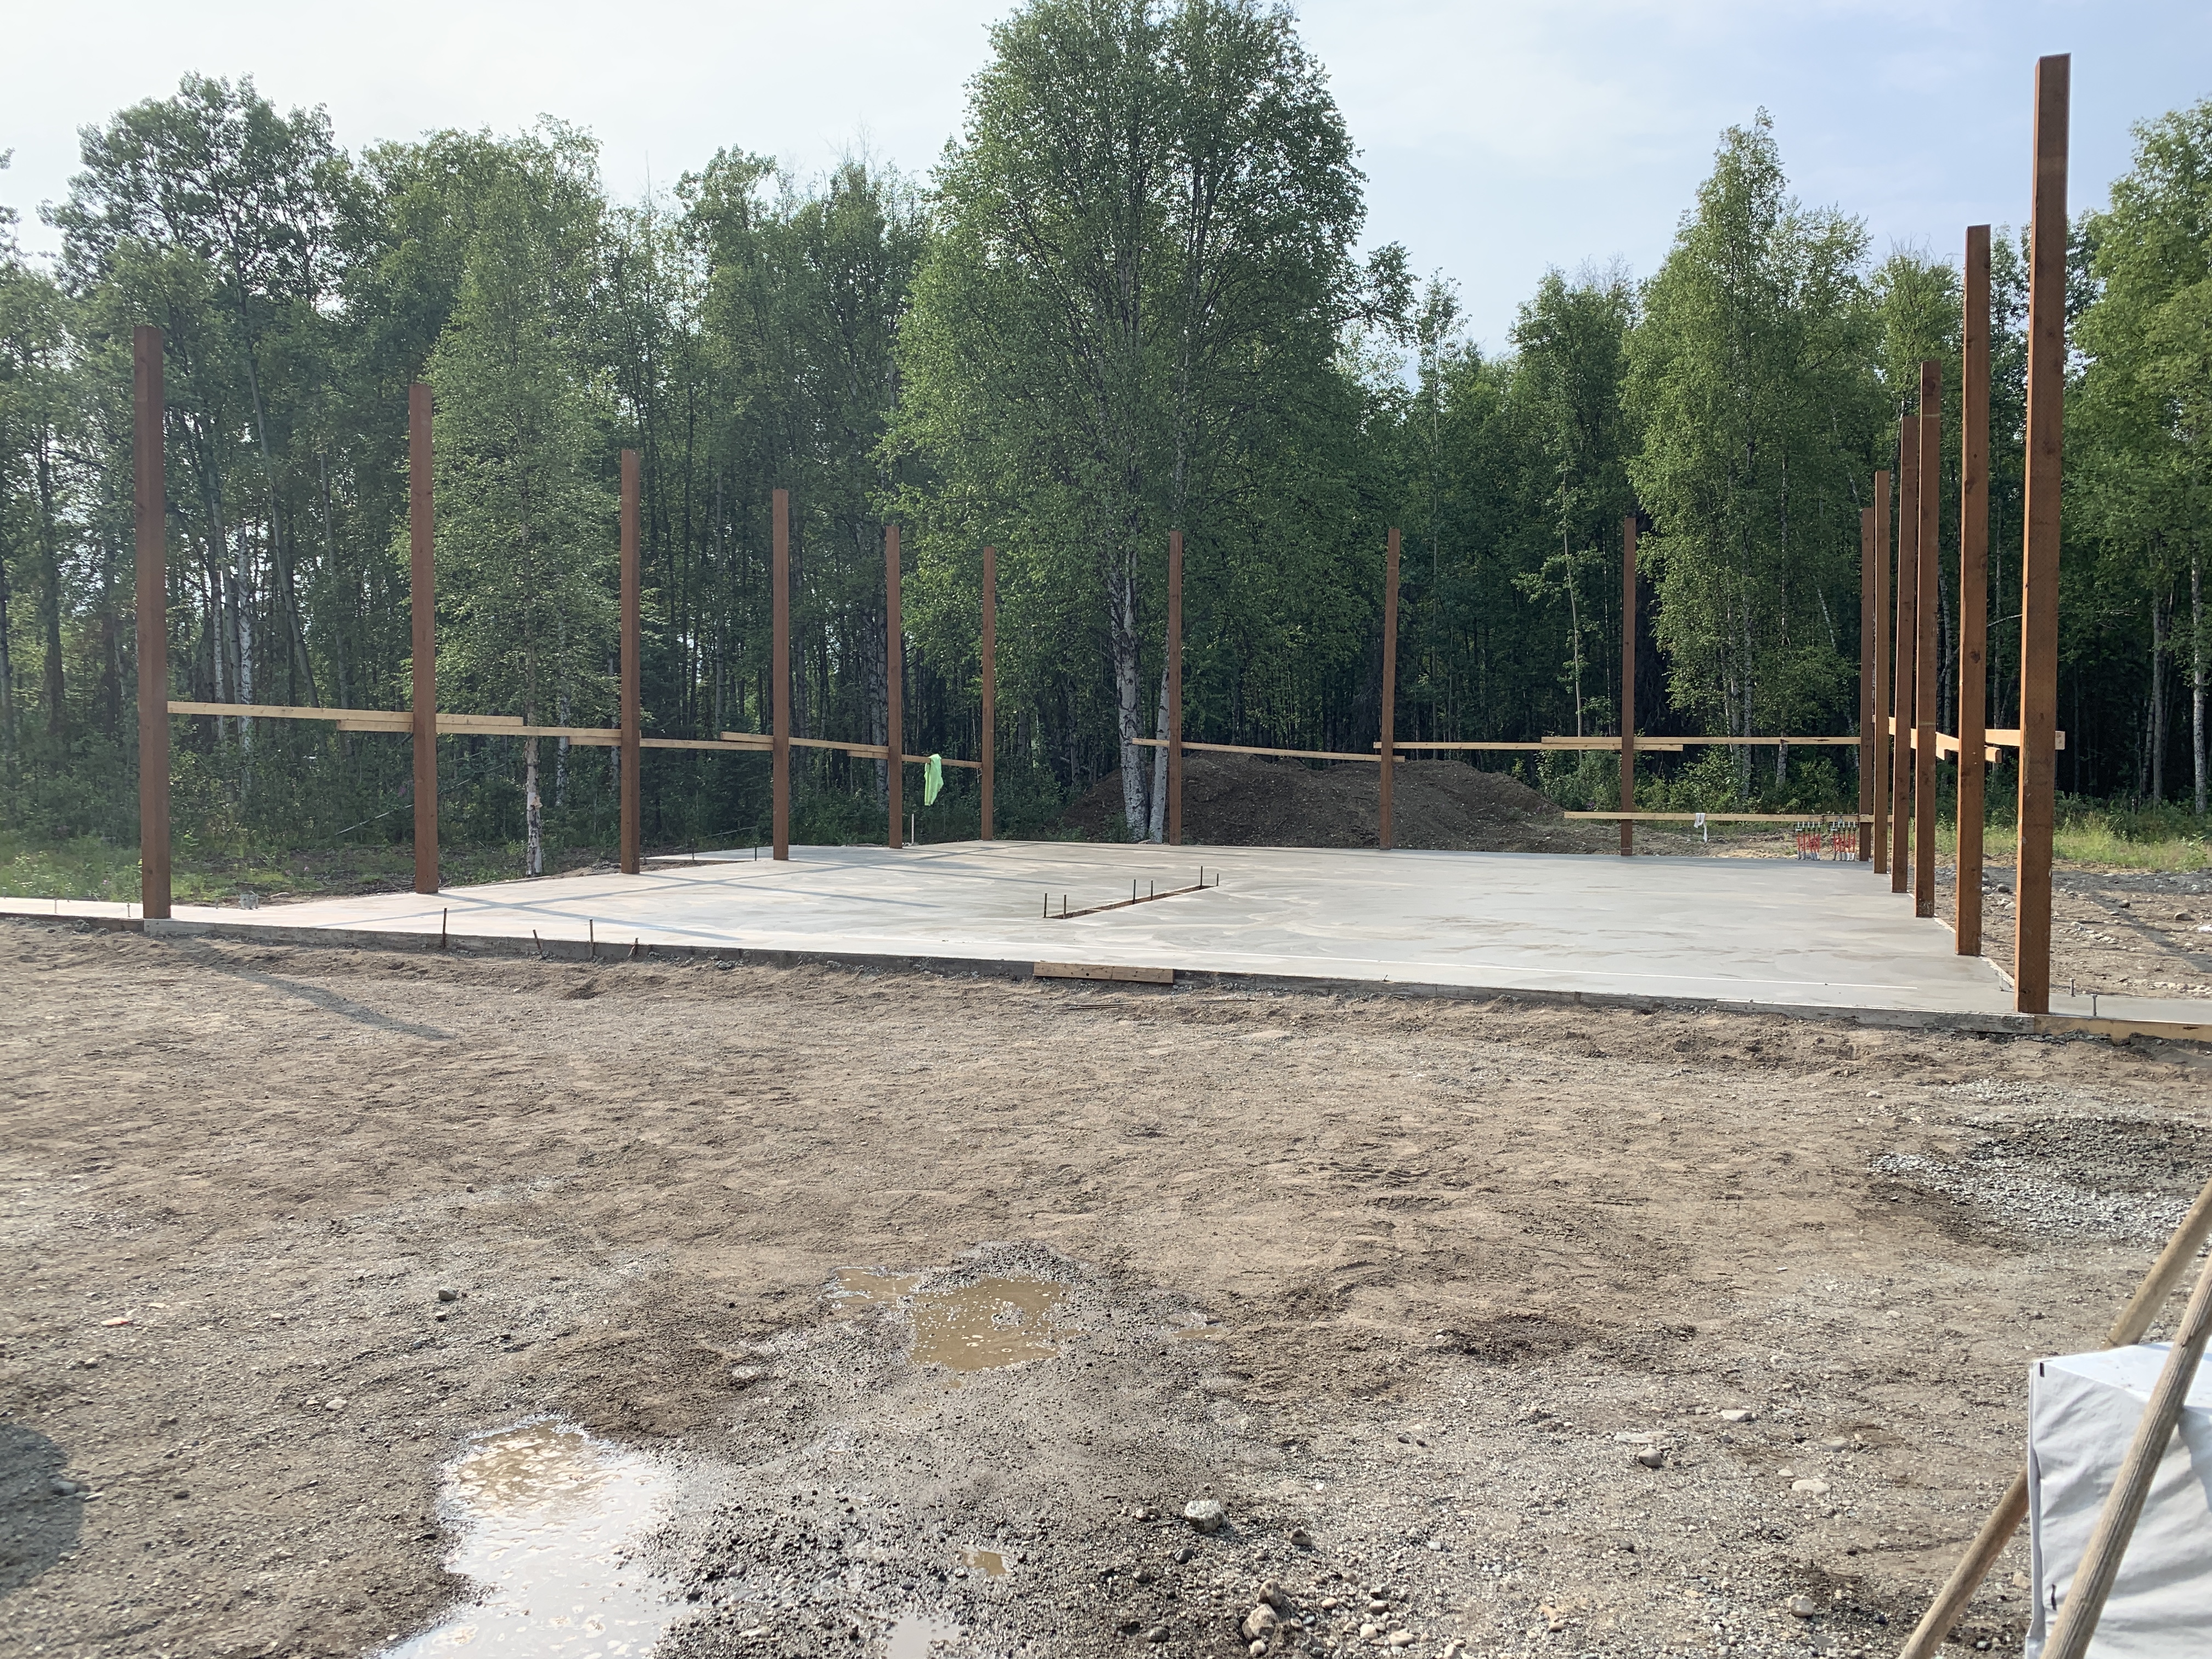
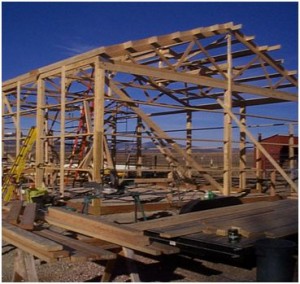 One of those “maybe simple” things is the overall footprint of our buildings. In the photo is a partially framed 30 foot wide by 48 foot long building. When we measure those dimensions, it is from outside of column, to outside of column. All of the wall framing is to extend out 1-1/2” past the posts. Done correctly, the finished framework of this building will be 30’3” by 48’3”.


