This Wednesday the Pole Barn Guru answers reader questions about how to best seal gaps at wall tops and a roll-up coil door, creating a moisture problem, and advice for girts, columns, and wiring.
DEAR POLE BARN GURU: What can I do to seal these gaps? We live in the garage and it’s getting cold out. TIFFANY
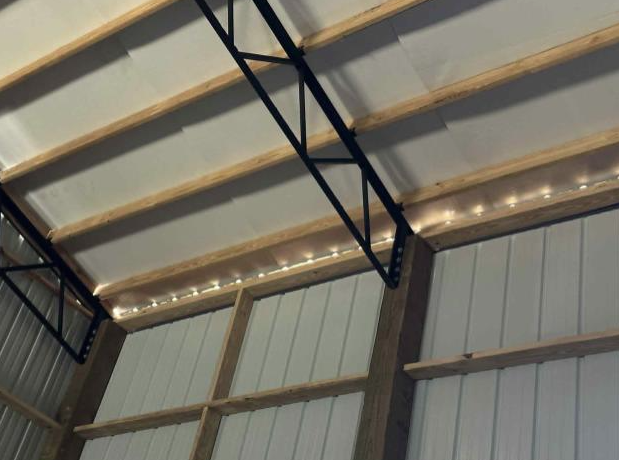

DEAR TIFFANY: There should be inside closure strips on top of eave strut under your roof steel. On endwalls, emseal expandable closures can be placed between rake trims and endwall steel. There should be a flat (wide face to sky) jamb across top of roll up door opening. These would help to seal around door opening https://www.snirtstopper.com/
 DEAR POLE BARN GURU: I have one more question for you I have a cabin that has 2×6 stud walls 12′ high that I put 2″ foam under slab and 2″ on the side walls so from under slab to top of walls on the exterior is completely covered in foam with 2″s of closed cell spray foam sprayed to the interior of the 2″ pink. Then 5″s of closed cell sprayed on the roof for a hot roof. My problem is I’m heating this building with electric boiler and my bills have been quite high. In the house side I have vaulted ceilings so not much I can do there but my garage ceiling is 12′ with no insulation at that level because of the hot roof in your opinion if I blew in insulation at the 12′ ceiling height what would you do between the blown in and hot roof I’m worried about creating a moisture problem and mold and thinking I should vent that area above the garage too the outside what’s your thoughts thanks. CHRIS in HIXTON
DEAR CHRIS: Very valid concern. You would need to vent at eave and ridge. Make sure to leave at least an inch of unobstructed airflow between top of blown in insulation and underside of roof deck, from eaves to ridge.
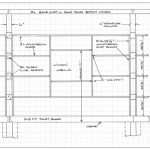
DEAR POLE BARN GURU: 1. Are properly blocked and attached bookshelf girts between 6×6 posts 4 ft on center without any exterior girts an acceptable approach? Same question for the purlins for the trusses. 2. Instead of adding the one and a half inch on the girts board, is it an acceptable practice to drill through the 6×6 posts for wiring? ERIC
 DEAR ERIC: 4 foot on center makes for an awful lot of holes to dig and posts to set, not to mention becoming very limiting on width of openings like windows. We would recommend (of course with engineer’s approval) glulaminated columns every 12′ or even 16′). Outside of this, it is an acceptable approach, provided you can attach your splash plank to adequately transfer shear loads. We always recommend insetting roof purlins between trusses using engineered hangers.
Think of a hole being drilled through as being an “open knot”. Lumber grading rules refer to these as being “Unsound or Loose Knots and Holes” due to any cause.
For #2 graded lumber holes may be no less than every two feet and up to 5/8” diameter in a 2” nominal face; 7/8” in a 3” nominal face; 1-1/4” for 4”; 1-1/2” for 6”; 2” for 8” and 2-12” for 10”.
For higher grades holes may be no less than every three feet and up to ½” diameter in a 2” nominal face; ¾” in a 3” nominal face; 1” for 4”; 1-1/4” for 6” and 1-1/2” for 8” and wider.
Any holes drilled through pressure preservative treated lumber or columns, especially near grade, should be treated with a Copper Naphthenate solution. Copper Naphthenate is available as a brush-on or spray-on.
 Your best column is going to be a glulam, hands down.
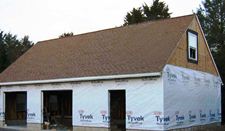
 Your stone wainscot will require sheathing and I would not personally install LP siding without sheathing. An Omnidirectional water resistant barrier should be placed on exterior side of your sheathing (under siding).
 DEAR TERRI: Fully engineered post frame, modest tastes, totally DIY, move in ready, budget roughly $70-80 per sft of floor space for living areas, $35 for all others. Does not include land, site prep, utilities, permits. Your new Hansen Pole Building kit is designed for an average physically capable person, who can and will read and follow instructions, to successfully construct your own beautiful building shell, without extensive prior construction knowledge (and most of our clients do DIY – saving tens of thousands of dollars). We’ve had clients ranging from septuagenarians to fathers bonding with their teenage daughters erect their own buildings, so chances are – you can as well! Your new building investment includes full multi-page 24” x 36” structural blueprints detailing location and attachment of every piece (as well as suitable for obtaining Building Permits), our industry’s best, fully illustrated, step-by-step installation manual, and unlimited technical support from people who have actually built post frame buildings. Even better – it includes our industry leading Limited Lifetime Structural warranty! If hiring it done turnkey, expect to pay two to three times as much. This is why so many of our clients do some or all work themselves.
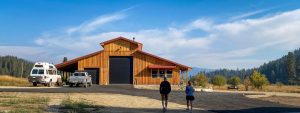 DEAR POLE BARN GURU: My question is that i want one pole barn to house at least 4 vehicles, an RV as large as 45 ft. and a small home around 500 sq feet. Is this possible? JASON in OWENSBORO
 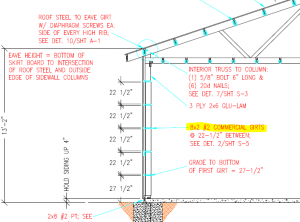 DEAR MATT: While it would certainly make for a larger screw target, when wall steel panels are predrilled, keeping screw lines straight and hitting commercial girts really is not an issue. Outside of extra materials and more labor, there are a couple of areas of possible concern: 6×6 columns vary in dimension. With a 2×8 commercial girt, extending 1-1/2″ outside of columns, a 6×6 up to 5-3/4″ can easily be hidden. If your idea is to use a 2×6 commercial girt, behind a 2×4 external girt, if columns run over dimension they will leave an uneven surface for internal finish. Of course, should you mount a 2×4 external girt above or below a 2×8 commercial girt (forming an “L”), then this concern goes away. Your other possible challenge would be in connecting these two members. Greatest force on wall girts is outward suction, so your 2×4 external girt and 2×6 bookshelf commercial girt will need to be adequately connected so as to not have external girt pull away and fail. This connection should be analyzed by an engineer.
 Kudos to you for doing a D-I-Y. Sadly you were lead to a product (Prodex) claiming to be insulation, however in reality it is a condensation control, and only if totally sealed.
 As time allows, remove roof Prodex, have two inches of closed cell spray foam applied to roof steel underside, and increase thickness of blown in attic insulation to R-60.
 They did not refill the tank until 7-20 21. They filled it from 62% to 80%! It only took from 92% down to 62% to heat the building ALL winter!
 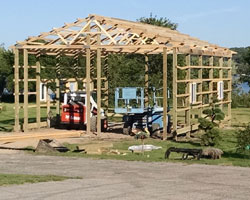 “My name is George xxxxxx, I am currently a thesis student at Auburn University’s Rural Studio, located in Hale County, Alabama. I am looking into pole barn // post frame construction as a method for quickly building strong homes. Hansen seems like it has more experience in this methodology than most in the nation, where most contractors are afraid of diverging from traditional stick-frame construction. I am particularly interested in the structuring of your residential homes (the retirement home in Decatur is beautiful), and your opinion on steel vs. wood roof framing. If there is an expert who would be willing to spend some minutes this week answering a few of my questions it would be greatly appreciated! Also, if you have more questions about the Rural Studio I would be happy to answer them to the best of my ability.”
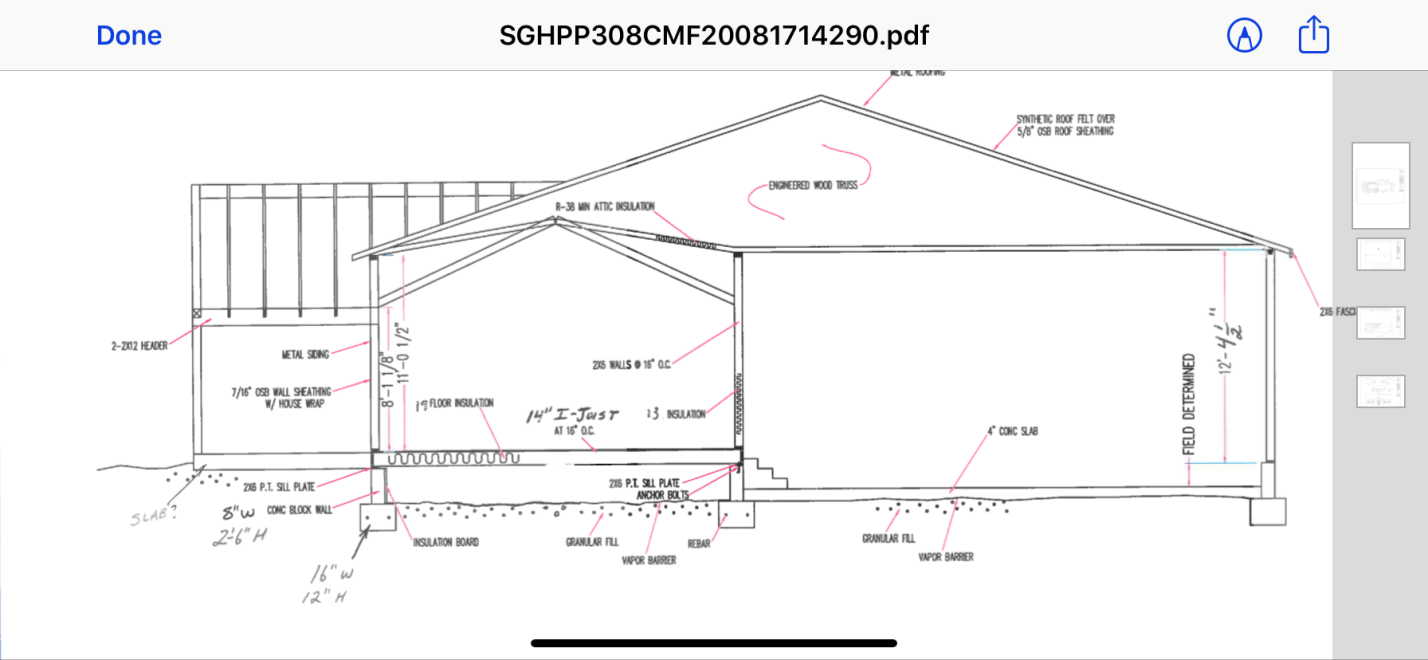
 Pretty straightforward – vertical stud walls will take more lumber. Besides increased material investment, more pieces mean more connections and more labor.
 DEAR LARRY: I hate to just throw out the obvious, but in your case I will – DO NOT BUILD YOUR OWN TRUSS.
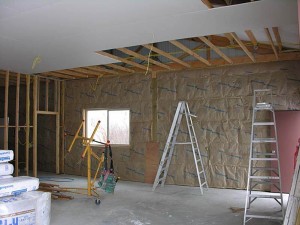

 On this building, the girts were unusually spaced – 31 inches from the top of the pressure treated skirt board, to the bottom of the first girt, then 25-1/4 inches on center above. This means the bottom girt has to carry a tributary load of 29 inches.
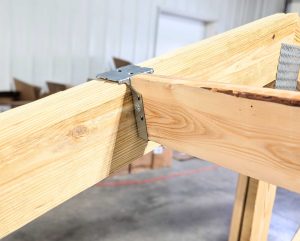 The beauty of pre-drilling pilot holes for roof and wall screws is perfectly straight lines. Straight screw lines are truly a thing of beauty – there are few things in life as pleasing as looking across a wall or roof and seeing the screws lined up like soldiers.


