Due to our recent storms throughout the country, we thought it might be nice to revisit a blog about building codes.
My Response: Why We Need Building Codes
As promised, here is my response to the Coeur d’Alene Press article of December 5, 2017 (exactly as I wrote in the comments portion following the newspaper article regarding adoption of building codes):
 I will first qualify myself – I attended the University of Idaho in architecture. I was a manager or owner in the prefabricated wood truss business for over 20 years. I’ve been a registered general contractor in four states, In 1987 I joined ICBO (they write the Codes) as well as ASAE (American Society of Agricultural Engineers) and was a sitting member on the committees which established the huge majority of the structural design criteria for post frame (pole) buildings. I have had the privilege of being involved in the structural design of nearly 20,000 buildings in every U.S. state. I am a contributing writer for Rural Builder magazine.
In my humble opinion – anyone who wants to “run bare” without Building Code minimum standards being applied to their new structures is out of their freaking mind.
The Building Codes are designed specifically to protect the safety and lives of those who occupy (or are in the vicinity of) structures. The Code requirements are ‘minimum’ standards, which are just scraping by – however something is better than nothing. For residential occupancies, the risk (under Code) is a once in every 50 year probability of the design loads for a given home to be exceeded! And yet there are some who would do away with even this minimal amount of protection.
I am not at all an advocate of governmental intervention, however only a fool acts as their own engineer. I deal, on a daily basis, with challenges posed from new building owners who have had under designed buildings constructed in jurisdictions which do not require structural plan reviews.
Mr. Tyler’s concern about homes having been built on unstable ground is not the fault of the Code, but the fault of the agencies which issued the permits. A geotechnical study should be done for the proposed site of any new structure – this allows the RDP (Registered Design Professional – architect or engineer) who designs the structure to have adequate information to be able to properly address foundation challenges, before they become foundation issues. The Code does not mandate engineered soils reports.
As to length of warranty provided by builders – an educated new building owner will look for a builder who offers an extended warranty. This, again, is not a function of the Code.
Having accurate information about snow loads is crucial to proper structural design. The 2015 edition of Ground Snow Loads for Idaho was produced by the Department of Civil Engineering at the University of Idaho. Based upon 31 more years of snowfall study than the previously used document – it appears Ground Snow Loads in Kootenai County should range from 43 to 100 psf (pounds per square foot) depending upon one’s location within the county.

Several factors go into calculation of Ps (sloped roof snow load) from Pg (ground snow load) including exposure to wind, is structure heated or not, importance of building, slope of roof and roofing material. In many instances the calculated Ps load is going to be higher than the currently accepted 40 psf. Will this add to construction costs? Yes. Will it help prevent failures and possible loss of life? Yes.
What is the value of even a single life?
Rather than throwing the baby out with the bath water, my advice is to require every single building to be designed per current Code to include plans which are sealed by a Registered Design Professional.
 This leaves “in hangers” between trusses as your only viable (and practical) design solution.
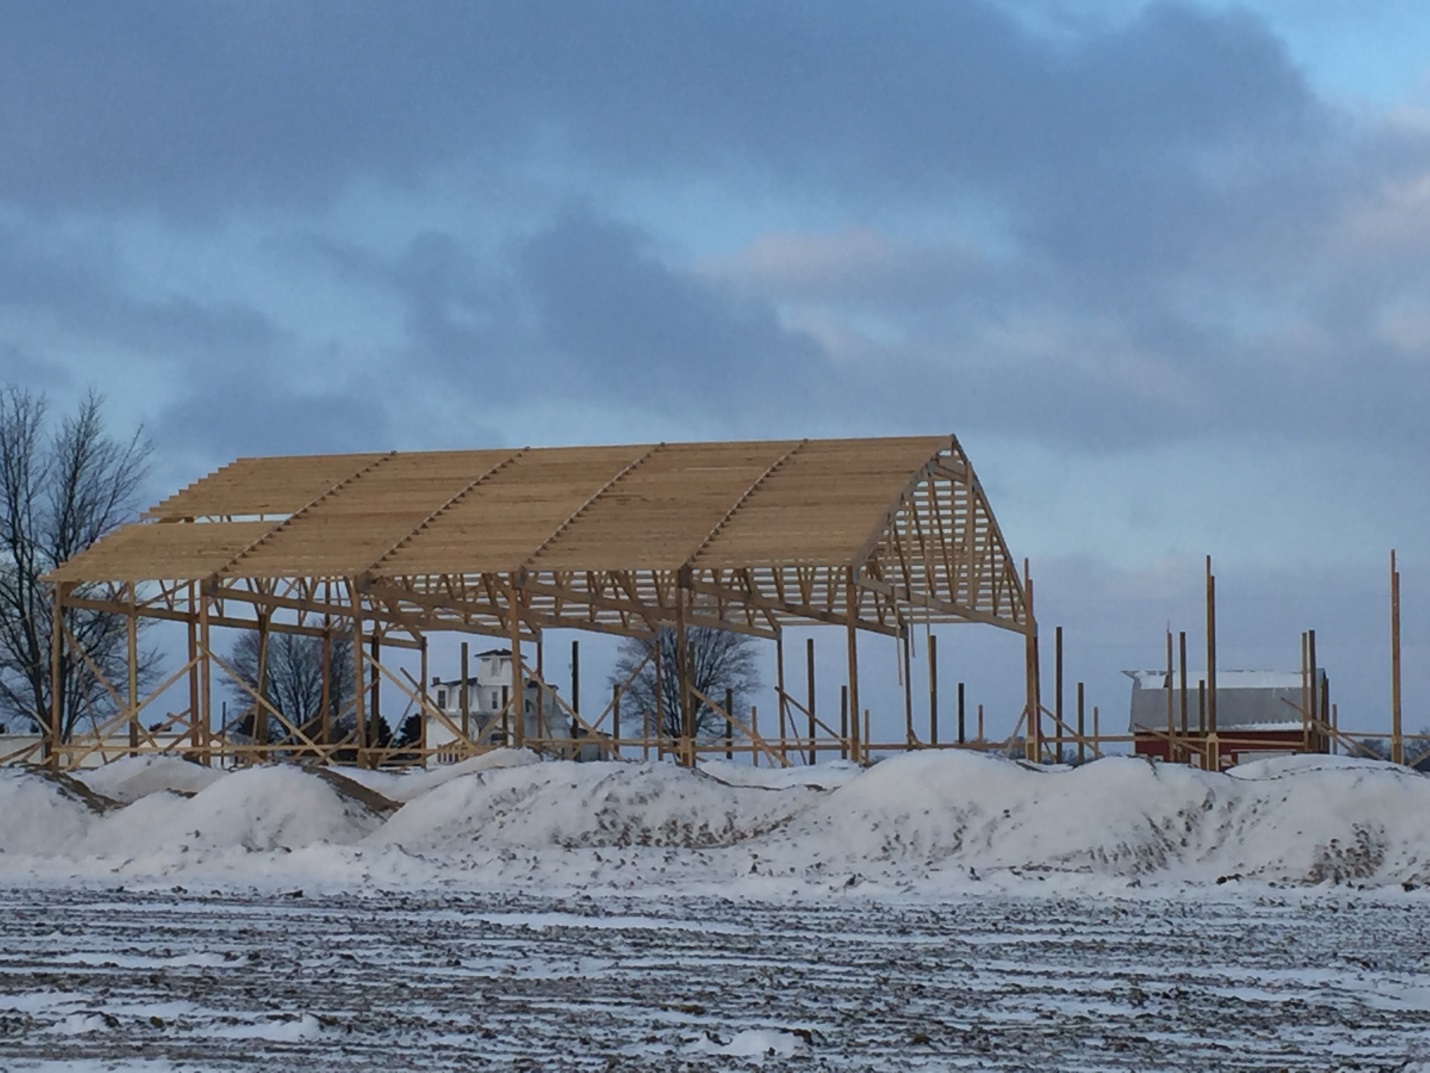
 Because I am not a Registered Design Professional, I can’t engineer your new post frame building for you. And, if I was, I most certainly would not be doing it for free. Typically an engineer should be compensated somewhere in the area of 8 to 12% of the value of the project, depending upon how involved they have to be with it, as well as if a visit (or visits) to the site are included.
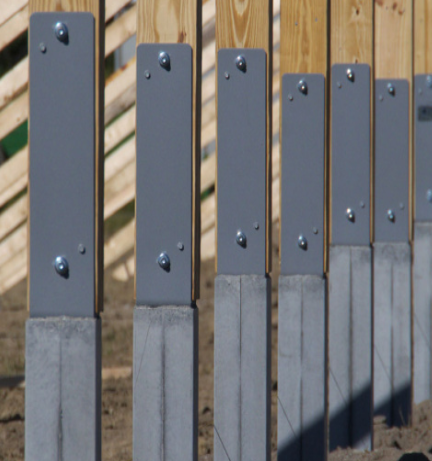
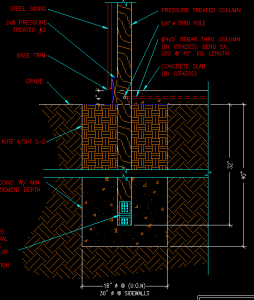
 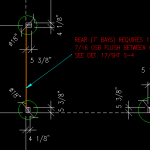 Some commentary – there are wet set brackets made specifically for post frame buildings. I would recommend you invest in them rather than trying to fabricate (or have fabricated) your own, unless they were designed by your RDP and inspected by him or her after production. For Clay soils, the Building Code allows a value of only 1500 psf – any greater values should be used only if an onsite soils test has been done by a registered engineer, else you are at risk of settling issues. See Table 1806.2
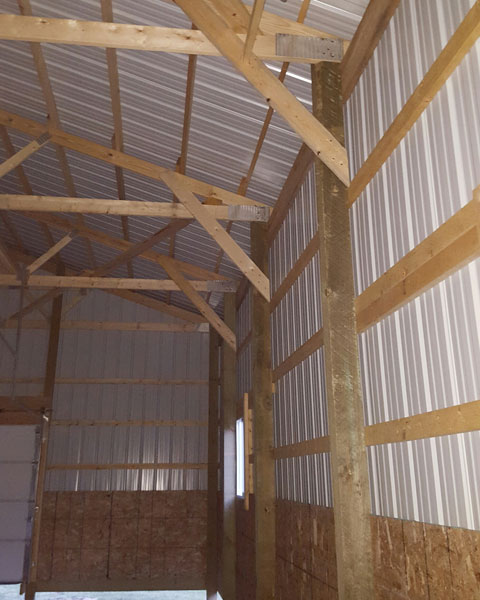

 MYTH #4 I NEED TO HIRE A BUILDER FIRST, BEFORE I DO ANYTHING
 bonding with their teenage daughters erect their own buildings, so chances are – you can as well!

 I spent two decades in management or owning prefabricated metal connector plated wood truss plants. In my humble opinion – attempting to fabricate your own trusses of this magnitude is a foolhardy endeavor, for a plethora of reasons:
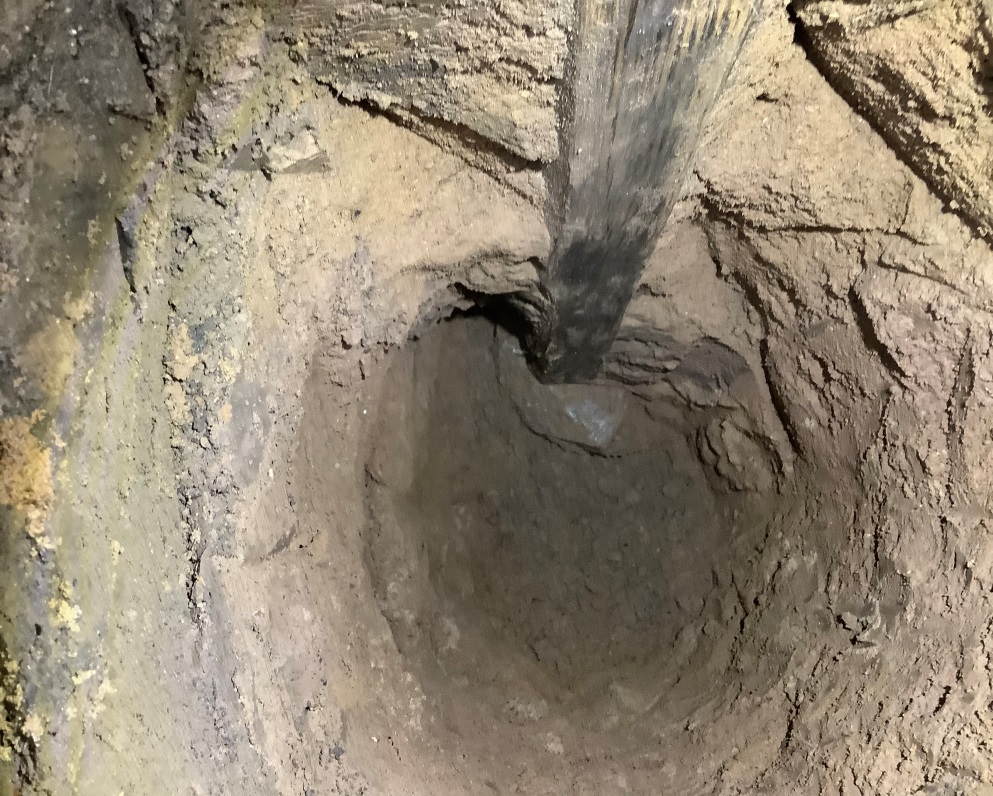
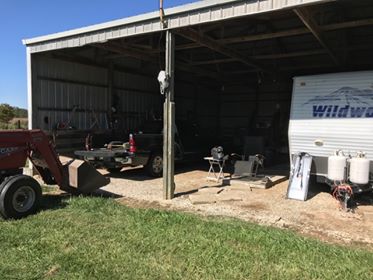
 DEAR MICHAEL: As you have realized, your immediate challenge is your columns, their lack of adequate treatment for structural in ground use, and a missing foundation system.
 DEAR POLE BARN GURU: Have a 32’wide by 30’long pole barn garage heated and insulated going to add on for storage only. It will have a concrete floor with vapor barrier and 2 inches of rigid foam. The walls and ceiling will be steel. There will be a 1 foot overhang all the way around to match the existing building, and one garage door at the rear of the building. The eves will be vented along with a rig vent. My question is that normal I would have used OSB for roof and sidewalls cost is an issue, what are your suggestions for the underside of the steel in both the walls and roof? ERIC in IRONS
 DEAR ZOE: It will depend upon how wide your building will be. If 12 feet wide, it may appear okay, if wider, it is going to start to look flat. One thing to keep in mind, most steel paint warranties are void on roof slopes of less than 3/12. Side lap sealants are also required for steel roofing on slopes under 3/12, adding to investment and complexity.


 DEAR NATE: Thank you for reaching out to me. In most instances it will be less expensive to add more square footage on main level than to create a partial loft space (not to mention no space wasted due to stairs). Here is a guide to creating appropriate eave heights:
  DEAR OMER: Thank you for being a loyal follower. Although I certainly have the ability to do your structural design, I prefer not as it would place me in a position of liability as well as practicing engineering without a license. Even though you are building a permit exempt agricultural building, I would encourage you to build from engineered plans – as you say you want it to be “rock solid for generations to come”. Only having it fully engineered is going to give you this sort of assurance. Sawing your own wood is also problematic
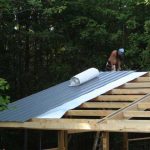 DEAR THOMAS: In most instances eave and ridge vents are inadequate alone to prevent condensation. Contractors who fail to include some sort of thermal break between roof framing and roof steel are doing a severe disservice, in my opinion. It is so easy to accomplish at time of construction with products such as a Reflective Radiant Barrier or Integral Condensation Control. There is not a good option for an underside of purlins vapor barrier, as it is nearly impossible to adequately seal it. Your only real solution, at this point, would be to use two inches of closed cell spray foam on underside of your roof steel.
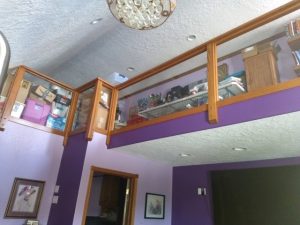 DEAR POLE BARN GURU:
 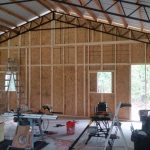 DEAR POLE BARN GURU:
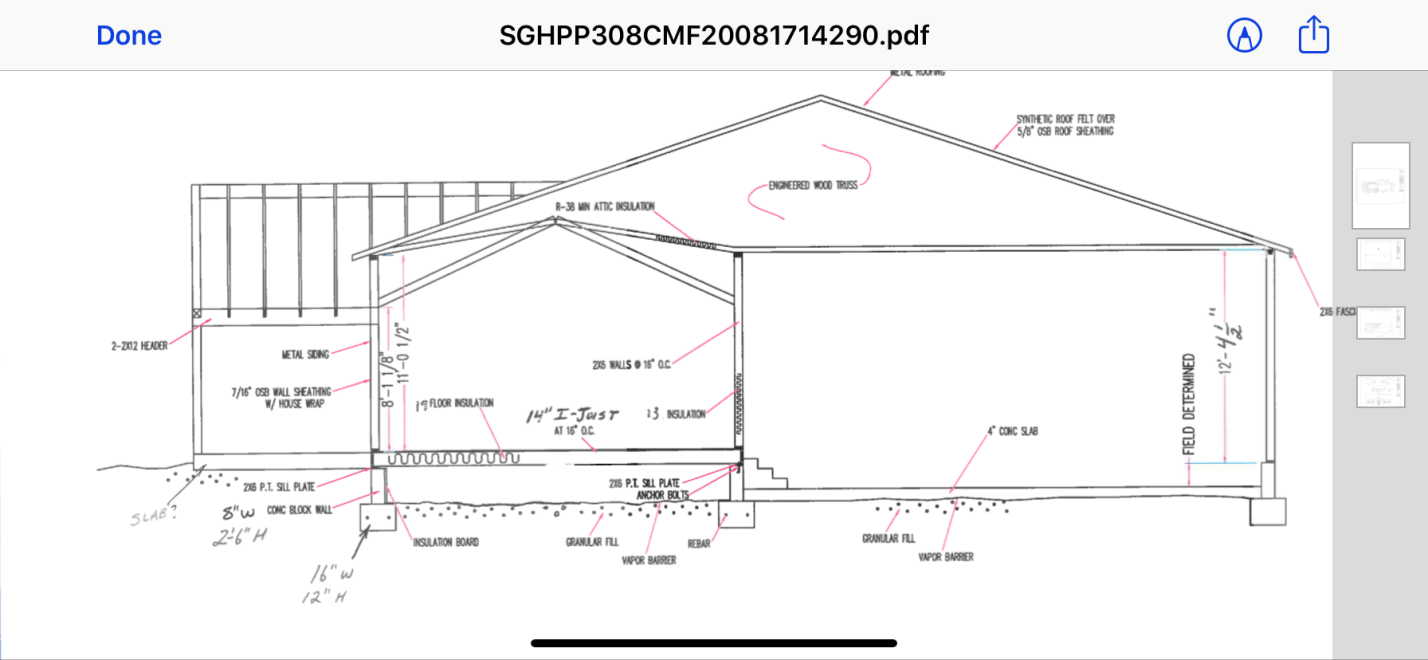
 Thank you for placing your faith in me. I do make a concerted effort to give best possible answers – even when it is not what people want to hear. Whether it makes money for Hansen Pole Buildings or not, our desire is to see people get into buildings they love and feel they have gotten a great value.
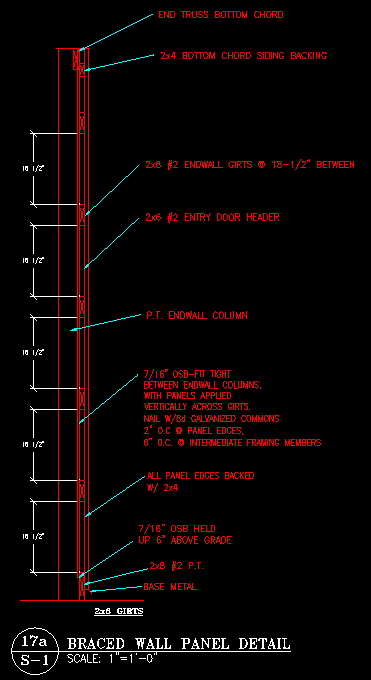 For cases where strength of steel skin is not adequate to support loads, the International Building Code (IBC) provides for wall panels to be braced by adding either Oriented Strand Board (OSB) or plywood. This most often occurs when a wall (or walls) have large amounts of openings (doors and windows) or in cases where buildings are tall and narrow, or very long (usually width of three to four times building length). An engineer can determine the applicability of this as a design solution. Installation of added sheathing is generally fairly simple and requires (in most cases) minimal extra framing materials.
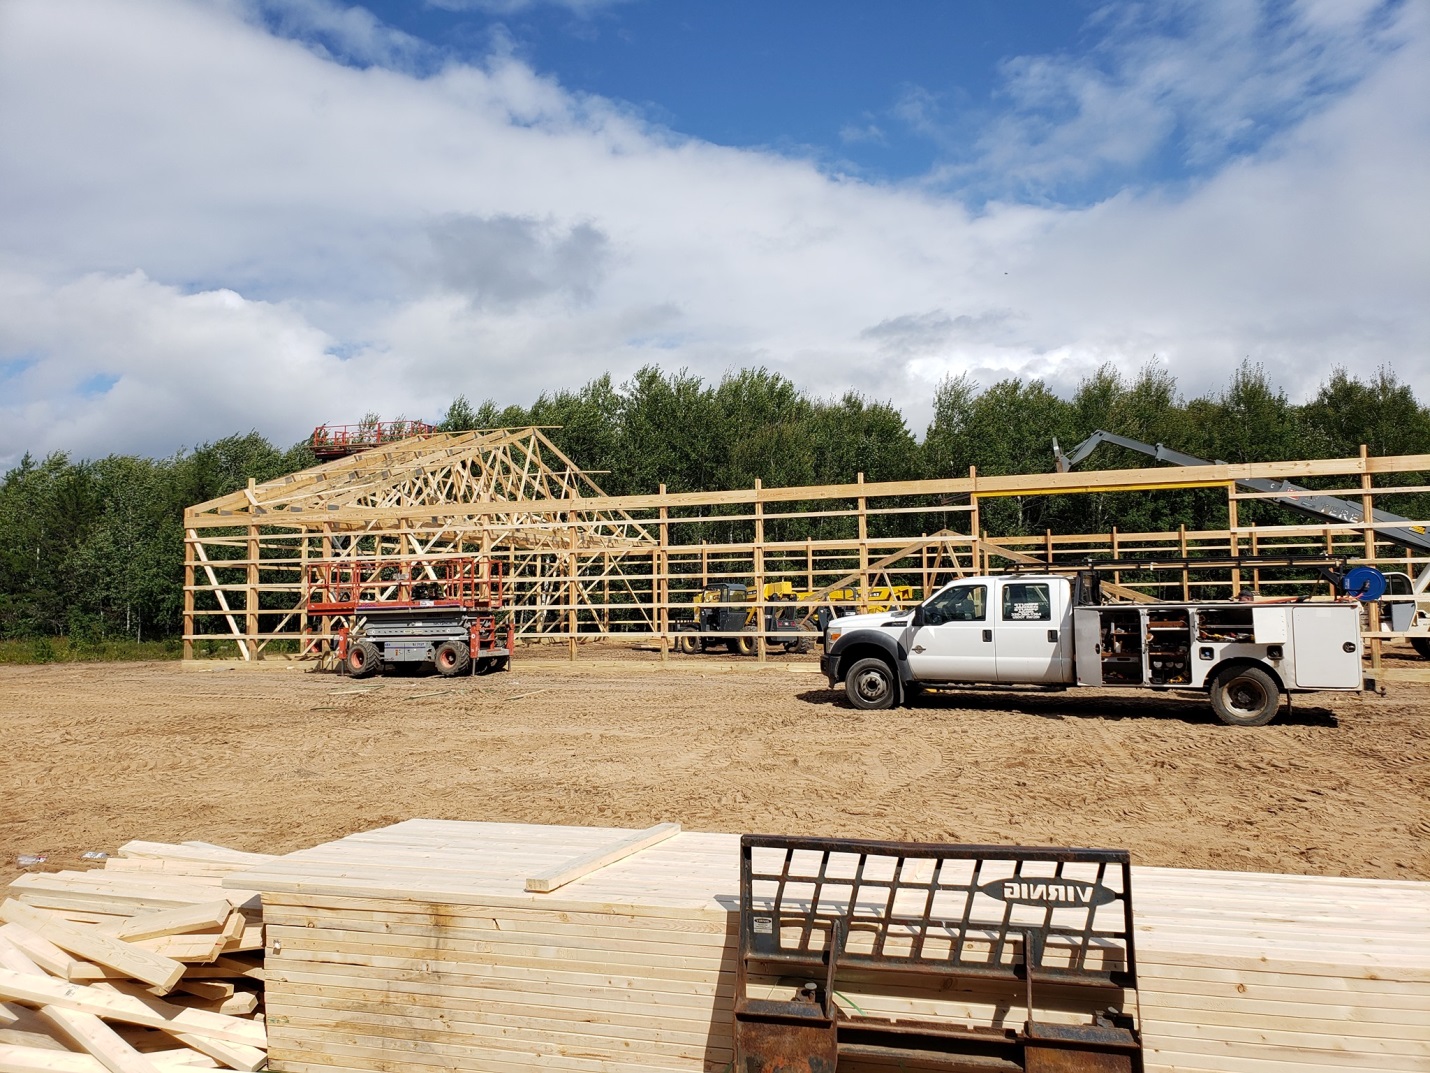
 “Maybe you could have a chapter on how building a new building cost money. And that you shouldn’t expect other people have spent money to just give you their plans and all their knowledge that they spent their own hard-earned money on to get.”
 Thank you for your interest in a new Hansen Pole Building. We should be able to take care of all of your needs with a third-party engineer sealed set of blueprints specifically for your building. Face it – this eliminates any guesswork, as anything you do without a Registered Design Professional involved is nothing but a W.A.G. (Wild Ass Guess), probably an errant one. Given height of your roof (it takes full brunt of wind coming from a side) it is unlikely a 6×6 column will work in bending (it is plenty strong enough to support downward forces from building weight and roof snow load acting alone).
 This very same adage holds true with those punting at their own building design….engage a trained professional. Or even better, a complete post frame building package structurally designed by a trained professional. And when I talk about “trained professional” in this context, I mean plans sealed by a Registered Design Professional (RDP – architect or engineer) specifically for your building on your property.
 The board of professional engineers is the only regulatory authority having jurisdiction over engineering. So what does this mean in practical terms? A properly licensed professional engineer is allowed to practice engineering, without discrimination, restraint or limitation. By engineering law, this needs to be in their area of expertise. The same process and concepts are true for licensed professional architects.
 We do not provide just trusses, as this lends itself to people believing they have an “engineered building” just because they have trusses built from engineer sealed drawings. In event of a collapse due to the balance of the structure not being designed by a RDP (Registered Design Professional – architect or engineer) fingers start to be pointed towards whoever provided the trusses.
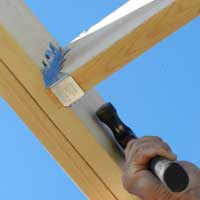
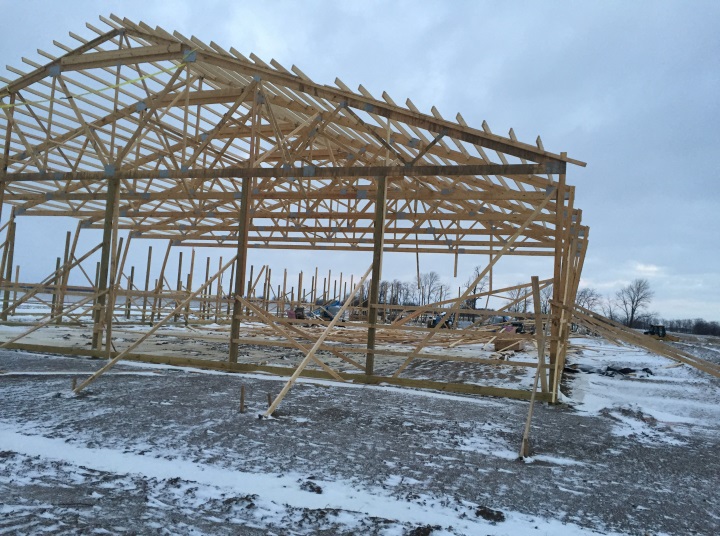
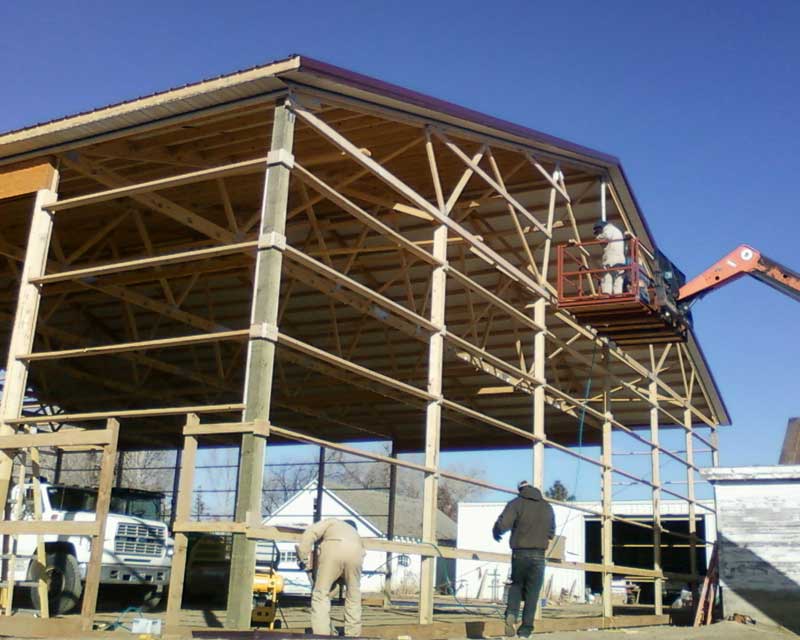
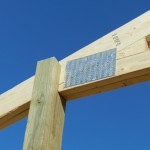 In my humble opinion, an ideal design solution eliminates need for a header (aka truss carrier) entirely, by having trusses bear directly upon columns. Why would this be ideal? Trusses (in my ideal dream world) are placed into a field cut notch in each column. This transmits all roof loads directly onto posts, without reliance upon beams typically scabbed onto each side. This eliminates trusses being driven to earth in a catastrophic snowfall event.
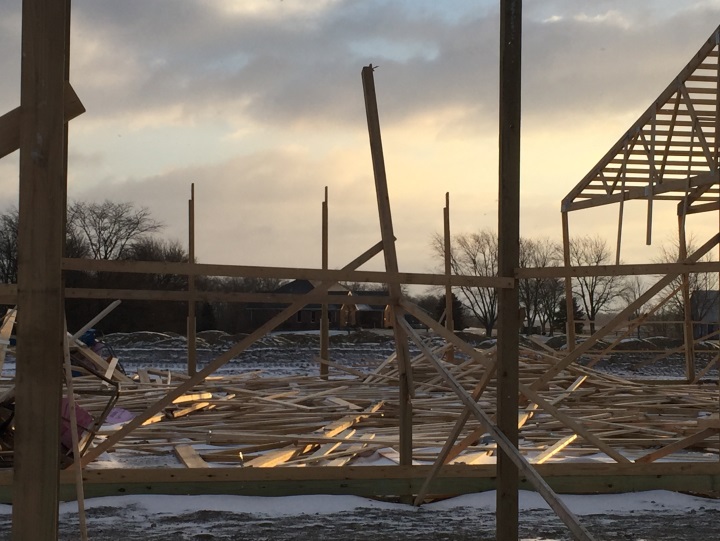
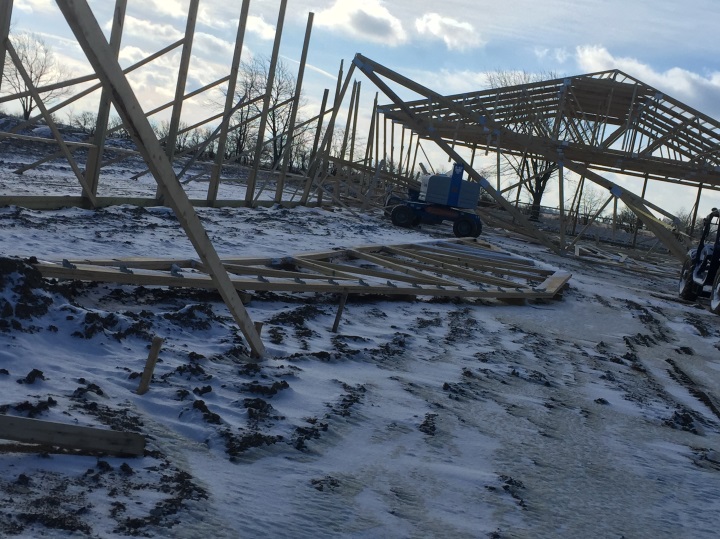
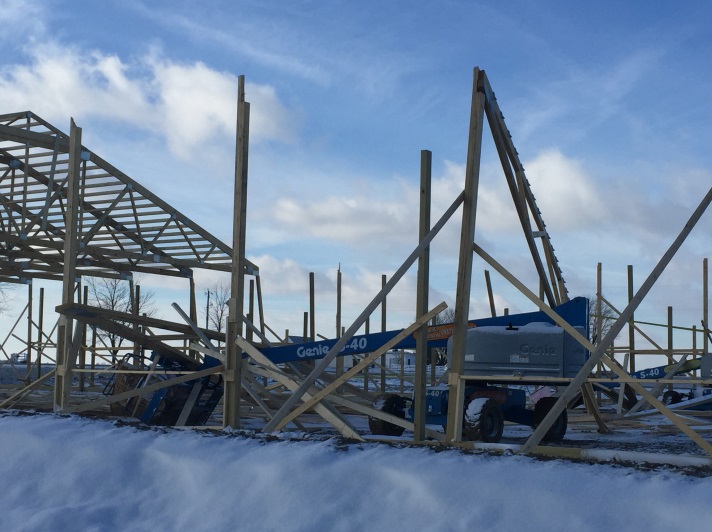
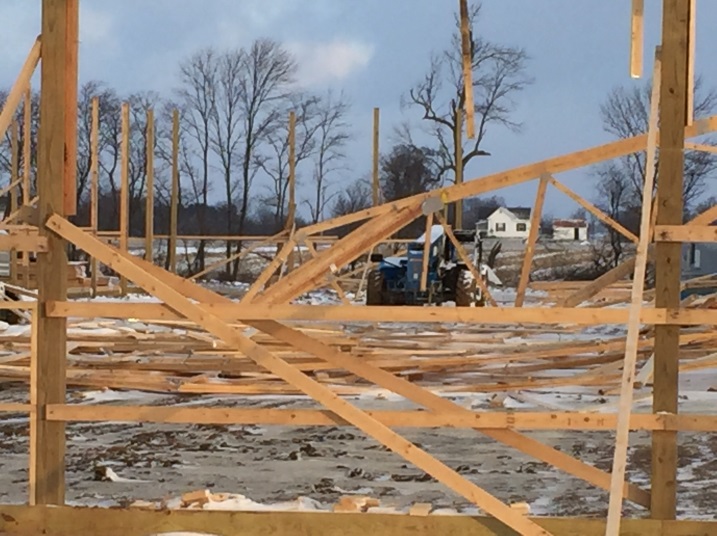
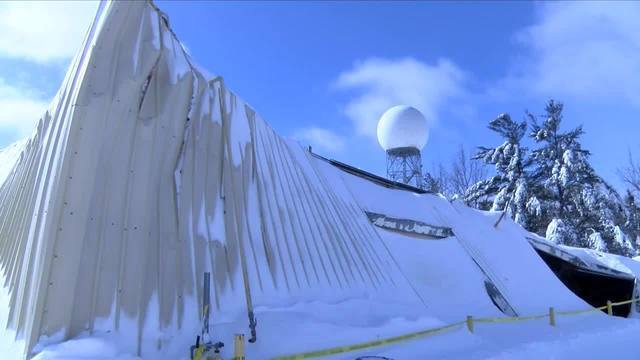
 In my humble opinion, a majority of these builders who had to change their construction were probably not building Code conforming structures! Think about this if you are considering investing in a post frame building from ANY builder.
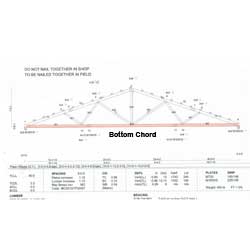 Prefabricated metal plate connected wood trusses captured me, as I became a sawyer in April of 1977. I quickly found it to be a totally fascinating industry and would venture out every evening, after work, to view new buildings using our trusses. I wanted to know how everything fit together. Just three weeks later I found myself in a new position as truss designer and jack of most trades, master of none. 19 years old, I was blessed to work for an exceptional employer, Ted Thompson of Coeur d’Alene Truss (now Coeur d’Alene Builders Supply). He gave me guidance and let me “run with it” as I shortly was doing just about every task short of writing checks to pay bills. It was a wonderful experience and built a solid foundation for my future careers, in both truss and post frame industries.
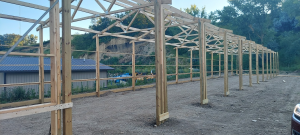 While I appreciate your questions, we as a company and me as an individual do not provide free engineering services. In answer to your questions:
 Gambrel style rooflines are often enticing, they offer the feeling (however not the reality) of getting added space for free. Building your own gambrel barn trusses might appear on the surface like a way to make this even a greater savings.
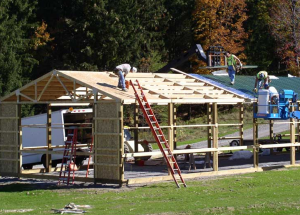 Always (may I repeat Always) construct only post frame (pole) buildings which are designed by a RDP (Registered Design Professional – engineer or architect) specifically for your building upon your site. You will always get piece of mind and usually the RDP will save you more money than what you invested for their design work.
 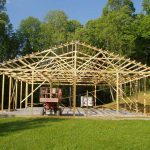 The span of the 1st section (north side), would need to be 18ft. If I used a triple truss at 18 ft. and 2×8 purlins would I be able to get this to work. I will be using a metal roof the 30 ft. wall will have a 16 ft. door and 9 ft. door Eve entry. I know it’s not optimal. But to get a lift inside the garage it will be a must to get this span. Also my garage door will follow the roof line. In the 18 ft. area it will be hung from the purlins. A winch will be used as an opener. Also attached to the purlins but boxed to prevent movement.”
 Best place to start is with the Indiana Code definition of a Class 1 structure:
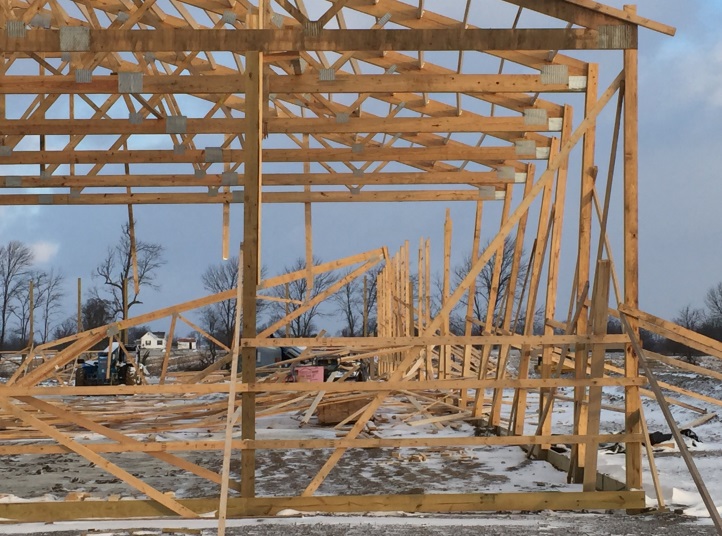
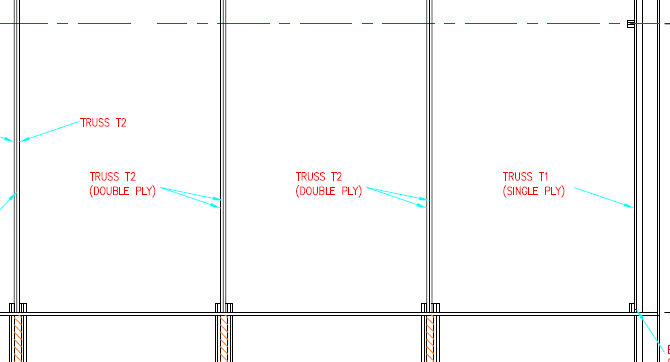 A design solution might be to place a pair of attic trusses directly aligned with the sidewall columns. This would provide direct bearing from the truss to the column and would eliminate the need for truss carriers (aka a top plate). This would be a far more reliable system, as the true double trusses load share and reduce the possible incidence of a weak link in a single truss taking down the entire roof system.
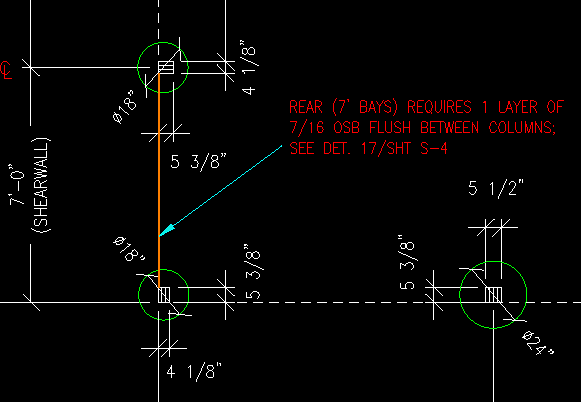


 It was a busy Friday morning in downtown Sioux Falls, South Dakota on December 2nd of this year. About 10:30 a.m. near the corner of East 10th Street and South Phillips Avenue, Boyd McPeek was inside the Coffea coffee shop, when the 1916 building across the street collapsed.
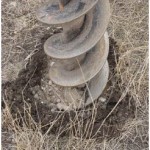
 DEAR POLE BARN GURU: The materials just arrived for my pole barn and construction is to start on Monday. The building will be 30×40 with attic trusses with an 8/12 pitch, 24 inches on center with a 1ft overhang (there is a total of 21 trusses). In the materials there was 4- 28ft 6x6s, and 14-18ft 4x6s. My question is will the 4×6’s be able to handle the load bearing of the attic trusses, or should they be 6×6’s as well? Thank you for your help. JIMMY IN PLYMOUTH
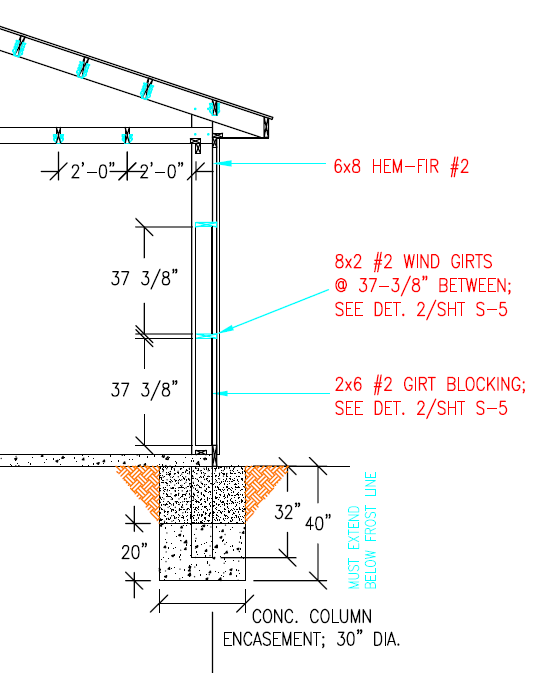
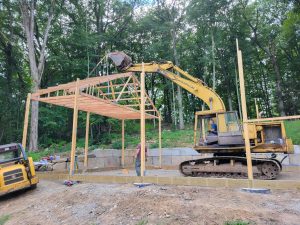
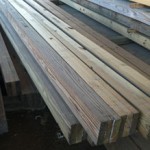
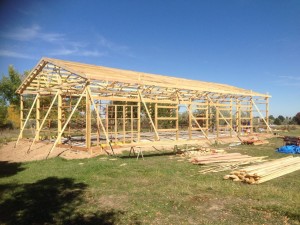 These plans specify the bearing columns for the double trusses, spaced every 12 feet along the 36 foot sidewall as being PT 6×6 HF #2. For folks in the Eastern 2/3 of the United States, your treated columns are generally going to be Southern Pine. Southern Pine absorbs pressure preservative treating chemicals very well, it does not have to be incised. HF (HemFir aka Western Hemlock) not so much, it has to be incised, which reduces its bending strength by 20%!
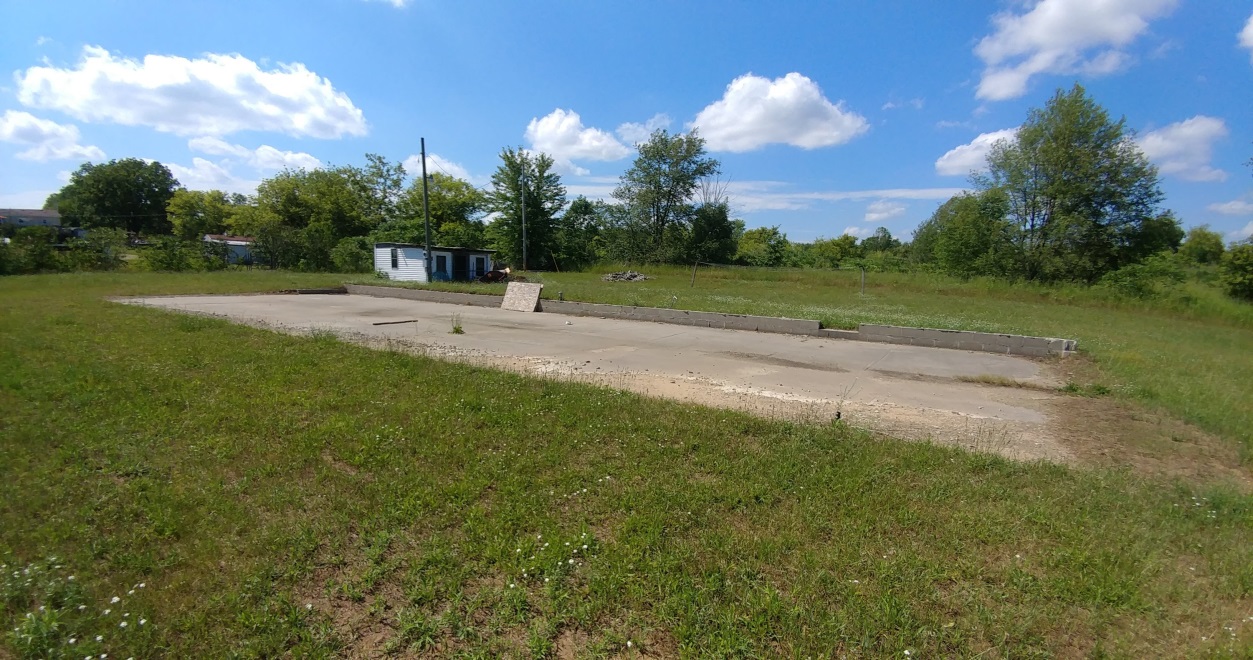
 Assuming the existing building endwall is fully enclosed, there is a very good chance the building was designed using what is called “diaphragm design”. If the existing building endwall steel (or structural sheathing) is removed, the entire building should now be reanalyzed by a registered design professional (RDP – engineer or architect) including the portion being added on.
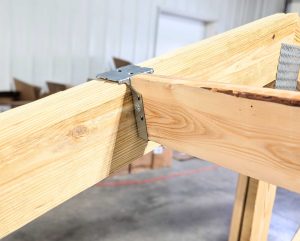 Our client has ordered a pole building kit package which is designed around sidewall columns spaced every 14’. For those who care, the building has a design roof snow load of 30 psf (pounds per square foot) and the actual roof dead load carried by the roof purlins (including the purlins themselves) is 1.626 psf. Our engineer designs a roof system with a pair of trusses at each sidewall column, and 2×8 #2 roof purlins joist hung between the trusses and placed 24 inches on center. The engineer prints off two sets of plans and supporting calculations, places his seal and signature on them, and sends them off to our client.
 An engineer is responsible for the analysis and design of the structure or framing system of a building or building component. While doing the building’s structural design, the engineer will take safety and performance into consideration. For performance or serviceability this is the design for vibrations from machinery, floor vibration or deflection which could cause discomfort, or even building deflection or sway. The occupants of a building might feel uncomfortable if the building sways or moves too much, especially on the upper stories.


