Last October Mr. W of Park County Colorado ordered a new pole building kit package from Hansen Buildings.
Just like every quotation or Invoice we prepare, it lists specifically the “Design Criteria” for his specific building.
Included in this were:
The Building Code and edition (every three years a new edition of the code is published, often with significant changes from the prior edition).
Flat Roof Snow (also known as Pf) – which is calculated by applying a series of factors to the Ground Snow Load (Pg). In some cases, in exception to the way the codes are written, a Pf value is stated by a particular Building Department.
Design Wind Speed in miles per hour (mph) as a three second gust, as well as Wind Exposure.
Allowable Foundation Pressure, as well as the general soils types which the given pressure would be applicable to.
Seismic zone.
Maximum frost depth of this design.
Thermal factor (Ct) and whether the building is heated or unheated. This factor is one of the influencing values in the calculation of Pf from Pg.
Occupancy Category (I, II, III or IV) – each of which corresponds to a factor which will influence the magnitude of snow, wind and seismic forces which the building much be designed to withstand.
Every quote we provide includes this statement directly below the design criteria:
“You must confirm all code/design criteria with your Building Department prior to placing your order.
We recommend taking this page to your building department for them to verify all design criteria listed above.”
In ordering the building, the Purchaser must agree to the following as a portion of the terms and conditions:
Purchaser acknowledges verification/confirmation/acceptance of all Building Code, Plan and Design Criteria included on Instant Invoice. Information Purchaser has verified includes, but is not limited to: Applicable Building Code version, Occupancy Category, Ground (Pg) and Flat Roof (Pf) Snow Loads, Roof Snow Exposure Factor (Ce), Thermal Factor (Ct), basic Wind Speed (3 second gust) and Wind Exposure, Allowable Foundation Pressure, Seismic Zone and Maximum Frost Depth, as well as obtaining for Seller any unusual code interpretations, amendments or prescriptive requirements for non-engineered buildings which could affect this structure. If purchase is a non-engineered building, reasonable efforts have been made to assure structural adequacy, however no guarantee or warranty is made or provided by Seller as to whether this design actually meets with any applicable code or structural requirements. The ultimate responsibility for verification rests with Purchaser. Any costs due to changes or requests by Purchaser, Purchaser’s agents, or Building Officials to non-engineered plans will be borne by Purchaser, including any and all of Seller’s staff time for research, or any other reason, even if no changes are ultimately made. Staff time is billable at a minimum of $120 per person hour, with a one hour minimum.
Seller’s designs are all per specified Building Code and include the use of NDS Table 2.3.2 Load Duration Factors (Cd) as well as ASCE 7-05, Eq. 7-2 for slippery surfaces. Seller’s designs rely solely upon occupancy category and structural criteria for and at specified job site address only, which have been provided and/or verified by Purchaser. It is Purchaser’s and only Purchaser’s responsibility to ascertain the design loads utilized in this Agreement meet or exceed the actual dead loads imposed on the structure and the live loads imposed by the local building code or historical climactic records. Purchaser understands Seller and/or Seller’s engineer(s) or agents will NOT be contacting anyone to confirm.
Now if the above sounds harsh, keep in mind, we have provided buildings in all 50 states. There are over 7000 building permit issuing jurisdictions in the country and to keep absolutely current with any and all changes, is an impossible task.
Remember our good friend Mr. W from the beginning of this story? Mr. W’s county has on their website a form to complete, where they will verify the snow load criteria for anyone’s particular piece of property. While a pretty handy tool, it seems Mr. W did not use it.
He ordered a building, which we designed to the loads Mr. W confirmed he had verified. The plans were submitted and a permit to build was issued.
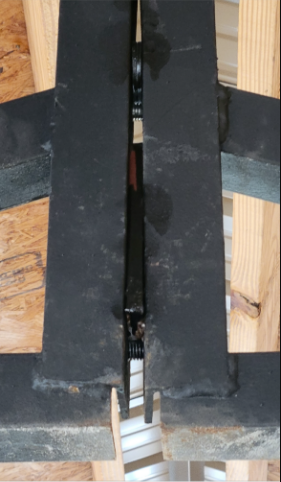
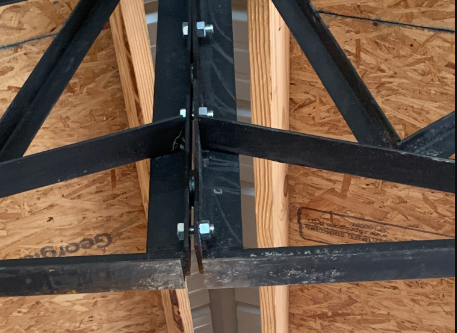
Now Mr. W has his building up and has called for final inspection. The inspector, in the field, notices the trusses are designed for a Pf of 50 psf (which matches what Mr. W ordered as well as the values on the approved plans). The problem…..the site is one where the flat roof snow load should have been 73 psf!
Mr. W now has a beautiful new building, which he cannot use. At least as it is presently built. The ultimate solution is going to involve a significant (as well as costly) repair to the trusses, as well as adding roof purlins between each purlin currently installed on the roof.
This is a case where an ounce of prevention (Mr. W having actually verified his loads as instructed) would have been well worth the pound of cure.
The question we sometimes get is, “why don’t you verify the loads for me?” Come back Monday and I’ll tell you why. Until then, think of the reasons we may or may not want to do this for you.
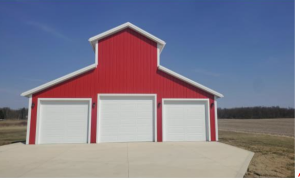
 We can create your ideal dream floor plan with this look. Every barndominium Hansen Pole Buildings provides is 100% custom designed to best meet the wants and needs of our clients and their loved ones. Please see #3 here to assist in determining needed spaces and approximate sizes, and to have professional floor plans and elevation drawings produced affordably. https://www.hansenpolebuildings.com/2021/02/a-shortlist-for-smooth-barndominium-sailing/
 As a member of most every active barndominium group in the social media world, I read all too often how new or prospective barndominium owners proudly proclaim they are or will be building where Building Codes are not enforced.
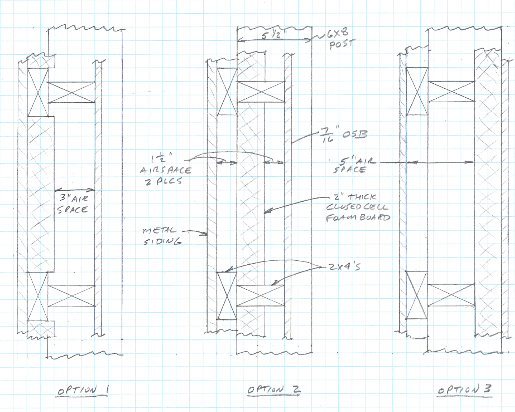
 DEAR POLE BARN GURU: I live on an acre within the city limits of Victoria, MN does the code allow pole barns as a detached garage? MARK in VICTORIA

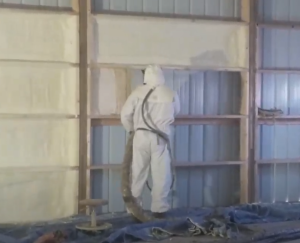
 While I am not a fan of vinyl backed fiberglass (aka metal building insulation), provided seams are sealed and facing is not punctured, it does provide a condensation control.
 DEAR TIM: As far as actually damaging posts themselves, highly unlikely. If your 4×6 columns are not adequately anchored in ground by a concrete bottom collar, concrete encasement, or other properly compacted backfill, there is a potential for them to be shifted out of place when concrete is poured. Depending upon method of pressure treatment, ph of concrete against pressure treated pine can cause brown-rot fungi. If your columns were treated with ACQ-D or MCA, it might be prudent to isolate columns from concrete with a waterproof barrier. A barrier can be created as simply as running your under-slab vapor barrier (6mil or thicker black plastic) up and over top of your pressure treated splash planks and around sides of columns to top of slab.
 DEAR POLE BARN GURU: Do your pole building packages meet the 2018 International Building Code and all codes adopted by Pennsylvania for commercial construction? ANDREW in HOLLIDAYSBURG
 DEAR POLE BARN GURU: We own the land however we don’t where to get started with this Process? TONY in FLORENCE
  IRC
IRC
 BUILDING CODES:
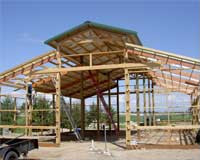
 DEAR POLE BARN GURU:
 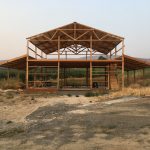 Here is how we did it for my Sales Manager, Dan, in my past life when I was a post frame building contractor. Dan wanted a 30′ x 50′ monitor style building for a garage/shop and then an office above. We had engineered a clearspan roof/floor truss combination for support of wings and second floor. This system had a double truss every 10 feet. At eight feet from each outside wall, we mounted columns to these trusses to support roof of raised center. Joists we placed for ceilings and floor system. With an 8/12 roof slope, upper level used scissor trusses with a 5/12 interior pitch.
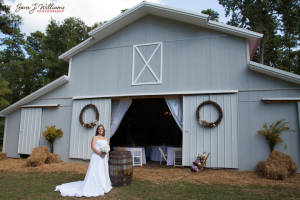 In my humble opinion, a majority of these builders who had to change their construction were probably not building Code conforming structures! Think about this if you are considering investing in a post frame building from ANY builder.
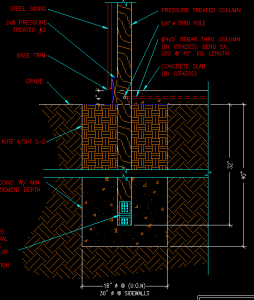 I was speaking to Rachel and she gave me your email to see if you might be able to answer a question for me. I hired complete a 50’x 80’ x 12’ pole barn here in Huntley, MT. The company showed up on the job yesterday and drilled the holes and started setting posts. Posts are 8’ center. They set the corner posts and maybe 6 sidewall posts and 4 endwall posts. The other posts were placed in the drilled holes and left for completion today/tomorrow. When I inspected the posts that were placed but not set (no backfill) I noticed that there was no footing or no cleats attached to post base to prevent uplift. When I questioned the owner of the company what he was using for footings he stated nothing added just solid tamped. I immediately called him and questioned his reasoning and got the I have been building these like this for 25 years. My question is on average what is the post load in psi on the 50’ x 80’ x 12’ pole barn with a 40# snow load? My soil has a bearing capacity of 2100 psi.”
 One of our clients had been discussing with Hansen Pole Buildings Designer Lily a pole building to be located in rural Larimer County. The county had provided him with a sheet of “prescriptive” requirements for non-commercial, non-residential pole barns in the county.
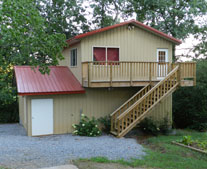 The purpose of the “Wind Speed Web Site” is to provide users with a site specific wind speed using the GPS coordinate system. The reason this utility is needed is the spatial resolution of the wind speed maps displayed in ASCE 7 are not sufficient to determine a site specific wind speed. There are no reference city or town locations on the ASCE 7 maps and while county boundaries are shown, the resolution is affected when the maps are expanded large enough to distinguish the boundaries and approximate the city locations.
 Reason #1 – The client failed to verify their Building Code version and load conditions with the Building Department prior to ordering their building. I cannot speak for anyone else, but we DO REQUIRE our clients to verify this information.


