Is Fiberglass Insulation a Carcinogen?
We live in a world fraught with unseen perils (COVID-19 anyone?), however fiberglass building insulation is probably not one of them. When it comes to fully engineered post frame barndominiums and homes, we all just want our clients to be safe and happy.
I went to an expert on this subject as Angus E. Crane penned this article “Cancer Warning Labels Removed from Fiberglass Building Insulation Products” for Insulation Outlook:
The North American Insulation Manufacturers Association (“NAIMA”) and its
fiberglass member companies have promoted the usefulness and safety of
fiberglass insulation products since the 1930s. Throughout the years, NAIMA has
asserted that “biosoluble” fiber, fiber that readily dissolves in the lungs, is
safe to manufacture, install and use when the proper work processes are
followed.
Man-made vitreous fibers were identified as a possible carcinogen in 1987 by the International Agency for Research on Cancer (“IARC”).
 These claims were later adopted by domestic governmental bodies. However, since
then, scientists, both internationally and domestically, have questioned the
evidence backing the classification of fiberglass as a carcinogen. Medical and
scientific evidence has been collected and analyzed from groups in the United
States, United Kingdom, Canada, The Netherlands, Australia, New Zealand, and
others since the 1930s.
In October 2001, IARC changed the classification of “insulation glass wool,” moving it from Group 2B (possibly carcinogenic) to Group 3 (not classifiable as to its carcinogenicity to humans).”1
Recent
Developments in the United States
On June 10, 2011, the National Toxicology Program (NTP) removed from its list of
“Reasonably Anticipated To Be Carcinogens” biosoluble glass wool fibers used
for home and building insulation, drawing a distinction between biosoluble
glass wool fibers and “certain glass wool fibers (inhalable) [that are]
reasonably anticipated to be human carcinogens” in an explanatory fact sheet.
The fact sheet notes “Not all glass wool fibers cause cancer. Certain refers to
those fibers that can enter the respiratory tract, are more durable, and remain
in the lungs for long periods of time.”2 The NTP action means that a
cancer warning label for biosoluble fiberglass home and building insulation is
no longer required under federal law. Home and building insulation that will no
longer carry a cancer warning label include fiberglass residential, commercial,
and industrial insulation products; specifically, fiberglass pipe and board
products will not carry a cancer warning label. In fact, the United States was
the only remaining jurisdiction in the world where biosoluble fiberglass
insulation was required to carry a cancer warning label.
Also in 2011, the California Office of Environmental Health
Hazard Assessment (OEHHA) published a modification of its Proposition 65
listing to include only “glass wool fibers (inhalable and biopersistent).”3
The OEHHA action means that a cancer warning label for biosoluble fiberglass
home and building insulation is no longer required under California law.
Delisting fiberglass insulation from the NTP’s Report on
Carcinogens (RoC) and California’s Prop. 65 list of carcinogens is consistent
with the findings or conclusions reported by the IARC4 in 2002; the
National Academy of Sciences (NAS)5 in 2000; the Agency for Toxic
Substances and Disease Registry (ATSDR) in 20046; and Health Canada7
in 1993.
What is a
Biosoluble Fiber?
Before any further discussion on these two significant
developments, it is imperative that the reader understand the meaning of
“biosoluble.” A “biosoluble” fiber is one that readily dissolves in the lung.
“Biopersistent” fibers are fibers that remain in the lungs for a longer time.
These more durable fibers are not used for insulation and represent a small
percentage of glass wool fibers produced in the United States; biopersistent fibers
actually constitute less than one percent of the glass wool fibers produced in
the United States. Biopersistent fibers are “used for high-efficiency air
filtration media, acid battery separators and certain fine-diameter glass
fibres.”8
To identify those fibers described by NTP and California as
biosoluble, NAIMA and its members have adopted as a policy the European Union
(EU) criteria to identify which fibers require cancer warning labels under U.S.
and California requirements. The EU provides a scientific classification system
for differentiating and distinguishing between those glass fibers that require
a cancer warning label from those that do not. The EU system relies on
standardized in vivo protocols. For additional details, the reader may consult
the EU Guidelines ECB/TM27 rev. 7.9
The Historical
Backdrop
The labeling of fiberglass insulation as a possible carcinogen had its genesis in
animal implantation studies. Implantation is a non-physiological route of
exposure. These studies literally injected or surgically implanted large
quantities of fibers directly into the abdomen, pleura (lining of the chest and
lungs), or trachea of the animals, bypassing the animals’ normal respiratory
systems’ protective mechanisms. Some of these studies resulted in tumors.10
Relying upon the studies where tumors occurred in animals
after implantation, IARC, in 1988, classified fiberglass as a possible
carcinogen. California’s OEHHA (Prop. 65) and NTP followed shortly thereafter
with similar listings. These listings were based on the animal implantation
studies, however.11 Over time, most in the scientific community
agreed that these implantation studies were not appropriate for characterizing
human health risk.12 It was the consensus of a World Health
Organization (WHO) panel of fiber toxicologists that these non-physiological
methods of administering fibers to animals were not appropriate substitutes for
inhalation studies for assessing risk of fibers to human health.13
As the legitimacy of implantation studies was called into question, a series of inhalation studies was conducted at RCC Laboratories in Geneva, Switzerland. The results of these studies demonstrated that animals exposed through inhalation to large doses of glass wool fibers did not develop tumors.14 With this animal data and expanded human epidemiological
data, IARC revisited its earlier decision. In October 2001, a panel of international experts reviewed the data and concluded that fiberglass and rock and slag wool fibers used for thermal and acoustical insulation were considered “not classifiable as to carcinogenicity to humans (Group 3).” IARC noted specifically:
“Epidemiologic studies published during the 15 years since the previous IARC Monographs review of these fibres in 1988 provide no evidence of increased risks of lung cancer or of mesothelioma (cancer of the lining of the body cavities) from occupational exposures during
manufacture of these materials, and inadequate evidence overall of any cancer risk.” 15
IARC also included a Group 3 classification for continuous glass filaments and the Group 2B “possible carcinogen” classification for certain special-purpose glass wools also known as biopersistent fibers.16
Catching Up With
the Rest of the World
After the IARC decision, the United States was the only jurisdiction in the world
that required a cancer warning label on biosoluble fiberglass insulation. NAIMA
immediately petitioned the NTP seeking a similar delisting from the RoC. In
submitting comments to NTP, NAIMA emphasized that glass wool fibers delisted by
IARC are not classified and labeled as carcinogens outside the United States.
Under this scenario, a company could produce a glass wool fiber product at a
plant in the United States and ship it to Europe, Canada, or anywhere else in
the world without a cancer warning label. If that identical product was
distributed in the United States, it would be required to carry a cancer
warning label.
It is useful to understand that to be listed on the RoC,
certain criteria must be satisfied (published in the Report on Carcinogens,
Twelfth Edition [12th RoC]):
– Known To Be Human Carcinogen:
There is sufficient evidence of carcinogenicity from studies in humans, which indicates a causal relationship between exposure to the agent, substance, or mixture, and human cancer.
– Reasonably Anticipated To Be Human
Carcinogen:
There is limited evidence of carcinogenicity from studies in humans, which indicates that causal
interpretation is credible, but that alternative explanations, such as chance, bias, or confounding factors, could not adequately be excluded,
or
there is sufficient evidence of carcinogenicity from studies in experimental animals, which indicates there is an increased incidence of malignant and/or a combination of malignant and
benign tumors (1) in multiple species or at multiple tissue sites, or (2) by multiple routes of exposure, or (3) to an unusual degree with regard to incidence, site, or type of tumor, or age at onset,
or
there is less than sufficient evidence of carcinogenicity in humans or laboratory animals; however, the agent, substance, or mixture belongs to a well-defined, structurally related
class of substances whose members are listed in a previous Report on Carcinogens as either known to be a human carcinogen or reasonably anticipated to be a human carcinogen, or there is convincing relevant information that the agent acts through mechanisms indicating it would likely cause cancer in humans.
Conclusions regarding carcinogenicity in humans or experimental animals are based on scientific judgment, with consideration given to all relevant information. Relevant information includes, but is not limited to, dose response, route of exposure, chemical structure, metabolism, pharmacokinetics, sensitive sub-populations, genetic effects, or other data
relating to mechanism of action or factors that may be unique to a given substance. For example, there may be substances for which there is evidence of carcinogenicity in laboratory animals, but there are compelling data indicating that the agent acts through mechanisms that do not operate in humans and would therefore not reasonably be anticipated to cause cancer in humans.
This evidence can include traditional cancer epidemiology studies, data from clinical studies, and/or data derived from the study of tissues or cells from humans exposed to the substance in question, which can be useful for evaluating whether a relevant cancer mechanism is operating in humans.
The 12th RoC profile for certain glass wool fibers (inhalable) indicated that biosoluble glass wool fibers do not meet the criteria for listing. Shortly after the NTP action, California’s OEHHA
published a modification to its Prop. 65 listing to include only “Glass wool fibers (inhalable and biopersistent).”17
Conclusion
IARC, NTP, and California’s Prop. 65 do not often remove substances from their lists
of carcinogens. NAIMA and its members are not surprised by the recent development, however, because they are supported by medical and scientific evidence.
NAIMA restates that “Fiberglass insulation products are safe to manufacture,
install and use when recommended work practices are followed.”18
References:
- The various classifications include Group 1 (carcinogenic
to humans), Group 2A (probably carcinogenic to humans), Group 2B (possibly
carcinogenic to humans), Group 3 (not classifiable as to its carcinogenicity to
humans), and Group 4 (probably not carcinogenic to humans). See http://monographs.iarc.fr/ENG/Monographs/vol81/mono81.pdf.
- National Institute of Environmental Health Sciences,
National Toxicology Program, Fact Sheet, “The Report on Carcinogens,” June
2011. See http://www.niehs.nih.gov/health/materials/the_report_on_carcinogens_12th_edition.pdf
- 46-Z California Regulatory Notice Register, p. 1878
(November 18, 2011). http://www.oal.ca.gov/res/docs/pdf/notice/46z-2011.pdf
- International Agency for Research on Cancer, IARC
Monographs on the Evaluation of Carcinogenic Risks to Humans: Man-Made Vitreous
Fibres, Vol. 81 (Lyon, France: WHO/IARC, 2002).
- NRC Subcommittee on Manufactured Vitreous Fibers. 2000.
Review of the U.S. Navy’s Exposure Standard for Manufactured Vitreous Fibers.
National Academy of Sciences, National Research Council, Washington, D.C.:
National Academy Press.
- Toxicological Profile for Synthetic Vitreous Fibers
(U.S. Department of Health and Human Services, Public Health Services, Agency
for Toxic Substances and Disease Registry), September 2004.
- Environment Canada. 1993. Mineral Fibres (Man-Made
Vitreous Fibres), Priority Substance Assessment Report, p. 5.
- IARC Monograph 81, p. 52.
- http://tsar.jrc.ec.europa.eu/documents/Testing-Methods/mmmfweb.pdf.
- Hesterberg, W., et al., “Chronic Inhalation Toxicity
of Size-Separated Glass Fibers in Fischer 344 Rats,” 20 Fund. & Appl.
Toxicol. 464-76 (1993); Bunn, W.B., et al., Recent Studies of Man-Made Vitreous
Fibres ? Chronic Animal Inhalation Studies,” 35 J. Occup. Med. 101 (1993).
- International Agency for Research on Cancer, IARC
Monographs on the Evaluation of Carcinogenic Risks to Human: Man-made Mineral
Fibres and Radon, Vol. 43 (Lyon, France: WHO/IARC, 1988), pp. 148-49, 152.
- Environmental Protection Agency, “Health Hazard Assessment
of Nonasbestos Fibers,” Final Draft (Dec. 30, 1988).
- WHO, European Programme For Occupational Health, “Validity
of Methods for Assessing the Carcinogenicity of Man-Made Fibers,” Executive
Summary of a WHO Consultation (May 19-20, 1992).
- Hesterberg, W., et al., “Chronic Inhalation Toxicity
of Size-Separated Glass Fibers in Fischer 344 Rats,” 20 Fund. & Appl.
Toxicol. 464-76 (1993); Bunn, W.B., et al., Recent Studies of Man-Made
Vitreous Fibres ? Chronic Animal Inhalation Studies,” 35 J. Occup. Med. 101
(1993).
- IARC Press Release, 24 October 2001 (http://www.iarc.fr/en/media-centre/pr/2001/pr137.html).
- World Health Organization International Agency for Research
on Cancer, IARC Monographs on the Evaluation of Carcinogenic Risks to
Humans: Man-Made Vitreous Fibres, Vol. 81 (Lyon, France: WHO/IARC, 2002). http://monographs.iarc.fr/ENG/Monographs/vol81/volume81.pdf
- 46-Z California Regulatory Notice
Register, p. 1878 (November 18, 2011). http://www.oal.ca.gov/res/docs/pdf/notice/46z-2011.pdf
- Recommended work practices are designed to reduce temporary
mechanical irritation. Note that this mechanical irritation does not meet the
U.S. OSHA HAZCOM definition of irritation as set forth in Appendix A to 29
C.F.R. § 1910.1200.
Disclaimer: Unless specifically noted at the
beginning of the article, the content, calculations, and opinions expressed by
the author of any article in Insulation Outlook are those of the author and do not
necessarily reflect the views of NIA.
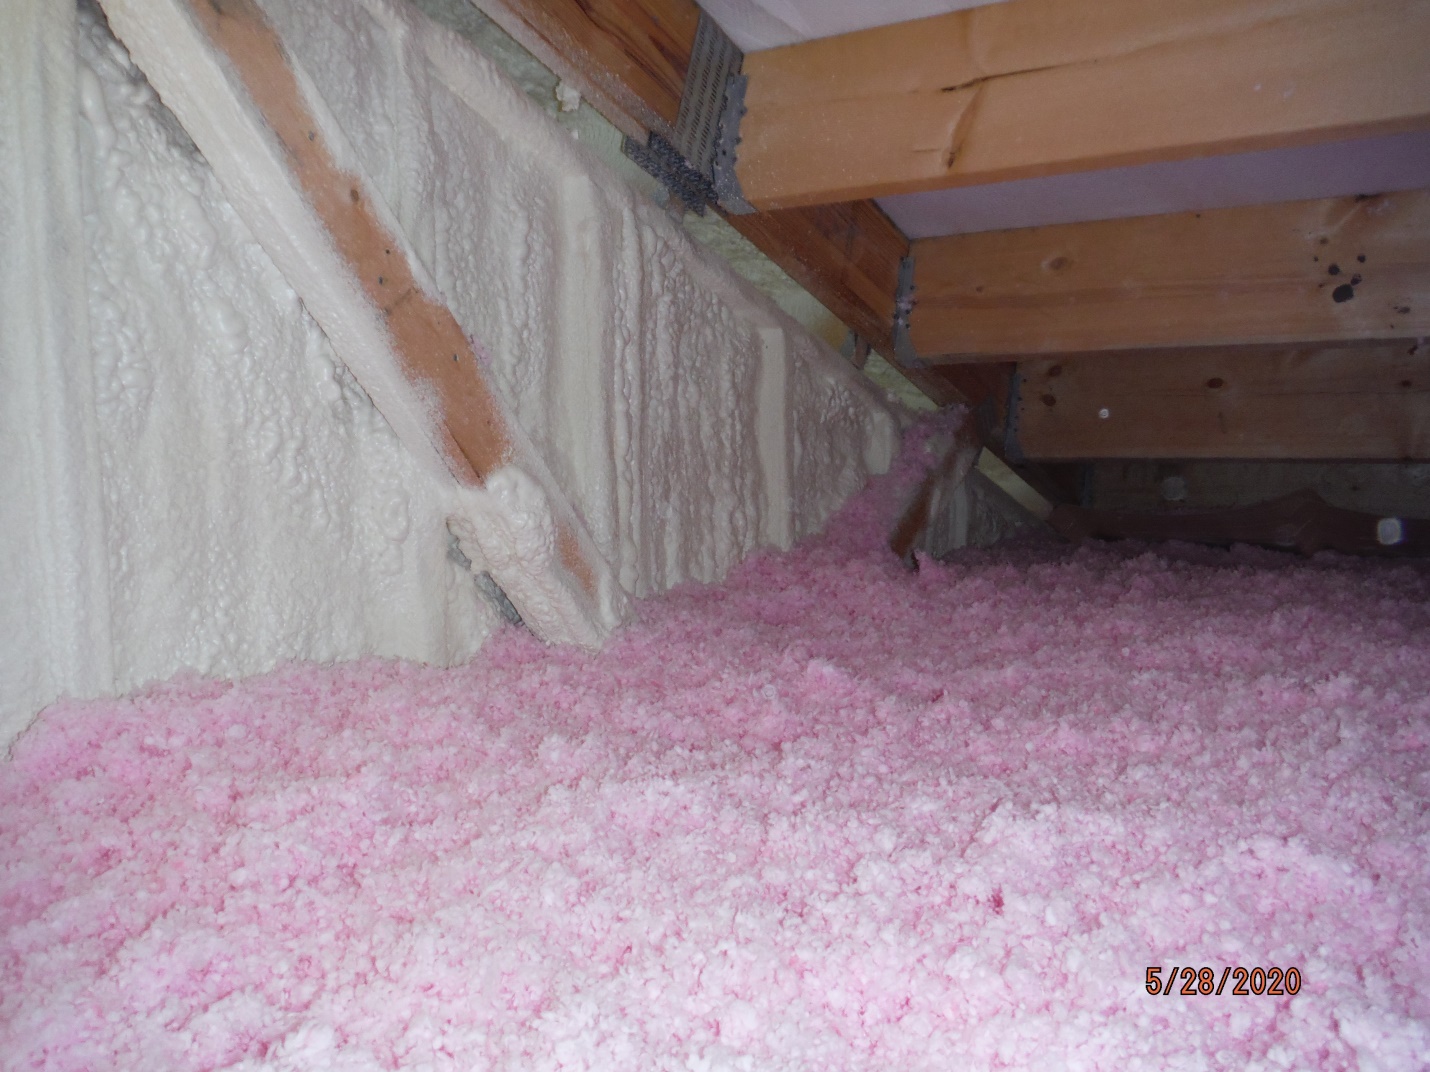
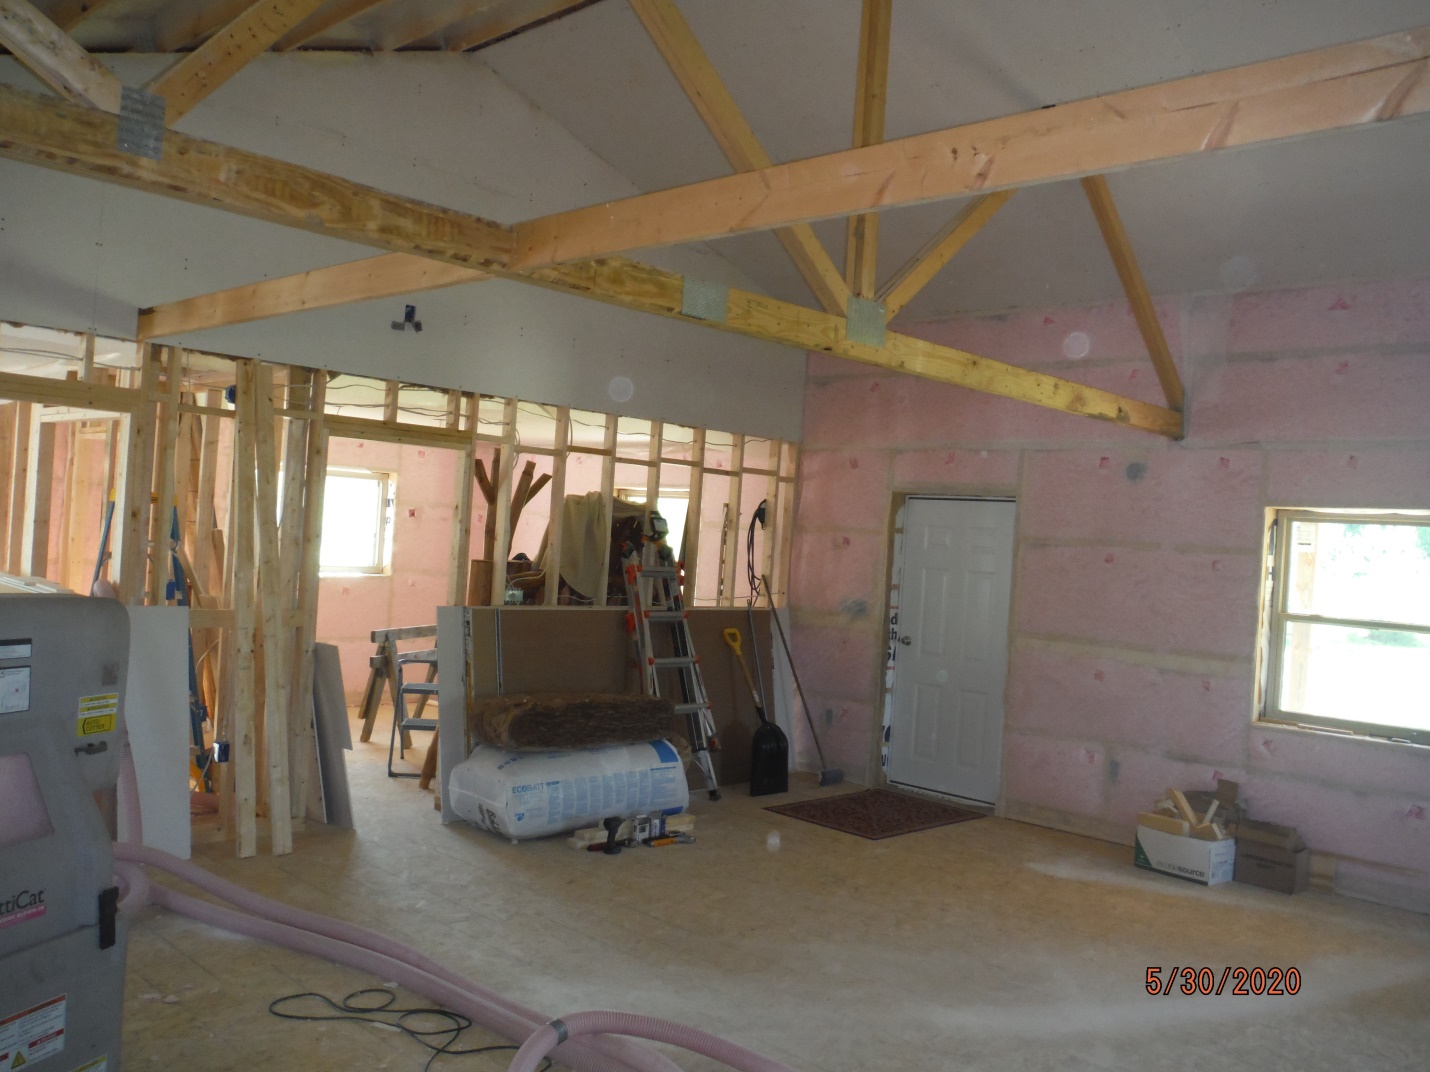
 Loose-fill fiberglass lost 35% to 50% of its resistance to heat flow at temperature differences of 70° F to 76° F. This loss of R-value started at a temperature difference of about 32° F. With temperature below ceiling drywall held at 70° F, R-value started dropping when attic temperature was reduced to 38° F and had lost 35-50% when attic temperature got to 0° F and below.
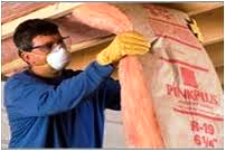
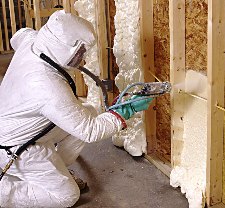 The most common yardstick for measuring insulation performance will be R value, but there’s a problem. Insulation packaging shows lab analysis of R values, but it’s based upon used testing completely eliminating air movement from results. This matters a lot with fluffy insulation materials because air movement greatly lowers real-world insulation performance. Drafts and air currents often happen within wall cavities and attics and this will be why real-world insulation performance can be significantly lower than advertised values.
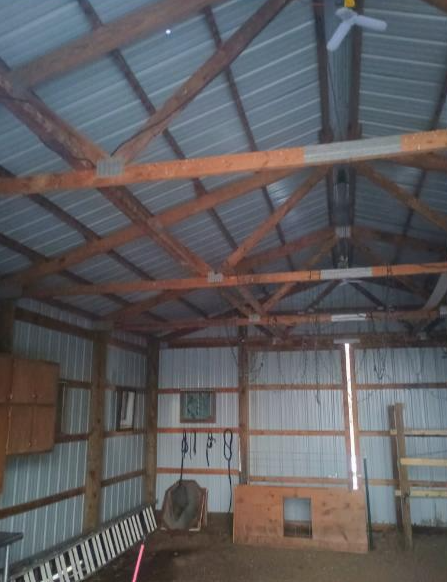
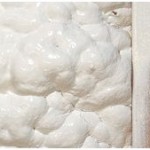 While I am not a fan of vinyl backed fiberglass (aka metal building insulation), provided seams are sealed and facing is not punctured, it does provide a condensation control.
 “Hi guru, I need your guidance. I am looking to build a 30x135x14 commercial building for dog daycare. I have no experience in building/ordering a pole barn and want to get it right.
  Under 2021’s IECC (International Energy Conservation Code) for commercial buildings Ceilings should be R-49, Walls R-20 plus R-3.8 continuous, slab R-15 three foot down at perimeter and R-5 under slab itself.
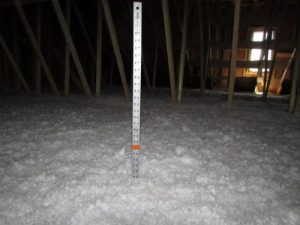 I have been scouring insulation, vapor barrier and building envelope sources for months now, trying to get to truthful data I can rely upon. Let me tell you – it has been a task, and there are moments when I felt blood would squirt from my eyeballs!
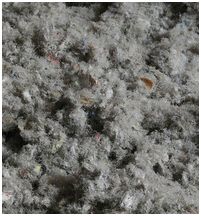
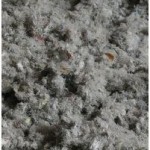 Cellulose is “green.” It’s made of 80% post-consumer recycled newsprint. Paper fiber is chemically treated with non-toxic borate compounds (20% by weight) to resist fire, insects and mold. Cellulose Insulation Manufacturers Association (CIMA) claims insulating a 1500 square foot house with cellulose will recycle as much newspaper as an individual will consume in 40 years. If all new homes were insulated with cellulose this would remove 3.2 million newsprint tons from our nation’s waste stream each year. There’s room to grow. Fewer than 10% of homes built today use cellulose. Cellulose earns “green” points because it requires less energy than fiberglass to manufacture. Disciples claim 200 times less petro-energy than fiberglass. More realistically, Environmental Building News reports fiberglass requires approximately eight times more energy to make when adjusted to reflect energy cost per installed R-value unit.
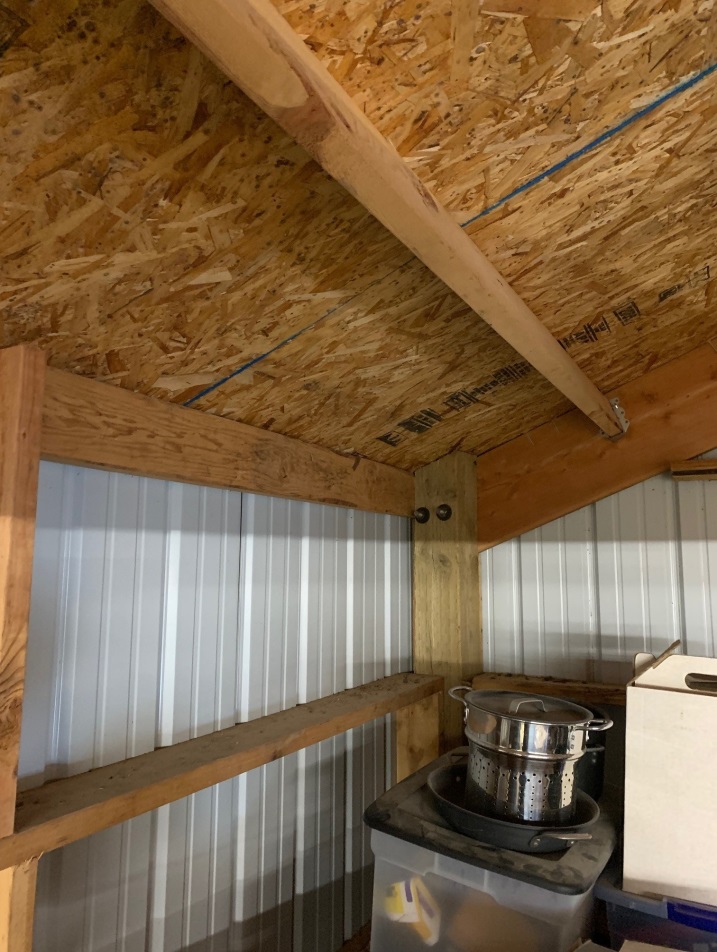
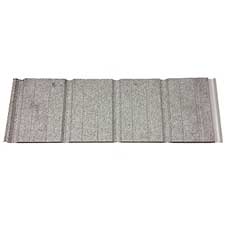 You need some provision for condensation control below roof steel – easiest would be to order roof steel with an Integral Condensation Control factory applied. In Tennessee you should not have a vapor barrier between steel ceiling liner panels and blown in fiberglass attic insulation. Placing a barrier on the underside of roof purlins does not appear to make a noticeable difference in performance of attic ventilation. Although you did not ask, you should have a well-sealed vapor barrier (6mil or greater) and R-10 EPS insulation under slabs (even in non-conditioned areas) to minimize potential for condensation on top of slab.
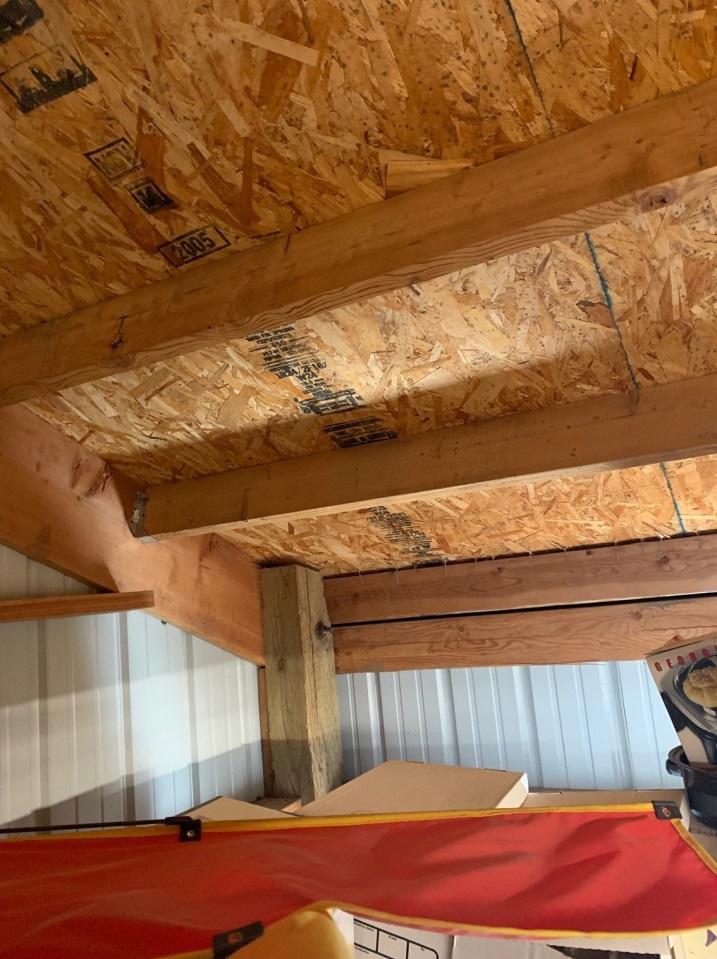

 Lake Charles is in climate zone 2A. 2018’s International Energy Conservation Code prescriptively mandates (for your zone) a minimum R-38 value for ceilings and R-13 for wood framed walls. This would require 5-1/2″ in roof and 2″ in walls. You could go with 2″ of closed cell directly to underside of roof deck plus 6″ of open cell, or 2-1/4″ of closed cell with 5-1/2″ of Rockwool as alternatives.
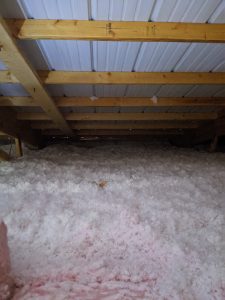 Blown in cellulose weighs roughly 2.5 to 3 pcf (pounds per cubic foot). Blown in cellulose will settle as much as 20% and can take up to two years to do so. Cellulose gives R-3.5 per inch, so your R-38 would be 10.86 inches thick (after settle), so I would plan on no less than 13.5 inches blown in to achieve your R-38. To be safe, I would assume 3.4 psf (pounds per square foot). Besides settling, blown cellulose does have another downside – in order to be fire retardant it is treated with borax or boric acid. Borates can be corrosive to steel in humid or moist environments, so you may want to consider a different insulation type, such as fiberglass. Fiberglass is also lighter weight, coming in at about a pound per cubic foot.
 “I am currently re-siding/re-roofing an existing pole building in order to match the exterior of the building I recently purchased from you. This building is roughly 32 x34 and the roof purlins are 2×6 on end roughly every 2 feet. I’m using Fabral’s grand rib 3 29ga for the roof and it will have fully vented soffit overhangs and a vented ridge cap. I am trying to figure out what I’m going to do for at least a vapor barrier under the roof steel, I see you seem to recommend foil faced bubble insulation but that is not very common in my area. I am seeing a lot of people using lamtec wmp-vrr (fiberglass insulation with a poly backing) 3″ thick and I believe they lay these wide rolls on top of the purlins and then place the metal roofing on top of that then screw down the roofing compressing the fiberglass insulation between the metal roofing and the purlins. Have you seen this style of insulating before? Do you think it is an acceptable way of doing it? I see as killing two birds with one stone. I may be insulating this shop in the future so if I do then the roof is already insulated plus I believe it acts as a vapor barrier which is the main reason to do it as I don’t want any condensation dripping down on the inside of the shop. I live in the Seattle area if that helps to know what my climate is like. Thanks in advance for your input.”
 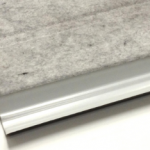 Our recommendation would be to order your roof steel with factory applied I.C.C. (
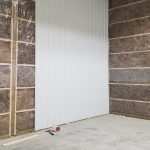 My recommendation would be to place a well-sealed WRB (Weather Resistant Barrier) between all wall framing and siding. Use commercial style bookshelf girts to create an insulation cavity
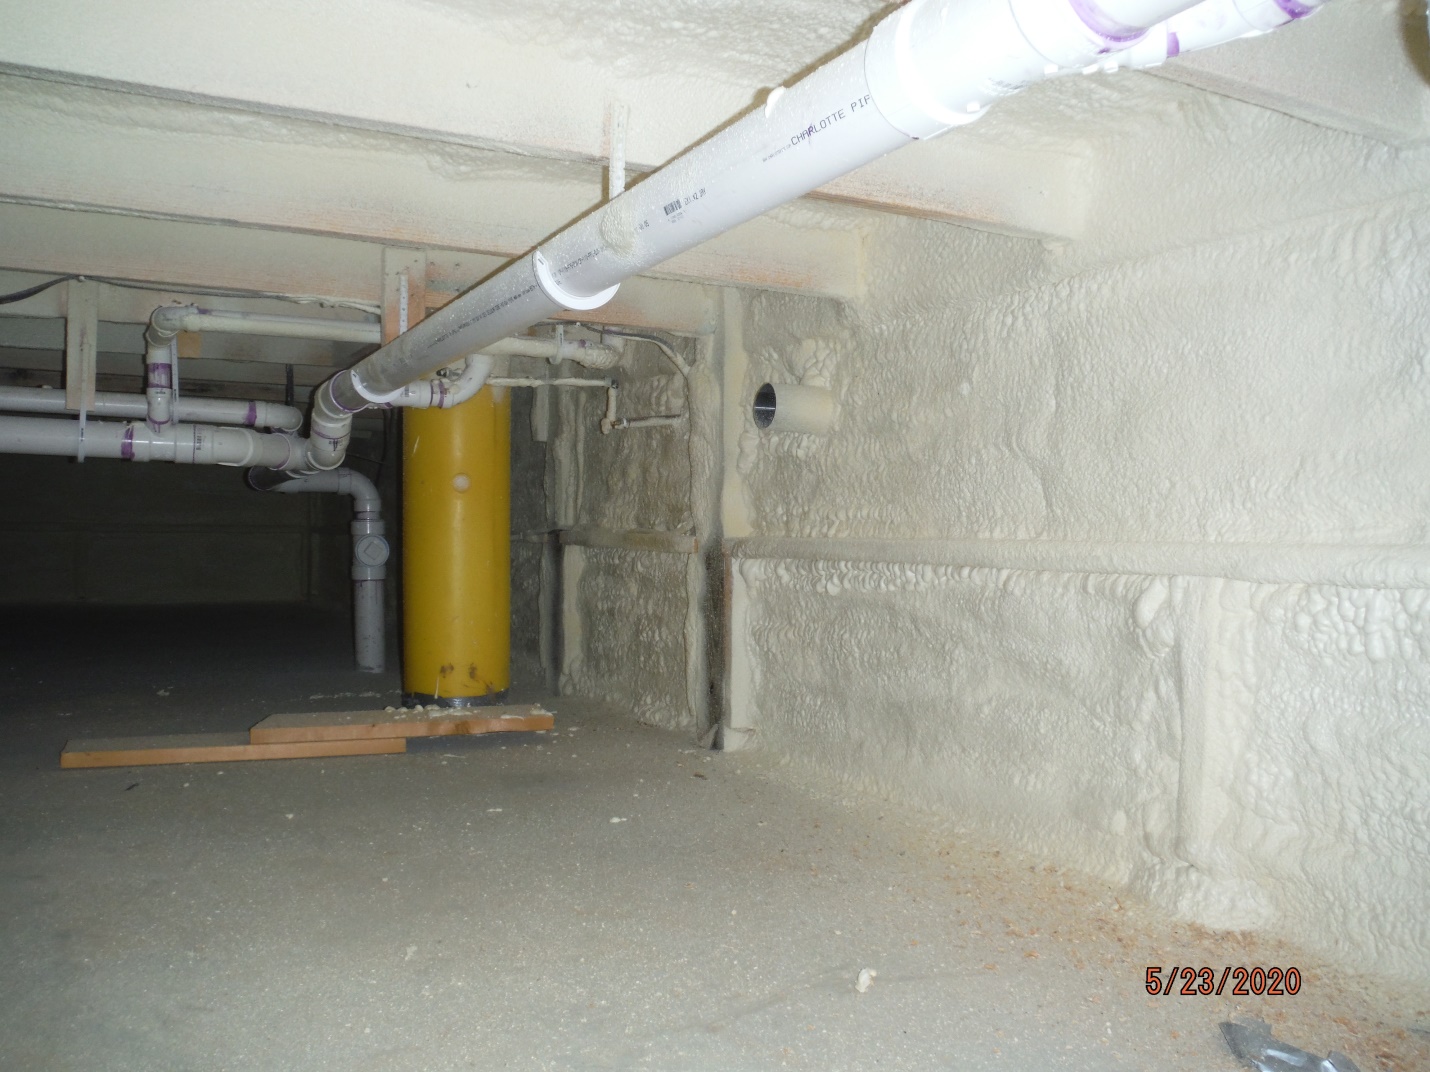


 Thank you very much for your kind words. My goal is to see to it people avoid making crucial mistakes so they end up with buildings best meeting their wants and needs, and be as ideal as possible – even if they are not Hansen Pole Buildings.
 This area can be reduced by finishing off the ceiling (with my personal preference being gypsum wallboard) and blowing in insulation above the ceiling – along with having a properly ventilated attic space. To give a rough idea of the volume of space differentials on a 40 foot wide by 60 foot long by 12 eave height building, having the most typical roof slope (4/12), about 25,000 finished cubic foot of area is to be conditioned with the ceiling, as opposed to nearly 34,000 cubic feet otherwise.
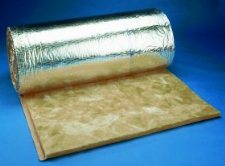 “I would like to line the entire building with MBI (2″ fiberglass with a WVPMR backing Metal Building Insulation)”
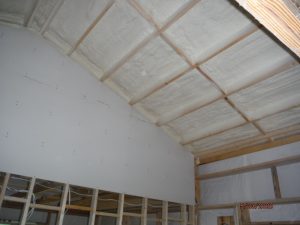
 For starters, keep in mind (by Code) spray foam insulation cannot be left exposed, it has to be covered with inflammable material – like gypsum wallboard. Gypsum Wallboard is not as flexible as steel, so it has deflection criteria which mean upsizing the roof purlins from 2×6 to 2×8, or changing the column spacing to 10’ on center(o.c.). In the end, when I priced it out the change to 10’ o.c. was less costly, adding only about $900.