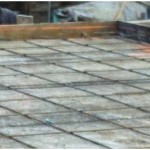
Replacing Rebar in Concrete Slabs on Grade?? Or not??
Hansen Pole Buildings client JOSH writes:
“I am wondering if I can substitute the #3 rebar 16″ O.C. for fiber concrete with a higher PSI rated mix for the 6″ cement floor? If so, would I be able to get a letter from your engineer stating the approval?”
 Cement is a binder manufactured from an iron, aluminum, silicon, calcium, and other substances mixture found in limestone, shells, chalk, clay, iron ore, and silica sand. These “ingredients” are heated to a very high temperature to create a rock-like substance then ground into an extremely fine powder called cement. (Cement is then mixed with water and aggregate to form concrete.)
· Modern cement was invented in an English bricklayer’s kitchen roughly 200 years ago.
· Cement can be mixed with water and used as a grout.
· Cement can be combined with plaster and water and applied to masonry surfaces to create a smooth surface. However, in some cases, applying this to masonry causes moisture to become trapped and cause damage.
Concrete is a cement, aggregate, and water mixture. Globally, concrete widely used construction materials in both residential and commercial applications. Its appeal includes components to make it are almost universally available as well as its strength and durability make it a practical and desirable building material.
· Aggregates such as sand, stone, and gravel make up about 75 percent of concrete.
· Water used to create concrete must be very clean, even drinkable.
· Aggregate materials, too, must be very clean, because any contamination by organic materials can compromise concrete strength.
Your proposed substitution would not be an equivalent. From years of a relationship with this engineer and a plethora of similarly asked requests, we can confidently say it would not be approved and would be charged for his time to say so.
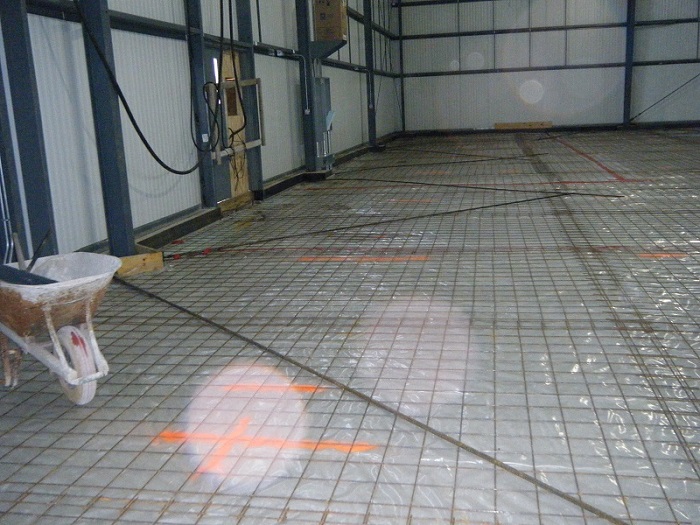
Fibermesh can enhance concrete slab’s tensile strength. It is a synthetic fiber reinforcement helping to improve concrete’s overall performance by distributing loads more evenly and reducing cracking. Here are some key points:
· Crack Control: Fibermesh helps control shrinkage cracks, this can lead to improved tensile strength over time.
· Load Distribution: Fibers help distribute tensile stresses throughout slab, reducing localized failure likelihood.
· Durability: Enhanced resistance to impact and fatigue can also contribute to slab’s effective tensile strength.
While fibermesh does not replace traditional reinforcement methods like rebar, it can be a valuable addition for improving concrete slab performance in various applications.
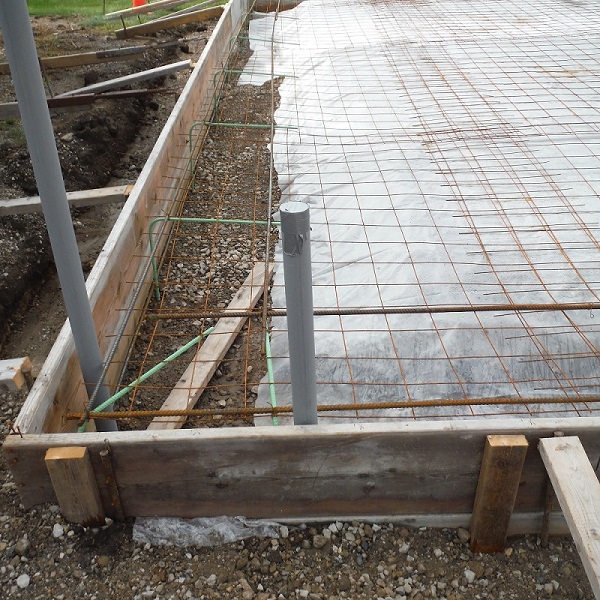
Increasing concrete psi does not replace a need for rebar in a concrete slab. While higher psi (pounds per square inch) concrete can enhance strength and durability, rebar serves a critical role in providing tensile strength and preventing cracking under tension. Here are some key points to consider:
· Concrete’s Weakness in Tension: Concrete is strong in compression but weak in tension. Rebar helps to counteract this weakness.
· Load-Bearing Capacity: Higher psi concrete can support more weight, but without rebar, it may still crack under tensile forces.
· Design Requirements: Building codes often specify both concrete strength and reinforcement requirements for safety and structural integrity.
In summary, while increasing concrete psi can improve performance, it cannot substitute for structural benefits provided by rebar.
 Growing up, I witnessed my Father forming and pouring four foot squares of concrete for our backyard patio. He would alternate them between smooth finish and exposed aggregate to create a variation in appearance. Oh how he made it look all so easy.
 Mike the Pole Barn Guru writes:
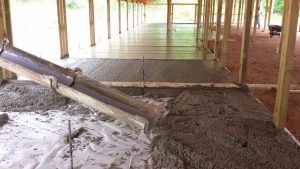 In the back of the barn, we are building a 1 story residence on slab. Ceilings will be about 8.5’ high with a loft above open to the barn. Slab is about 1,300 sq ft. Will be 4” thick in most places other than around the perimeter where I have it thicker as well as in areas for load bearing walls and point loads where beams/posts will be bearing to help carry the ceiling/loft span.
 DEAR ANDREW: Rather than trying to reinvent a wheel, it would probably behoove you to look into an actual polycarbonate greenhouse such as these
  DEAR JOSEPH: More important than concrete thickness will be what you have done to prepare your site. Properly prepared and well compacted, it is possible a four inch thick slab could do everything you need it to be. It might behoove you to thicken slab to five or more inches in zones of wheel travel and add 1/2″ rebar in these areas (less than five inches thick does not provide adequate concrete coverage for rebar to be effective).
 DEAR MARK: DeKalb county is in Climate Zone 3A. Here are my recommendations (all based upon 2021 IECC):
 Thank you very much for your kind words. My goal is to see to it people avoid making crucial mistakes so they end up with buildings best meeting their wants and needs, and be as ideal as possible – even if they are not Hansen Pole Buildings.
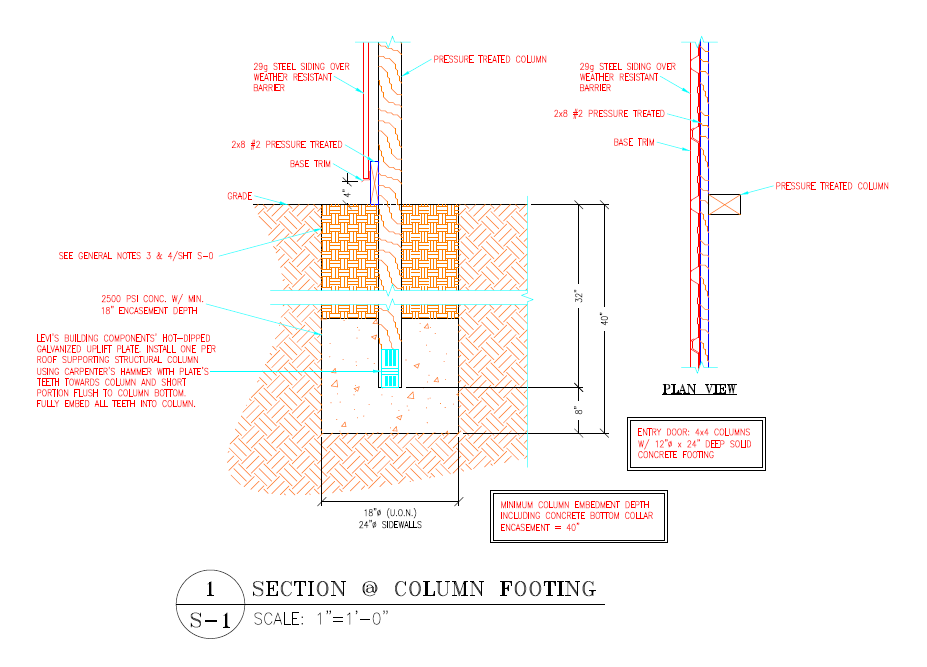
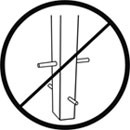 UNDERSTANDING HOW IT WORKS In order to anchor a post properly you need to make sure column and concrete are fused for life. Older techniques involve drilling holes though column and pounding in a piece of rebar. Or nailing a block or blocks of wood onto column. Either one becomes only as strong as materials used to join it.
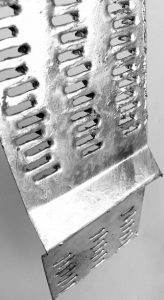 Using Truss Plate Technology Uplift Plate™ creates a stronger better alternative. Uplift Plate™ provides an adaption of this technology, simplifying processes while strengthening concrete to column bonds. Holding power increases by three times when using Uplift Plate™ compared to two ½ inch pieces of rebar.