Replacing Rebar in Concrete Slabs on Grade?? Or not??
Hansen Pole Buildings client JOSH writes:
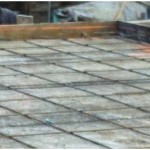
“I am wondering if I can substitute the #3 rebar 16″ O.C. for fiber concrete with a higher PSI rated mix for the 6″ cement floor? If so, would I be able to get a letter from your engineer stating the approval?”
 Cement is a binder manufactured from an iron, aluminum, silicon, calcium, and other substances mixture found in limestone, shells, chalk, clay, iron ore, and silica sand. These “ingredients” are heated to a very high temperature to create a rock-like substance then ground into an extremely fine powder called cement. (Cement is then mixed with water and aggregate to form concrete.)
· Modern cement was invented in an English bricklayer’s kitchen roughly 200 years ago.
· Cement can be mixed with water and used as a grout.
· Cement can be combined with plaster and water and applied to masonry surfaces to create a smooth surface. However, in some cases, applying this to masonry causes moisture to become trapped and cause damage.
Concrete is a cement, aggregate, and water mixture. Globally, concrete widely used construction materials in both residential and commercial applications. Its appeal includes components to make it are almost universally available as well as its strength and durability make it a practical and desirable building material.
· Aggregates such as sand, stone, and gravel make up about 75 percent of concrete.
· Water used to create concrete must be very clean, even drinkable.
· Aggregate materials, too, must be very clean, because any contamination by organic materials can compromise concrete strength.
Your proposed substitution would not be an equivalent. From years of a relationship with this engineer and a plethora of similarly asked requests, we can confidently say it would not be approved and would be charged for his time to say so.
Fibermesh can enhance concrete slab’s tensile strength. It is a synthetic fiber reinforcement helping to improve concrete’s overall performance by distributing loads more evenly and reducing cracking. Here are some key points:
· Crack Control: Fibermesh helps control shrinkage cracks, this can lead to improved tensile strength over time.
· Load Distribution: Fibers help distribute tensile stresses throughout slab, reducing localized failure likelihood.
· Durability: Enhanced resistance to impact and fatigue can also contribute to slab’s effective tensile strength.
While fibermesh does not replace traditional reinforcement methods like rebar, it can be a valuable addition for improving concrete slab performance in various applications.
Increasing concrete psi does not replace a need for rebar in a concrete slab. While higher psi (pounds per square inch) concrete can enhance strength and durability, rebar serves a critical role in providing tensile strength and preventing cracking under tension. Here are some key points to consider:
· Concrete’s Weakness in Tension: Concrete is strong in compression but weak in tension. Rebar helps to counteract this weakness.
· Load-Bearing Capacity: Higher psi concrete can support more weight, but without rebar, it may still crack under tensile forces.
· Design Requirements: Building codes often specify both concrete strength and reinforcement requirements for safety and structural integrity.
In summary, while increasing concrete psi can improve performance, it cannot substitute for structural benefits provided by rebar.
 There are days when I think what a joy it would be to be out building. I do truly love to build, smells of earth from freshly dug holes, lumber being taken out of a wrapped unit, sawdust – all of these give me warm, fuzzy nostalgic feelings.
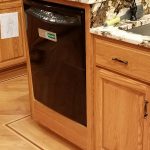 Kitchen – two dishwashers, two microwaves, two ovens, trash compactor. Separate side-by-side refrigerator and freezer units. A good sized pantry.
 DEAR POLE BARN GURU: I need a 3 1/4″ x 7 1/4″ x 12′ beam. Is this something you can help me with? JAMES in TUCSON
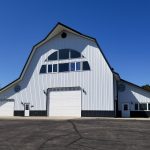
 DEAR POLE BARN GURU: Hello Mike, our building lot is pretty much flat. I’m using the elevation of our street at the curb as a zero reference point for our build. We are in a coastal area with occasional very minor flooding, so I would like to have the finished floor level of our radiant slab at sixteen inches above that elevation. The frost depth at this site is twenty four inches as per our building department. I’m wondering if a monolithic frost protected slab would be practical for our 56 x 48 monitor style house? I’m open to any suggestions that will allow me to use the radiant in floor heat. We’ll be requesting a design and quote soon as we still have a few more details to figure out on our floor plan. Thanks RUSS in TILGHMAN
 Growing up, I witnessed my Father forming and pouring four foot squares of concrete for our backyard patio. He would alternate them between smooth finish and exposed aggregate to create a variation in appearance. Oh how he made it look all so easy.
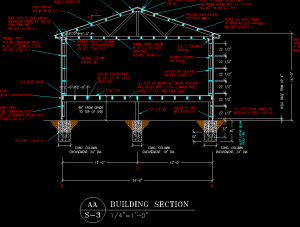
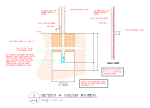 DEAR ELLIOT: Most post frame buildings are rectangular, with peaks (a point or gable) on opposite ends. Building codes require a minimum footing thickness of six inches, or an ICC-ESR approved alternative (like these
  DEAR NEIL: A far greater issue than weight of your building package (roughly 20,000 pounds total depending upon features) will be weight of trucks making deliveries (many weigh 32-40,000 pounds when empty). We have had many clients in a similar situation to yours and materials can often be offloaded onto a flat trailer you can pull behind a pickup, or similar, in order to get into challenging jobsites. Biggest concern will be 50 foot long roof trusses, as truss truck is going to be a semi pulling usually a 48 foot long trailer. You might want to consider making a donation to your local high school’s football team in order to have them physically pick up and carry individual trusses across bridge and to your site.
 DEAR BRENT: We have provided roughly 300 fully engineered post frame buildings to our clients in Colorado (many of these in Weld County). Types of foundations for post frame homes are nearly as varied as are our clients. We’ve done full or partial basements (including walkout or daylight) in block, poured concrete or ICF; crawl spaces (both conditioned and non-conditioned) as well as slabs on grade (both with heated slabs and under floor insulation or unheated slabs with perimeter insulation). Embedded columns are going to be least expensive and strongest, however we can also design and provide for cases with ICC-ESR approved wet set brackets. With most sites in Colorado, it is beneficial to involve a Geotechnical engineer to do a proper assessment of your site’s soil conditions and bearing capacity in order to assure best outcome. Often jurisdictions will make this a requirement. Here is some extended reading on slabs vs. crawl spaces:
  DEAR ASHLEY: A post frame home is certainly an excellent design solution for a slope building site. You do have some options (both of these I used on a personal building site of my own) – you can cut to create a ‘daylight’ or ‘walk-out’, or build on stilts.
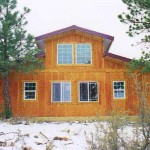
 DEAR DAVID: Even building with a slab on grade is going to require excavation, as you need to have footings either extending below frost line, or thermally isolated to prevent frost heaving. Horizontal girts, by themself, provide little or no resistance to racking. Properly engineered, your steel roofing and board and batten siding can provide adequate shear resistance.
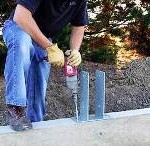 DEAR ALAN: There are plenty of folks out there who would gladly be willing to use dry set brackets to mount pole barn columns to your slab. In most instances, this is a less than adequate design solution as these brackets are not designed to withstand moment (bending) loads. (For extended reading, please visit
  “When a building of otherwise conventional construction contains structural elements exceeding the limits of Section R301 or otherwise not conforming to this code, these elements shall be designed in accordance with accepted engineering practice. The extent of such design need only demonstrate compliance of nonconventional elements with other applicable provisions and shall be compatible with the performance of the conventional framed system. Engineered design in accordance with the International Building Code is permitted for all buildings and structures, and parts thereof, included in the scope of this code.”
 With this said, Jefferson County is in Climate Zone 6A. As such I personally would follow International Energy Code Table R402.1.2 and place R-10 rigid insulation inside of my splash plank from top of slab (3-1/2″ up from bottom of splash plank) extending downward 48 inches. This can easily be done by trenching at time of construction and would be of benefit should building ever be heated (as most strictly non-agricultural buildings usually are at some point) and be a point in eventual resale.
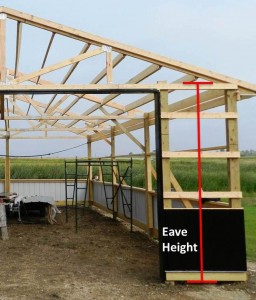
 Thank you for your kind words. Certainly any building could be designed for door openings, ceiling heights, etc., to be adjusted for top of slab on grade to be at any point. This would entail leaving greater amounts of splash plank exposed on exterior beneath siding in order to prevent concrete aprons, sidewalks, driveways, etc., from being poured up against wall steel. Some people find great amounts of splash plank being exposed to be aesthetically unpleasant however. By being consistent in design, it also allows for one set of assembly instructions to be used – rather than having to rely upon making adjustments for whatever custom situation individuals (or their builders) deemed their particular case.
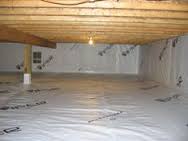
 If I went to slab on grade, I would recommend a minimum R-60 for ceiling, taking a 22 inch deep raised heel truss to allow for adequate depths of blown in insulation. (Read more about raised heel trusses here:
 Yet three feet is nowhere near standard. The City of Houston requires one foot of elevation above the 100-year floodplain. Many jurisdictions in Texas and other states require none. What seems like a simple, obvious safeguard raises tricky questions: How high is high enough? Who has to pay for it? And at what point does it no longer make sense to build in a place at all?