The Dual Splash Plank Dilemma
I’ve never been a fan of stacking splash planks. Even when they are center matched (think tongue and grooved) the two boards never seem to want to bend, twist, warp and/or cup the same direction leading to gaps. Gaps which lead to water getting through and spoiling an otherwise fun place to hang out doing man stuff (okay, girl stuff too) when the weather outside is frightening.
Mike the Pole Barn Guru responds:
Reader CRAIG in MONTGOMERY was less than enjoying this experience. Craig writes:
“What is the best method to waterproof the skirt boards (I have 2) so that snow melt does not leak into my building and on to the concrete slab. The lower green treat board was used as the concrete form then another was stacked on as the lowest exterior purlin. The seam is above ground and visible below the steel.”
 I hate it when this happens – basically the builder used the lower splash plank (aka skirt board) to screed the concrete off from then had to add the upper one in order to have something to attach the siding to. Now you are stuck with the challenge.
I’d look upon this as a multi part solution.
First – seal the leak, a bead of good caulking (check in at the ProDesk of your local The Home Depot for recommendations) placed along the seam will be a beginning. However, this can be seen, so…..
Second – If your building does not have continuous seamless gutters (read more here: https://www.hansenpolebuildings.com/2012/09/rain-gutters/), invest in them. Make sure the downspouts either go into a drain which takes the runoff away from the building, or have significant extensions at the bottom.
Third – If you did number three, add a snow retention system to your roof to keep sliding snow from taking off those brand new gutters. Most gutter companies will not warranty their installs without them.
Fourth – Make sure the grade at the edge of your building is no higher than the bottom of the lower splash plank and slopes away from there at a minimum of a 5% slope.
Do all of these things and the concrete slab inside of your building should be a dry and happy place.
 DEAR BRADLEY: My recommendation is for you to be building from a fully engineered set of building plans. When you are provided with a design frost depth from your Building Department, it is telling you the BOTTOM of the footing must be at or below the design frost depth.
 DEAR POLE BARN GURU:
 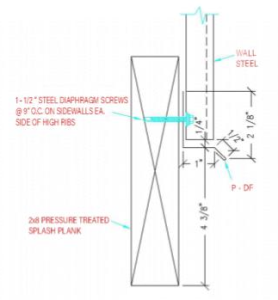 DEAR POLE BARN GURU:
 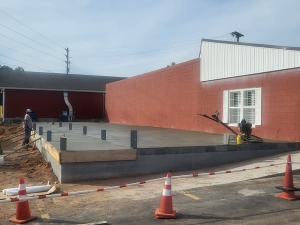 Thank you for your kind words. Certainly any building could be designed for door openings, ceiling heights, etc., to be adjusted for top of slab on grade to be at any point. This would entail leaving greater amounts of splash plank exposed on exterior beneath siding in order to prevent concrete aprons, sidewalks, driveways, etc., from being poured up against wall steel. Some people find great amounts of splash plank being exposed to be aesthetically unpleasant however. By being consistent in design, it also allows for one set of assembly instructions to be used – rather than having to rely upon making adjustments for whatever custom situation individuals (or their builders) deemed their particular case.
 DEAR
DEAR DEAR TOM: You’ll want to make certain your proposed 20′ x 30′ area will be adequate for all of your needs. You may find increasing building footprint to say 24′ x 36′ to not be significantly more expensive of an investment, whilst providing 44% more space. With every building we provide being a custom design to best fit client needs, we can certainly provide exactly what you are looking for. A Hansen Pole Buildings’ Designer will be in contact with you shortly.
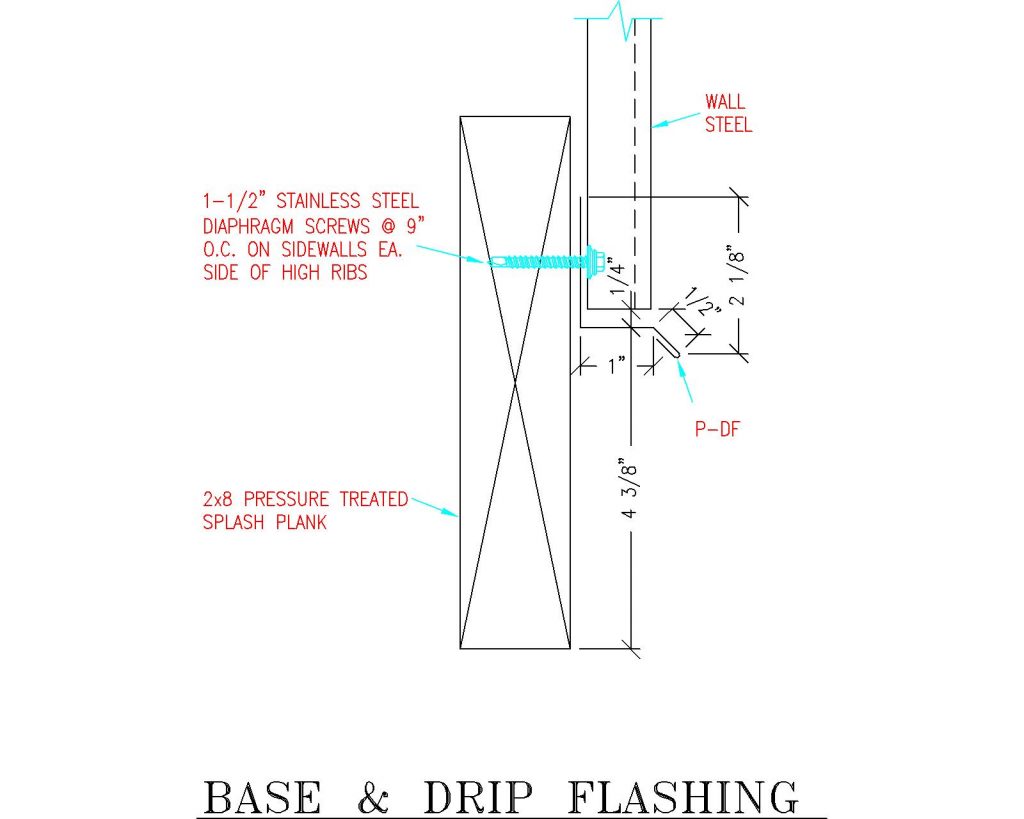
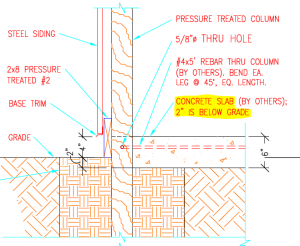
 First, a question is hiding a building exterior pressure preservative treated skirt board (aka splash plank). Simple answer is yes, building is already designed so this can be done. Skirt board should be placed per engineer sealed building plans, showing drip edged base trim bottom four inches above grade. This allows for a nominal four inch thick (finished thickness 3-1/2”) sidewalk, driveway, landing or other concreted areas to be poured against exterior of splash plank, coming in ½ inch below bottom of drip edge. Any such pours should be along a grade sloping sufficiently away from building a minimum slope of 2%, to keep water from pooling against building.
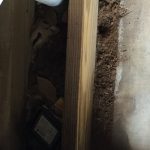 DEAR POLE BARN GURU: The pole building garage at the house I bought has two skirt boards. Can I remove the interior board to remove the dirt easier and put quikrete in its place. There is a 5” gap between the wall and the floor. The previous owner started putting quikrete in some places. Looks like the floor was put in before the building was built. KENNY in PARKERSBURG
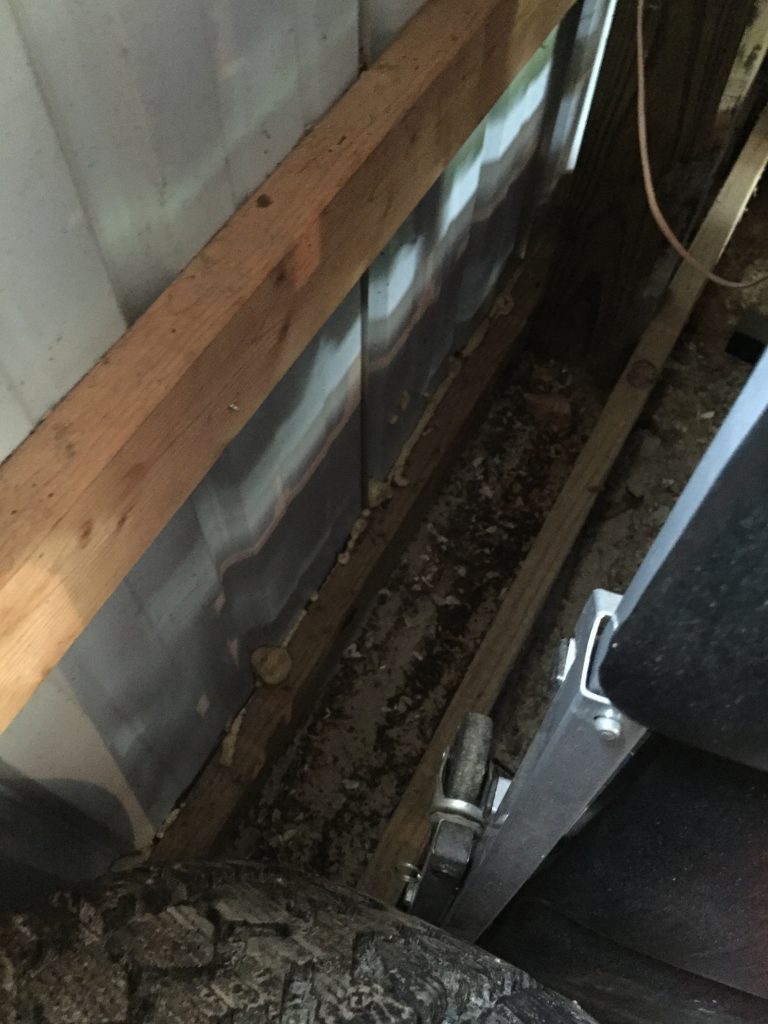
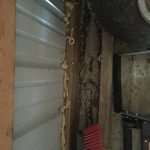 DEAR KENNY: The Hansen Pole Buildings’ warehouse has the exact same situation. The interior splash plank is doing nothing for you or your building, feel free to remove it.
 DEAR BILL: In short, yes – we can provide a building ready for you to side. What we most typically provide is 7/16” thick OSB over bookshelf girts 24 inches on center, with housewrap over the sheathing. If your false log siding can structurally provide resistance to shear, the OSB could be omitted, however this would not be my recommendation.
 DEAR POLE BARN GURU: Do you include foundation plans with your kits? JOE
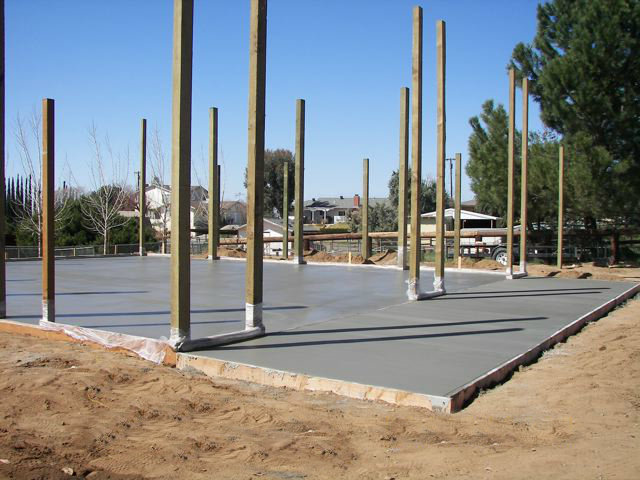
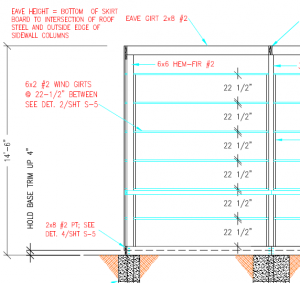
 Known also as a Bottom Girt, Grade Girt, Skirt Board or Splash Plank, it is a decay and corrosion resistant girt which is in soil contact or located near the soil surface. It remains visible from the building exterior upon building completion, and is normally two inches in nominal thickness.


