Tag Archives: drip edge

Steel to Plywood, Carport Over Tiny House, and Drip Edge at Fasia

This Wednesday the Pole Barn Guru answers reader questions about the possibility of adding steel roofing on top of existing plywood, some thoughts on a small metal carport over a tiny house, and the use of two-piece trims for fascia.

DEAR POLE BARN GURU: My garage has plywood on it already can I just put steel roofing right on to the roof or do I have to purlin it. ? No insulation in garage, rough wood with ridge cap. SUE in HINCKLEY

DEAR SUE: For best results, you will want to at least place 2×4 ‘purlins’ (stripping) on top of existing roof sheathing with 3-1/2″ face towards plywood. Screws into plywood or OSB only will have a limited resistance to uplift due to limited thickness of wood fibers to grip into. Make sure to use 30# felt or a synthetic underlayment on top of roof sheathing.


DEAR POLE BARN GURU: Hello, I just had a metal carport erected over my tiny house. The structure has 2″x2″ vertical supports every 45 inches. I would like to use high hat metal galvanized supports at the top of the skirting and behind the vertical board and baton style vinyl siding. My questions is if I notch the high hats so they recess passed the front of the vertical supports, so the top of the high hat is against the face of the vertical supports, will it destroy he integrity of the high hat that is needed for support to attach the vinyl siding to? The face of the high hat would have a screw through it and the tabs that exist from cutting the notch would be attached to the side of the vertical supports with a sheet metal screw also. R.J. in OSTEEN

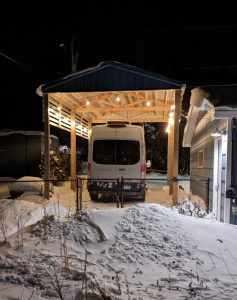
DEAR R.J.: In my humble opinion, you are plowing lots of time, energy and hard-earned cash into something unlikely to be worth your investment. These light gauge steel carports are generally referred to as “blow aways”, because so many of them do (although here in snow country, they usually collapse from snow first). You will need to reach out to whoever provided engineering for your original build, as they will be best to advise you as to what can and cannot be done. Just make certain to get their design solution as an engineer sealed plan specific to your site, so when it fails, you are not personally hung out to dry.


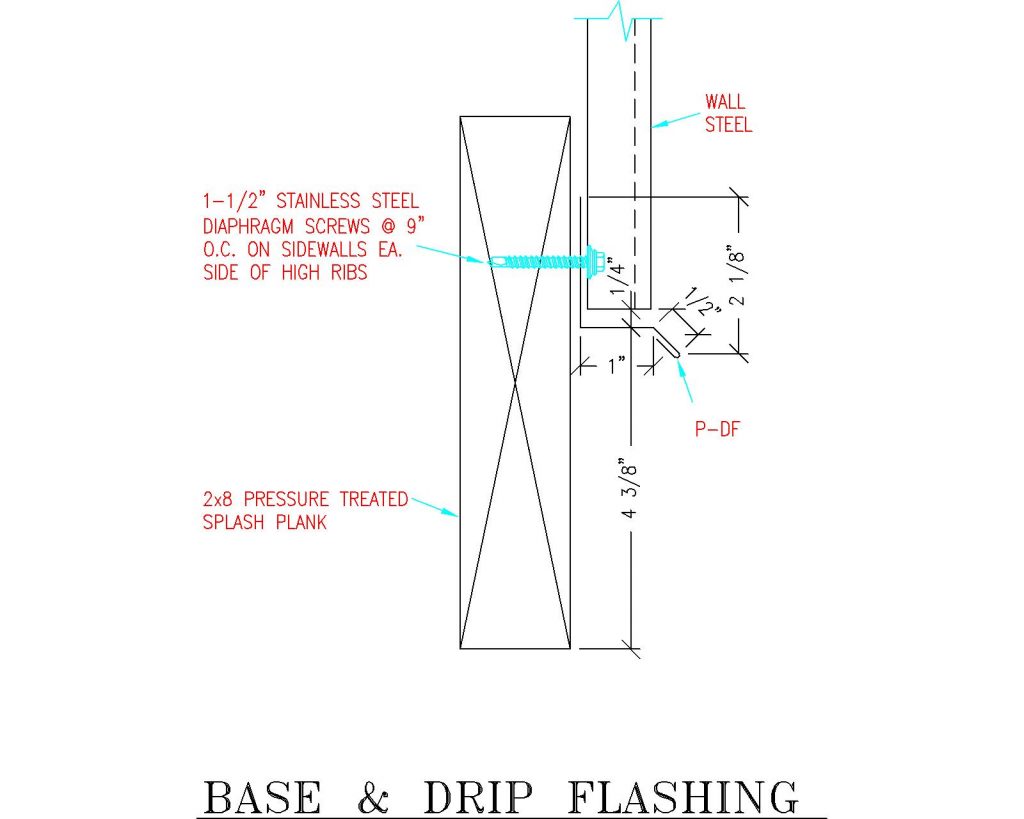
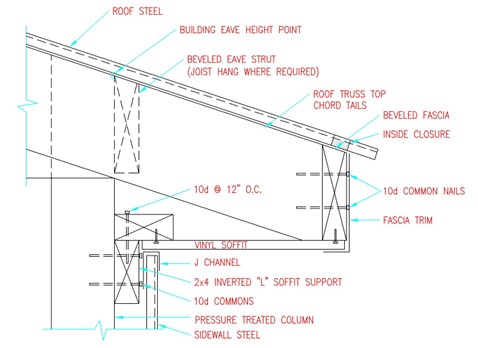
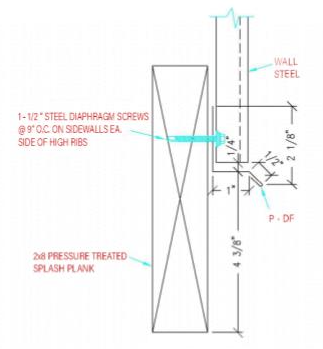
DEAR POLE BARN GURU: From the research I have done, it seems most pole barn builders use an eave trim overlapping a fascia trim at the eave overhangs. Everlast doesn’t have an eave trim, so I ordered drip edge. I was planning to apply fascia trim and overlap the drip edge, but the overlap is only about 1/4″. Will this work? Perhaps you could show a detailed sketch of this area. Thank you. DAVID in WESTFIELD

DEAR DAVID: Building Codes do not require a drip edge with steel roofing and most builders do not use one. We tried overlapping eave trims with an L trim years ago and could never get a decent look out of it. Steel companies seemingly struggled to get correct angle to fit on top of a beveled fascia purlin, eave trims were press broken so were not 100% identical, list was endless. We went to just ordering L trims at dimension of face of fascia purlin plus 1/2″ for soffit and has worked out well. I wouldn’t try to use your proposed drip edge/fascia trim combination as proposed, as even if you were to get it to lay smoothly, drip edge will be in way of gutters.

Eave Light Replacement, Base Drip Edge Height, and Two-Hour Fire Wall Design

This week the Pole Barn Guru answers reader questions about eave light panel replacement for panels used for solar warming, base drip edge height related to concrete height, and drawing for two-hour fire wall design.

DEAR POLE BARN GURU: I have a south wall on shed built 40 years ago which was set up for solar warming. The panels are starting to deteriorate, and I would like to replace them. It is a 14′ eave height 60′ long. The panels are screwed directly to the 2X6. They are a translucent material but not milky color as I see now. We painted the 2X6 black before the old panels were installed. I would like to replace them and was wondering what the best product might be. Thank you for any advice. STEVE in STONINGTON

DEAR STEVE: Your old panels were most probably opaque fiberglass (actually fiberglass reinforced plastic) panels, with roughly same rib configuration as typical steel siding and roofing. They allow for affordable light transmission into non-conditioned building interiors. Their downside is fiberglass panels have a very low tolerance for sun’s UV rays. This causes them to quickly degrade, turn yellow and become brittle, meaning they can crack and break easily. Besides this less than attractive ‘yellow’ color, light transmission decreases as yellow color increase. A far better option exists – polycarbonate panels. Polycarbonate panels (with trademark names such as Lexan) are very durable and have a high impact resistance. Polycarbonate panels have better light transmission characteristics than many kinds of glass even!


DEAR POLE BARN GURU: Building a pole barn and have a question. Where do you start the base angle height on the grade board, do you measure up 4″ from the bottom or should it be higher or lower than top of the concrete? MARY in FRANKFORD

DEAR MARY: Assuming top of your interior slab is set at 3-1/2 inches above pressure preservative treated splash plank bottom here is how base trim should be placed:


DEAR POLE BARN GURU: Where can I find a UL approved drawing of a 2 hour firewall design specifically for a pole barn to submit for a permit? How do I show continuous load path from the foundation to the roof system? Not planning to use stud walls but 2×6 yellow pine vjoint tongue and groove. STEVEN in JASPER

DEAR STEVEN: UL approved drawings for post-frame firewalls are available through the National Frame Building Association (www.NFBA.org). Engineer who is providing and sealing your structural building plans can provide continuous load path documentation for your Building Officials. Post-frame buildings do not typically use exterior stud walls and in order to meet firewall requirements, will have exterior (wide face to column) mounted girts each side of columns. Any tongue and groove lumber desired for interior finishes would need to be applied to inside face of interior layers of 5/8″ Type X wallboard, required to achieve needed fire rating.


Contractual Minimum Material Specifications

Disclaimer – this and subsequent articles on this subject are not intended to be legal advice, merely an example for discussions between you and your legal advisor.

Please keep in mind, many of these terms are applicable towards post frame building kits and would require edits for cases where a builder is providing erection services or materials and labor.

It never ceases to amaze me, when I read comments from people who have ordered a pole building kit, or a constructed building, and have little or no idea of how their building will go together, or what is or is not included. 

Wood Bending StrengthMINIMUM MATERIALS’ SPECIFICATIONS: (as applicable) Skirt Boards (splash planks): #2&btr pressure preservative treated to a minimum UC-4A specification. Structural Columns (those which support roof loads), pressure preservative treated to a minimum UC-4B specification. Spacing of wall columns is at Seller’s discretion unless specifically indicated on face of Agreement.

Wall Girts and Roof Purlins greater than 8′ in length, minimum #2&btr.

Prefabricated, engineered roof trusses, or rafters, at discretion of Seller, unless otherwise noted in the Agreement. On occasion, with sidewall overhangs, trusses may be shipped without tails – if so, appropriate lumber and hangers (as needed) will be furnished to field add overhangs. Lumber shall conform to the applicable grading agencies Standard Grading Rules. 

29 gauge steel roofing and siding. With steel roofing and siding and no sidewall overhangs, J Channel only shall be provided at tops of sidewalls as eave trim. No drip edge is included for steel roofing. Butyl tape sealant is supplied ONLY on roof steel overlaps for slopes of less than 3/12, unless by special order and indicated on face of invoice. 

Polycarbonate eave light panels are fastened with 1″ white screws nine inches on center. Ridge caps are fastened with roof steel colored stitch screws to each roofing high rib. 

Roof slope(s) not so specified in the Agreement are to be determined by Seller. Permanent roof truss chord bracing is as specified on third party E.O.R. sealed plans, which supersedes truss drawings. 

Sliding doors must be assembled on site, from provided components, will not seal airtight, do not include weather stripping and are not insulated. Sliding door jambs are ripped (by Purchaser) from Seller furnished 2×6 and are not pressure preservative treated as they are protected from weather when the door is closed.

Residential overhead doors may be approximately 2″ less in width and 1″ less in height than dimensions specified. Overhead door openings only are provided without vinyl weather seals. 

Pre-hung entry doors have 3-1/2″ jambs and may need to be installed swinging outward to facilitate full opening width. Doorknobs are usually positioned to be equidistant from top and bottom of doors. Seller is entitled to make substitutions of materials or equipment which Seller deems to be equivalent in performance to materials specified in the Agreement. 

At Seller’s option, roof radiant reflective barrier may be replaced by felt (or other similar barrier) over oriented strand board, without the need for a Change Order. When needed for shear wall requirements, Purchaser will not unduly prevent Seller from relocating any doors, windows, or other openings. 

Any shearwall or diaphragm blocking shall be as specified on third party E.O.R. sealed plans. Seller’s plans and instructions may deviate from component manufacturer’s installation instructions and manuals, due to judicious experience, and Purchaser acknowledges any such deviations are not cause for rejection or demands for extra or alternate materials.

Interior wall framing included only as specified on face of Agreement.

Eave height is the measure from the bottom of the pressure preservative treated skirt board (splash plank) (grade), to the underside of the roof steel (or other roofing material) at the outside of the sidewall double truss bearing columns. 

Interior clear height, allowing for a nominal four inch concrete floor, will be ten inches or more less than the eave height. It is the responsibility of Purchaser to determine if eave height, width and height of door openings, or provided doors, is adequate for Purchaser’s needs.

MINIMUM QUALITY SPECIFICATIONS: Steel roofing and siding may naturally dimple at through fasteners or ripple between supports, and as such, neither is a defect. Steel trims may be subject to oil canning, or other expansion and contraction conditions after installation – this is not a product defect. Although every good faith effort will be made, no guarantee is possible to exactly match any colors, to existing materials. Commercial overhead doors may be primed only, and as such, color variations and/or scratches are not defects.

PURCHASER SUPPLIED MATERIALS: Purchaser clearly understands Purchaser will under no circumstances be reimbursed for the purchase of any replacement materials for any reason (including suspected damage or shortage) without the prior written authorization of Seller, or Seller’s suppliers.

This one pertains specifically when a building is being erected by a contractor:

PURCHASER SUPPLIED LABOR: Any work performed by purchaser is strictly prohibited without Seller’s written consent, however Purchaser may supply his own labor, without adjustment of the agreement price, with the exception of the column holes “where applicable”. Should the Purchaser opt to excavate their own column holes, Seller will furnish Purchaser with a layout only, and Purchaser must properly locate the same. 

Column holes properly located, excavated and cleaned out by Purchaser, passing Building Department inspection will be credited at $10 per hole. For structures where columns are supported by brackets, purchaser to supply all equipment, and labor to properly embed into new concrete, except as otherwise noted. Purchaser is responsible for the timeliness and quality of all labor furnished by Purchaser, and is responsible for the performance of such work according to Seller’s schedule. Purchaser is responsible for Seller’s extra costs pursuant to section xx of this agreement, “change orders”, for extra costs incurred as a consequence of Purchaser’s failure to perform own labor in a timely manner without defect.

Correct Pole Size, The Better Building Size, and Drip Edge Placement

The Pole Barn Guru assists with questions about pole size, the “right” sized building, and a picture is worth a thousand words.

DEAR POLE BARN GURU: I have a question on a pole barn.  I’m thinking of 50 by 60 and about 14ft high or so.  On the 4/4 poles, how far apart should they be.  Also on the headers, that are at the top and go all the way around, are they usually 2 by 8?  Thanks, JOE in BOWLING GREEN

DEAR JOE: Hopefully you trust me enough to believe I will steer you in a correct direction, because you are heading in a wrong one. Only one right way exists to get answers you seek, to order yourself a post frame building kit package with plans sealed by a registered design professional (RDP – engineer or architect) specifically for your building (not a generic photo copy). Done right – there will be no need to have headers all around your building, as double trusses should be placed directly to bear upon columns, insuring best possible structural connections. As to columns, they will need to be much larger than 4×4, regardless of how far apart they are spaced.

DEAR POLE BARN GURU: I am trying to design a small hard apple cider production building. It does not need to have a retail portion; that is elsewhere at our farm; just a convenient 20×30 work room that can accommodate lots of washing/spraying down of equipment, temperature control, allow vehicle entry for loading/unloading, and some viewing windows for customers to see the process. Do you have some plans/designs/kit for such a building?

Thanks and kind regards, TOM in ROSE HILL

Hansen VisionDEAR TOM: You’ll want to make certain your proposed 20′ x 30′ area will be adequate for all of your needs. You may find increasing building footprint to say 24′ x 36′ to not be significantly more expensive of an investment, whilst providing 44% more space. With every building we provide being a custom design to best fit client needs, we can certainly provide exactly what you are looking for. A Hansen Pole Buildings’ Designer will be in contact with you shortly.


DEAR POLE BARN GURU: 14 foot side wall panels with 2×8 skirt, what is my measurement on the skirt either from top of skirt or bottom to install my rat guard, I will have a 12 inch overhang (eaveside) using fj channel. CARL in NEWAYGOl

DEAR CARL: