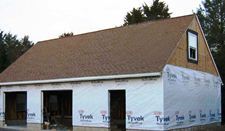
Aircrete for Post Frame Cladding
Reader KRISTOPHER in GARDINER writes:
“Can I use pre-cast aircrete panel in lieu of metal siding for the walls and roof?”
Mike the Pole Barn Guru responds:
 It may be possible to use aircrete in lieu of steel roofing and siding, however it would need to be strong enough in bending to span from column-to-column on walls and between trusses on a roof. Product weight would need to be accounted for to adequately design supporting members and attachments could become problematic. All of these considerations could result in some significant investment into engineering costs, perhaps making this system unaffordable.
Aircrete is simply concrete with bubbles. Regular concrete we use for our roads, basements, and foundations traditionally is made from Portland cement. This combination hardens into a highly dense material with impressive compressive strength. Addition of iron rebar adds additional structural integrity.
Aircrete reduces or eliminates traditionally used aggregate. Instead of including gravel or other coarse aggregate types, aircrete relies on incorporating premade foam pieces to essentially add bubbles of airspace within a concrete mix. Instead of foam, another option is mixing certain types of reactive substances into a wet cement mix. This chemical reaction creates gas bubbles within a cement and water slurry to harden with empty cavities.
There is no set recipe for aircrete, as exact amounts of foam or air bubbles depend on how aircrete will be used. Generally, aircrete with higher proportions of foam or air bubbles will offer less compressive strength but higher insulation capacities. Builders and homeowners might decide to use some traditional aggregate like gravel in aircrete applications requiring structural strength.
Aircrete offers many traditional concrete benefits with added properties to enhance sustainable and energy-efficient homes. If you have ever been inside an inadequately sealed cement and cinder block home, chances are it felt cold and damp. Aircrete offers superior insulation properties due to foam and air bubbles built into concrete itself.
As with regular concrete, aircrete can be formed into blocks for easy application or poured into forms for walls and other interior and exterior purposes. In one sense, aircrete is similar to ICFs (insulated concrete forms). It increases the insulation capacity of traditional concrete. Unlike ICFs, however, aircrete doesn’t require separate polystyrene foam blocks or other rigid insulation, subsequently connected with space in between for pouring a concrete wall.
Other benefits of aircrete for a sustainable home include:
- Relatively inexpensive
- DIY friendly for innovative homeowners and home builders.
- Good compressive strength
- Self-leveling
- Improved acoustic properties
Aircrete is an innovative approach to “greening up” traditional concrete. However, in some cases, use of aircrete can lead to certain disadvantages. When high densities of foam are included, aircrete can become brittle, and chipping can occur. This type of aircrete will have limited compressive strength and could not be load-bearing.
Homeowners should understand aircrete and concrete are fundamentally different construction materials with different uses. Concrete incorporating natural aggregate has different performance characteristics. Concrete is a great alternative wherever high levels of compressive strength are needed. Where increased insulation is a concern; however, aircrete offers superior advantages.
Aircrete drastically improves upon insulation properties of regular concrete. According to one analysis, aircrete might be able to offer R-6 per inch insulation values. Blown cellulose, for comparison’s sake, only offers R-values of 3.7 per inch. A home built with six inch thick aircrete blocks could potentially achieve an R-value of 36.
Aircrete is also water-resistant and fire-resistant. Portland cement in aircrete offers necessary water resistance. Foam or air bubbles provide an added layer of protection against moisture. Like all cement structures, specific vapor barriers can also help reduce condensation penetrating your home. For homes located in areas where wildfires are an increasing threat, aircrete exteriors can diminish vulnerability and increase overall resiliency.
Aircrete is most often used for exterior and interior walls. However, aircrete can also be used for several other home applications, such as precast blocks and panels and concrete slabs for an insulated flooring system. In some cases aircrete is used for poured roofs, increasing insulation capacity of ceilings and attics where heat tends to escape from homes.
Cost of building with aircrete will depend on several factors, including thickness of application, cost of Portland cement and how much foam aggregate is included. In general, however, aircrete will be much less expensive than building with regular concrete.
 DEAR POLE BARN GURU: Hey I’m on the starting process of building a barn and wanted to ask your opinion on something. The barn I’m building is a 40x60x16 on a 2ft block wall. My question is what is the strongest way to attach my 8×8 post to my sill plate? I’ve looked at many others and it looks like they just “toenailed” the post into the sill plate but I had thought about using these hurricane straps instead…. What do you think?
 DEAR POLE BARN GURU: How can I have a 26 foot span 12 feet off the wall with no poles underneath for an open kitchen areas like this? DOUG in TERRE HAUTE
 DEAR POLE BARN GURU: Do you do site-specific engineered plans for Panama City Florida? I’m trying to find someone to do our plans, quote them, and erect the building so that we can GC the rest ourselves. Can you help? Do I just tell you what I’m looking for to get a quote or how does it work? BRITTANY in PANAMA CITY
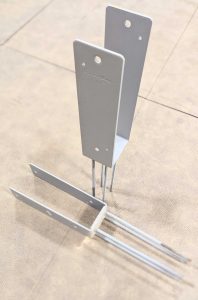
 For extended reading on wet-set brackets
  DEAR POLE BARN GURU: Can a pole barn be used to create a backyard ADU (accessory dwelling unit)? My city allows them with rules and specifically said hoped to use modular to decrease construction noise but it seems that this might be a similar decrease in noise. However the issue is size I need it to be 400 which is the current minimum my house is 700 so my backyard is around 40×60. I would actually prefer a two story which could then have a smaller footprint perhaps 250-300 sq ft on each level with a simple porch lift between with an exterior staircase as back up and fire escape, or a two car garage with the ADU as the second floor. The ADU would become my home as I need a wheelchair accessible space. thank you. KRISTINE in GRAND RAPIDS
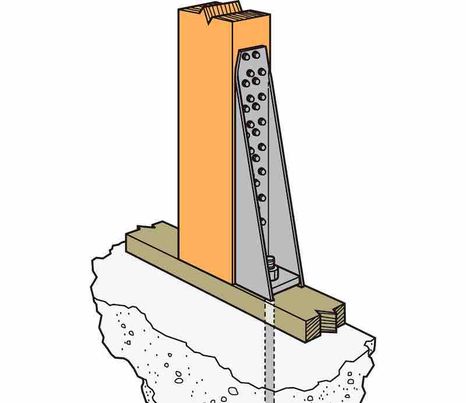
 DEAR POLE BARN GURU:
 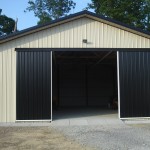 DEAR JEFF: I would have ditched lumber frames for prepainted metal frames and been done with it, plus metal will never twist and warp like wood and your door frame would be significantly lighter (not too late to regroup). Still not convinced? Any steel roofing and siding roll former can bend trim to match any dimensions, so you can have created exactly what you are looking for.
 DEAR POLE BARN GURU:
  DEAR JOEL: Hopefully your ‘guy’ bought a fully engineered building, designed for R-3 Occupancy Classification and Use, Risk Category II with deflection limits of L/240 or greater for walls and truss supported drywalled ceilings. All of these will be specified on this building’s engineered plans. If you do not have a set of them, your Building Department may have them on file.
 DEAR POLE BARN GURU:
  DEAR BEN: Thank you very much for your kind words. Due to liability issues we are unable to offer this sort of service. You might try reaching out to one of our independent third-party engineers John Raby (john@raby-assoc.com) to determine if he would have an interest in assisting you.
 2019’s average home had 2594 square feet of finished space and a sales price of $485,128. Without lot costs, general contractor’s overhead and profit actual construction costs were $296,652 ($114 per square foot).
 DEAR
DEAR DEAR TOM: You’ll want to make certain your proposed 20′ x 30′ area will be adequate for all of your needs. You may find increasing building footprint to say 24′ x 36′ to not be significantly more expensive of an investment, whilst providing 44% more space. With every building we provide being a custom design to best fit client needs, we can certainly provide exactly what you are looking for. A Hansen Pole Buildings’ Designer will be in contact with you shortly.
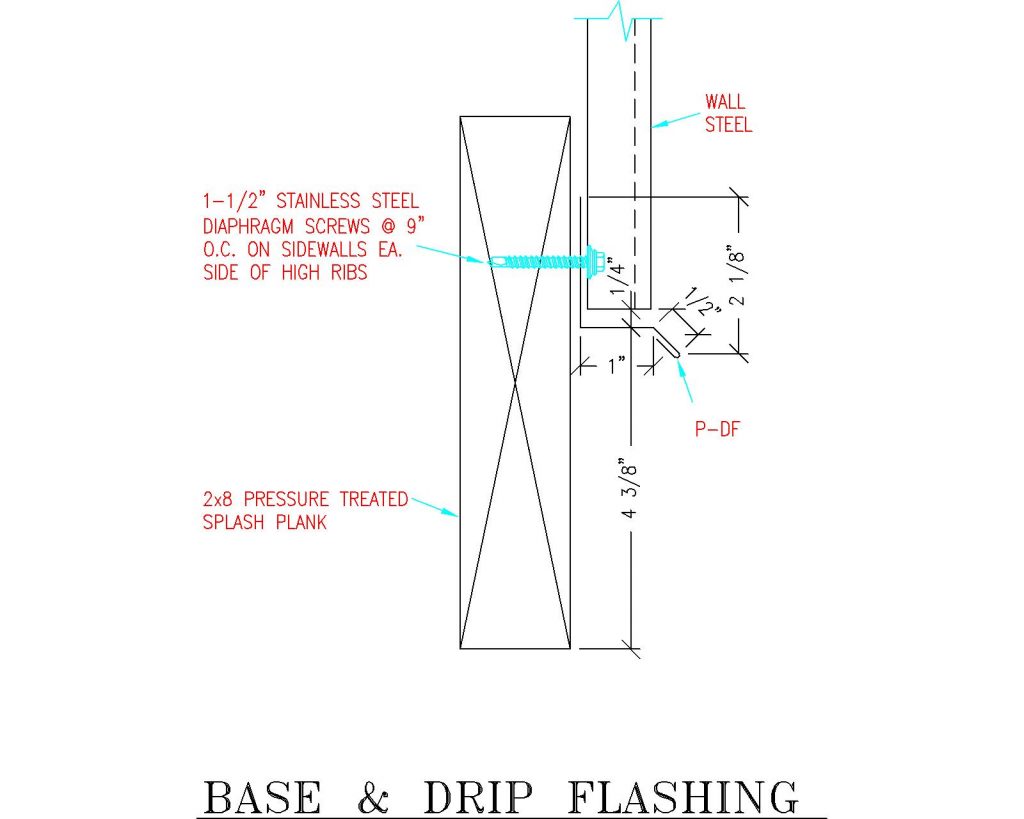
 DEAR MICHAEL: Regardless of design solution chosen, it would prudent to have your existing foundation reviewed by a competent local engineer for adequacy. In many areas frost depths are deeper than your foundation, rendering it unable to be reused. There are dry set brackets designed for attaching post frame building columns to existing concrete, however our third party engineers will no longer certify them for use as they will not resist moment (bending) loads. Provided your concrete has sufficient depth and strength, you might be able to have an engineer of your choice specify a connection of columns to concrete.
  I noticed on your web site you have some buildings in Wyoming. Do you use vendors for regional distribution? I can’t imagine shipping everything from MN. JOHN in AFTON
 DEAR MICHAEL: Second part of your question gets answered first, it would only need to be pressure preservative treated if wood was in contact with concrete. As most commonly available timber sizes are pressure preservative treated, you might very well find treated timbers to be both more readily available and more cost affordable.