This Wednesday, the Pole Barn Guru answers reader questions about use of hurricane straps to anchor 8×8 posts to sill plate, the possibility of adding a beam to old a loft for open concept, and if we do site specific engineering for Panama City Florida- yes.
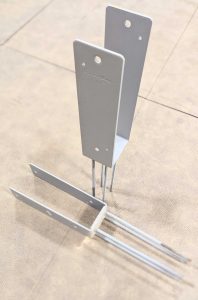 DEAR POLE BARN GURU: Hey I’m on the starting process of building a barn and wanted to ask your opinion on something. The barn I’m building is a 40x60x16 on a 2ft block wall. My question is what is the strongest way to attach my 8×8 post to my sill plate? I’ve looked at many others and it looks like they just “toenailed” the post into the sill plate but I had thought about using these hurricane straps instead…. What do you think?
DEAR RICKY: Pour wet set brackets into the top of your block walls, like these: https://www.hansenpolebuildings.com/2019/05/sturdi-wall-plus-concrete-brackets/
 DEAR POLE BARN GURU: How can I have a 26 foot span 12 feet off the wall with no poles underneath for an open kitchen areas like this? DOUG in TERRE HAUTE
DEAR DOUG: You can run an LVL beam from wall-to-wall or use prefabricated wood floor trusses. Your building’s engineer will need to adjust diameter and depth of footings under columns appropriately. For extended reading on floor trusses: https://www.hansenpolebuildings.com/2020/01/floor-trusses-for-barndominiums/
 DEAR POLE BARN GURU: Do you do site-specific engineered plans for Panama City Florida? I’m trying to find someone to do our plans, quote them, and erect the building so that we can GC the rest ourselves. Can you help? Do I just tell you what I’m looking for to get a quote or how does it work? BRITTANY in PANAMA CITY
DEAR BRITTANY: Every building Hansen Pole Buildings provides comes with site specific engineered structural plans and verifying calculations. We are not, however, contractors, so the great majority of our clients erect their own building shells following our detailed step-by-step instructions. We would appreciate the opportunity to participate in your new home. Please email your building floor plans and elevation drawings (even if rough or just photos), site address and best contact number to our Design Studio Manager Caleb@HansenPoleBuildings.com 1(866)200-9657 Thank you.
 DEAR DAN: I surmise your headers (aka truss carriers) are LVLs. While I personally prefer to place ganged two-ply trusses directly into notches in columns, in cases where truss carriers are used, I like to see them fully notched into columns, rather than having to rely upon connectors (whether nails, bolts or a combination) to resist gravitational (snow and dead) loads. Fully notching in interior carrier, also provides for an interior surface where no members project inside plane of columns, making for ease of adding an interior finish. In either case, I would cut my notches in only after columns have been raised and set. This assures me bottoms of all notches are at an exact height.
 It would seem as though column notches can be on the same side in all bays except 1, due to the end wall trusses needing to be notched on the outside to be flush with outside building edge (which would make the end wall notches face in opposite directions). Is this correct? MATT in SPOKANE
  DEAR MICHELLE: Amanda (Hansen Pole Buildings’ financing wizardress) received a notification from you filling out our finance questionnaire; however, was waiting to get back to you until your quote was complete so we would have a better idea of how much you would need to borrow.
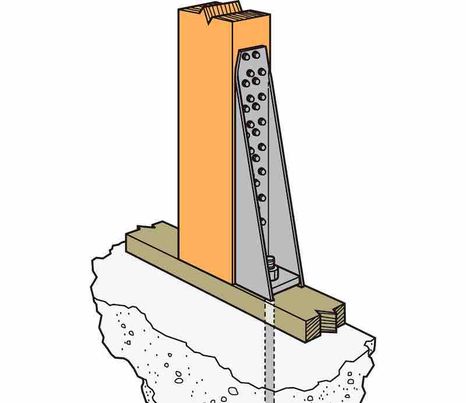
 DEAR GREG: In your climate zone I would typically not recommend using spray foam other than as two inch thickness applied directly to steel roofing and/or siding in order to control condensation. This does result in having to mechanically control humidity as your building will now “dry” to inside. As standing seam steel does not provide shear resistance, it must be installed over solid decking – and you can spray foam directly to this decking underside.
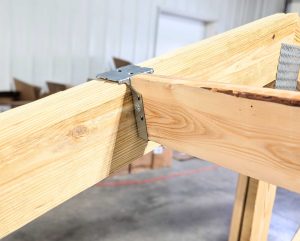 DEAR MIKE: Absolutely do not cut or notch into your end rafter. You need to lower end rafters to allow purlins to go over top of end rafters without any notching.
 In most instances, you are better served with sidewall columns spaced every 12 feet. Use a true two-ply truss, aligned with every sidewall column (


