Tag Archives: Siding

A Shouse, Adding Tin to Block Siding, and Truss Carriers

This week the Pole Barn Guru tackles the subjects of building a shouse with RV storage, how to add tin to block siding, and truss carriers vs notched posts.

DEAR POLE BARN GURU: Good morning!

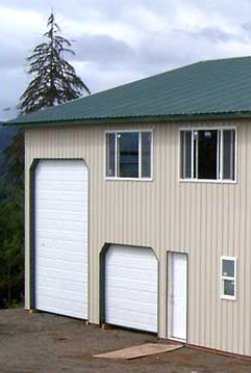
My wife and are currently going to market with our home in Lakeville and are considering our next steps.  We have a great deal of interest in exploring an affordable option for our current needs which include about 1,500 SF of residential space and then remaining storage for a 45’ motorcoach, our vehicles/toys, shop and an above ground “block” safe room.  As we have no idea what the cost, or practicality, of this option is we felt it would be a good first step to determine your design services and simply what you have to offer in terms of options.

We do not have a piece of land acquired (though it would likely be in S/SE MN) as we need to first determine the viability of the option and then get a better sense for what the area counties allow/require.

Hopeful you can assist! MITCH & WENDY in LAKEVILLE

DEAR MITCH AND WENDY: Thank you for your interest! Our team members at Hansen Pole Buildings are barndominium experts. Basically your only limitations will be imagination, budget and available space.

Links in this article should answer many of your questions: https://www.hansenpolebuildings.com/2019/10/show-me-your-barndominium-plans-please/.


DEAR POLE BARN GURU: I came across this sight and found it very informative.

I have a question:  I have a 8′ block foundation with 6′ above the block that is tinned. I want to tin the block to match.

Tinning is not the problem but what or how do I fasten the tin to the block?

Type of fasteners work best? Later, BRIAN

DEAR BRIAN: Thank you for your kind words. Your steel siding should be screwed onto 2×4 horizontals. These 2×4 can be attached to your block using Tapcon concrete screws. Attach steel siding to 2x4s using 1-1/2″ powder coated diaphragm screws.


DEAR POLE BARN GURU: Should the top boards be on the inside and outside? MARK in LAWRENCEBURG

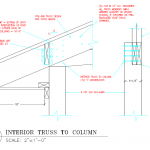
DEAR MARK: By “top boards” I will guess you are placing ‘truss carriers’ (headers) between columns in order to support trusses. In my humble opinion it would be best to utilize a two-ply ganged prefabricated wood roof truss at each column (notched in) and eliminate carriers entirely. It is far cleaner structurally as you eliminate numerous connections and if a failure is going to occur, it is most often at a connection.

In direct answer to your concern, placement of your top boards and their proper attachment will be called out for on your engineer sealed building plans. Should you not be building from an engineered plan, it would be prudent to invest in one’s service now, before a crucial design flaw becomes a failure.

For extended reading on truss carriers, please see: https://www.hansenpolebuildings.com/2018/10/what-size-truss-carriers/


Moving a Building, Moisture Issues, and Siding Options

This week, the Pole Barn Guru discusses moving a building, a building with moisture issues, and siding options other than wainscot.

DEAR POLE BARN GURU: We have a 50 year old Morton machine shed 45X90X12. The posts and trusses are in excellent condition. The roof steel needs to be re-screwed and painted . The side wall steel probably needs to be replaced. The big problem with the building is its location. Our grain drying and storage has grown over the years and now we use semis instead of straight trucks and wagons. the machine shed blocks the grain dump so we have to back every semi in to unload and load. If we could move the shed about 60 feet north and 15 feet east we could still get a lot of use out of it. Otherwise we will probably take it down. Is moving it a practical idea to pursue? TED in DEXTER

DEAR TED: Sadly I just cannot see a scenario where moving this building becomes truly practical. If you have lots of free time, you could completely disassemble it and rebuild in a preferable location. However, you are reusing materials and things never seem to fit back together as tight as they did originally. If you are not going to rebuild, you might consider offering it to someone who will take it down and haul it away – it would save you time and effort and someone else can have headaches of teardown and rebuild.


DEAR POLE BARN GURU: I had a 30×40 built 14 feet high. Vapor barrier was used, insulated walls and vapor shield on top of the trusses, Vented over hangs and a ridge vent, insulated ceiling and metal on the walls and the ceilings.

Whenever I pull in my vehicles wet and leave them in there I get moisture all over everything. Now I am noticing green mold on the plywood work bench and in some various spots on the loft I built. I do not have any heat in there as I was not concerned about it being real warm in there, but I am wondering if am going to have to heat it to get rid of the moisture?
Any help would be appreciated. GREG in ELMA

DEAR GREG: Your steel liner has created a surface trapping any and all moisture inside of your building. In my humble opinion you have just one more example of why steel liner panels are not a good design solution for most buildings.

Just water alone, dripping from your vehicles, will probably not add enough moisture to create your described situation.

Step number one in solving your challenge – unless you know a well-sealed vapor barrier exists underneath your building’s concrete floor, use a good concrete sealer upon it. This might be a product you should consider: https://www.hansenpolebuildings.com/2018/11/siloxa-tek-8505-concrete-sealant/.

Unless you have taken steps to prevent moisture from migrating through your concrete slab, adding heat will merely draw even more water up through this slab into your building.

Secondly, you need to get moisture out of your building by adding a powered exhaust vent, a dehumidifier or both.

DEAR POLE BARN GURU: Another design question from me, I have too much planning time on my hands. With my house I made the mistake of having the vinyl siding too close to grade and it is showing lots of damage from typical yard maintenance, i.e. trimmers. I want to do a wainscot on my pole barn and probably correct the problem with my home siding at the same time. Not a huge fan of the metal siding for wainscot, not enough style contrast for me. Ideally I would do a stone veneer, but that is pricey. I am considering all options at this point. Stucco, fiber cement board, wood, even toying with the idea of veneering the outside with concrete pavers. Do you have any experience gems to share or any out of the box ideas? Thanks. ROB in ANNAPOLIS

DEAR ROB: Even with Code mandated six inch minimum hold up above grade for vinyl siding, it experiences a significant amount of damage just as you describe. Our house has steel wainscot and it has performed admirably other than where our daughter-in-law drove a riding lawn mower into it.  All it took to repair was removal and replacement of a few short steel panels.

Given your preferences, I’d recommend you look into products such as

https://www.hansenpolebuildings.com/2018/10/mortarless-masonry-exterior/

or Thin Brick (http://thinbrick.us/).


Double Skirt Boards, Siding Options, and Foundation Plans

Today’s blog discusses double skirt boards, siding options and foundation plans.

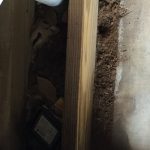
DEAR POLE BARN GURU: The pole building garage at the house I bought has two skirt boards. Can I remove the interior board to remove the dirt easier and put quikrete in its place. There is a 5” gap between the wall and the floor. The previous owner started putting quikrete in some places. Looks like the floor was put in before the building was built. KENNY in PARKERSBURG


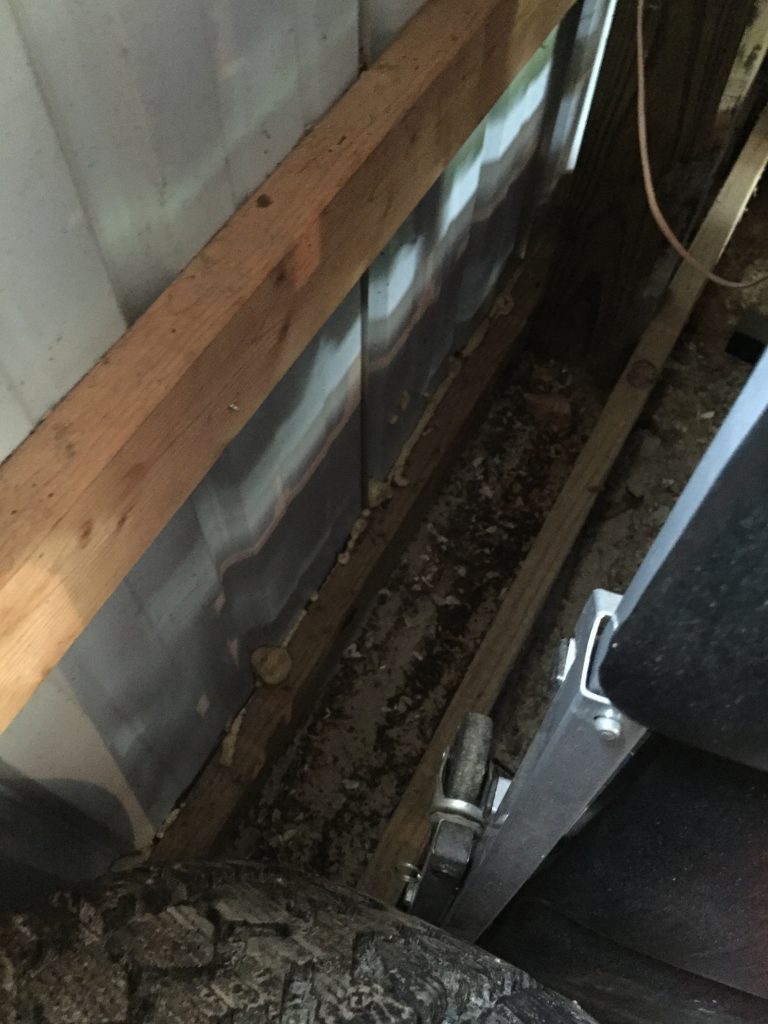
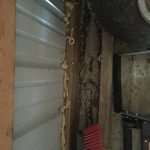
DEAR KENNY: The Hansen Pole Buildings’ warehouse has the exact same situation. The interior splash plank is doing nothing for you or your building, feel free to remove it.


DEAR POLE BARN GURU: Can the steel exterior panels be omitted? I plan to install log siding and false log corners to match the appearance of my new log home.
Thanks BILL in WILTON

Roof Only PorchDEAR BILL: In short, yes – we can provide a building ready for you to side. What we most typically provide is 7/16” thick OSB over bookshelf girts 24 inches on center, with housewrap over the sheathing. If your false log siding can structurally provide resistance to shear, the OSB could be omitted, however this would not be my recommendation.


DEAR POLE BARN GURU: Do you include foundation plans with your kits? JOE
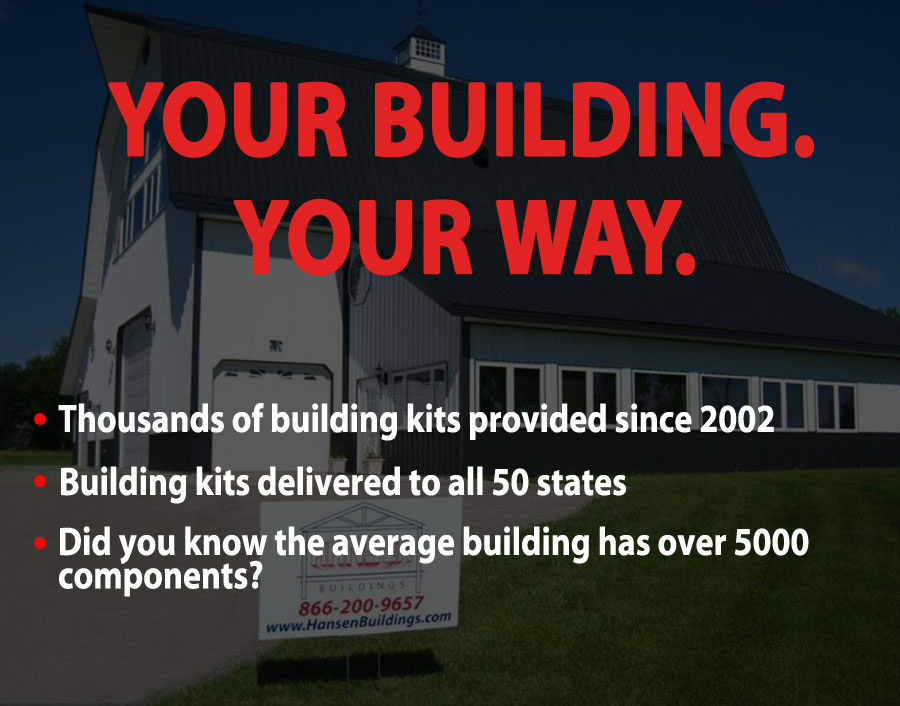
DEAR JOE: All Hansen Pole Buildings come with complete engineered foundation plans based upon your specific building, upon your site and reflecting the soil bearing capacity confirmed by you.


Materials Mastery with the PBG!

DEAR POLE BARN GURU: Hi: I have a design and will build myself. Do you sell components such as poles and trusses? Or is it possible to purchase one of your kits and leave off certain materials? For example, I want to use corrugated metal siding. If you don’t supply that could it be left off? I have a design already and can send that so your folks know what I’m looking for and might be able to advise. Thanks – JUD in LOOMIS

DEAR JUD: Typically it is not cost effective for either our clients or us to provide just a handful of components for a building, especially if we (and our engineers) are responsible for the structural design of the building.

About Hansen BuildingsWe most often supply all of the components required for assembly, other than concrete, rebar and any nails which would be commonly driven by a nail gun. This gives our clients the most value for their investment, as well as insuring the components being furnished are meeting with the structural requirements of the plans.

A Hansen Pole Buildings’ Designer will be in contact with you shortly to discuss details with you.

DEAR POLE BARN GURU: I am within a few weeks of placing my order for my residential kit but I have a question about siding. My wife has veto’d metal siding so we will be specifying either hardie board siding or LP Smartside. I’ve been assuming that in order to use such siding in place of metal, the walls must be sheathed with OSB for structural reasons? I’m guessing that the OSB sheathing would not have enough holding strength for the siding to attach directly and that I would need to install vertical furring strips nailed to the girts in order to attach the siding? The problem is that I have heard stories about waves in the siding when attached this way. What does one need to do in order to prevent wavy siding?

Thanks. LONNIE in COLORADO SPRINGS

DEAR LONNIE: Most jurisdictions will allow panels (4′ x 8′ typically) of cement based siding or LP Smartside to be installed directly over framing (wall girts) spaced up to 24 inches on center. My guess is you are looking at doing a lap siding, in which case the walls would need to be first sheathed with either 7/16″ OSB or 15/32″ plywood in order to carry the wind shear loads. When this is the case, we plan upon furnishing 2×4 vertical blocking every two feet to give a positive attachment for the siding.

In order to prevent wavy siding – just don’t use it. I’ve installed a fair amount of lap siding (back in the day) as well as seen it upon numerous buildings and at some point it always has waves. Why? It is a function of expansion and contraction. If the siding is applied when cold, it will wave between fasteners when it heats up. Applied warm and as it shrinks it strains against the end fasteners and gets gaps between end joints. All-in-all, maybe not the best aesthetic solution.

I currently own three different post frame (pole) buildings. The oldest two are sided with 1×8 cedar channel run vertically (I wanted to match the house). When I painted the buildings for about the fifth time, my lovely bride asked me why I had not put steel siding on them to begin with, as it would have been maintenance free (not to mention less expensive). Right now I live in a magnificent post frame home – with steel siding. Wouldn’t have it any other way and my wife will agree it is by far the best solution for both looks and durability. In the end – people will notice the colors, but chances are the great majority will never pay attention to what the actual material is.

DEAR POLE BARN GURU: We want to build a pole structure for RV cover similar to a pole barn but no sides. Pole sides and roof clearance of 14 feet, 36 long, 24 wide (where post in ground)
Looking for plan and help to build. Hope you can direct us. Thanks JUDY in MISSION

DEAR JUDY: Yours is most certainly a building which we can assist you with. If possible, it will be less expensive to have at least one of the 24 foot endwalls covered to the ground. Here is an article which explains why: https://www.hansenpolebuildings.com/2015/04/roof-only-pole-buildings/

One of the senior Hansen Pole Buildings’ Designers will be in contact with you shortly to assist you with your new post frame building.


Consider Post Frame for New Home!

DEAR POLE BARN GURU: Good morning. My name is Thomas and I am with xxxxxx; we manufacture metal roofing and siding and based out of Tennessee. I wanted to ask you a few questions to gain some information. First, my wife and I are starting to look at metal building for our new home, is this something your company is licensed to do in the state of Tennessee; second, I also would like to know if you manufacture your own metal roofing and siding, or if it is purchased from another company. Hope you had a great Christmas and I look forward to hearing back from you. THOMAS in MURFREESBORO

DEAR THOMAS: Thank you for your inquiry. Hansen Pole Buildings provides engineered post frame buildings in all 50 states, including Tennessee. Post frame (pole) building homes have become quite popular in the past few years and chances are excellent we can provide a customized building shell which will ideally meet with your needs and budget. We outsource our metal roofing and siding and we can provide the building sans roofing and siding in the event you should wish to provide your own.

DEAR POLE BARN GURU: I have submitted a request for a quote on our residence but I’ve needed to make a few modifications. How important is post spacing on a residential post frame building? The residence I’m designing is based on nominal 8′ post spacing but with the interior design I have, a couple of the posts interfere with window/door placement. I’ve been assuming that as long as opposite side posts are aligned so that the trusses are supported, the post position can be varied somewhat. On our design, I’ve assumed nominal 8′ post spacing but actual spacing winds up being as close as 7′ and as wide as 10′ 6″. Can irregular post spacing be accommodated or do I need to modify our interior design? Thanks LONNIE in COLORADO SPRINGS

DEAR LONNIE: Your assumption, “as long as opposite side posts are aligned so that the trusses are supported, the post position can be varied somewhat” is absolutely correct. In most circumstancing having the sidewall columns spaced at 12 foot on center is your most economical, so anything at this spacing or less should not be an issue from an engineering and design standpoint. When you arrive at an ideal spacing, please make sure it is listed on any quotes and invoices, otherwise there is always the possibility of columns being reorganized to the most cost effective combination.

DEAR POLE BARN GURU: Is there a recommended distance from the peak of a roof that the top purlin is installed, and why? WILL in NEWPORT

DEAR WILL: Yes there is a recommended distance. Here is the applicable excerpt from the Hansen Pole Buildings’ Construction Manual:

With standard steel ridge caps, the ridge purlin “uphill” side can be no closer to peak than five inches. This may result in space between ridge purlin and next purlin “downhill” being decreased. Ridge purlins can be further from truss peak than the minimum distances, without negatively affecting building. Roof ridge caps attach to roof steel with metal-to-metal screws, not to ridge purlins, so ridge purlins need not align with future ridge cap fastener locations.

If ridge purlins are “uphill” further than this, roof steel may not have an adequate overhang at eave and challenging situations will result!”

Horizontal Steel Siding

The answer is – yes!

Back in the late 1960’s in Spokane, Washington Joseph “Joe” Mazzie started Pacific Metal Buildings. Joe is from my father and uncle’s generation and, being in construction (and living in the same general area of town) they were acquainted.

Joe developed a reputation as a shrewd businessman, as well as a colorful character. The story is told of Joe driving around town in his “comfortable” car, with ten grand and a revolver in the jockey box. If Joe found a deal on something he could resell, he’d negotiate an even better deal by offering cash on the barrel head for it.

He found he could buy ‘seconds’ (for more info on seconds: https://www.hansenpolebuildings.com/2014/06/1-steel/) from the steel roll forming companies for 50 cents on the dollar. He bought pretty much all he could, storing the panels in one of several of his warehouses. When I was building post frame buildings in the 1990s, we would occasionally have a client decide they just had to have a different color than what they had ordered – and Joe would buy the original panels from us at the same price level.

Joe was smart, he built stick frame barns, garages and shops – running the walls steel panels horizontally, so it would not matter where the splices were, as there were vertical studs every two feet! This made a great way of using up whatever he happened to have in inventory.

Hansen Pole Buildings has provided a limited few clients with wall horizontal steel siding, for aesthetic reasons. Some folks just happen to like the look. There are some considerations to be accounted for.

In order to attach the panels, wood framing needs to be provided vertically either between or across the wall girts.

Horizontal Steel SidingMost steel roll formers are limited to the production of panels over 40 feet in length. Walls over 40 foot long, will require splices, which some clients may consider unsightly.

Steel panels have a net coverage of 36 inches, plus an overlap. The siding should be held up four or more inches from the bottom of the pressure preservative treated splash board. To minimize material waste, eave heights (for buildings without overhangs) or distance from grade to the underside of enclosed sidewall soffits should be measurements such as 9’6”, 12’6” or 15’6”.

Standard corner trims are designed to ‘land’ in the flat area of vertically placed steel panels. The same trims can be used, however expanding foam closures should be placed underneath the flanges of the corner trims, to seal the spaces between the high ribs.

Like the affordability and maintenance free aspects of roll formed steel siding, but want a different look? If so, horizontal steel siding might be the solution!

Camo

For my step-son Kevin, this one word pretty much covers everything. He and his identical twin brother Josh have always gone by the premise of – if it moves- kill it, and if it doesn’t move, prod it until it moves, then kill it.

Kevin loves to hunt, and if he isn’t hunting, he is fishing. He owns pretty much everything which can be camo. I swear he has camo skivvies.

A few years ago, one of our steel roofing and siding suppliers came out with camo steel for buildings. My first thought was – why? Then I realized, for those like Kevin, there would be a million and ones uses – hunting blinds, fishing shacks, heck (in his case) – the walls of his family room.

Camouflage Vinyl Siding

Camouflage Vinyl Siding

Today I got an Email from one of our suppliers. It seems camo has been taken to a new level in the world of construction – vinyl siding. This is certainly a step up the building chain from blinds and shacks – we are talking about homes, garages and shops!

Now I live in the woods, where it is fairly rustic and my neighbors are not ones who are around enough to complain. For those living in more semi-urban areas, there might be a few objections!

The camo vinyl siding is ideal for any climate, and has a Kynar® PVDF film finish for advanced color protection. It is moisture resistant and has a Temp-Rite® high performance substrate to withstand extreme weather. It is impervious to wood-boring insects. The low-gloss finish looks like freshly camouflaged and it never needs painting or caulking.

Camo side your new house, garage, barn or shed to either blend in, or stand out.  For others like my step-sons who live and breathe anything to with hunting and fishing, ENJOY!