Heave Ho
Reader TIM in HUNTER writes:
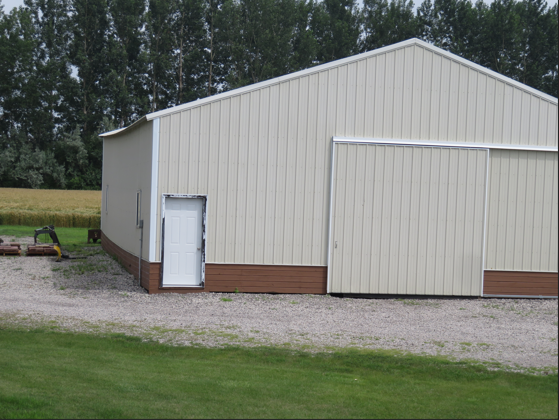
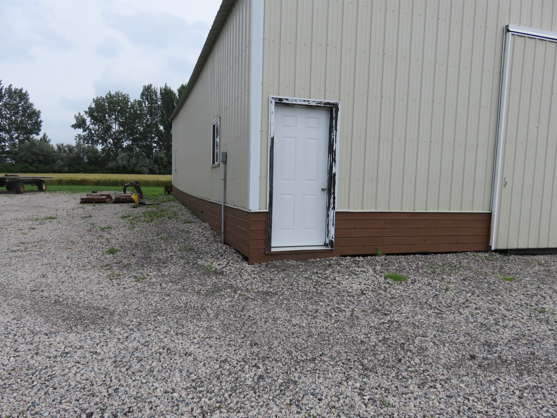
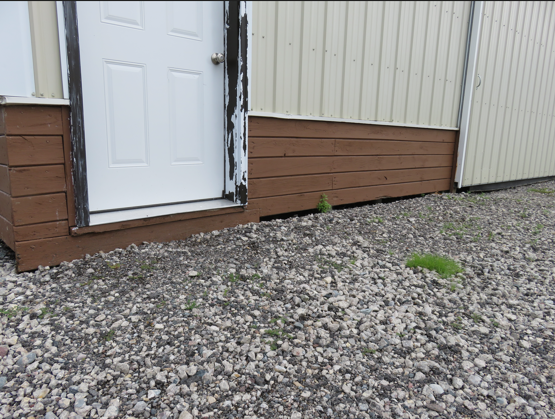
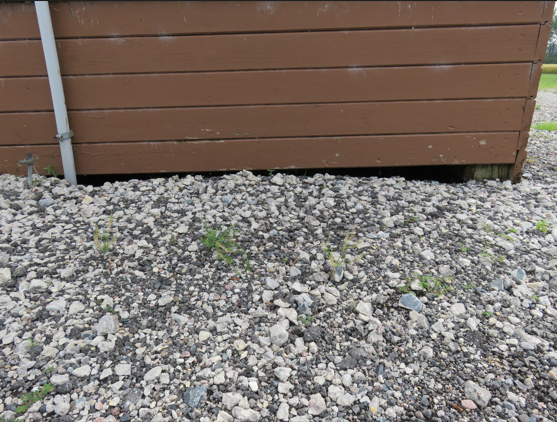
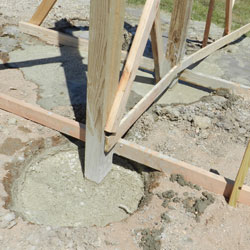
“I have a pole building, dirt floor no concrete that has heaved up in one corner about 12 inches. I think the builder put Quick Crete in the hole of each posts. I realize it is caused by frost. The frost free hydrant located near the corner has leaked where the connection is attached to the pipe underground and this will be the third time in 20 years that I have to dig it up and have it repaired. I noticed the starting heaving about 4 or 5 years ago. My question is how to fix the issue. As no one around here in the construction business has any idea, other than a dirt contractor that thinks we can dig a channel and let the weight of the building push it back down. This comes with the challenge of deflection that could destroy all or part of the building it has heaved up about 12 inches, but there are no cracks in the rafters, stringers, or posts. See attached pictures. I really need some help in determining what to do! Pictures attached. Thank-You!”
Your dirt contractor is actually on a correct right path. This is not going to be easy, but it should preserve your building and keep issue from repeating.
At each “lifted” column, doing so one column at a time, dig down around column far enough to place a 2x6x12′ on edge (running perpendicular to wall) each side of column (centered on column) and secure with structural screws. Repeat until all lifted columns have been braced. Now, dig channel along wall at least four feet wide (need to have at least two feet on each side of exterior side of wall), extending to below current quick crete footings, and deep enough to allow building to fully be able to ‘settle’. One raised column at a time, dig an inch of soil out from under 2×6 braces. Repeat this cycle until each column has settled into an eave level position.
Next, pour new concrete footings around each previously offending column. You can use a 2′ diameter sonotube as a form (make a vertical cut in tube to allow to slip around columns), with top of tube being 22″ below bottom of splash plank.
Remove 2×6 braces.
Beyond channel, install a french drain.
Fill channel up to top of tubes with crushed gravel, compacting every six inches.
Place a 48″ wide piece of R-10 EPS or XPS rigid insulation board horizontally on top of gravel, with outside edge 2′ beyond columns.
Place another 24″ wide piece of insulation board on top of center of horizontal board and attach top to inside of splash plank. You are forming an inverted “T” with insulation boards. These insulation boards will help to keep frost from forming in ground at columns and having a repeat performance.
Carefully backfill with more crushed gravel, up to grade.
Finish grade sloping down from building six inches in 10 feet.
Install gutters, with ends of downspouts at least 10 feet from building.

 MYTH #8. THERE ARE NO FOOTERS IN POST FRAMES
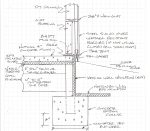
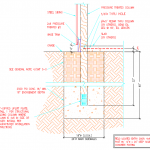 DEAR PETE: Any building is only as strong as its foundation, so this is not a place to be penny wise and pound foolish. Code requires minimum six inch thick concrete footing, or a Code approved alternative (here is an example
 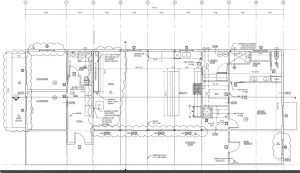 DEAR JOHN: Our floor plan team can add plumbing and electrical for a nominal fee – challenge is, your subcontractors will ignore this entirely. I have always had best results having these subcontract trades submit their own drawings when they apply for their permits (these permits are outside of your structural permit).
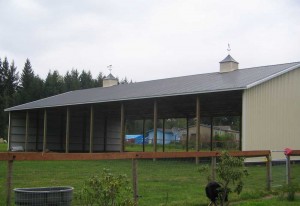 For barns with enclosed sidewalls, enclosed vented sidewall eaves and a vented ridge are critical design elements to allow for passive ventilation. Air enters through eaves and exits through ridge vent with excess moisture.
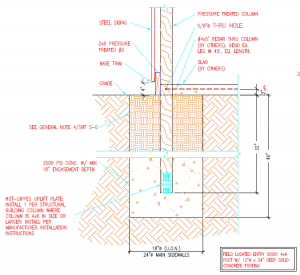 Sigh…..without an adequate footing beneath columns your building is going to sink. A minimum 6″ thick concrete footing needs to be poured under every column. There should also be a provision to prevent uplift. I would recommend no further payments to them until this issue is resolved. They should be providing an engineer certified solution to this.
 DEAR JOSEPH: From Hansen Pole Buildings’ Construction Manual, Chapter 2:
 DEAR PAUL: I am guessing you are talking about concrete poured for a footing pad under the columns.
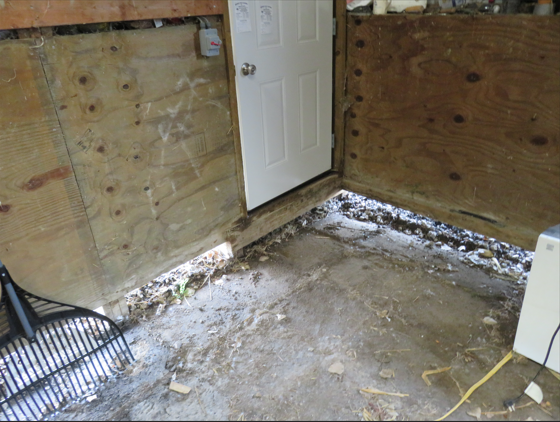
 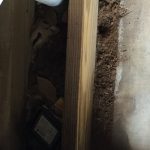 DEAR POLE BARN GURU: The pole building garage at the house I bought has two skirt boards. Can I remove the interior board to remove the dirt easier and put quikrete in its place. There is a 5” gap between the wall and the floor. The previous owner started putting quikrete in some places. Looks like the floor was put in before the building was built. KENNY in PARKERSBURG
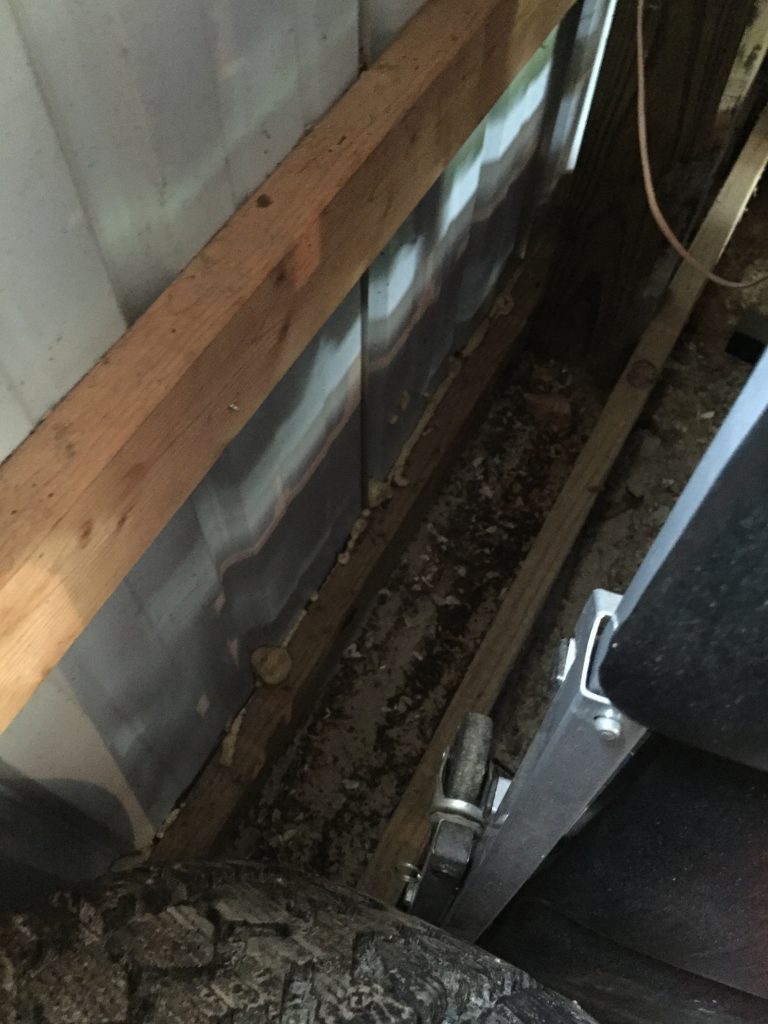
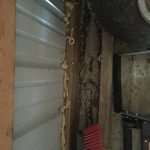 DEAR KENNY: The Hansen Pole Buildings’ warehouse has the exact same situation. The interior splash plank is doing nothing for you or your building, feel free to remove it.
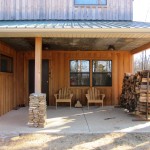 DEAR BILL: In short, yes – we can provide a building ready for you to side. What we most typically provide is 7/16” thick OSB over bookshelf girts 24 inches on center, with housewrap over the sheathing. If your false log siding can structurally provide resistance to shear, the OSB could be omitted, however this would not be my recommendation.
 DEAR POLE BARN GURU: Do you include foundation plans with your kits? JOE
 Resisting uplift – the columns, their encasement (the concrete attached to the base of the column) and the “cone” of soil above the concrete bottom collar, must have sufficient mass to keep the building from being literally “sucked” out of the ground.


