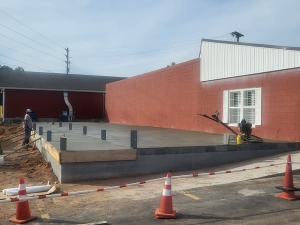
Post frame (pole building) construction is popular due to efficiencies of materials (ability to do more with less) and speed of construction.
Reader RAYMOND in BARLING is trying to find a way to make stick framing cheaper, he writes:
“24×64 pole barn in question. 4 pitch. I am just comparing the cost of alternate designs.
Using 2×6 rafters with purlins across top for metal. Can I part from the standard 24 OC of rafters and expand to 30 OC (since more support from purlins)?
Furthermore, is it possible to use 30 OC studs all around, instead of poles (since more support from purlins on walls)
I would really appreciate your wisdom.
Thanks!!”
Mike the Pole Barn Guru says:
Let’s begin with, “since more support from purlins on walls”. Studs in stick framed walls will not resist wind loads perpendicular to a wall any better due to lateral support from purlins (actually girts) installed horizontally.
Your rafters are also going to be unable to support greater roof loads due to purlins being attached.
Building Codes have prescriptive requirements limiting what can and cannot be done with conventional (stud wall) framing, without having to have a fully engineered building. This would include studs and rafters being no greater than 24 inches on center. They also preclude wall heights of over 12 feet (you did not mention any heights however it should be kept in mind).
 International Residential Code (IRC) Table R8702.4.1(1) provides rafter spans for common lumber species with a roof live load of 20 psf (this happens to be Code minimum whether snow is present or not). Being as you are in Arkansas, we will assume the minimum load as well as no ceiling being attached to rafters. With rafters 24 inches on center your rafters would need to be 2×8 #2 Southern Pine at a minimum. You would also need to provide ceiling joists or rafter ties to resist outward push of rafters on bearing walls. In order to get full value from rafters, ratio of rafter ties measured vertically above the top of stud walls to the height of roof ridge would need to be 1/7.5 or less. At a 4/12 slope ridge height would be 55.64″ meaning rafter ties could be located no more than 7-3/8″ above top of stud wall, so plan on then being at least 20 feet in length. A ridge board must also be provided as well as a collar tie, gusset plate or ridge strap (please refer to IRC R802.4.2).
Stud walls also mean you would need to make provisions for structural headers above any opening in any load bearing exterior wall. With post frame construction openings can be placed between columns in exterior walls, eliminating structural headers (this assumes trusses are placed aligned with wall columns with roof purlins on edge).
For stud wall construction, your concrete slab on grade will need to have an appropriately thickened edge in order to support weight of walls, or a continuous footing and foundation will need to be poured.
Ultimately post frame construction, not stick wall construction, is most probably going to be Raymond’s best route to go when considering investment and ease of construction.
 Thank you for your kind words. Certainly any building could be designed for door openings, ceiling heights, etc., to be adjusted for top of slab on grade to be at any point. This would entail leaving greater amounts of splash plank exposed on exterior beneath siding in order to prevent concrete aprons, sidewalks, driveways, etc., from being poured up against wall steel. Some people find great amounts of splash plank being exposed to be aesthetically unpleasant however. By being consistent in design, it also allows for one set of assembly instructions to be used – rather than having to rely upon making adjustments for whatever custom situation individuals (or their builders) deemed their particular case.
 A single post can be both constrained or non-constrained, depending on the load case. Using the previous example of a concrete slab-on-grade, and assuming that the post is not attached to the slab, if the wind loading was such that the post was pushing on the slab, the post would be considered constrained. However, if the wind were blowing in the opposite direction, the post would not be supported by the slab; hence, the post would be analyzed for that load case as non-constrained.”


