This Wednesday readers “Ask the Guru” about Hansen having a builder in the area of Minot, ND, if an existing pole barn with 8′ column spacing can be converted into a residential space by “beefing up” rafters, and use of a vapor barrier in a residential post frame structure.
 DEAR POLE BARN GURU: I am interested in a residential build. Do you have a builder you’ve worked with in the Minot ND area? Have you had any troubles with builders taking on jobs with your kits? KARLEY in VELVA
DEAR KARLEY: Hansen Pole Buildings is America’s leader in providing fully engineered, 100% custom designed, post frame building and barndominium kits, with multiple buildings in all 50 states. Your new building kit is designed for the average physically capable person, who can and will read and follow instructions, to successfully construct your own beautiful building shell (and most of our clients do DIY – saving tens of thousands of dollars – need a builder, we can probably help you there as well). We’ve had clients ranging from septuagenarians to fathers bonding with their teenage daughters erect their own buildings, so chances are – you can as well! Your new building investment includes full multi-page 24” x 36” structural blueprints detailing the location and attachment of every piece (as well as suitable for obtaining Building Permits), the industry’s best, fully illustrated, step-by-step installation manual, and unlimited technical support from people who have actually built post frame buildings. Even better – it includes our industry leading Limited Lifetime Structural warranty! Need a builder? Please complete this information https://www.hansenpolebuildings.com/builder-terms-conditions/ As to your last question, sadly most builders are unable or unwilling to read plans and can only build they way they have always done it – this may or may not be correct or even structurally sound (not to mention, highly limiting to meet clients’ end wants and needs).
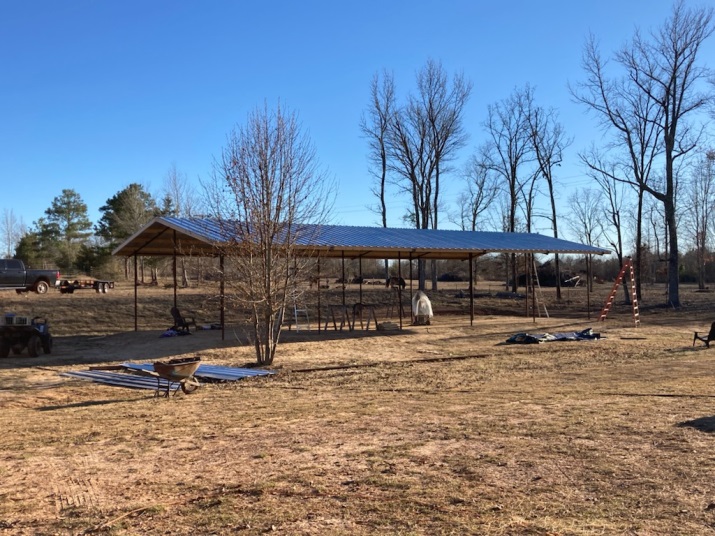
DEAR POLE BARN GURU: Is there anything I can do to make an existing pole building with 8′ pole spacing that was built for commercial use into residential without adding additional rafters. Can the rafters be beefed? CHRIS in HIXTON
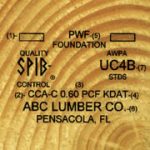
 DEAR CHRIS: If your existing pole building was indeed built for commercial use, then it should be in Risk Category II for wind, snow and seismic loads – same as residential. You will want to ascertain if roof trusses were fabricated to an adequate bottom chord (ceiling) dead load to support your choice of interior finishes. Typically you will want to see a 10 psf (pounds per square foot) load to support sheetrock. You will want to examine truss drawings prior owner should have. If these are not available, reach out to your local permit issuing authority, as many jurisdictions now have digitally archived plans and specifications. Another source would be whomever fabricated your trusses. Each truss should have a quality control stamp with fabricator’s name on it. Contact them, with your site address and approximate year built and they may be able to assist you. Worst case is you should be able to pay fabricator to send a representative out to gather specifics of your trusses (web configuration, lumber dimensions and grade, steel connector plate sizes). They can run it on their computer program to determine adequacy. If a structural repair is required for an upgrade, for a nominal fee, they should be able to provide.
 DEAR POLE BARN GURU: I am a little confused on this vapor barrier situation as some say yes and some say no. I am building a residence in Missouri. Metal roof with reflective bubble wrap radiant barrier. I have Soffit venting with a thermostat controlled ventilation fan in one gable end. Is vapor barrier needed when attaching metal to bottom of trusses when using R38 blown in fiberglass. RANDY in MISSOURI
DEAR RANDY: Your gable fan probably is inadequate for meeting ventilation requirements, I would look to vent your ridge as well. Your short answer is – no. Here is some extended reading on this subject: https://www.hansenpolebuildings.com/2023/01/does-my-pole-barn-need-a-vapor-barrier/
 “I’m looking for an explanation on how to size a rafter on the side of an existing pole barn. The lean-to will be 12′ wide, 80′ long, ~10 height on the inside, pole barn post are 8′ spacing. I was planning on using 2×4 on end for the purling on top of the rafters. I am looking to understand how to size the rafters not just an answer like use 2×8 or 2×10. I’m finding it hard to find any explanations on how the purling affect the rafters sizing. I see lots of rafters spacing at 18″ and 24″ but nothing when using 8′ spacing. Thanks for any assistance.”
 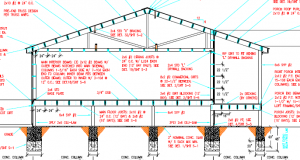 DEAR RON: Most often (and most cost effective) is to effectively increase sidewall (eave height) and use a raised wood floor. To prevent rodent infiltration, clients have either used this:
  DEAR POLE BARN GURU: Do you have an option to put the posts on a concrete wall or pylon? Where the posts don’t go in the ground. DREW in HAW RIVER
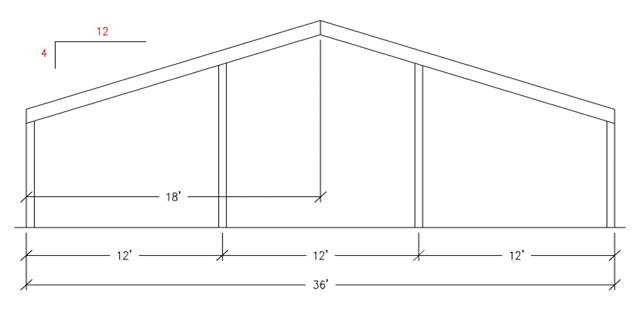
  DEAR POLE BARN GURU: Not too sure if you’re able to help answer my question. I’m a homeowner looking to build a 24x24x10 pole barn with a 6/12 roof pitch. Looking to build my rafters for a more open ceiling instead of using trusses. My question is should I use 2×10 or 2×12 for rafters and do you recommend 24” or 48” spacing? I will have 12” over hangs. FRANK in MILFORD
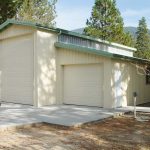
 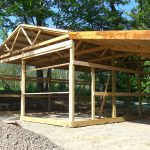 Shed off endwalls have their own unique set of circumstances, as they must be designed to account for snow blowing off entire main roof. This can create tremendous drift loads on top of end sheds. This is one reason to consider an extension of main roofline, rather than an end shed. Other reasons are increased clear height and ease of assembly.
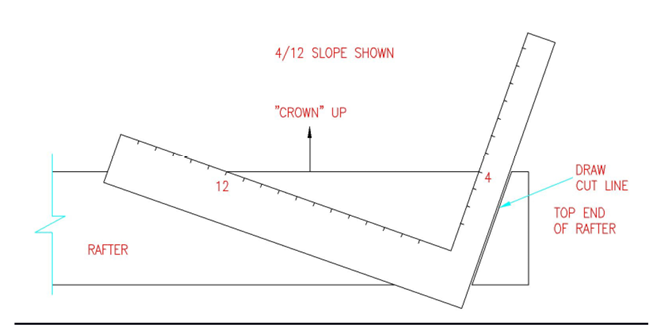

 International Residential Code (IRC) Table R8702.4.1(1) provides rafter spans for common lumber species with a roof live load of 20 psf (this happens to be Code minimum whether snow is present or not). Being as you are in Arkansas, we will assume the minimum load as well as no ceiling being attached to rafters. With rafters 24 inches on center your rafters would need to be 2×8 #2 Southern Pine at a minimum. You would also need to provide ceiling joists or rafter ties to resist outward push of rafters on bearing walls. In order to get full value from rafters, ratio of rafter ties measured vertically above the top of stud walls to the height of roof ridge would need to be 1/7.5 or less. At a 4/12 slope ridge height would be 55.64″ meaning rafter ties could be located no more than 7-3/8″ above top of stud wall, so plan on then being at least 20 feet in length. A ridge board must also be provided as well as a collar tie, gusset plate or ridge strap (please refer to IRC R802.4.2).
 DEAR POLE BARN GURU: I am planning on building a post frame home with a standard wood framed floor structure. It will have a crawlspace below but will not have concrete stem walls. The building site slopes down, some of the crawlspace may be excavated below grade, some areas will be above grade. Looking for ideas for skirting the crawlspace to provide the most appealing look at exterior side and keep out water and pests. TRENT in WALLA WALLA
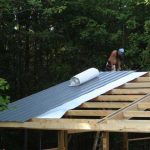 I have some questions. We ordered the kit with roof insulation and it was installed when built. I’m thinking of leaving the ceiling open so the trusses are exposed. Can the foam be sprayed over the insulation? If the insulation is removed can the foam be sprayed directly to the roof? If so do I just close off the ridge vent? On the side walls do I just close off the top that opens to the eaves? MARK in MT. AIRY
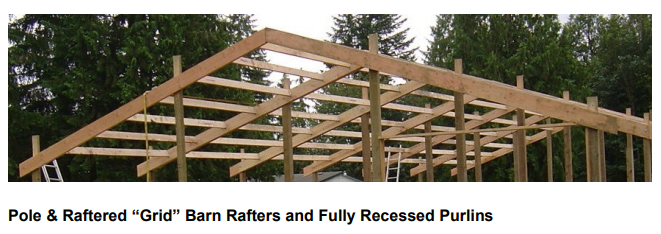
 DEAR DAVE: I will interpret your “rafters” to be Midwestern casual term for roof trusses. If so and properly designed to support required loads, trusses could be placed every four feet. In order to support roof steel, purlins would need to be laid either across top of, or joist hung in between roof truss top chords.
  DEAR POLE BARN GURU:
  I have a construction question… I
 There are some cases where it is advantageous to increase the height of the fascia, these would include (but are not limited to):


