Tag Archives: horse stalls

Nine Considerations for Your Post Frame Horse Stall Barn

Loyal, long time readers have gotten to know a little bit about our eldest daughter and professional horse trainer – Bailey. Her horse showing season reaches an apex with the historic Tennessee Walking Horse National Celebration (www.twhnc.com/content/celebration-information/ ) held annually in Shelbyville, TN over 11 days each year, ending on Saturday night before Labor Day.

In Bailey’s honor today’s topic will be factors for consideration regarding horse stalls.
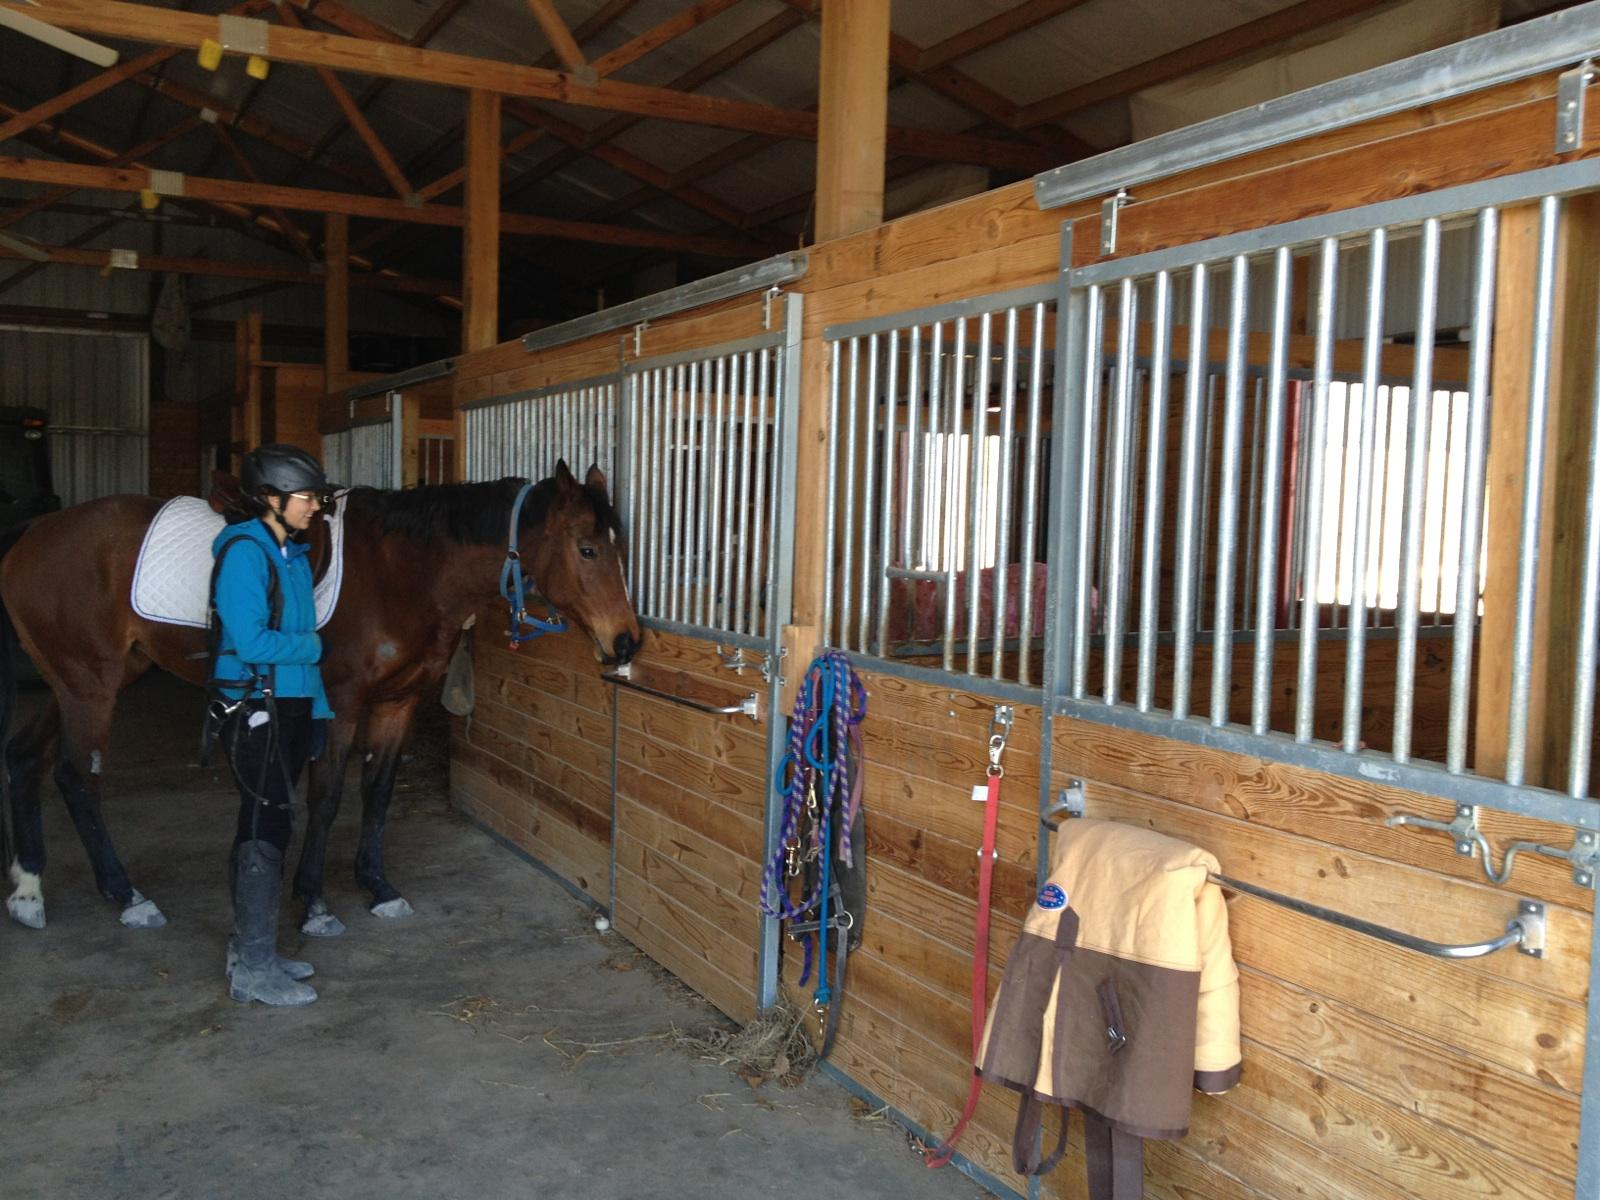
Stall Size

Your horse needs adequate stall space to stand, lie down, and walk around in a circle. Standard horse stalls are 12 feet square. For extended reading on horse stalls: https://www.hansenpolebuildings.com/2011/12/horse-stalls/

Aisle Width

In order to determine your proper aisle width, think about how you’ll be using it. Adjust width to accommodate for equipment and vehicles. At a bare minimum aisles should be at least 12 feet wide to accommodate vehicles, equipment, and (of course) horses. Read why my daughter thinks you need a 16 foot wide aisleway here: https://www.hansenpolebuildings.com/2011/12/horse-aisleway/
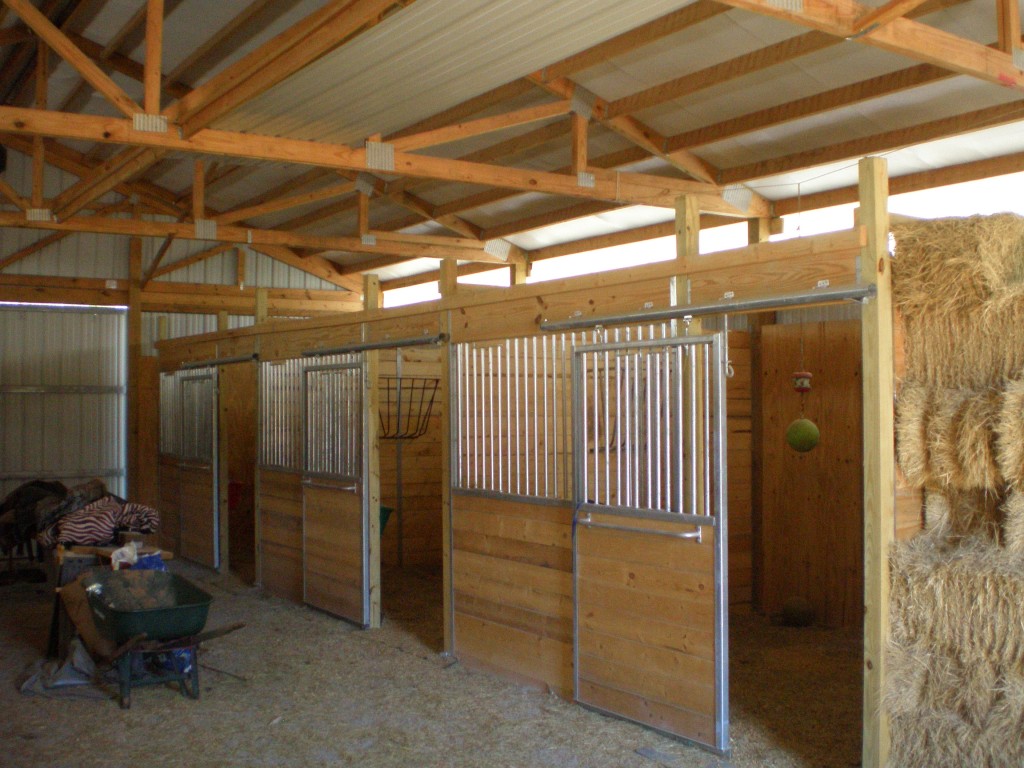
Materials

There are many options for horse stall construction materials, however for practicality, investment and ease of construction kiln dried tongue and groove lumber cannot be beat. Tops of wood walls are best covered with an aluminum channel cap to prevent cribbing.

Structural Integrity

Your horse stalls should not compromise post frame building shell structural integrity. Connecting stall corner columns to roof trusses can cause serious challenges: https://www.hansenpolebuildings.com/2018/08/attaching-horse-stall-posts-to-trusses/.

Styles

There are endless styles of horse stalls. European stall fronts traditionally feature a poorly located swinging door centered in stall front. Lower than the balance of the stall front, this allows horses to poke their heads out into aisleways and nip at passing horses, riders and innocent bystanders. Any style of stall can be customized with yoke openings, feed openings, blankets, bars, etc

Horse Stalls

Stall Doors

You have two choices – sliding or swinging. Sliding doors save space and allow you to easily enter the stall without your horse getting out. Ins and outs (pun intended) about stall doors is covered at this link: https://www.hansenpolebuildings.com/2019/06/dont-make-mistakes-on-horse-stall-doors/.

Air Flow

Healthy horses need adequate airflow. Pole and raftered stall barns help to aid with proper air circulation: https://www.hansenpolebuildings.com/2012/08/stall-barn/.

And a well ventilated barn makes for both happy horses and happy horse owners (not to mention smaller vet bills). Here is how to achieve proper ventilation: https://www.hansenpolebuildings.com/2012/11/horse-barn-ventilation/

Dividers

Dividers between stalls can be solid or vented. As some horses are anti-social and behave best when they have their own space solid seems to be the best overall choice.

Wash Stalls

Having a wash stall improves abilities for effective horse grooming. Usually wash stalls are the same size as occupied stalls, adding to ease of barn layout. Well drained non-slip flooring with a hair trapping drain is essential. Good lighting and easily-accessible storage are also important.

Getting Started

Dial 1(866)200-9657 and speak with a Hansen Pole Buildings’ Designer today. Our time and consultation are free!

Don’t Make Mistakes on Horse Stall Doors

Don’t Make Mistakes on Horse Stall Doors

Horse owners please join in, this one is for you:

Picture, if you will, your dream barn. You know how many stalls, feed rooms, tack rooms, etc., are needed and how much space they will take up. You have the exterior down pat, but you may not have put as much thought into stall doors for your horses.

Building the right stall for your horse is crucial for creating a comfortable environment and working space. Very intricate details matter, from stall door types to their hardware.

Caveat – even though our daughter Bailey (https://www.hansenpolebuildings.com/2018/09/planning-your-equestrian-facility/ ) is a famous horse trainer, I have never ridden a horse. I have had many, many clients (along with my daughter) who have provided valuable feedback. I am sharing common view points below.

There are two main types of stall doors to choose from when designing your horses’ ideal stalls—sliding and swinging doors. As with any option, each type of door has its pros and cons.

Sliding doors are great investments for your horse stalls for a number of reasons. They are far less expensive. They are less hazardous than swinging doors because they won’t take up aisleway (https://www.hansenpolebuildings.com/2011/12/horse-aisleway/ ) room as you open them. I would never recommend a swinging door into an aisleway. A sliding door simply slides on its track so both you and your horse can enter and exit a stall comfortably together without worrying whether the door is latched back properly or blocking space in the aisle.

Pole Building - Horse Stalls

In addition, a sliding door allows you to adjust the stall’s entrance just wide enough for you to enter without risking your horse sneaking past you, anxious to get into trouble. This makes accomplishing basic chores much easier, whether you’re changing your horse’s water or refilling feed.

Swinging stall doors are both more traditional and less practical. Dutch doors have grown in popularity and are more often seen in barn architecture. Why are they still so popular?

For some, it makes an ideal exterior door. Although appearing as one solid piece when closed, Dutch doors are actually split in two sections. The top half can be opened and secured outside with a hook and eye latch, allowing your horse to bask sunshine and enjoy views (think Mister Ed) of fields or outdoor arenas while secure in his stall. Sounds like a good way to torture your horse to me. Dutch doors also make great exterior stall doors because they provide your horses with opportunities to communicate with one another while trapped in their stalls, exercising their natural desires to socialize.

You can read more about exterior stall doors here: https://www.hansenpolebuildings.com/2014/10/exterior-horse-stall-doors/

Regardless of your stall door choice, your doorways should always be approximately four feet in width to provide comfort for you and your equine friends.

Dial (866)200-9657 to speak with a Hansen Pole Buildings’ Designer in regards to your horse stable wants and needs.

Attaching Horse Stall Posts to Trusses

Attaching Horse Stall Posts to Trusses – Just Say No!

Horse housing can be a significant piece of pie for post frame (pole barn) builders and building kit suppliers when economies are good. From 2007 to 2012, as U.S. economy tanked, horse populations decreased by 10%! Well, economies are cyclical and with a strong recovery a need  for stall barns has increased.

What surprises me – only a very small number of what I would term “best designed” stall barns – designed with sufficient airflow for healthiest horses, are being built. These buildings do not have prefabricated roof trusses, instead they are built using poles (columns) and dimensional lumber rafters. For more reading about pole and raftered stall barns: https://www.hansenpolebuildings.com/2012/08/stall-barn/.

I scratch my head when I see clients investing in clearspan buildings to be used for equine housing. I am most familiar with pole and rafter buildings with poles every twelve feet, to accommodate building horse stalls. Reader SCOTT in DAYTON writes in as one of these who now facing some challenges of trying to correctly construct stalls in his clearspan building. He writes:

“I am installing dividers and horse stalls in a clear span structure. Interior posts need to be added two of which will attach to one of the rafters and serve as supports for the dividers and a stall front. Each post will consist of three 2×6 cribbed boards with treated lumber for the below grade pieces. The tops of the posts will be saddles so that I can through-bolt into the rafter. My question is: how do I set these so that they are neither supporting or hanging from the rafter? Do I dig the holes just shallow enough so that the top of the posts will be snug to the rafter or just hang them and fill the holes with concrete? Thanks!”

Mike the Pole Barn Guru responds:

Even after nearly 20 years as a Midwest import I am still not used to prefabricated wood roof trusses being referred to as “rafters”. Unless you have prior truss manufacturer engineer sealed approval you should not be connecting columns to truss bottom chords. While it may seem added support of a tightly fitting column might be an assist, under a snow load it may actually place loads upon truss in spots not designed for support and can lead to a catastrophic failure.

You may want to consider using either a solid sawn pressure preservative treated column, or a glu-laminated column with bottoms treated for structural in ground use, as opposed to nailing up a three ply 2×6 column where members can separate over time.

I’d be prone to place columns deep into the ground and completely backfill the holes with premix concrete, stopping columns well below trusses.


Moving Sliding Doors to Inside of Building

Welcome to Ask the Pole Barn Guru – where you can ask questions about building topics, with answers posted on Mondays.  With many questions to answer, please be patient to watch for yours to come up on a future Monday segment.  If you want a quick answer, please be sure to answer with a “reply-able” email address.

Email all questions to: PoleBarnGuru@HansenPoleBuildings.com

Pole Barn Guru BlogDEAR POLE BARN GURU: Hello, we have a problem with our sliding barn doors hanging up on the siding and getting froze into the ice/snow or stuck in mud. Is there any reason to not relocate them inside the barn? Our barn has a concrete floor but the outside approach is dirt and grass. Moving the track and (2) doors inside would prevent snow and mud from interfering with opening and seems to be a win win. We have just never seen this done before. Thanks for your time! BRANDONN IN MUSKEGON

DEAR BRANDONN: Your situation is a prime example of why I try to discourage the use of sliding doors in snow country. In most instances sectional overhead doors are a much better design solution.

Most clients with sliding doors do not want to mount them on the inside because they do not want to sacrifice the wall space. Nothing can be hung or placed against the interior of the wall in the direction the door (or doors) slide.

In many instances exterior sliding doors can be taller than interior sliding doors, as the interior doors must hang below the bottom chord of the trusses. This may be an issue in your case.

As far as relocating – if it was my own building I would want to re-side this wall, to eliminate the slot in the siding where the track board currently resides. Most of the balance of the expense (or time) will come from labor. But yes, you can move them, with the above considerations in mind.

Mike the Pole Barn Guru

DEAR POLE BARN GURU: How much a square foot for a horse area that is 50’wx128’Lx14′ eave height, metal painted siding and white metal roof with an 8×10, 10×10 and 12×16 roll up metal insulated doors with 2 man doors, 8-4’x6′ sliding double pane windows, and an 8×8 tack room? JOHN IN GARDEN CITY

DEAR JOHN: Thank you very much for your interest in a new Hansen Pole Building. While we appreciate you having worked out so many of the dimensional details, as well as doors and windows, it is always best to discuss your exact building needs with one of our Building Designers at (866)200-9657. Every quote is free, and your Building Designer will contact you as much – or as little as you wish.

Your request for a tack room leads me to believe some portion of this building may eventually have some stalls in it. If so, we can perhaps make some suggestions as to size and locations which would give you the most bang for your investment.

I always encourage horse enthusiasts to read through some of the most relevant articles on equestrian facilities, prior to getting ideas “set in stone”.

Here are a few:

Arenas: https://www.hansenpolebuildings.com/2012/07/the-perfect-indoor-riding-arena/

Stalls: https://www.hansenpolebuildings.com/2011/12/horse-stalls/

Aisleways: https://www.hansenpolebuildings.com/2011/12/horse-aisleway/

Ventilation: https://www.hansenpolebuildings.com/2012/11/horse-barn-ventilation/

Mike the Pole Barn Guru

DEAR POLE BARN GURU: Could you tell me how tall are the side walls on project 04-0509 please? If I wanted to build a combo workshop and home, a home with two floors, how tall of a side wall do you recommend? If I got a quote from you for 16′ tall building, 60 x 40.  How much of a difference is it to change it to 18′ side walls.  Or can I get two floors for my house out of a sixteen footer?  Please advise. Thank you. PAUL IN MECHANICSBURG

DEAR PAUL: The walls on Project 04-0509 are 18 feet tall, which is the bare minimum needed to get two full eight foot tall ceilings. You need to account for the thickness of a nominal four inch thick concrete slab, the thickness of the floor system (usually around a foot) and the thickness of the roof system (always at least six inches). In order to get the full thickness of attic insulation from wall to wall, I recommend using raised heel trusses (read more here: https://www.hansenpolebuildings.com/blog/2012/07/raised-heel-trusses/), which means you will generally need to add yet another foot to the eave height.

Keep in mind – fire separation requirements between mixed uses (shop and living areas), which will entail a minimum of one-hour fire resistance.

Mike the Pole Barn Guru

DEAR POLE BARN GURU: How much does a pole barn materials weigh? 30×40 x12 DONALD IN LIBERTY

DEAR DONALD: Obviously the features of any given building will change the weight. For the dimensions you have mentioned, with average features, expect it to weigh in at about 8,000 pounds.

Mike the Pole Barn Guru

Horse Riding Arena

Once Upon a Time

My nearly four year old grandson Colton overnighted with Grandma and Poppa last night. Colton is Jake’s son (you might remember Jake from various pole building adventures such as https://www.hansenpolebuildings.com/blog/2012/07/construction-time-2/).

Colton likes Papa Mike just a little, so we got into some serious pre-bedtime reading and like every good story, they all begin with “Once upon a time…….”

In this case it was …..with a lady who wanted a clearspan horse riding arena which was to be 104 feet wide by 168 feet long. I’ve spent headed towards 40 years doing nearly everything imaginable with prefabricated metal connector plated wood roof trusses (not to mention a few things which are unimaginable and should not be mentioned even in fairy tales). A 104 foot clearspan truss would not only be a very big truss, but would also come with a very large price tag!

When I was the owner of a truss plant, we did 100 foot trusses – once, 92 foot once, and nothing else larger than 80’. For the most part, they are not only very expensive, they are very challenging to transport and most people frankly just do not need clearspans this wide.

Indoor Riding ArenaWe got a layout of the building from the client, and it turns out she also did not need a 104 foot clearspan, as the horse riding arena portion of the building was to be 80 x 120. This would not be my personal choice for arena dimensions – you can read my opinions here: https://www.hansenpolebuildings.com/blog/2012/07/the-perfect-indoor-riding-arena/.

Both ends and one long side of the arena are to have a 12 foot wide aisleway (read more on aisleways here: https://www.hansenpolebuildings.com/blog/2014/10/horse-barn-aisles/) with another 12 feet devoted to stalls, washrooms, office, lounge, etc.

The Hansen Building Designer’s proposed solution is to hip the 24’ aisleway/stall combination around three sides of the building, which should be a nice look.

The client has also suggested leaving the one sidewall of the horse riding arena open, however this makes the structural design of the building into a three sided building (https://www.hansenpolebuildings.com/blog/2014/03/three-sided-building/) where the fourth side could be enclosed with polycarbonate eave lights at the top of the wall, for less money than leaving the wall open.

And as Colton knows – all fairy tales end with…”and they all lived happily ever after”…in their new horse riding arena!

Tongue and Groove Lumber

My first exposure to tongue and groove lumber was when I managed the prefabricated metal plate connected wood truss manufacturing facility at Lucas Plywood and Lumber back in 1979. I’d relocated from Northern Idaho to Salem, Oregon to take the position.

(Read more about Lucas Plywood and Lumber here: https://www.hansenpolebuildings.com/blog/2011/06/theres-no-education-like-real-life-business-experience/)

The most common method of residential home construction in the Willamette Valley, at the time, was for houses to be constructed over crawl spaces. The subfloor utilized four inch width beams spaced every four feet, with usually 2×8 #3 grade lumber nailed flatwise across the beams. A few of the better builders used 2×8 commercial decking for their subfloors.

To produce commercial decking, a #3 grade board is resawn. The board is passed through a set of what are known as “knives” creating a thin, deep ridged “tongue” on one edge and a slot or “groove” on the other. When properly milled and installed, the tongue fits perfectly within the groove of the preceding member – creating a snug fit. The end product is commonly known as tongue and grooved, or center matched lumber.

Keep in mind, lumber grades are a product of allowable defects (read about allowable defects here: https://www.hansenpolebuildings.com/blog/2013/12/lumber-defects/). One of the most common defects in lumber, which causes downgrading, is wane. The process of center matching lumber is cause for the removal of a large amount of wane, especially if the resaw operator is properly orienting the lumber on the infeed side so the greatest wane is on what will become the tongue edge of the board.

tongue and groove lumber
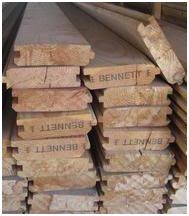
In pole (post frame) buildings, tongue and groove 2×6 lumber is often used to construct box stalls for horses. What most people do not realize, is the tongue and groove lumber they are ordering to build stalls out of is most often commercial decking – a product of #3 grade material!

2×6 Select Decking is most often used on top of exposed beams to create aesthetically pleasing ceilings. As it has far fewer defects than #3 grade lumber, it is far more pleasing to the eye, as well as having greater strength properties. (The American Forest & Paper Association has produced this document on Tongue and Groove Roof Decking https://www.awc.org/pdf/wcd2.pdf)

For high quality horse stalls, 2×6 Select Decking is the choice of discerning horse owners and trainers.

P.S. Don’t forget, at a minimum the lower two rows of 2×6 tongue and groove lumber used for stalls should be pressure preservative treated to resist rot and decay from contact with ground, moisture and animal wastes.

Dear Guru: What are the Benefits of Building a Pole Barn House?

Welcome to Ask the Pole Barn Guru – where you can ask questions about building topics, with answers posted on Mondays.  With many questions to answer, please be patient to watch for yours to come up on a future Monday segment.  If you want a quick answer, please be sure to answer with a “reply-able” email address.

Email all questions to: PoleBarnGuru@HansenPoleBuildings.com

DEAR POLE BARN GURU: I am considering building a pole barn house and wont have much time do to my job to do any of the work myself. We have looked in to buying a modular home but prices are rather high and my property taxes would be high as well im afraid. With this in mind what would my benefits be to going with a pole barn house? And how would I go about finding a reputable contractor to do the job right and in a timely manner? I already own the Land and the Electric / Septic is completed just has to be ran to the house. Thanks PERPLEXED IN PITTSFIELD

DEAR PERPLEXED: There are numerous benefits of post frame construction for residential purposes. Cost is going to be one – the savings in foundation costs alone will be huge. This blog article may prove helpful: https://www.hansenpolebuildings.com/blog/2011/10/buildings-why-not-stick-frame-construction/

As to finding a reputable contractor who will do the job right and in a timely fashion – there are three factors involved in a contractor – price, service and quality. You are going to get only two of these, at the most, so (in my mind) you have picked the best two: service and quality. My blog articles cover many aspects of hiring a contractor, this one may be especially appropriate:

https://www.hansenpolebuildings.com/blog/2013/07/contractor-6/

DEAR POLE BARN GURU: I am placing my poles for a pole barn and want to know what would be the best spacing on center for my poles. I am going to purchase horse stall kits through you and need to know what spacing to place my poles at to accommodate your horse stall and paddock kits.  I would like flexability to have 12 by 12 stalls or 12 by 24 stalls. CORRALLED IN CALIFORNIA

DEAR CORRALLED:  Overall dimensions should be a multiple of 12′ from outside of column, to outside of column. You have chosen the ideal size for stalls. Anything smaller means you’d be cleaning those stalls twice a day, instead of once a day.

Along the length and width, columns should measure 12′ from building line to center of first column, then 12′ on center for subsequent columns.

Horse Stalls: What Size?

My 21 year old daughter Bailey is a professional horse trainer. She works at a riding facility in Aumsville, Oregon – near Salem. Now Dad is pretty proud of her, as she has competed with the best in Tennessee and one of her horses was a national grand champion. The road to her dream occupation included some humble beginnings.

Bailey came to live with me full time when she was 11 and in fifth grade. She had always liked horses and needed to be kept busy after school. Nearby our home, was a riding stable, where Tennessee Walking horses were trained by Michele, a tough gal with a kind heart. I discussed Bailey’s situation with Michele and soon Bailey was starting her first job in her new career – mucking out horse stalls.

The facility she worked at has 12’ x 12’ stalls in shedrows attached to both eave sides of a riding arena. Also, at the same facility, was a stall barn with 10’ x 10’ stalls on each side of an aisleway.

Even at 11, Bailey was a pretty astute little business woman. The 10’ x 10’ stalls had to be cleaned out twice a day, while the 12’ x 12’ stalls were “once a day cleaners”. At a dollar a stall, she quickly could see it was to her advantage to make the smaller stalls her first choice.

The difference in cost between the small and large horse stalls, including the building size being increased, could have been made up in less than a year’s worth of the cost of cleaning the stall a second time every day.  And a horse which has more room to move around within their stall is more content.  This translates to less chewing, kicking, injuries and bottom line…fewer vet bills.

While ponies and small horses under 900 pounds may do just fine in 10’ x 10’ stalls – larger riding horses really require a 12’ x 12’ stall, which is the industry standard. The larger horse stalls also make the barn more versatile as well as appealing to future buyers who might have larger horses.  A small draft horse may require a stall 14’ x 14’ and a large draft horse 16’ x 16’.

Foaling stalls can be created by arranging two 12’ x 12’ stalls adjacent to each other, with a removable partition in between.  If you have stalls for rent, it’s a good idea to incorporate some flexibility in with your design, so stall sizes can be changed to fit the horse.  If injured, a horse may need a larger stall to move around more during the recuperation period.

For normal riding horses a 10’ ceiling height is the bare minimum to help prevent a rearing horse from incurring head injuries.  A 12’ height will be needed for warmbloods and larger draft horses.

The size of horse stalls is not a place to become penny wise and pound foolish. Make the small investment to do the job correctly the first time, as there is only one opportunity to do the job right – or wrong.