Remediating Pole Barn Sliding Door Frost Heaves
Reader MARK in MARINE ON ST. CROIX writes:
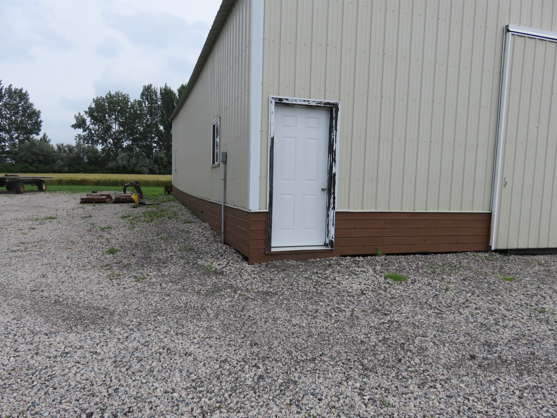
 “Poll barn door two 12 foot slider’s how to prevent frost heave s can’t open or close do I dig out under them and pour concrete or put 2 inch styrofoam any ideas?”
Harris Hyman, P.E. wrote this in a July 1994 article in Practical Engineering:
“As an engineer, I want to understand a little about the problem before I recommend corrective measures. Research work on frost heaving is somewhat limited, but there is a theory. Around the end of winter in cold regions, the earth develops a characteristic temperature profile: At the surface, the earth takes on the day’s temperature. But a couple of inches below, the ground temperature cools to approximately the February average temperature of the region. As we go deeper into the earth, the temperature rises, until several feet deep it reaches the annual mean temperature of the area.
The soil usually reaches its coldest temperature in March, when the freezing point reaches down to the region’s frost line. Below this depth, the soil and groundwater almost never freeze. But at the frost line — the 32°F point — the groundwater freezes, forming a thin sheet of ice. In soils that are porous enough to allow moisture to move, more groundwater touches this ice. The groundwater accumulates, freezes, and builds up into a bulge called an ice lens, which might be anywhere from several inches to a few feet across. The bulging ice lens pushes the earth above up into a frost heave. Aggravating the effect is surface melting, which also occurs at the end of March. The snow melt water moves through the ground, touches the ice lens, and adds to the bulge.
This is why, every spring, rural roads up North develop sinuous dips and dives. The ice lenses form during the winter, pushing up spots on the asphalt surface. When the weather warms sufficiently to melt the ice lenses, the unsupported asphalt sags and leaves low spots and potholes. On major highways, which cost a lot more to build, the base layer is sufficiently permeable to carry away groundwater, so heaves are rare.
Ice is fierce stuff. While most substances expand as they become warmer, ice actually expands as it gets colder, with the maximum expansion at about 28°F. When ice is confined, it can exert pressures from 20,000 to 80,000 pounds per square foot. There is almost no way to contain pressures like this; other solutions must be found.
The theory about ice lenses corresponds pretty well with the experience of engineers and excavating contractors. The most interesting implication is that heaving needs two things: cold and water.
This fact gives us our solution: Remove the water. Drainage is the one solution to heaving that does work most of the time.”
I would start by getting rid of any water. Slope ground away from building by at least 5% for 10 feet. Gutter downspouts need to discharge at least 10 feet away from building. Consider a French drainage system.
If this does not solve your issues, you could excavate to below frost line (I have had frost over seven feet deep not far away from you in Northeast South Dakota) and pour a concrete wall across your opening. If wall was thicker at base than top would also help minimize heave potential. Or, you could attempt to solve by pouring a concrete wall say 30″ deep, then insulate each side of wall down two feet and then out horizontally two to four feet with R-10 or thicker rigid insulation boards. Why both sides? I am assuming your pole barn does not have a concrete slab on grade and is unheated.
 DEAR POLE BARN GURU: I recently moved into a house with a 40×30 pole barn (wood post and wood trusses) with a metal exterior. The building has a reflective foil radiant barrier between the metal and wood structure. It is extremely hot in the summer and cold in the winter. I want to insulate and cannot afford spray foam. I also don’t have the ability to remove the walls to remove the foil barrier that way. I do have some Silvercote insulation that has an attached vapor barrier. It is just a fiberglass roll insulation that has an attached vapor barrier to it. It is sold around here for use as insulation in metal buildings. I was given enough to insulate the whole shop from someone that had left overs. I would like to install this insulation to help with temps in the shop. I have tried to research to get an answer on the best way to go about this. The shop builder said just put it up but I feel that would create a double vapor barrier. Is my best route to cut the foil radiant barrier out and then install the fiberglass insulation with vapor barrier facing the interior of the building? This would basically take the foil barrier out and install the fiberglass against the metal with the attached face vapor barrier to the inside of the building. I want to make sure I do it right. Thank you. DAVID in OKLAHOMA CITY
 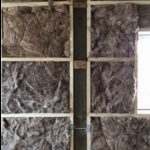 DEAR DAVID: If you are dead set on using this Silvercote insulation then you should cut out any foil radiant barrier. You never want to have a double vapor barrier situation as any trapped moisture will have no method of escaping. Downside of this is you do not have a Weather Resistant Barrier (aka housewrap) between framing and siding. An option to consider would be to resell your metal building insulation, then use unfaced Rockwool batt insulation, as it is unaffected by moisture.
 DEAR POLE BARN GURU: I plan to build a 28×48 metal pole barn, concrete floor, 12′ eave with 8/12 pitch. Barn will have 6 3×4 windows, and two 10×10 roll doors, one roll door on each gable end. For now, the roof will be insulated with 3in closed cell foam. I plan to insulate the walls down the road with rigid foam board. The building will not have A/C. Question: Do I need vents or exhaust fan in the gable ends of the roof with the high heat/humidity of Alabama? There will be no ridge vent or soffit vents. I may not have the building open every day, either. Thank you. JASON in MONTGOMERY
  DEAR JONI: One 4th of July we downhill snow skied Mount Bachelor’s summit before lunch, then hit The Deschutes River for white water rafting. We have provided hundreds of engineered post frame buildings to our clients in Oregon, so we know your area well.
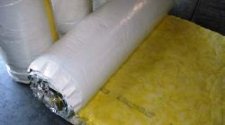 DEAR POLE BARN GURU: I work in commercial buildings a lot, that have similarities to pole barn design. Some are wood and steel, some are all steel framed. But none of them have spray foam, they’re either rockwool or fiberglass insulation. And ALL of their roofs are closed dead spaced with no venting at all. In lieu of your reply, how do they get away with this? Why can’t I emulate what they’re doing to some extent? Thanks again! DAVE in GALES CREEK
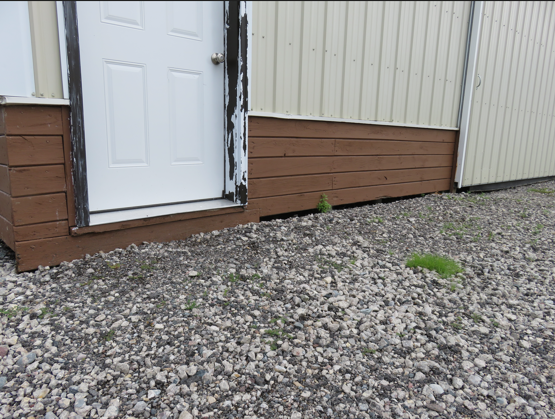
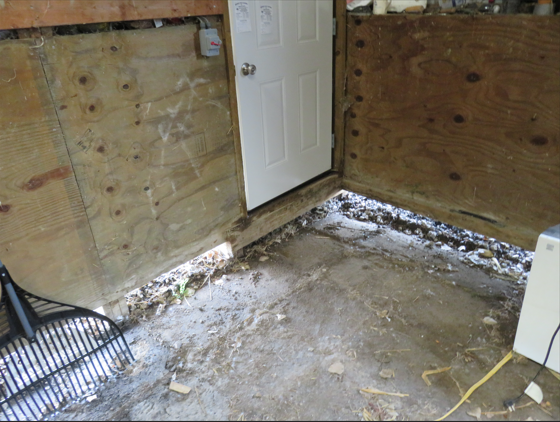
 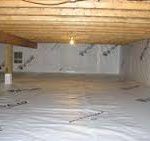 DEAR ROSS: You are correct about where moisture is coming from – and it is made even worse in Winter, when ground outside of your building is frozen and inside your building is where all ground moisture is trying to escape (basically think of your building as being a cork pulled out of a genie’s bottle). While pouring a concrete slab on grade of a vapor barrier would be your best (and permanent) solution, concrete is costly. With this said, my best recommendation would be to remove top two inches of dirt inside of your building, making sure there are no sharp rocks projecting up above surface. Place a 15mil black vapor barrier across entire floor, overlapping seams by 12 inches and taping them tightly shut. Run vapor barrier up onto splash planks on walls (if possible) as well as sealing to each column. Cover vapor barrier with two inches of clean sand. You may need to mechanically dehumidify, in order to fully resolve your challenges.
 DEAR WESLEY: Post frame buildings “work” due to their skin. Placing openings, without approval from your building’s engineer, could result in catastrophic structural failure.
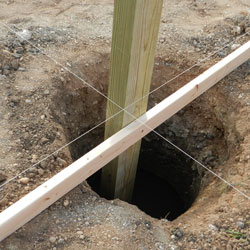
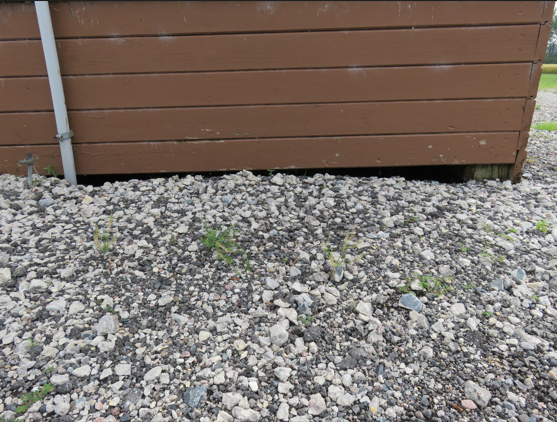
 DEAR TONY: Most important for avoiding frost heave is having a properly prepared building site:
  DEAR KURT: Thank you for your investment in a new Hansen Pole Building – be sure to send me lots of progress photos during construction (and of course ones when it is all complete).
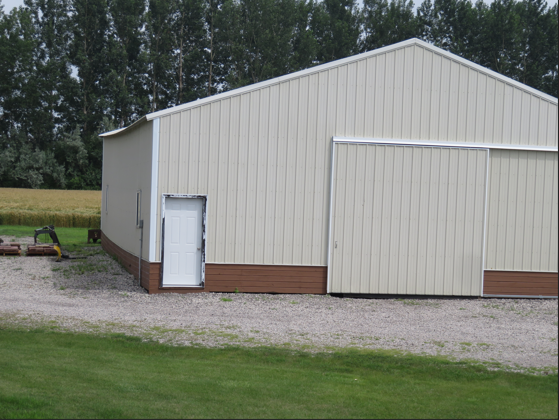
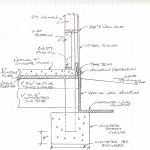 DEAR GREG: Any possible movement would come from either inadequately compacted or loose soil below column footings, inadequate footing diameter, or frost heave. To prevent frost heave, columns footings should be placed at frost depth or deeper and perimeter of slab should be insulated vertically with rigid insulation. In your climate zone, this would entail a four foot ‘tall’ R-10 insulation board. Install on inside face of pressure preservative treated splash plank, with top of insulation even with top of concrete slab. As an alternative, you can insulate slab perimeter per Frost-Protected Shallow Foundation requirements found here (note, slab edge does not have to be thickened or have a stem wall):
  DEAR POLE BARN GURU: Hello Guru! We were wondering if the USDA Rural Development program allows for the construction of a pole barn home? KIRSTYN in LANSDALE
 DEAR POLE BARN GURU: What do you charge to take my floor plan and send me engineered drawings? SHANNON in JONESBOROUGH
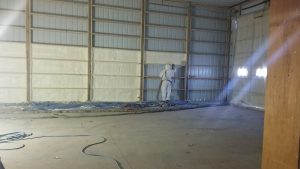 DEAR POLE BARN GURU: Hello! I have recently purchased a pole building that is not insulated & It does not have the vapor barrier/plastic installed between the wood framing and the sheet metal. We would like to insulate this building. We are thinking spray foam because I have heard you can apply it directly to the steel. Do we have any other options for insulating this? Any advice is greatly appreciated. Thank you!! KRYSTA in SPOKANE
 DEAR POLE BARN GURU: I need to pour a concrete sill at the 18’ wide entry to my pole shed in South central Wisconsin. The interior of shed is compacted crushed limestone, the apron leading up to it will be asphalt so a concrete sill seems like a good idea to protect asphalt edge. I can’t find any advice online so I hope you can help me out with your expert thoughts. First, good idea? Second, thickness. It would be about 12” wide. The base is 30 years old, thick and well compacted. Any help would be greatly appreciated. Thanks for your time. JAPH in WISCONSIN
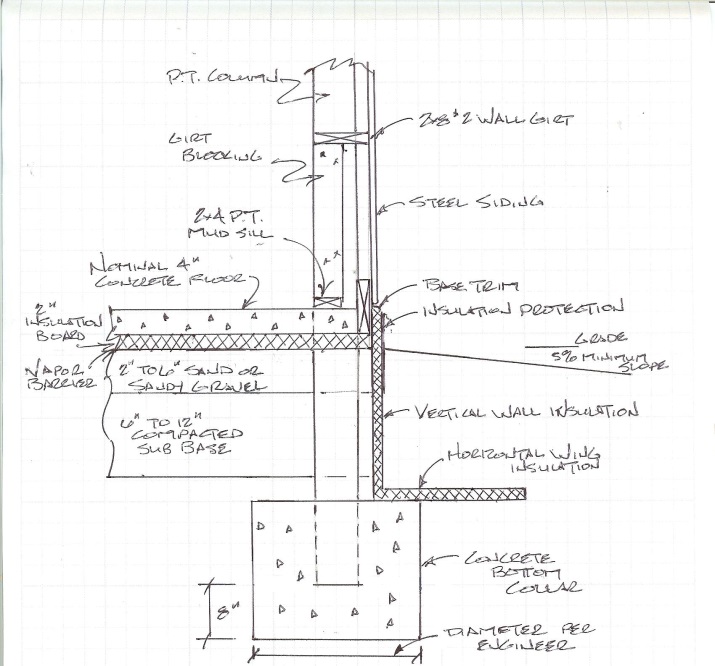
 Everyone says to put on single or double bubble before putting down roof metal but if I do that how do I insulate the ceiling because then I will have a vapor barrier above the insulation. DAVID in KIRKWOOD
 DEAR POLE BARN GURU: I have a pole shed 1972? with skylights that need replacing where do I find . DAVE in COLFAX
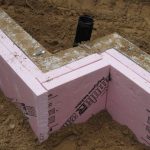 Thank you, CHRIS in NEW HOLLAND
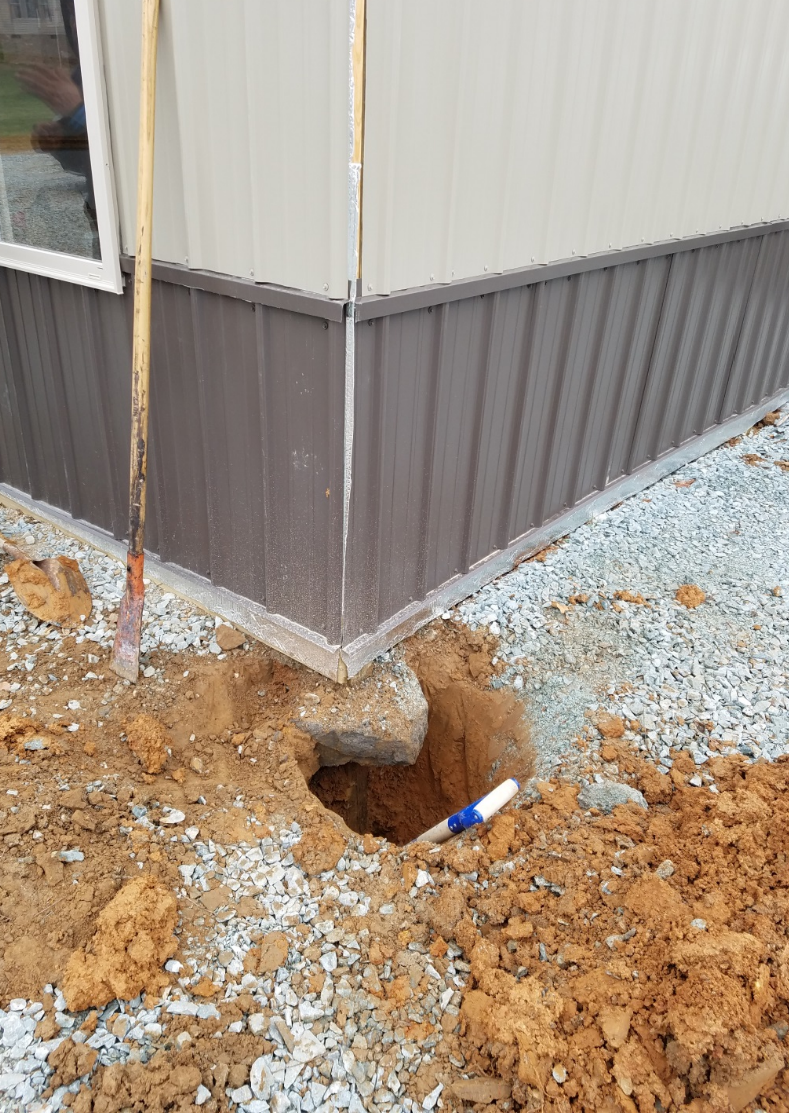
 DEAR JOHN: Ground water is going to be an issue no matter what you do. Frost walls are going to be very costly (
 DEAR WILLIAM: With proper structural design, probably. There are some downsides of this application, however. You will be extremely limited in your ability to place anything along building sidewalls. Care will need to be given in opening vehicle doors so as not to smash them against each other, or sidewalls.
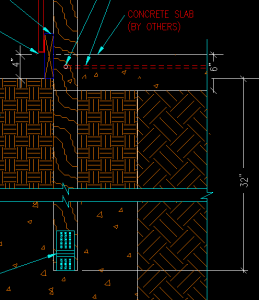 DEAR ANDREA: My father’s family came to be United States citizens after arriving from Norway prior to 1900, so I have always had an affinity towards all things Norse. (A little snippet of my Norsk history here:
 DEAR LONNIE: A consideration would be to design entire building to be able to be climate controlled, as you may decide to expand your office space, or building may be re-purposed in future and require some or all of remainder to be conditioned.