Tag Archives: silicone caulking

How to Prevent Existing 6×6 Columns From Future Settling and Rotting

How to Prevent Existing 6×6 to Prevent Future Settling and Rotting

Reader BARRY in FREDERICKTOWN writes:

“I recently acquired some property with an existing pole barn “house” on it. It is an unfinished 20’x30′ room with corrugated steel siding, a trussed, steel covered roof and several doors and windows. It was built with a raised floor attached to the 6×6 treated beams set deep into the rocky soil. Before I make any improvements to the inside of the structure to make it livable I am wondering if there is any process I can do now to set the existing 14 6×6 supports on concrete piers or a footing to prevent future settling and rotting. I cannot see any existing concrete surrounding or supporting the vertical 6×6’s. I would hate to invest anything on the inside of a structure that was not set on a good foundation.”
Mike the Pole Barn Guru writes:
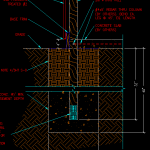
If your existing columns are showing no decay signs then they are probably adequately pressure preservative treated. You could excavate around each column, to below frost line. Hole diameter (to provide sufficient bearing surface) should be determined by an engineer, however for sturdy soils and small spans, usually 24 inch diameters will be sufficient.

Drill each column, in both directions using a 5/8” bit, six to 12 inches above column base. Insert a #4 re-bar dowel (#4 is 1/2″ diameter) through each hole.

Galvanized re-bar is recommended. Otherwise, coat rebar penetrating column with an asphalt emulsion, or similar, to isolate re-bar from pressure treated wood.

Seal rebar, into bored holes, at each column edge with silicone caulking.

Before backfilling holes with premix concrete, make sure floor is level. If not, slowly jack floor up to be level with highest point and temporarily brace.

A recent study has shown concrete in contact with pressure preservative treated pine may encourage premature decay by brown-rot fungi. As such, we strongly recommend isolating such columns from concrete starting at splash plank top (roughly 7-1/4″ above grade), to 14 to 18 inches below grade by use of a moisture impervious barrier. Then backfill holes with pre-mix.

If premature post decay is apparent, here are some other options: https://permacolumn.com/pdfs/perma-column-rotted-posts-repair-guide.pdf
Help! My Cupola Leaks

Help! My Cupola Leaks

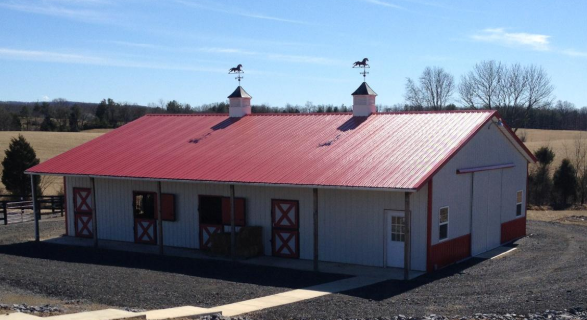
If you have a leaking cupola, I can understand why you would be looking for help. Only twice ever have I gotten feedback from a client with a leaking cupola. In first case client’s builder somehow neglected to read installation instructions in Hansen Pole Buildings’ Construction Manual.

Aforementioned builder decided to defy Isaac Newton (Laws of Gravity) and installed cupola and flashing directly to top of roof purlins, then butted steel roofing and ridge cap up to cupola. According to Mr. Newton, things like water will flow downhill, resulting in water leaking around said cupola.

In today’s dilemma reader PAT from TRAFALGAR writes:

“If possible I would like a direct response via email

My 30×40 pole barn was completed in September. When it rains it get very small amounts of water leaking in through the cupola. Is this normal? Should I require my contractor to repair, under the warranty? Will repairing result in other problems?”

As much as I would like to have sent a direct response via email, Pat neglected to share his email address. For those who are curious, Pat did not invest in a Hansen Pole Building.

Water leaking in through or around a cupola would be abnormal. Your contractor should indeed repair it and a proper repair should not result in other problems.

Most often provided cupolas are pre-manufactured. If site built instead, it should probably be replaced with a manufactured unit.

Pre-manufactured cupolas come with either standard flashings or a universal base. Universal bases do involve a slightly greater investment, however save a significant amount of labor as well as greatly reducing (or probably eliminating) chances of a leak. Many builders are short sighted and will go the cheaper route, ignoring end result challenges.

Assuming the builder wants to fix rather than replace – find the leak (sounds pretty simple, eh?). This requires a hose and someone to stand inside and tell a person upon the roof when water starts coming through. Begin with downhill edge flashings, run a pretty good stream of water onto them (one side, then other) for a minute or so. Even if the leak happens to be along one of them, keep checking along the way, as it could be multiple points. Next, check ridge cap side flashings, using the same process. Then check each side of the cupola individually (letting water run down from cupola roof).

If a leak exists, it should have shown up in the hose test. With leak isolated, a repair can be done using the best silicone caulking money can buy. If a flashing edge happens to not be sealed to the roof, Emseal AST expanding closures work quite well to fill those gaps. https://www.hansenpolebuildings.com/2016/03/emseal-self-expanding-sealant-tape-closures/