Tag Archives: mezzanine

Pole Barn House Roof Styles

POLE BARN HOUSE ROOF STYLES: WHICH ONE IS THE RIGHT FIT FOR YOU? 

Today’s guest blogger is John Hamlin, an industrial manufacturing writer with a passion for technology. Having a background in construction and a keen interest in engineering, John has slowly made his way into becoming a major contributor to many online publications.

The roof is one of the most crucial parts of a building. The basic function of a roof is to provide the building with protection against external elements such as sunlight, rain, snow, and any debris that may fall from the top during storms. A roof also provides privacy and insulation. 

Aside from these major purposes, a roof gives style and establishes the character and profile of your building. The unique features of a roof are attributed to the materials used, roof pitch, size, and orientation. 

There are various roof styles to choose from for different buildings like residential, commercial, agricultural, storage, etc. In this blog post, we will focus on the different roof styles available for pole barn houses. As we go through the post, we will also tackle the advantages and disadvantages of each roof style to help you choose which is the right fit for you. Read on and let us build that roof for your pole barn house! 

What are Pole Barn Houses? 

To begin with, let us first define what a pole barn house is. A few years back, a pole barn was considered an agricultural building where farmers used to store their equipment inside. Later, some farmers decided to convert their pole barns into an entire home and called them pole barn houses. These are just like any conventional residential houses, but the main difference is that pole barn houses have poles (actually sawn or glulaminated wood columns) instead of a continuous concrete foundation. Pole barn houses can be designed to include an attic, vaulted ceiling, loft, or mezzanine

Pole Barn House Roof Styles: Pros and Cons 

Choosing your roof style is one of the many ways to customize your pole barn house and make it stand out. Below are the Top 4 roof styles available for your pole barn house including their corresponding advantages and disadvantages. 

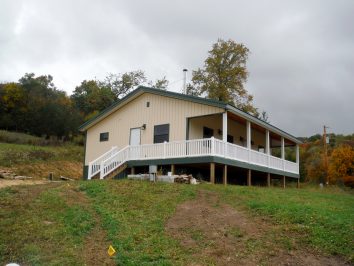
1- Gable Roofs 

Gable roofs are popularly known for their triangular shape and are the most typically used roof style in the USA. Gable roofs are alternatively called peaked or pitched roofs. 

Gable Roof

Pros: Because gable roofs are pitched, they allow rain and snow to slide off. With this design, snow accumulation is reduced thereby preventing roof collapse or structural damage. Additionally, you can (with a steep enough slope) build an attic for additional storage or room in your house due to the large space that a gable roof provides. This type of roof also allows good ventilation. 

Cons: If inadequately anchored, strong winds and hurricanes can destroy gable roofs. 


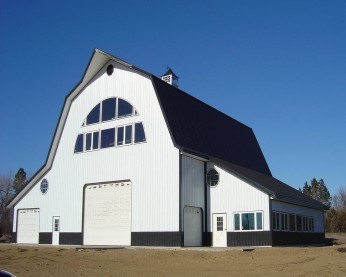
2- Gambrel Roofs 

Gambrel roofs, also known as barn roofs, have two sides with two slopes on each side. The two sides are typically symmetrical. The lower slope is steeper, which is almost vertical, than the upper slope. 

Gambrel Roof

Pros: Gambrel roofs also provide enough space for attics or lofts and offer very good drainage. 

Cons: Far more expensive than gabled roofs or full two story buildings.


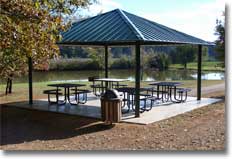
3- Hip Roofs 

Hip roofs have four sides that are declining towards the walls and form a ridge at the top. 

Hipped Roof

Pros: Hip roofs can be an excellent choice for windy and snowy areas.

Cons: More expensive than gabled roofs for materials and highly labor intensive to assemble. 


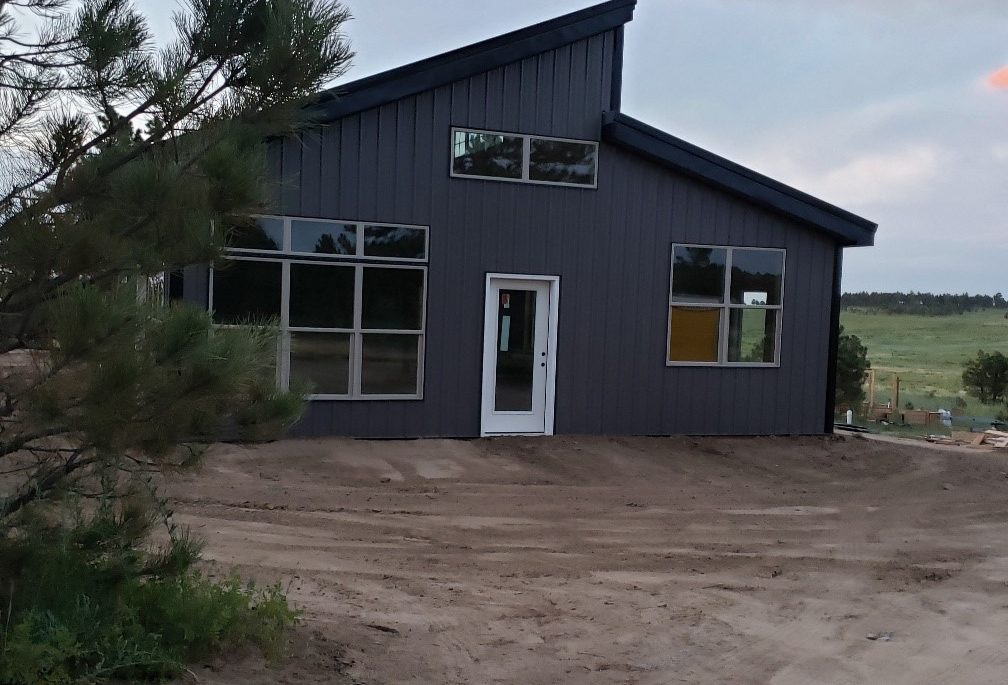
4- Skillion Roofs 

Skillion roofs or shed roofs have a mono slope or the entire roof plane is designed to slope in a single direction.

Skillion Roof

Pros: Popular for modern designs. Because of their design, skillion roofs can be 

very simple to build. 

Cons: A slight-pitched skillion roof can encounter snow loading problems. 

Ventilation can become problematic.

Hansen Pole Buildings can help you in building your roof style of choice. We offer many pole barn designs and layout ideas. If you have another design in mind, we can still help you with that as we also provide custom roof designs. At Hansen Pole Buildings, we want to provide our customers with “The Ultimate Post Frame Building Experience”. For inquiries, do not hesitate to contact us!

Contract Scheduling and Terms

Disclaimer – this and subsequent articles on this subject are not intended to be legal advice, merely an example for discussions between you and your legal advisor.

Please keep in mind, many of these terms are applicable towards post frame building kits and would require edits for cases where a builder is providing erection services or materials and labor.

SCHEDULING: Upon completion of all required documents by Purchaser (including, but not limited to, Instant Invoice, Door locations and Jobsite Delivery Information), Purchaser’s online approval of Seller’s plans, and appropriate payment, shipment(s) will be expedited to be as soon as is practical, however no guaranteed time frame is promised. Purchaser will receive multiple deliveries over a span of a week or more. Seller has little or no control over the exact date of arrival, nor can Purchaser specify any exact date and/or time for deliveries.

Some vendors will require Purchaser or Purchaser’s adult agent to be present at time of delivery. Materials may be delivered via any combination of USPS, UPS, FedEx or freight carrier, the choice of which is strictly determined only by Seller and/or Seller’s vendors. In the event tracking information is furnished to Purchaser, the responsibility to monitor tracking is upon Purchaser.

EXCLUSIONS: Seller is not a contractor, architect or engineer in any state, and both parties agree no such representation has been made. Seller does not and cannot endorse, nor take responsibility for the performance of any contractor or laborer hired by Purchaser, even if the name was provided by Seller. Purchaser waives any and all right of claim against Seller for non-performance of any materials improperly installed by any contractor. 

Seller cannot predict nor guarantee any permit, construction or labor costs. Any and all construction labor and equipment, as well as nails 16d or smaller, staples or tacks which can be commonly driven by pneumatic powered equipment are to be provided by Purchaser or Purchaser’s agents. The need for butyl tape sealants, water seals, closures for wall steel or polycarbonate panels, caulking or any other sealants is to be determined and furnished by Purchaser. 

While great effort is made to include web bracing material Seller does not see final engineered truss drawings prior to shipment so cannot verify, in advance, all web bracing requirements. As such, any materials for web bracing required beyond what is originally shipped with building kit, shall be furnished by Purchaser. Seller also does not furnish, nor pay for, any cement, concrete, pre-mix, rebar, wire mesh or any other materials which would be used to backfill Purchaser’s building columns or to construct any concrete floor, foundation or curb.

Concrete floors and/or continuous footings and/or foundations, electrical, plumbing, HVAC, insulation, drywall, site or grading plans, non-structural interior walls or partitions, provision for flooding, firewalls, sprinklers or other fire separations, gutters and downspouts, energy/heat loss calculations, meeting requirements of any energy code, meeting requirements of The International Wildlife-Urban Interface Code, or materials not provided by Seller, as well as the design of or specifications for any concrete work (including but not limited to driveways, porches, approaches, slabs, retaining walls, footings for walls, continuous foundations or stem walls) are specifically excluded from this Agreement and provided plans and/or calculations to be provided by Seller or third party engineer(s). 

Seller’s plans include a foundation designed as an isolated, shallow foundation with embedded columns. In the event any other foundation type be desired, or required, Purchaser will need to hire an appropriate engineer, at Purchaser’s expense. Any “plot” plans, floor plans or site tests/reports/engineering, or other “special” reports requested by any agency for Purchaser’s building are to be provided by Purchaser. Stairs, lofts, decks, mezzanines, second or higher floors, if included, will have handrails provided by Purchaser, unless otherwise specified. 

Purchaser further agrees to not enter into any other agreement, either verbal or written, with any of Seller’s suppliers, manufacturers, agents, employees or subcontractors, without the express written consent of Seller.

Working a Shop Mezzanine in With Planning Department Height Restrictions

Not every post frame building gets planned and constructed in areas where height limitations are not an issue. Reader AARON in BURLINGTON gets to deal with his Planning and Zoning Department placing height restrictions on what he can build.

Aaron writes:

Pole Barn Loft“I am planning a 45×56 pole barn, with ~16ft deep mezzanine on the end wall. The zoning rules limit the building height to 25 ft.  It seems the best options are scissor trusses with 1) 4:12 roof pitch and 2:12 ceiling pitch which puts the eave height around 16ft or 2) a 3:12 roof pitch with ~1:12 interior pitch which puts the eave height around 17.5. With a 9′ 4” Mezz Floor height and a roughly 16inch thick floor, the height under the mezz will be just under 8ft, and the min/max heights above the mezz will be roughly 1) 6 -10′ or 2) 8- 10′.  The space below will be used for vehicle storage (or possibly a pool table), and the Mezz will be used as a recreation area in the center with offices on either side wall.  The whole building will be insulated and climate controlled. 
My question is: Is it worth going to a 3:12 roof pitch in order to get the extra height on the side wall above the mezz?  Or should I stick with my preferred 4’12 pitch and accept the lower height on the sides of the mezz? Or are there other options I haven’t thought of?  Building will be in WI, where a snow cover of 6-12” is typical in the winter.”

If you research your trusses very far you are going to find you are not going to be able to get a 45′ span scissor truss with a 4:12 exterior and 2:12 interior, even spacing them every two feet (same with 3:12 and 1:12) and if you should happen to find them, they are likely to have a raised heel (reducing your interior clear height) as well as being phenomenally expensive.

Mike the Pole Barn Guru responds:

Here is my spin – and one probably no one else will suggest (in fact they are likely to raise an eyebrow over it). Stay with 4:12 exterior slope and make eave height 17’6″ to utilize every inch your Planning and Zoning friends will allow. Space sidewall columns front to rear at 14′ – 14′ – 12′ – 16′ with a pair of trusses aligned with each column and purlins joist hung on edge between trusses. With some creative truss and rear endwall column bracing, you can now utilize the space between your rear endwall and the next pair of trusses, all of the way up to the purlins! If your top of mezzanine is set at 9’4″ above grade, you will create a sloped ceiling running from roughly 7’4″ at sidewalls up to 14’10” at center, making for a spectacular recreation area (you have enough height to do lob serves playing table tennis). Make sure to have the purlins in this rear bay designed to support weight of sheetrock (as well as deflection limited to L/240 so as not to crack drywall joints). Roof of this rear 16 foot section is best insulated with 2-3″ of closed cell spray foam directly to roof steel, then the balance of the cavity filled with rock wool batts or open cell spray foam.

One last word of sage advice – do not attempt to do this on your own without an engineer having done your structural design. You will then know it is right and you will have wheels greased when you go to acquire your Building Permit.

A Mezzanine for Your Barndominium

A mezzanine is a common design feature found in all types of buildings- very possibly even your new barndominium, shouse or post frame home. Think of a mezzanine as being a lofted area above a room.

International Building Codes outline some basic rules for mezzanines to help determine if it is an intermediate level within the room it serves or if it is considered another story. 

A mezzanine is an intermediate level between floor and ceiling of any story. In regards to building codes, mezzanines must comply in accordance with IBC (International Building Code) Section 505.2. (Please note all references in this article are 2018 IBC)

Mezzanines can be great features within a building because they provide an additional floor level without being considered an additional story as long as they comply with IBC Section 505.2. Even though they don’t contribute to “building area” or number of “stories” regulated by IBC Section 503.1, they must still be included within “fire area” calculations when determining need for fire protection systems.

Another important piece of information is they should be constructed of consistent materials according to your building’s construction type per IBC Table 601. 

Clear height above and below a mezzanine shall not be less than seven feet.

Total area of a mezzanine within a room shall be not greater than 1/3 floor area of room it is located in (IBC 505.2.1)

Code has some exceptions allowing for a mezzanine to be larger given certain factors such as building’s type of construction and whether the building is equipped with an automatic sprinkler system. IBC 505.2.1 Exception 3 allows for an aggregate area of a mezzanine within a dwelling unit with an approved automatic sprinkler system which can be up to ½ floor area of the room it is located in.

Means of egress (exits) for mezzanines shall comply with applicable provisions of IBC Chapter 10.

A mezzanine acts like a room or space as it has an occupant load. This occupant load must have correct existing parameters per IBC Chapter 10 (egress chapter). IBC Table 1004.5 provides for maximum floor area allowances per occupant. For R-3 (residential) occupancy purposes, this occupant load factor would be 200 square feet per occupant.

A mezzanine shall be open to the room in which it is located, except for walls not more than 42 inches in height.

Code does also provide some exceptions related to mezzanine “openness”. If you meet these exceptions, your mezzanine would not be required to be open. One exception would be if the mezzanine occupant load is not more than 10 (IBC 505.2.3 Exception 1) and another is if it has at least two exits (IBC 505.2.3 Exception 2). In either case you could have an enclosed mezzanine space.

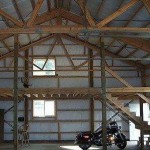
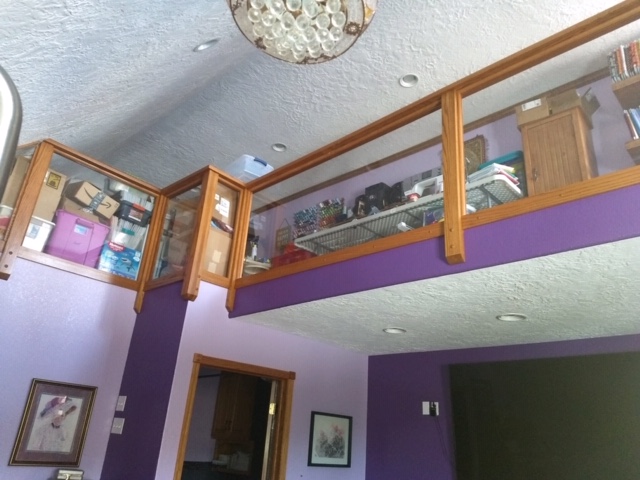
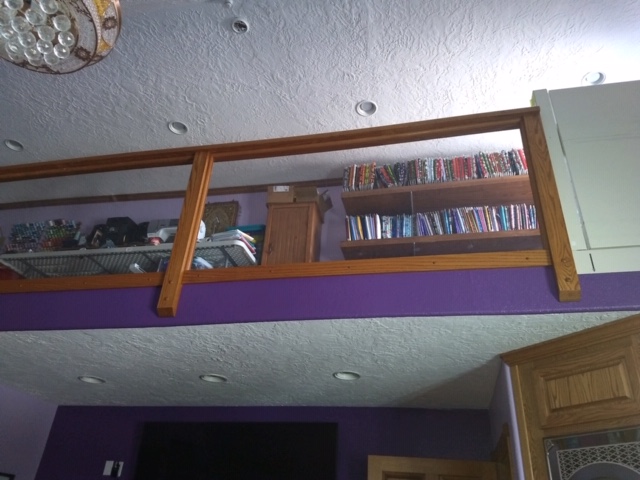
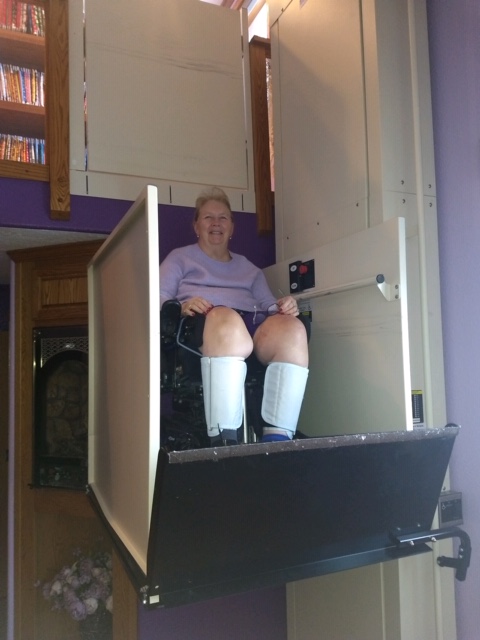
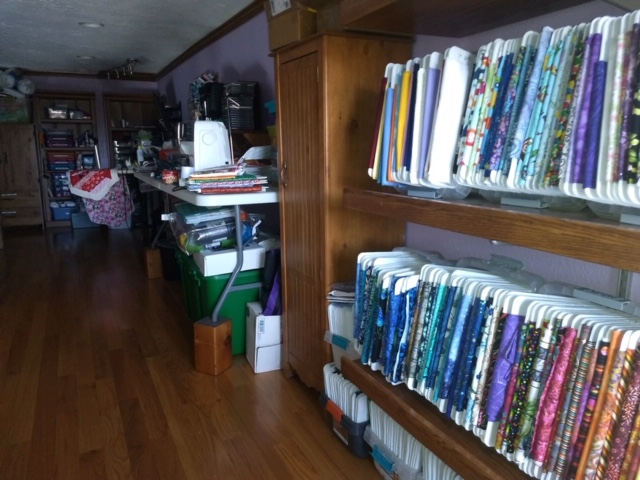
Photos are of the mezzanine within our barndominium. My wife wanted a space within our shouse (shop/house) which would be a totally dedicated space for her sewing and crafts. She has a sign in her sewing loft which clearly states “This is my happy place.” I can tell she is really happy up there as I often can hear her singing along with her favorite rock and roll tunes from the 70’s and 80’s. Lastly, access to her mezzanine is by a wheelchair accessible electric lift system.

Multi-Story Pole Barns

Multi-story Pole Barns
Hansen Pole Buildings has developed a reputation for taking potentially challenging post frame (pole barn) building projects and developing them from concept to fruition. This leads many clients, with an interest in multi-story pole barns, to our doors.

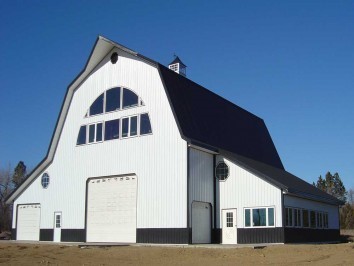
Gambrel roof pole barnMy own post frame building home, along Lake Traverse South Dakota side, features both a second floor and a mezzanine (partial third floor) where my lovely bride has her sewing and quilting projects in various stages of assembly.
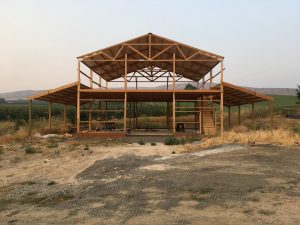
Our house Northeast of Spokane has two multi-story post frame buildings. Both of these happen to be constructed upon sites with a significant grade change. One of them has a 22’ x 24’ garage, with a studio apartment below and an office above (located in attic bonus room trusses). Tallest of these has been located near property rear. 40’ x 36’, it has a three vehicle garage space in lowest level, a full second floor, as well as a third floor (and a rooftop deck).

More reading about this building can be found here: https://www.hansenpolebuildings.com/2012/02/grade-change/.

Reader K.F. in ONTARIO writes:
“I would like to build a pole barn with a 10’ lower level and an 8’ upper area, with the dimensions 30×48. I would expect that the poles would need to be around 19-20’ long (above grade). That seems like a very tall pole (3x-2×6). What is the best way to build two levels and how does the upper floor go in?”

In my humble opinion, multi-story post frame buildings should always be designed by a Registered Design Professional (RDP – architect or engineer). Risks are far too great for an average person to safely and competently design a multi-story pole barn.

As to heights, one needs to look to how they desire to best utilize spaces being created. If interior columns are not an issue, a floor thickness of around a foot should be allowed for between levels. Don’t like having to maneuver around posts? Then floor trusses (https://www.hansenpolebuildings.com/2017/01/wood-floor-trusses/) might be a design solution. Roughly allow about an inch of truss depth for every foot of floor being spanned. Obviously, higher than residential weighted floors will necessitate a need for greater truss thickness.

Many multi-story post frame buildings are used residentially. If your proposed building will be climate controlled have roof trusses designed with raised heels (https://www.hansenpolebuildings.com/2012/07/raised-heel-trusses/) in order to provide full thickness of insulation from wall-to-wall. In colder climates, with a R-60 attic insulation recommendation, raised heel trusses could be as deep as 22 inches!

With a clearspan floor and raised heel roof trusses, ceiling heights desired by K.F. could result in sidewall heights of over 22 feet.

Not to fret – glu-laminated technology has allowed for one piece columns to be manufactured up to 60 feet in length. My own South Dakota building has columns as long as 50 feet.
As to how an upper floor goes in, this is where RDP experience comes into play. I have witnessed far too many instances of poor design practices of second floors without an engineer’s knowledge involved.

Looking for a multi-story pole building? Look to a post frame building kit supplier who works with a RDP to provide engineer certified plans for your building. Much better safe and standing, than flattened.

Adding a Second Floor to an Existing Pole Building

Adding a Second Floor in an Existing Pole Building

second floorMore than one pole (post frame) building owner has an idea of adding a second floor inside their existing building. Or, they plan a new post frame building with an idea of a future second floor being incorporated.
This apparently simple proposition has no simplicity involved.

Reader RYAN in HAMPSTEAD writes:

“Good morning,I have a 30×40 pole building, and I’m looking to add a partial second floor.  The posts are 8x8s, set at 8′ OC.  I’ve attached a layout for trusses that I received from another vendor, based on specs I provided.  The exact indoor measurement is about 29’11” outside to outside of the 8x8s (to the exterior sheeting).  The distance between the posts is about 28’6″.  So the joists should be field trimmable or around 29’8″ to carry from ledger to ledger.  I do not currently have the ledger/ribbon boards purchased or installed.

The trusses will be clear span, and the total floor space will be 30’x24′ with a cutout for a staircase.  Can you send a quote for this?  The shipping zip is 21074.

Thanks.”

Mike the Pole Barn Guru Writes:

Hansen Pole Buildings does not manufacture trusses, so we weren’t able to solve this portion of Ryan’s challenge. However, there are some considerations anyone should consider when looking towards a second floor being inserted in an existing post frame building.

Before moving forward, an EOR (Engineer of Record) should have originally designed your building. This person should be consulted with, as a second floor places a tremendous load upon wall columns and may overload footings (not to mention columns themselves), possibly causing columns to sink. Headers (also known as ledgers/ribbon boards) as well as attachment of floor trusses to them also need to be engineer designed. If somehow an engineer did not design your building, a competent one should be engaged to verify adequacy or design a repair.

Don’t be pennywise and pound foolish when it comes to structural changes involving a second floor, mezzanine or loft – lives you save may be your own, or those of a loved one!


Use and Occupancy Challenge Part II

See yesterday’s blog for Part I. To continue the discussion on Use and Occupancy:
Momentarily skipping a few chapters and going to Chapter 6 (because it would be too simple if the IBC was in order) the code book outlines different types of construction. Post frame buildings can fall under the following construction types:
The Type of Construction for post frame buildings is typically Type V.
602.5 Type V.
Type V construction is that type of construction in which the structural elements, exterior walls and interior walls are of any materials permitted by this code.

Table 601 gives TYPE V-B systems no fire rating (most typical for post frame construction). With a one-hour fire rating for the primary structural frame, bearing walls, as well as floor and roof construction and associated secondary members, post frame buildings could be classified as

TYPE V-A.
In some cases, a post frame building could also be Type III.

602.3 Type III.
Type III construction is that type of construction in which the exterior walls are of noncombustible materials and the interior building elements are of any material permitted by this code. Fire-retardant-treated wood framing complying with Section 2303.2 shall be permitted within exterior wall assemblies of a 2-hour rating or less.

Now head back to Chapter 5.
504.1 General.
The height, in feet, and the number of stories of a building shall be determined based on the type of construction, occupancy classification and whether there is an automatic sprinkler system installed throughout the building.

504.2 Mixed occupancy.
In a building containing mixed occupancies in accordance with Section 508, no individual occupancy shall exceed the height and number of story limits specified in this section for the applicable occupancies.
504.3 Height in feet.
The maximum height, in feet, of a building shall not exceed the limits specified in Table 504.3.

In TABLE 504.3 we find the proposed building to be well under the wall height limitations for Type V-B buildings of 40’ without sprinklers or 60’ with.
504.4 Number of Stories.
The maximum number of stories of a building shall not exceed the limits specified in Table 504.4.

In TABLE 504.4 we find A-3 and U to be limited to one story without sprinklers, or two stories with sprinklers. Buildings with an R-3 category (residence) is three stories without or four stories with sprinklers.

Might the partial second floor be a mezzanine?
“505.2 Mezzanines.
A mezzanine or mezzanines in compliance with Section 505.2 shall be considered a portion of the story below. Such mezzanines shall not contribute to either the building area or number of stories as regulated by Section 503.1. The area of a mezzanine shall be included in determining the fire area. The clear height above and below the mezzanine floor construction shall not be less than seven feet.
505.2.1 Area limitation.
The aggregate area of a mezzanine or mezzanines within a room shall not be greater than one-third of the floor area of that room or space in which they are located. The enclosed portion of a room shall not be included in a determination of the floor area of the room in which the mezzanine is located. In determining the allowable mezzanine area, the area of the mezzanine shall not be included in the floor area of the room.”
If the second floor was 37 feet or less in length it might possibly become a mezzanine, which could alleviate some of the fire separation issues. This is provided the area below is not divided up into individual spaces.

However….
“505.2.3 Openness.
A mezzanine shall be open and unobstructed to the room in which such mezzanine is located except for walls not more than 42 inches in height, columns and posts.
Exceptions:
Mezzanines or portions thereof are not required to be open to the room in which the mezzanines are located, provided that the occupant load of the aggregate area of the enclosed space is not greater than 10.
2. A mezzanine having two or more exits or access to exits is not required to be open to the room in which the mezzanine is located.”
So, it does not appear the second floor will be able to be classified as being a mezzanine.

Come back tomorrow for Part III of a four part series.

Retrofit a Mezzanine in a Converted Racquetball Court

Considering a Retrofit to a Mezzanine in a Converted Racquetball Court

Reader JOHN writes:
“…… is a 501(c)(3) non-profit organization rooted in Bayfield, WI (population 500). We provide and support affordable access to facilities, programs, classes, and events that promote health, activity, and fun.

We have a racquetball court that has been converted to a fitness room and is now running out of space.  We are looking to add a mezzanine to the fitness room that can support several treadmills and light stretching equipment while keeping the heavy equipment (free weights, weight machines, etc.) on the main floor.

We are looking for a possible kit that can be easily carried down narrow hallways, through a standard size doorway and assembled around existing fitness equipment.  If you have any information on a product that can meet these requirements, we would be very interested.  Our installation goal is the end of Sept. of 2018.
Enclosed is a basic floor plan of fitness room along with pictures of the present layout.  The room is 40’x20’x20′.”

Mike the Pole Barn Guru Responds:

Thank you very much for your inquiry. Hansen Pole Buildings is a huge supporter of 501(c)(3) non-profit organizations, as such we offer an added discount to all 501(c)(3) please read more here: https://www.hansenpolebuildings.com/2013/08/charitable-organizations/.

I was myself a former racquetball player, having sacrificed an Achilles’ tendon in a match back in the 1980’s (dating myself again). My dad also had built a court for himself in a condo development he and his brothers built at Liberty Lake, WA. Racquetball has gone out of vogue over the past few decades and many courts have been converted, such as yours, to other uses.

The post frame style of construction would be quite fitting for your retro application – until the narrow hallways come into play. In order to provide a clearspan floor, it would be necessary to be able to manhandle pieces up to 20 feet in length down those hallways. If you feel it might be possible to get a 20 foot long board into the former court area, I would recommend you go invest in a single 2×12 20 feet in length and try to carry it in, without bending it. If this is successful, we should discuss further.

When the Loft Design Seems Inadequate

One of the great things about post frame (pole) building construction is the ability to add interior raised spaces (think lofts, mezzanines and second stories).

One of the most overlooked things about adding such space is proper engineering design. In general I have found them to be inadequate to support the loads. This can result in catastrophic failures which can include bodily injury or death.

Here is a story from one of my readers:

DEAR POLE BARN GURU: My pole barn (approximately 81×44) has three lofts. The lofts are attached with a 2×10 “ledgerboard” to the main building posts on the outer edge and to 2×10 “beams attached 4×6” posts on 8 ft centers on the inside. Span is about 10 feet from outer to inner.

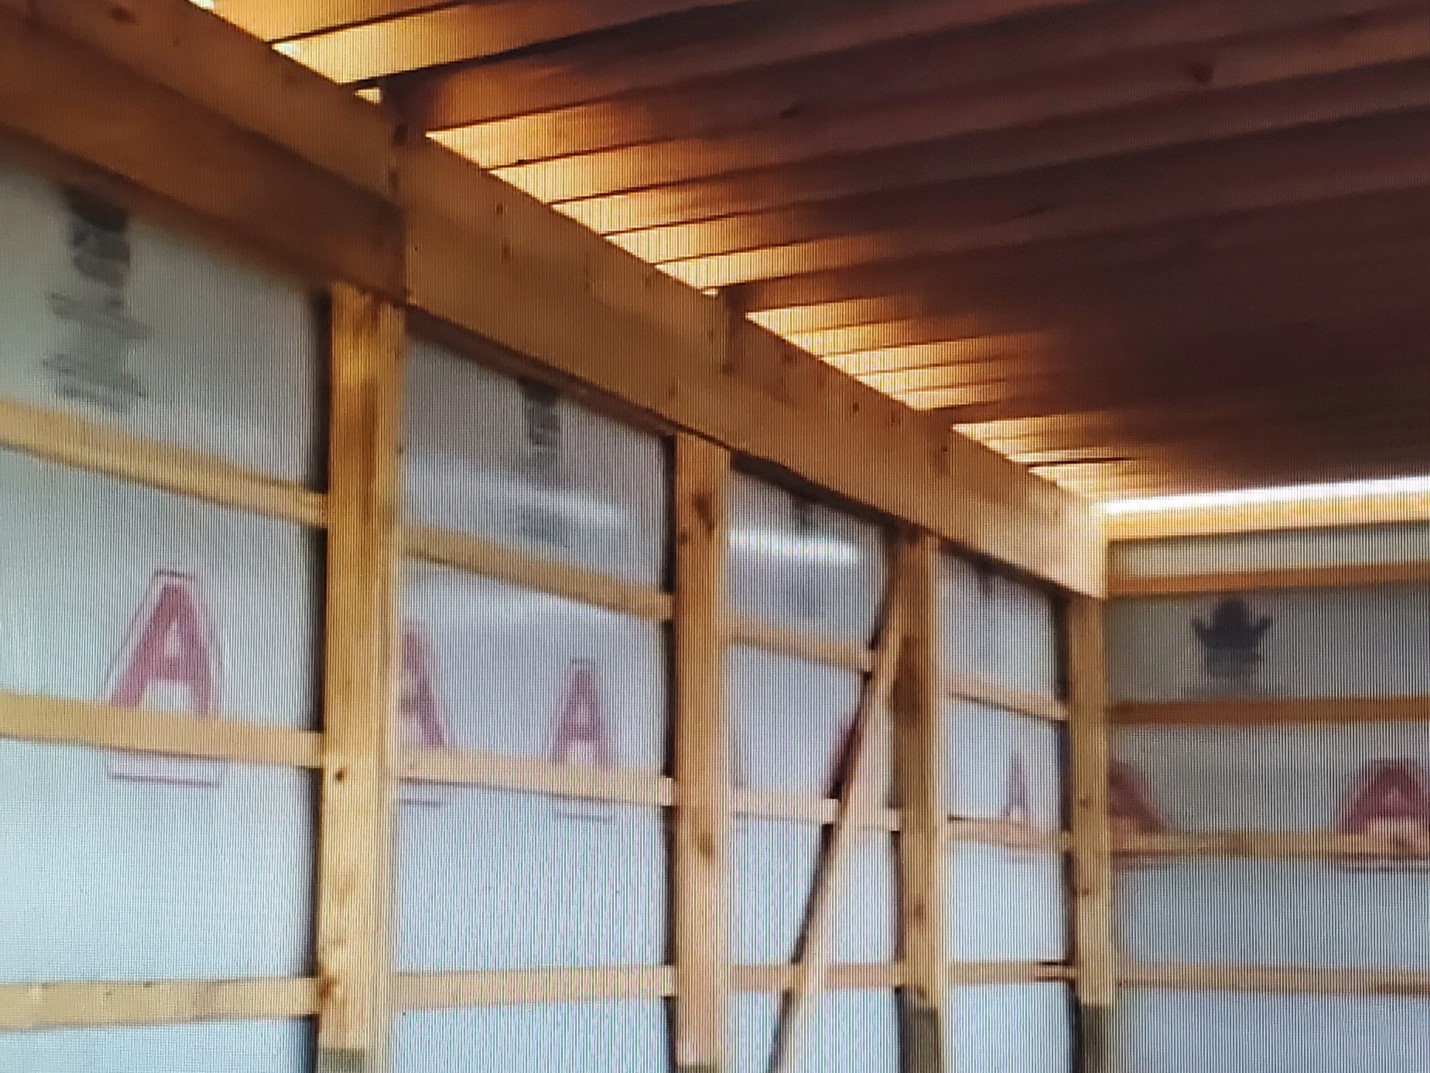
Loft Pic 2The interior 2×10 beams are attached to the inner and outer faces of the 4×6 posts. Joists are flush with the top of the beams, and each has a joist hanger. Only the inner beam carries any weight, as there is no connection (except for the 3/4″ flooring) between a joist and the outer beam.

All three lofts are built that way and I have seen others on the Internet and locally built the same way. What is the purpose of the outer beam? Why not use a double beam (two, 2×10) and attach to a face or notch in the post?

All three lofts are attached to large posts at the gable ends of the building, apparently to stabilize the “inverted pendulum” structure without using diagonal braces.

I have been scratching my head about this for months and came up with only 2 reasons:
1) By sandwiching the interior posts with the additional 2×10, some of the twist in the treated posts can be removed, which seems like a terrible waste of wood if that is the only purpose; and
2) The design allows for addition of a diagonal 4×4 to the posts, should it be needed.

I put the question to some engineer friends, and they all thought it was a waste of wood, but none of them was experienced in pole barn construction. I want to add a new loft and will rebuild one of the existing ones that was put up sloppily.

Any help would be appreciated.

Thank you, JOHN IN WELLINGTON

DEAR JOHN: Let’s begin by taking a quick look at the 2×10 beam itself. You are correct in thinking only one of the two 2x10s is doing any work. It is doubtful a great deal of thought was put into the placement of the second 2×10.

Assuming a residential live load of 40 psf (pounds per square foot) which is the lowest allowable by Code for a habitable area supported by lumber (bonus rooms in attic trusses can be designed for 30 psf) and a 10 psf dead load (typical for the weight of the joists and beams, floor sheathing and any drywall which could potentially be added to the underside) and plugging it into the beam formula of W x L^2 / 8 (here is some background: https://www.hansenpolebuildings.com/2014/10/non-engineered-building/) gives us this:

[(40 psf + 10 psf) X 10′ / 2 (1/2 the span of the floor joists) X 12″ (converts the 10′ to inches) X 8′ (the span of the beam)^2] / [8 X 21.3906 (the Section Modulus of a 2×10)] = 1122 which would be the required Fb (fiberstress in bending) for the 2×10. The strongest readily commercially available species of framing lumber will be Douglas Fir which in 2×10 has an Fb value of 990. In Southern Pine, the Fb value for a 2×10 would be only 800. In either case, your 2×10 beams are over stressed as a single member.

Your thought of the 2x10s being physically connected as a two ply beam is absolutely spot on.

Your engineer friends are correct in the belief what you have currently is a waste of lumber.

Moving forward, I would strongly encourage you to consult with a Registered Design Professional (RDP – engineer or architect) who can design for you a loft space which is actually adequate to carry the imposed loads. Besides confirming the design of the members of the loft, they can also examine the adequacy of the exterior columns and footings to be able to support the loft areas.