DEAR POLE BARN GURU: Good morning, Mike … I have a question for you.
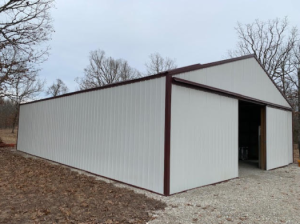
I’m trying to decide between a 30×40 barn and a 60×40 barn. It would have a gambrel roof with a loft. 16′ wide sliding door in the center of the short ends.
All other things being equal, what is the cost difference between 30×40 and 60×40?
Or is there a size that’s more economical?
Thanks, Mike T. in Kershaw, SC
DEAR MIKE T.: Having to design the loft to support hay weight is not so much of a challenge as it is expensive. For sake of discussion the comparison was done a full loft, however it may be more practical to only have the loft in the center.
There is an economy of scale with pole buildings. For practical purposes, the price per square foot is going to decrease as the building footprint increases (until clearspans become very wide). I’ve also never had a client tell me their new building is “just too big”!
In your particular case, you could double the size of the building, while increasing the investment by only about 2/3.
Mike the Pole Barn Guru
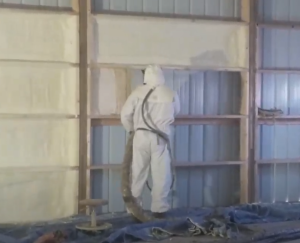
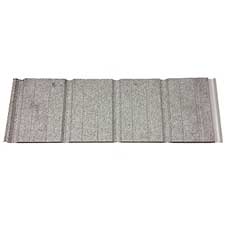
DEAR POLE BARN GURU: Renovating our pole building arena is an undertaking. We were quoted $70k (which included windows to replace the plastic) so we are doing it ourselves. I expect materials to run about $25k in the end. The company that sold me the metal ceiling panels based out of Kentucky told me that people in his area do it all the time and that the best way to go is with blown insulation, as fiberglass batting is a lot more time consuming to install. I decided against spray foam because it is toxic to begin with and then they put fire retardants in the mix which is even more toxic. Plus it is expensive.
What will happen if we don’t have a “thermal break” on the underside of the metal roof? There will be a lot of condensation falling on the blown insulation? We have a roof vent which I guess is correctly installed because we never have water coming in even during the most violent and heavy of rain storms. Isn’t this vent enough to prevent condensation?
If a herd of animals lived in the building, then I would worry about condensation, but there will be maximum 2-4 live beings in there at one time. Removing the roof to install a reflective radiant barrier is not an option. How about covering the underside with “Tyvek” the stuff houses are wrapped in? Are you saying the blown insulation on the ceiling will not do its job without this thermal break on the roof, or is it the condensation you are concerned about? What does the reflective radiant barrier need to reflect? Cold coming from outside, or heat coming from outside?
We have blown insulation in our 14 year old house. I guess it is newspaper. It works a charm. We’re on a hill and it can blow out there and we’re cozy inside. One can buy cellulose from Lowe’s or Home Depot and they lend you a machine to install it. I was worried that wind from the roof vent would blow it around. I was also worried critters would nest in it, although we have covered such access with 1/2″ wire mesh. Nonetheless, critters are very resourceful about getting into things. I was worried that if it got wet it would get moldy. My daughter is very sensitive to mold. Best thing is it stays dry….and like I said, we never had rain come through that vent, although when the conditions were right, we’d get a bit of snow blown in. We have a lot of snow now, and no snow in the arena. So it has to be special conditions. I thought of covering the blown insulation with tarps to protect it from wind or moisture. Is that a good or bad idea?
BTW, we have no intention of heating the arena. The goal is to have it warmer in there than outside….hopefully a little above freezing.
I guess for the walls we will use fiberglass. The plastic panels will be replaced with double glazed “picture” windows (they don’t open) and will run the length of about 2/3 of the arena at 2′ high.
A trainer we met from Maine said he insulated his riding arena and it really helped keep out the cold.
I’m wondering what will happen in summer. Will it keep out the heat, or trap it?
It’s great communicating with someone who knows what they are talking about. I’d be happy to compensate you for your expertise.
P.S. Here’s a fiberglass story. The owner of a horse boarded at our farm had a plumbing leak in her basement. The plumber came and fixed the leak and left. Several weeks later she developed itching sores all over her body. She woke up one morning with arms so swollen she could not bend them and a face twice the size of normal. She went to the ER and they told her a dust allergy, so she threw out all drapes and mattresses, etc. and cleaned the carpet and whole place. However, it didn’t help and she landed in the ER again. Meanwhile they found out that the plumber had pulled away fiberglass insulation from the broken pipe, and because of the leak it was all wet. He didn’t remove the wet fiberglass and so mold developed, and with the furnace down there blowing hot air (with the mold) all over the living space it made her VERY sick. She moved out immediately and had to take a lot of nasty drugs, and she is still not well. Plus, inhaled fiberglass is a known carcinogen, as you probably know.
A GREAT thing to insulate with is wool. But who can afford it? They do make wool “bats” for the purpose though. CINDY
DEAR CINDY: Without the thermal break under the roof steel, there will be condensation on the underside of the roof steel, which will result in rain upon the attic insulation. Ventilation alone may cure some, but not all of the condensation problems.
The major source of the warm moist air rising is the ground under your building (evapotranspiration). According to www.ScienceDirect.com the average value of the moisture evaporation with uncovered ground is 0.33 to 0.53 gallons per hour per square foot. For a fairly typical 60 by 120 foot riding arena, this could be between 57 and 90 thousand gallons per day!!
Housewraps like Tyvek are not vapor barriers – they are designed to allow moisture to pass through.
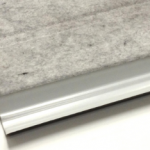
Reflective radiant barriers just happens to be a very cost effective thermal break. The aluminum facing on the exterior reflects radiant heat in the summer, keeping the building cooler.
Insulating your building will keep it cooler in the summer, there is no question there. As to the effectiveness for keeping things warmer inside, without a heat source the air inside will be at or near the temperature on the outside.
And thank you very kindly for your offer of compensation. I do my best to provide quality information for the good of the industry as a whole. If you feel I have been of service, please feel free to share the link to this blog with others.
Mike the Pole Barn Guru
 Commonly (when addressed at all during construction) solutions to this problem have often involved creating a thermal break. A thermal break reduces contact between a structure’s warm interior air and cooler metal roofing, thereby reducing or eliminating overall condensation. Installing a reflective radiant barrier, often termed Vapor Barrier, involves laying rolls of faced ‘bubble wrap’ across your building’s purlins prior to roof steel installation. Ideal weather conditions are required for this as even a slight wind can make this a challenging or altogether impossible task. This can cause jobsite delays and may bring progress to a halt while a structure remains unprotected to weather. Even when ideal weather conditions are present, installing a reflective radiant barrier can be a very dangerous task, requiring builders to expose themselves to awkward material handling on a building’s bare roof framing. These risks and delays often generate additional costs for both owners and builders, but have often been necessary with reflective radiant barrier being the only relatively affordable option to prevent interior dripping.
  If you have not seen ridiculous claims of double digit R-values from reflective radiant barriers yet (aka ‘bubble wrap insulation”) you will. Read more about these claims here:
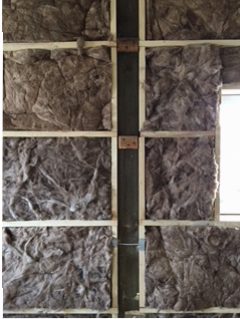
 Your builder sadly did you no favors in not having a means to prevent condensation on your roof steel underside. It also requires having an actual thermal break, not just a vapor barrier. Your best solution now is to have two inches of closed cell spray foam applied directly to the underside of your roof steel, making certain they do not block ridge vents. Without this thermal break, expect to end up with damp insulation.
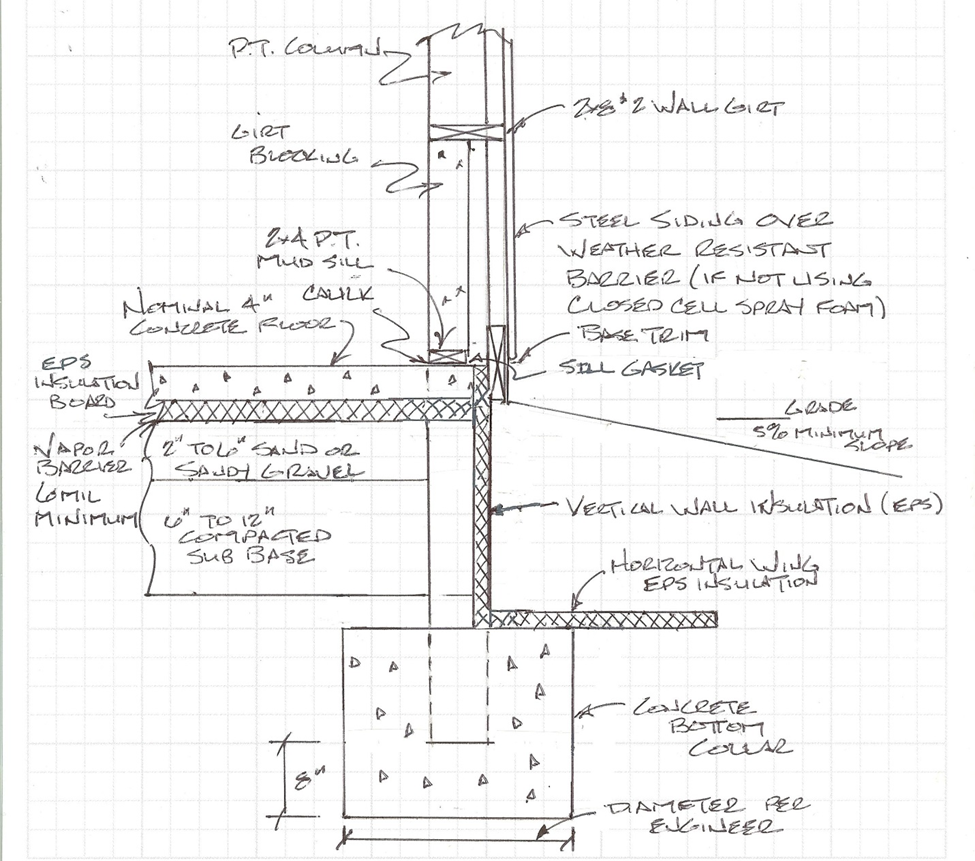
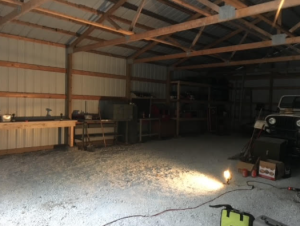
 You need some provision for condensation control below roof steel – easiest would be to order roof steel with an Integral Condensation Control factory applied. In Tennessee you should not have a vapor barrier between steel ceiling liner panels and blown in fiberglass attic insulation. Placing a barrier on the underside of roof purlins does not appear to make a noticeable difference in performance of attic ventilation. Although you did not ask, you should have a well-sealed vapor barrier (6mil or greater) and R-10 EPS insulation under slabs (even in non-conditioned areas) to minimize potential for condensation on top of slab.
 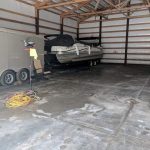 #1 Controlling source – if there is not a well-sealed vapor barrier under your concrete slab on grade, you should be planning on two coats of a good sealant for it. If you do not know if there is a vapor barrier under it or not, leave a wrench on it overnight. Next day, pick the wrench up and if there is a dark place on the floor surface where the wrench was, you have no under slab vapor barrier.
 #4 Ventilation – you are going to create a dead attic space above an insulated ceiling. If it is not adequately vented you are going to have problems. Best combination is vented eaves and ridge. Your building will require at least 1944 square inches of net free ventilation area (NFVA), distributed equally between eave and ridge. If this is not possible (building has no sidewall overhangs), then your choice is limited to gable vents and it will take many of them to provide adequate NFVA.
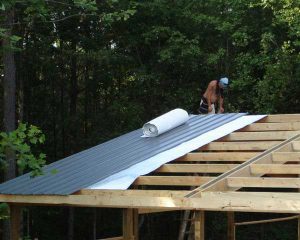 Commonly (when addressed at all during construction) solutions to this problem have often involved creating a thermal break. A thermal break reduces contact between a structure’s warm interior air and cooler metal roofing, thereby reducing or eliminating overall condensation. Installing a reflective radiant barrier, often termed Vapor Barrier, involves laying rolls of faced ‘bubble wrap’ across your building’s purlins prior to roof steel installation. Ideal weather conditions are required for this as even a slight wind can make this a challenging or altogether impossible task. This can cause jobsite delays and may bring progress to a halt while a structure remains unprotected to weather. Even when ideal weather conditions are present, installing a reflective radiant barrier can be a very dangerous task, requiring builders to expose themselves to awkward material handling on a building’s bare roof framing. These risks and delays often generate additional costs for both owners and builders, but have often been necessary with reflective radiant barrier being the only relatively affordable option to prevent interior dripping.
  Provided your building has roof trusses designed to adequately support a ceiling load, your best bet will be to blow in insulation above a flat level ceiling. If you do not have original truss drawings available to determine if they have a bottom chord dead load (BCDL) of three or more, then you will need to find the manufacturer’s stamp placed on truss bottom chords and contact them with your site address. With this information they should be able to pull up records and give you a yes or no. If you are yet unable to make this determination, a Registered Professional Engineer should be retained to evaluate your trusses and advise as to if they are appropriate to carry a ceiling and if not, what upgrades will be required.
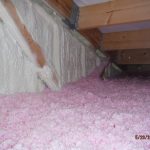
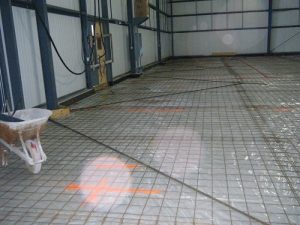
 In an ideal dream world every 6×6 column would measure exactly 5-1/2 inches square. However lumber comes from trees, and trees are organic and tend to have a certain degree of variability. Rarely are timbers going to be dried after being milled, other than by nature. As such, they most usually start off being cut slightly over-sized in order to allow for shrinkage hopefully ending up with a 5-1/2 inch dimension.


