Tag Archives: radiant floor heating

Fishing Cabin Insulation

Fishing Cabin Insulation Blog-Compliments to Rick Carr in sharing this post on how he insulated his fishing cabin. 

My insulation challenges are a little unique due to having an above ground crawl space, radiant floor heating above the sub floor, 2×8 and 2×10 walls and having a partial attic area (over the bedrooms) with the remainder a vaulted ceiling.  My insulation is done and the drywall is going up.  The test for the plan will wait until next winter.

Here is what I did.

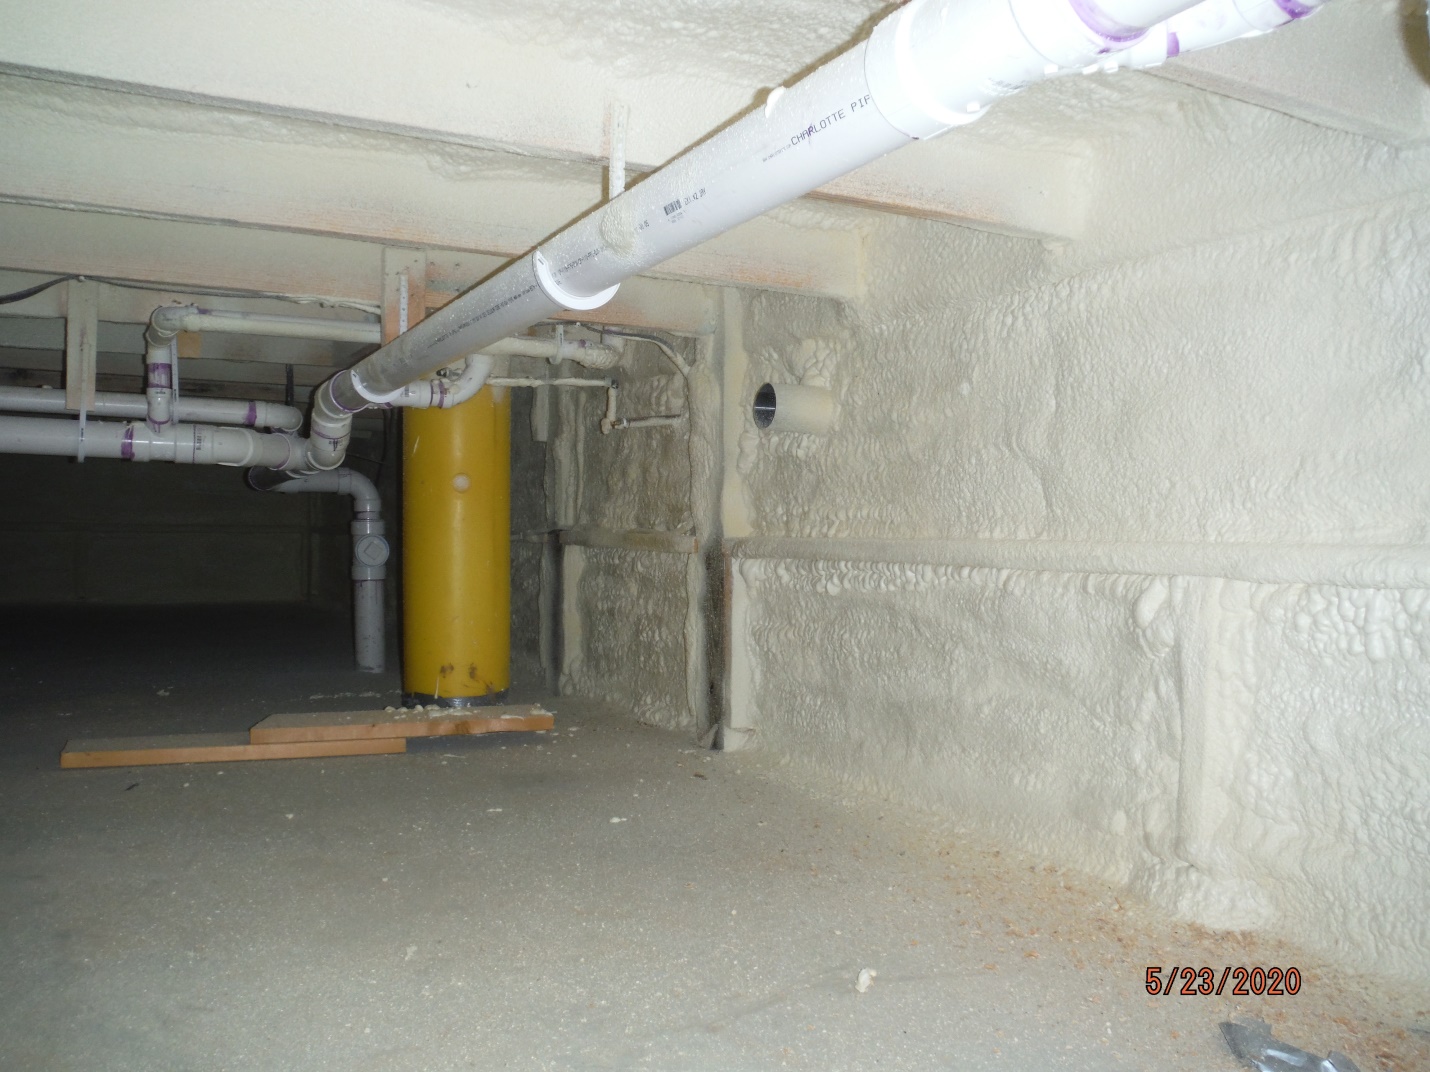
First I had closed cell foam sprayed.  In the crawl space, walls 3 inches closed cell spray foam, completely sealed and R 21.  Also we sprayed the underside of the subfloor to 1 ½ to 1 ¾ inches.  The goal was to get R 1- to 12 on the underside of the floor.  The radiant floor people tell me that heat moves to cold, so R 12 under the floor will have heat going up into the living space rather than down into the crawl space.  There is also R 10 foam board and poly under the concrete.

I also had 3 inches of spray foam, R 21, on the underside of the roof steel.  The drywall will go on the underside of the roof purlins.  We used 2 x 10 roof purlins to get a 9.5 inch cavity for insulation.  I put Tyvek under the roof steel, so the spray foam actually adheres to the Tyvek, this will allow replacement of roof sheets, if ever needed.  This still leaves a 6 inch space for R 21 unfaced batt insulation.  Spray foam people will tell you that because the spray foam completely seals the effect is greater than the R value.

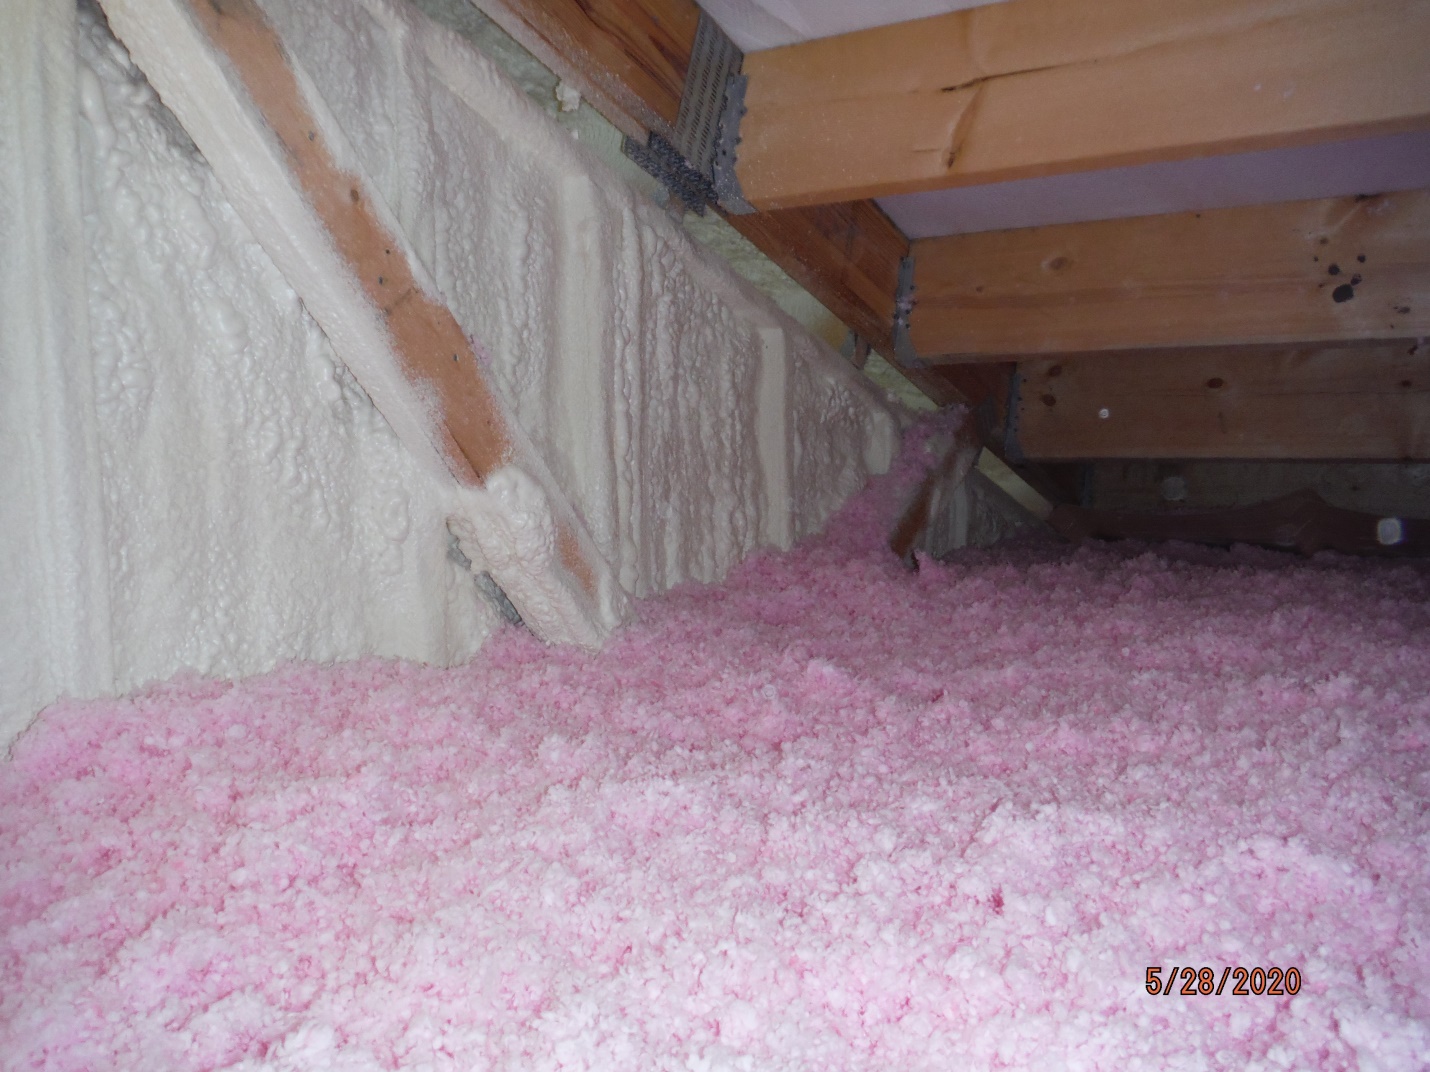
The Attic side of the divider wall was also prayed with 3 inches of closed cell foam.  There wasn’t a normal 6 inch cavity to fill with batt insulation which made the spray foam a good choice for this.  We also blew in 16.5 inches of fiberglass insulation into the attic above the bedrooms for R 49 in that area.

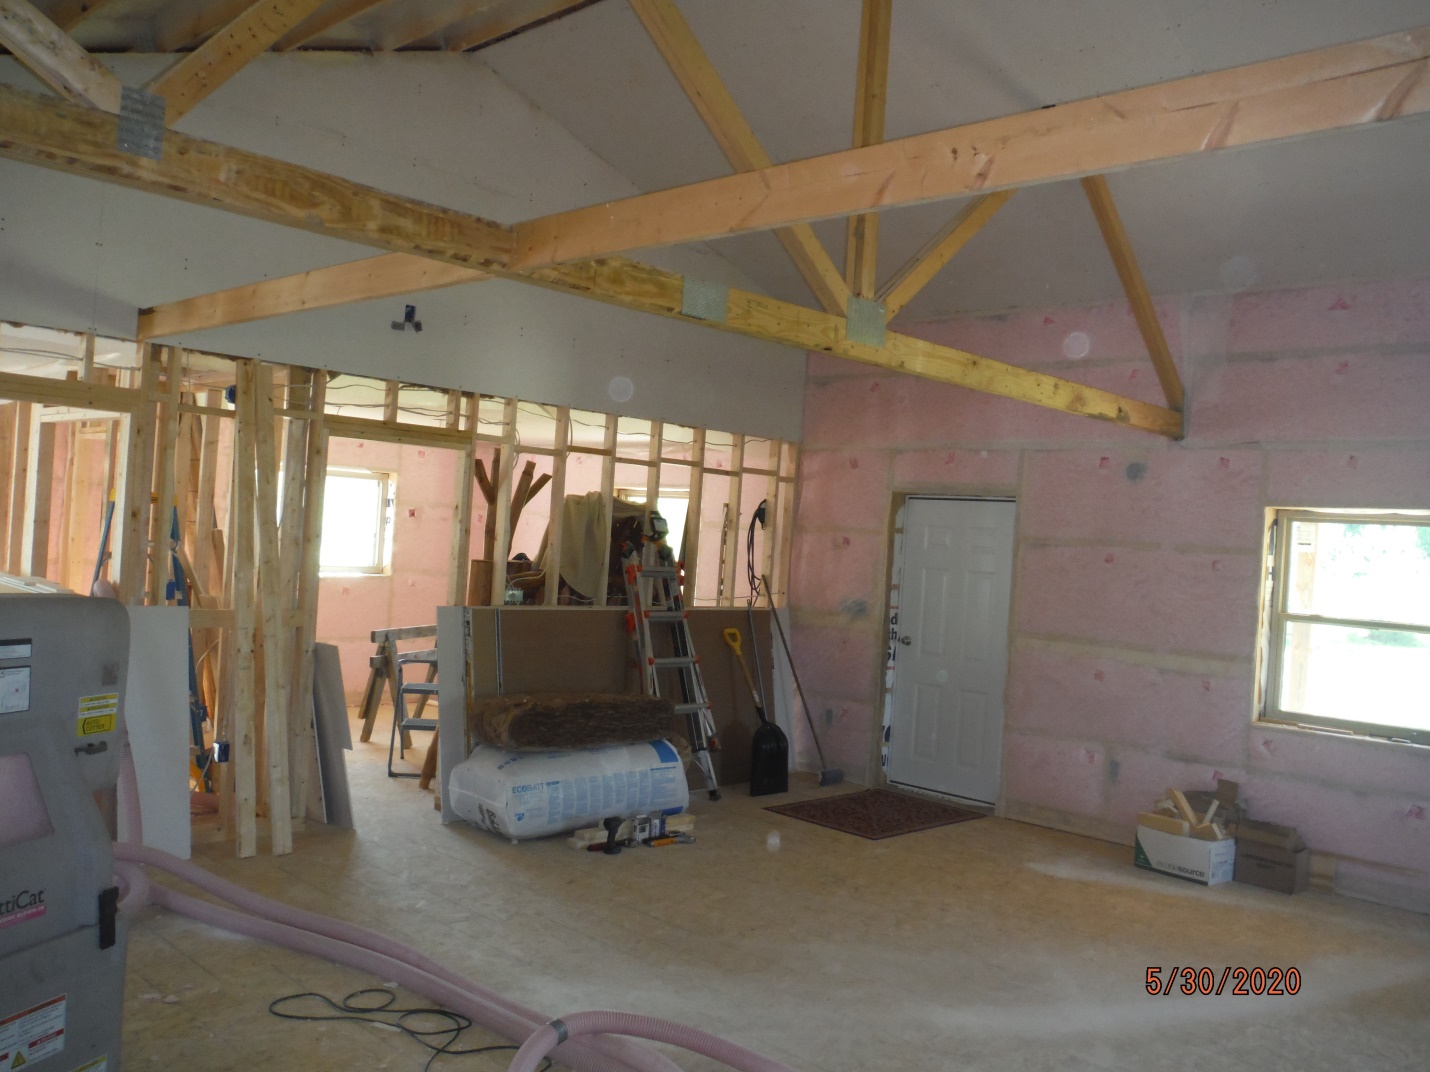
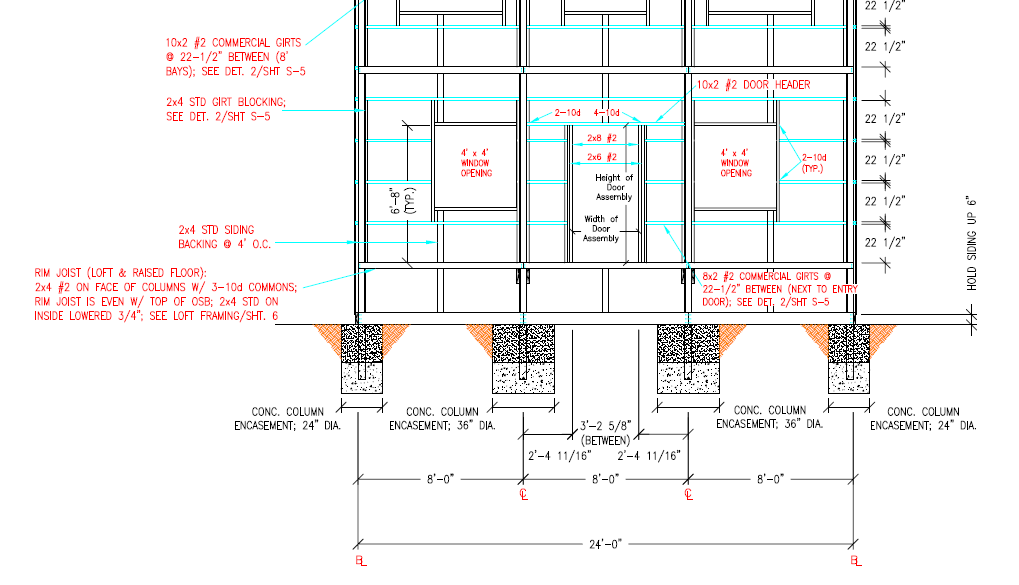
 The walls are another matter.  The 42 foot walls on the north and south sides of the building are 2 x 10 walls with 9.5 inch cavity.  The 30 foot east and west walls are 2×8 walls with 7.5 inch cavity.  I chose blown in wall insulation for the walls.  It is commonly thought that you can only have a pro blow insulation into your walls, not so, I did it myself, with some help.

I chose Owen Corning’s Procat product and system, which can be purchased from contractor supply houses. https://www.owenscorning.com/insulation/products/procat  This is the same product as used in the ceiling.  The supply house will loan you the blower, which has a control at the end of the hose.  You staple Insulweb netting to the framing, cut a small slit in the netting, insert the hose and blow it in.  This might be a little more costly than batt insulation, but where do you find batts for 2 x 10 walls?  Also the electric all over the place gets in the way of batts, no problem, filled in and around.  The blown in insulation fills into all cracks and spaces.  What you spend in the product is also made up in time/labor savings; it goes very quickly once you get the hang of it and the netting up.

The puffing or pillowing is not a factor because the product is light enough that the drywall will straighten it.  Also you can use your free hand to minimize the pillowing if you have a large cavity.  The product R value for 5.5 inch cavity walls (2×6) is between R 22 and R 24 depending on how full you pack it in.  With my 2×8 and 2×10 walls, the R value is literally off the chart, well over R 30.


I think I’ll be snug this winter.

Pole Barn Cabin Part II

Today’s blog is a continuation from yesterday….Rick Carr, Senior Building Designer for Hansen Buildings shares his thoughts on planning his new pole barn cabin.

From JA Hansen, co-owner of Hansen Buildings….Thanks Rick!

Next I dealt with the crawl space:

After deciding that I want to do a crawl space, several design issues arise and decisions on how you will deal with those issues can affect how the building is designed and ordered.  All reading on crawl spaces emphasize making sure that you avoid moisture issues in the crawl space.  Next you need to do something to avoid losing heat to the ground and out the sides of the crawl space, this crawl space being above grade.   How tall do you make the crawl space?  Do you “condition” the crawl space?  How do you insulate it if you do “condition” the space?  Most crawl spaces are underground with a foundation wall, but that is not the case with post frame buildings so there is very little information out there on how to plan the post frame crawl space  and to “do it right”.  I have read the five blogs articles on crawl spaces, but there are still unanswered issues.

https://www.hansenpolebuildings.com/2013/03/crawl-space/

https://www.hansenpolebuildings.com/2016/04/foundation-and-crawl-spaces/

https://www.hansenpolebuildings.com/2018/06/conditioned-post-frame-crawl-space/

https://www.hansenpolebuildings.com/2018/02/insulating-post-frame-home-crawl-space/

https://www.hansenpolebuildings.com/2016/12/cost-savings-crawlspace-vs-slab/

I will present what I think that I want to do and I’d like to get Mike the Pole Barn Guru’s ideas on it with a question or two.

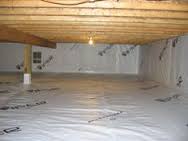
I plan to condition the space, so I would put down between 6 and 10 mil plastic, then 2 inches of foam board insulation followed by pouring a concrete floor, just enough to keep critters out.  I plan to use BIBS insulation in the walls, so I would extend that down the exterior crawlspace walls to the concrete.


The radiant floor heating people that I am talking to have recommended that I put between R-13 and R-15 insulation on the underside of the sub-floor.  The reasoning is that heat wants to move to cold and that you don’t need the crawl space heated to the same temperature as the living space; so insulating the underside of the floor keeps most of the heat up in the living space.  I need to talk to the insulation contractor about what type of insulation to use here.  Spray foam might be good, but the spray foam would make working on any plumbing or electric that is run below the floor very difficult, partially defeating one of the purposes of having the crawl space.

The plastic with the concrete over the top should control the moisture issues coming up from the ground.  The 2 inches of foam insulation under the concrete should help to prevent losing heat to the ground. The concrete should keep critters out and allow using a “creeper” to move around down there.  I haven’t decided on the height, but I’m thinking that it should be three feet.  When on all fours, I am almost three feet tall.  I am 6’3” and it has to be functional.  I would need assistance to figure out how high to make the top of the floor to yield the three feet considering the concrete and foam.

I have not yet discussed this plan with the building inspector.

So Mike, the questions; do you think that this is a good plan?   Would I be able to put in the 2 inches of foam board and the 2- 2 ½ inches of concrete (normal concrete floor being 3 ½ inches) without doing anything different to the splash boards considering that the splashboards are 2×8’s and that there will not be any door thresholds to be worried about?

Stay tuned for Mike the Pole Barn Guru’s answers in an upcoming blog.

Development of My Post Frame Cabin Plans

Thank you to Hansen Pole Buildings’ Designer Rick Carr for today’s guest blog.

Development of my Cabin Plans

I have been looking at both open land and existing “cabins” in the Southwestern part of the State of Wisconsin where I do a lot of fly fishing for trout in anticipation of eventually retiring.  I want to be able to go out and stay for four or five days to a week on short notice without having to worry about where to stay while having my own personal items and gear there waiting for me along with the ability to just fire up the grill for dinner rather than going out every night.  Space for friends bearing Bourbon to visit was also a consideration.

Existing Cabins were disappointing to say the least, either upper level sleeping (which doesn’t work for over 65 year old guys) or tiny showers, filthy kitchens. There was always something very wrong; and all this with a limited budget.  It became clear that building would have to be an option unless I was going to settle in some area or another. With my five year plus experience as a Senior Building Designer with Hansen along with two years on a post frame building construction crew in my youth, I knew that if I had to build, it would be a post frame building.

Last spring I found and bought a nine acre parcel with 1,600 feet of the headwaters of a crystal clear spring creek full of brook trout flowing through.  I have three of the four permits that I need to allow me to put in a driveway and culvert across the creek and the wetlands to the high ground building site on the far side.  The front porch/deck will have great views of both sunrises and sunsets looking over the valley.

Some of the deciding factors for post frame were, knowing that a post frame building can be built to be extremely well insulated for climate control, knowing the cost advantages, knowing the longevity, knowing the framing system, and the fact that I can do a lot of the building myself for additional saving. I have also been developing relationships with the local Amish community who I know that I can hire for reliable economic labor.

About Hansen BuildingsI plan to construct the building so that it can be used as a full time residence for resale value, although that is not my intended use.  Relative to a well-sealed and insulated building, I intend to use BIBS insulation in the walls using 2×8’s in a 7 ½ inch cavity and closed cell foam insulation on the underside of the roof purlins designed for drywall to create a vaulted ceiling in part of the cabin.  This combination will make an extremely tight building making it more comfortable and less costly to heat.

The cost advantages of post frame start with not needing a full foundation and the costs of a full foundation.  Then post frame is very efficient in terms of lumber usage. Over the years I have had client after client send finished building pictures with the tiniest of scrap piles in the background.  My experience and familiarity with our construction manual gives me the confidence that I can act as the general contractor and jobsite supervisor while hiring local Amish builders for more cost savings.  I have a lot of DIY experience so a post frame building from Hansen will allow me to finish most of the interior myself for additional savings.

I am not concerned with how long the building will last, rotting of posts, as some people are because I know that the testing of current pressure treating is good for 70 plus years.  At the age of 66, I will be able to use this Cabin for as long as I can manage, ten to fifteen years, and still have many years remaining of useful life for resale value.

My next consideration was a heating and insulating plan.  My experience as a Building Designer tells me that it is very important to have a heating and insulating plan before ordering a building to make sure that the correct options are designed into the building and are on the Engineer Sealed Plans, especially on a post frame building to be used as a residence.  I have a friend that has a similar building/cabin in the fishing area. A year or so ago on an early spring fishing trip, he asked me to stop in and check on his cabin that was last used back in the prior fall. I walked in and there was no dust, after no one being there for months. I was convinced at that point that I wanted radiant floor heating, but being close to a flood plain, (last year there was a 100 year flood in the valley).

I knew that I wanted a crawl space, which would give a few extra feet of protection in the event of a 150 year flood.  The other advantage is that the crawl space would provide access to plumbing in the event of a problem or change versus having the radiant floor heating and the plumbing encased in the concrete floor. The drawback is that a radiant floor in a building with a crawl space adds other design issues.

Come back tomorrow as Rick investigates his pole barn cabin’s crawl space issues, and asks for Mike the Pole Barn Guru’s wise advice.