Welcome to Ask the Pole Barn Guru – where you can ask questions about building topics, with answers posted on Mondays. With many questions to answer, please be patient to watch for yours to come up on a future Monday segment. If you want a quick answer, please be sure to answer with a “reply-able” email address.
Email all questions to: PoleBarnGuru@HansenPoleBuildings.com
DEAR POLE BARN GURU: Hi,
I recently built myself a pole-barn home in NY that used the traditional flat girt style with columns 8′ OC and a double 2×10 truss header and trusses 4’OC.
The overall result has been great as we have achieved net-zero energy with our all electric utilities and solar PV array.
I’m thinking of getting into the home building business and want to use the post-frame technology to deliver the most affordable and highly-engineered product.
After reading your site, I’m totally sold on the double truss system and 12′ OC truss spacing. However, using flat girts on either side of the posts gives us an extra 3″ of insulation and also reduces thermal bridging in the assembly for the spaces between the posts (essential for getting the heat loss down for the building).
Is there any way to combine the two methods? For example, i was thinking of using intermittent single studs between the columns that are anchored to the floor to support the flat girts in between the posts.
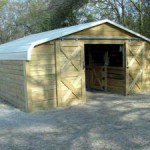
Or are there any creative solutions that you have used in the past or can think of? Here are a few photos of my project for reference. If you have any questions feel free to contact me.
Thanks, KNOWING IN NEW YORK
DEAR KNOWING: Thank you for visiting our website, we hope you will continue to avail yourself of the free information available within it.
Post frame (pole building) construction will certainly be more affordable than any other permanent type of construction, and it does afford the ability to create some deep insulation cavities.
The challenge of flat girts on the outside of the columns is they (in most cases) will deflect more than what is allowed by the Codes. Read more about flat wall girt deflection here: https://www.hansenpolebuildings.com/blog/2012/03/girts/
Here is an idea which might meet with all of your needs…..between the wall columns, install either bookshelf style girts (https://www.hansenpolebuildings.com/blog/2011/09/commercial-girts-what-are-they/) or construct a vertical stud wall with the thickness of the wall matched to the size of the wall columns. With bookshelf style girts, make the girts the next size larger than the columns, and leave 1-1/2″ sticking outside of the column faces. In the stud wall scenario, place 2×4 “flat” girts on the face of the studs, across the columns, at 24 inches on center. Regardless of the route, use a high quality building wrap to cover the girts prior to application of either sheathing or siding.
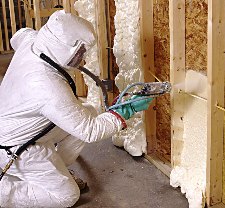
I’d recommend the use of BIBs insulation: https://www.hansenpolebuildings.com/blog/2011/11/bibs/
On the inside – Use reflective insulation with adhesive pull strips as your vapor barrier, then apply drywall.
Good Luck and let me know how you come out – I appreciate the photos!
Mike the Pole Barn Guru
DEAR POLE BARN GURU: Greetings, are the “typical” roofs -as in your monitor style project 04-0328, considered “walkable” for once in a while fixes? Not planning on making it a habit –just good to know ADVENTURING IN ARIZONA
DEAR ADVENTURING: I’ve been asked this question more than a few times over the years, and have always wondered why it is anyone would actually want or need to be walking around on their roof. With steel roofing, unless it is installed improperly in the beginning, there should never be a “fix” to be made.
Shingled roofs are an entirely different story – as shingles are very susceptible to damage, especially from hail. For more reading on hail damage:
https://www.hansenpolebuildings.com/blog/2013/05/steel-roofing-5/
The answer to your posed question is – yes, the roofs can be walked on. Because steel roofing can be slippery, if you feel the desire to walk on the roof, please use care to step only where there is a screw – the head of the screw will give a traction point to help you stay on the roof. And be sure to use shoes with good soles on them.
Mike the Pole Barn Guru
DEAR POLE BARN GURU: Scissor trusses, or raised lower cord and false economy?
Some claim that the increased cost of the truss is offset by the reduction in side wall height. CHAFING IN CHAFFEE
DEAR CHAFING: For just a moment let’s assume the scissor trusses add no extra cost. A tall door is placed in the center of an endwall (after all – the concept of scissor trusses is most often to be able to get a taller door, into an eave height the door should not fit in). The door is opened and the VTT (very tall thing) is driven into the building. The then driver decides the VTT would be ideally parked off to one side, rather than right in the center of the building, where it cannot be easily gotten around.
A loud WHAP is heard, right before the roof caves in on top of the VTT, because the VTT has run into the bottom chord of the scissor trusses – which are lower closer to the sidewalls of the building.
In nearly every case I can imagine, it will be less expensive to have a taller sidewall and complete unobstructed use of the inside of the building, than to go with scissor trusses.
There are some cases where scissor trusses make sense – and none of them have anything to do with economy.
Planning upon finishing the ceiling and like the look of a vaulted ceiling? Scissor trusses make sense.
Your Planning Department has a restriction upon eave height (but not overall height) – scissor trusses again make sense.
The verdict – false economy.
Mike the Pole Barn Guru
DEAR POLE BARN GURU: Per square foot cost of steel pole with 6″ concrete floor and pitch roof with 14′ door. BONKERS IN BAY CITY
DEAR BONKERS: As the boss used to say, $3 a square foot, but you need to cover at least an acre. Have an 8’ eave with no walls, lots of interior columns and an uninsulated galvanized roof.
Pole buildings, just like any other form of construction, become more cost effective as the “footprint” of the building increases. Want to lower the cost per square foot? Enclose more square feet. Or reduce the eave height. Or go narrower and longer rather than wide but shorter. Or don’t put on any doors. Or take off the overhangs, wainscot or other features. Or….get the picture?
The quickest and best way to get an exact price on any pole building is to put in a request for a quote at: https://www.hansenpolebuildings.com/freequote.htm
And if you get a quote, don’t compare a 40’ wide by 24’ deep to someone else’s 60 x 80 by only using “per square feet” as your measure. Get a comparison of “apples to apples” – that’s the only way you will know exactly what you are paying for.
Mike the Pole Barn Guru
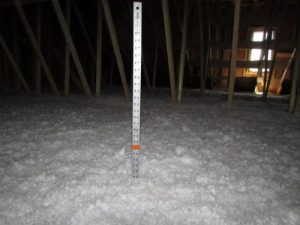
 The most common yardstick for measuring insulation performance will be R value, but there’s a problem. Insulation packaging shows lab analysis of R values, but it’s based upon used testing completely eliminating air movement from results. This matters a lot with fluffy insulation materials because air movement greatly lowers real-world insulation performance. Drafts and air currents often happen within wall cavities and attics and this will be why real-world insulation performance can be significantly lower than advertised values.
 Nice to see jurisdictions enforcing IECC (International Energy Conservation Code) requirements, as it will result in more energy efficient structures. In Ouray County, you are in Climate Zone 6B. This requires ceiling R-49, wood frame walls of R-20 plus R-5 (or R-13 plus R-10) where second value is continuous insulation and slab edges to have R-10 four feet deep.
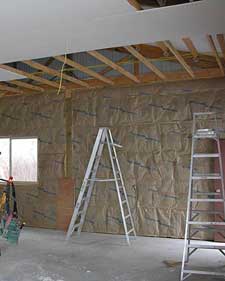 uilding Designer Doug asked, “I’m sorry to keep beating the insulation horse, but I have a client who wants to put up a 60×100 building on his timberland. I asked him about heating it and he wants to put a wood stove in it. So he wants to heat it occasionally. It’s in Clackamas County, OR, so it will get cold.
 DEAR POLE BARN GURU: I am building a 24×30 pole building 15 foot wall height. I am l am planning on not putting in a ceiling and insulating directly in the purlins up to the OSB. Soffits are vented but should I put in just some small gable vents for outlet flow? MIKE in SEDRO WOOLLEY
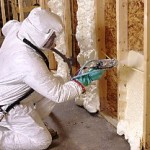
 Use two inches of closed cell spray foam against your wall and roof steel – if not, you run a high risk of condensation troubles. If you are going to blow insulation into your walls, use a product such as BIBs.
 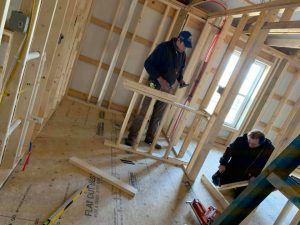 This myth is created and propagated by post frame kit suppliers and post frame builders who do not understand there is a solution – and a very cost effective one (in both labor and materials).
 With only 1200 square feet of living space, you should be able to easily exceed the state mandated required number of energy efficiency credits. We are currently changing our standard windows to U-29, meeting Washington’s standards. Lesser U values are available, however added expense may well not ever be recouped by energy savings. I would recommend two inches of closed cell spray foam on your walls, then BIBs or similar to fill the balance of wall cavity. R-49 attic insulation is mandated by Code, however your added investment to go to R-60 would be minimal. With either we would recommend raised heel trusses.
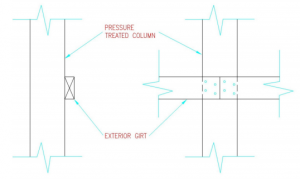 Wall girts flat on column exteriors are inadequate to carry imposed loads and will not meet deflection limitations. I would suggest you reinforce each of them to create either an “L” or a “T”. Assuming you have 6×6 wall columns, you could place a 2×8 bookshelf style girt on top or bottom of each girt, nailing through 2×8 into existing girts with a 10d common nail at say 12 inches on center. This will create an insulation cavity and allow for easy interior finish.
 As only incidental heat will be provided into crawl space areas, using rigid foam insulation boards beneath a thin concrete slab might very well prove to be an undue expense.
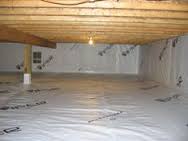 I plan to condition the space, so I would put down between 6 and 10 mil plastic, then 2 inches of foam board insulation followed by pouring a concrete floor, just enough to keep critters out. I plan to use BIBS insulation in the walls, so I would extend that down the exterior crawlspace walls to the concrete.
 Why would I do this? Comparing “apples to apples”, I know our price will beat theirs, every single time. I am doing this for your peace of mind. I guarantee other prices will be higher. And I will provide you with documentation to prove it!
 Reader DAVE in ROBERTS apologizes for buying from a competitor and writes:
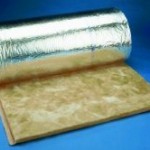 “STEVE would like some advice on insulating. He has a Cleary Building which has blanket insulation in the walls and roof and he would like to insulate over the top of this insulation and wondered if there would be issues.
  Thank you for your kind words. Sadly, most post frame home clients are just not savvy enough to be willing to make an extra upfront investment to super insulate their buildings. I have designed several post frame residential buildings for my own use, so I have learned from mistakes. Also, technologies have improved greatly in recent years, making energy efficient designs more practical.
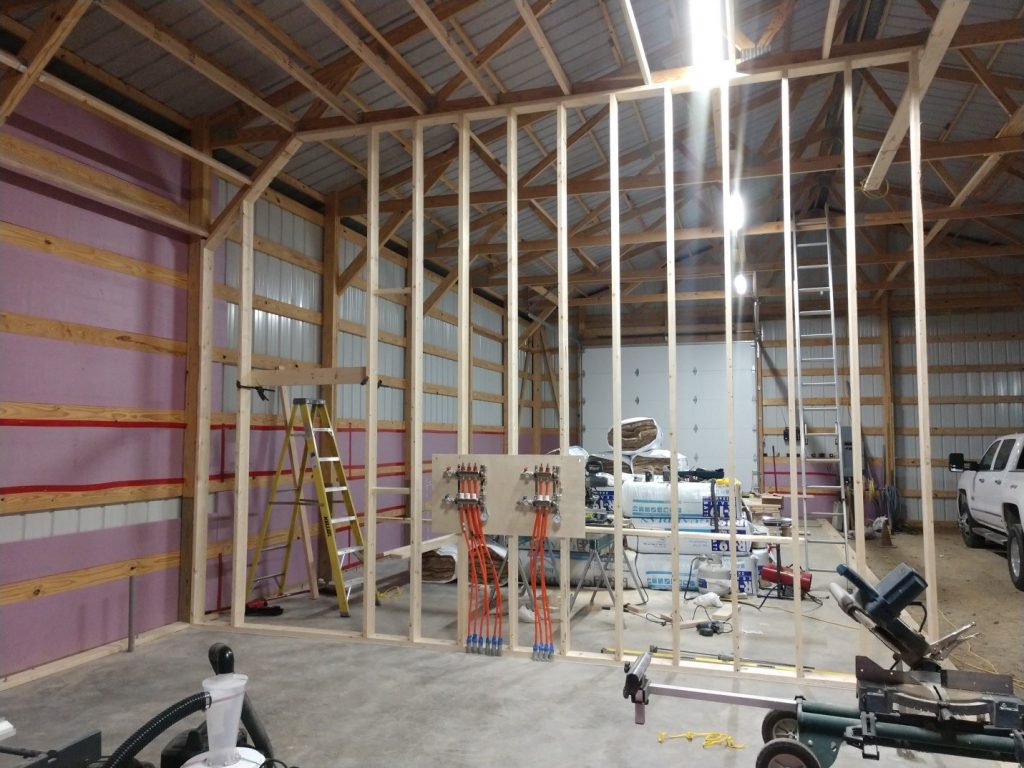
 Thanks again for the input. I read those articles you mentioned on the BIBs and the white liner panels. The liner panels are very common and popular around here but the article had very good points and gave me more to think about. As for the insulation, I was not familiar with the BIBs system and was impressed. I have done some more reading and reached out to a few contractors for quotes on the BIBs system. I do prefer to do things myself whenever possible however, so the option of installing fiberglass myself is still on the table. This is where I still have a question. You mentioned to fill the entire wall cavity with unfaced fiberglass and then cover with Visqueen. Is there an issue if the cavity is not completely filled and an air space is created between the fiberglass and the Tyvek® behind the metal sheeting? I ask because my walls are roughly 5 1/2” deep and obviously R13 is only 3 1/2” thick and R19 is 6 1/2” thick. If I go with R13 (cheaper) I end up with an air space. If I go with R19, I end up compressing it and losing r value anyway. Also, I have diagonal bracing in the corners which will also make it near impossible to tightly fill with fiberglass batts. I would love to go with the BIBs system but am waiting to see if it is within budget. If I can save considerable money insulating myself with batts I would most likely do so but need to be sure I am not causing problems down the road. Sorry for being so long winded and thank you very much for all your help and information.”


 between the wall girts. If steel siding is used, it could be beneficial to use a quality housewrap between the wall girts and the siding. With commercial girts, to properly size the insulation cavity, create a space equal to the depth of the pole, plus the 1-1/2″ outside of the posts where girts extend. This allows for drywall to be attached to the inside face of the wall girts, creating a smooth wall surface.


