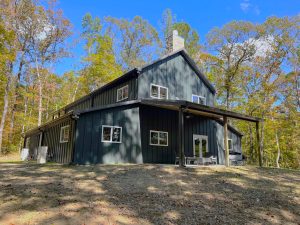
Whole House Barndominium Fans
Apparently when it comes to barndominiums, there is a limitless number of subjects to cover!
Reader CAROLYN in CLEVELAND writes:
 “We would like to build a post frame home but I would like to have a whole house fan to cut down on cooling costs. Most barndos we see under construction use spray foam insulation directly against the metal roofing/ siding which would prevent the use of a whole house fan. You talk about blown in insulation and roof venting which sounds similar to stick built homes. So is it safe to assume that your designs would allow us to install a whole house fan in the attic space with adequate venting? I fondly recall the ancient airplane engine attic fans 3 or 4 ft wide from years ago and was pleasantly surprised to see the new ones drastically reduced in size and volume. What is your opinion on this?”
Mike the Pole Barn Guru responds:
Most Hansen Pole Buildings’ post frame barndominiums are designed with dead attic spaces – blown in insulation above a sheetrocked ceiling (yes, very similar to stick built homes). This would certainly allow for use of a whole house fan and could prove to be very effective. I would still encourage use of a flash coat of closed cell spray foam insulation inside your barndominium’s wall steel. (For extended reading on flash and batt: https://www.hansenpolebuildings.com/2020/01/flash-and-batt-insulating-barndominium-walls/).
In most climates whole house cooling using a whole house fan can substitute for an air conditioner. Combined with ceiling fans and other circulating fans, whole house fans provide acceptable summer comfort for many families, even in hot weather. In addition to whole house fans, central heating and cooling system ducts can be modified to provide whole house cooling.
A whole house fan pulls air in from open windows and exhausts it through the attic and roof. It provides good attic ventilation in addition to whole house cooling. Whole house fans should provide houses with 3 to 6 air changes per hour (varies with climate, floor plan, etc.—check with a professional to determine what is appropriate for your home). Air-change rate you will choose depends on your climate and how much you will depend on your whole house fan for cooling.
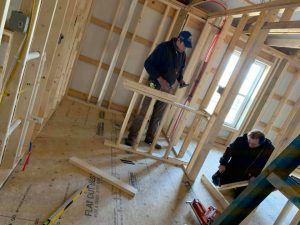
Installing a whole house fan can be tricky and should be done by a professional. An experienced professional should take your attic measurements and install your dedicated circuit wiring and, if needed, your new attic vents.
Attic ventilation will usually need to be increased to exhaust fan’s air outdoors. You’ll need two to four times the normal area of attic vents, or about one square foot of net free area for every 750 cubic feet per minute of fan capacity. Code requirements for dead attic space venting are 1/300th of the attic “footprint” with at least half of this located in the upper half of the attic. Net free area of a vent takes into account resistance offered by its louvers and insect screens. More vent area is better for optimal whole house fan performance.
If your fan doesn’t come with a tight-sealing winter cover, you should either buy one or build one. If you switch between air conditioning and cooling with a whole house fan as summer weather changes, build a tightly sealed, hinged door for fan opening easy to open and close when switching cooling methods.
Be cautious when operating these large exhaust fans. Open windows throughout the barndominium to prevent a powerful and concentrated suction in one location. If enough ventilation isn’t provided, these fans can cause a backdraft in your furnace, water heater or gas-fired dryer, pulling combustion products such as carbon monoxide into your living space.
Whole house fans can be noisy, especially if improperly installed. In general, a large-capacity fan running at low speed makes less noise than a small fan operating at high speed. All whole house fans should be installed with rubber or felt gaskets to dampen noise. You can set a multi-speed fan to a lower speed when noise is a problem.
You may be able to use heating and air conditioning ducts in your barndominium as a means of whole house ventilation. This would involve installing an intake duct to pull air into an attic-mounted system directing air into your heating and cooling ducts. A damper would control exhaust air from your home into the attic. Check with a local HVAC professional to find out if this option is right for you.
 This myth is created and propagated by post frame kit suppliers and post frame builders who do not understand there is a solution – and a very cost effective one (in both labor and materials).


