How to Install Bookshelf Girts for Insulation
Reader SEAN in CAMAS writes:
“Please help! I have plans for a 48x60x16 pole barn here in the NW. I helped build a pole barn when I was in my teens and I think mostly for my young back and ability to swing a hammer. However I am a bit lost with these new plans. They call for bookshelf girts. I sent a photo of the plans showing the details and the cut away. I get that the boards are on their side between the posts with a 2×6 “holding it up” on both ends that is nailed to the posts. However it looks like they all protrude 1 3/4″ beyond the outside of the post based on the bottom PT board being laid on the outside of the post. This would make sense to keep the siding all hitting a level board all the way up. Any photos or explanation would help greatly.”
Well Sean, you are finding a set of plans is only as good as installation instructions provided with them. Having thorough step-by-step instructions, such as those in Hansen Pole Buildings’ Construction Manual, can save countless hours of grief, wasted materials and doing and undoing work.
Here is an excerpt you can use:
Most Common Mistakes:
- Installing wall girts before framing roof and roofing.
- Placing first girt bottom at a height other than 27-1/2” above grade.
- Girt end blocks cut to varying lengths.
- Setting girts to project beyond column outsides other than by 1-1/2”.
Cut girt blocks to 22-7/16” lengths from 2×4 material provided. First girt block bottom edge starts 5-1/2” above splash plank bottom. After the concrete floor has been poured, a 2×4 pressure treated base plate will be inserted between floor top and girt block bottoms. Base plate is toe-nailed to the pressure treated column at each end (exception being if columns are attached to brackets), as well as anchored to the concrete floor two feet on center (using concrete nails or nails “shot” into concrete). Base plate inside edge will be even with the inside edge of the girts above. Base plate should be installed over a sill gasket and/or caulked to the concrete floor. When space between treated columns is less than 24”, there is no base plate.
See Figure 29-1
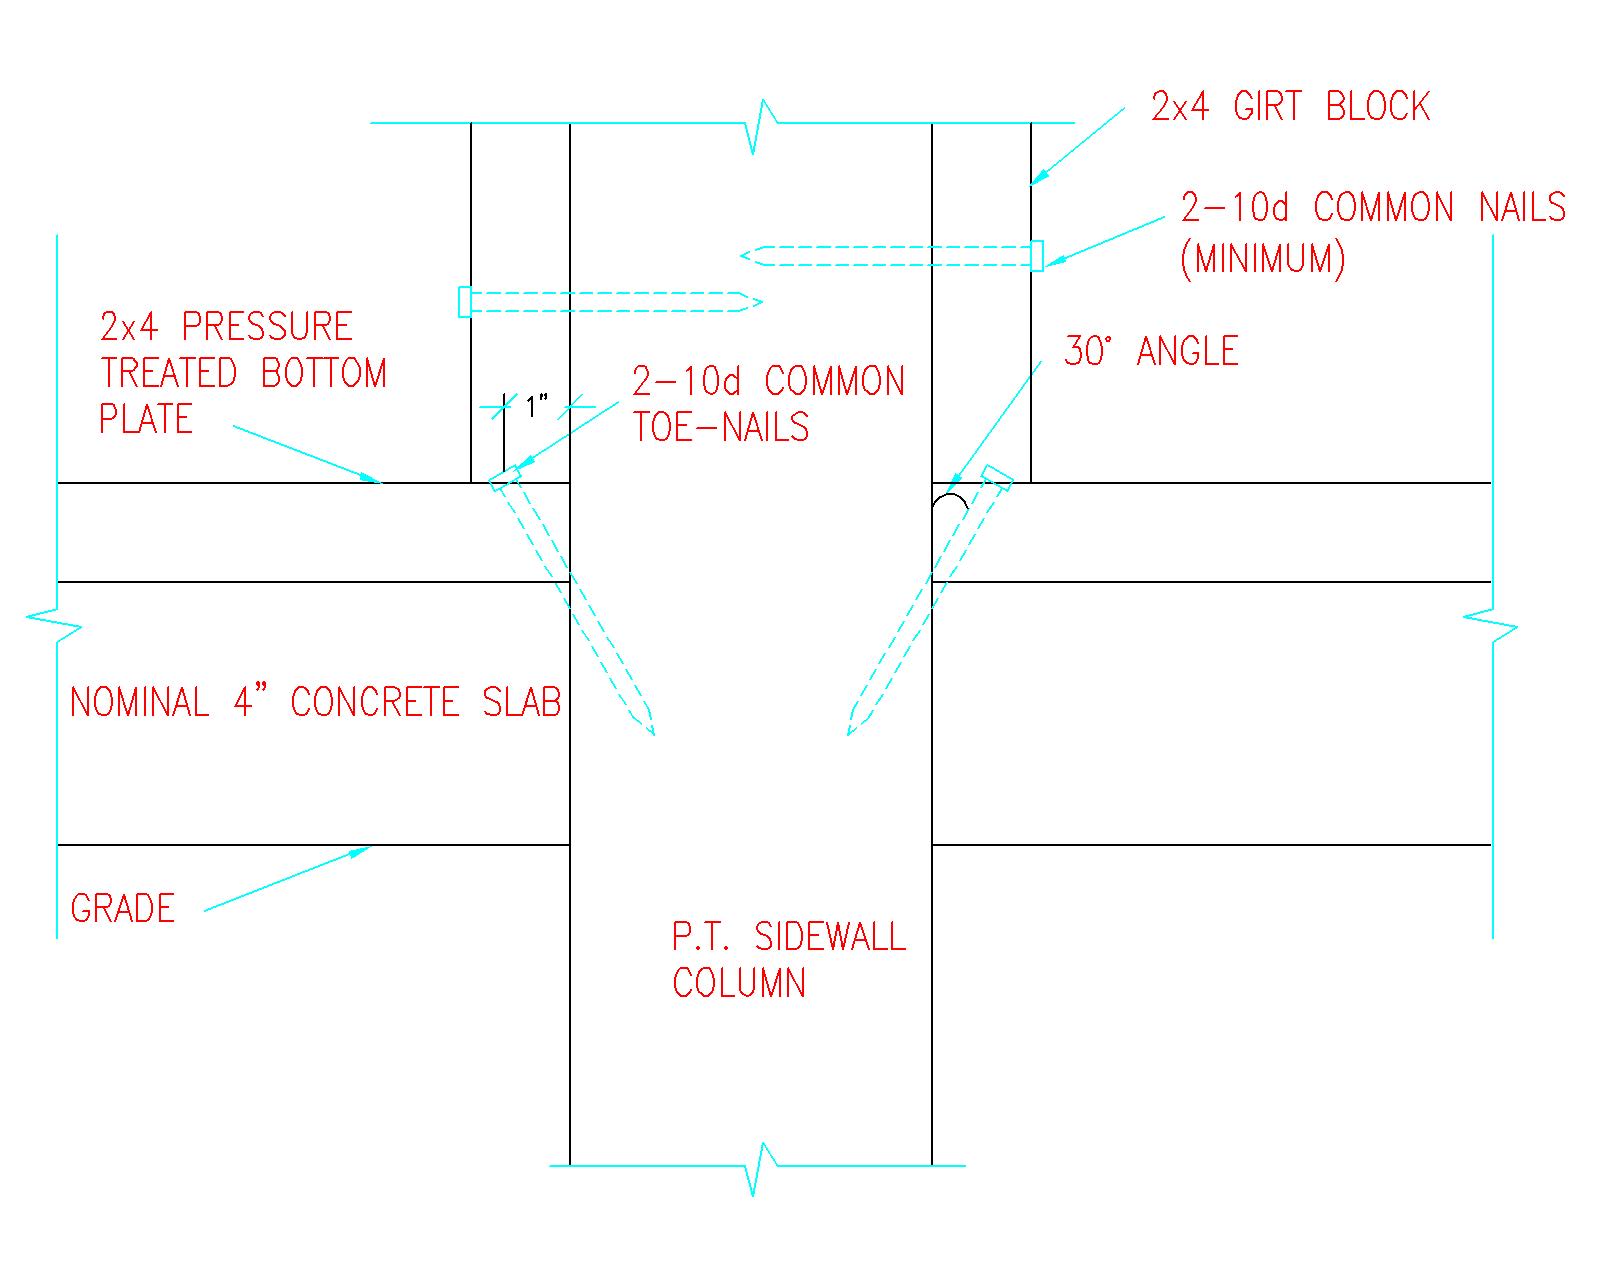
Figure 29-1 Toe-nailing Base plate
Any pressure preservative treated lumber cut edge or end should be treated with a Copper Naphthenate solution. Copper Naphthenate is available as a brush-on (Cuprinol No. 10 Copper-Green® Wood Preserver https://www.homedepot.com/p/Copper-Green-1-gal-Wood-Preservative-176223/300502829) or spray-on (https://www.homedepot.com/p/Copper-Green-Wood-Preservative-14-fl-oz-Aerosol-CopperSpr/100191444).
Girt blocks are placed so the block inside edge is flush with the wall girt inside edge. This may cause girts, as well as blocking, to extend past columns on inside, without adversely affecting interior finish applications such as gypsum wallboard. Nail girt block with (2) 10d common nails at each end (unless specified otherwise on building plans).
In any event, the total nail number used to attach any girt block to a column should never be fewer than the nail number used to attach girt to block top.
Cut girt to fit snugly between columns, with “crown” out, resting on girt blocking at each end. Outside girt edge extends from columns outward 1-1/2”. See Figure 29-2
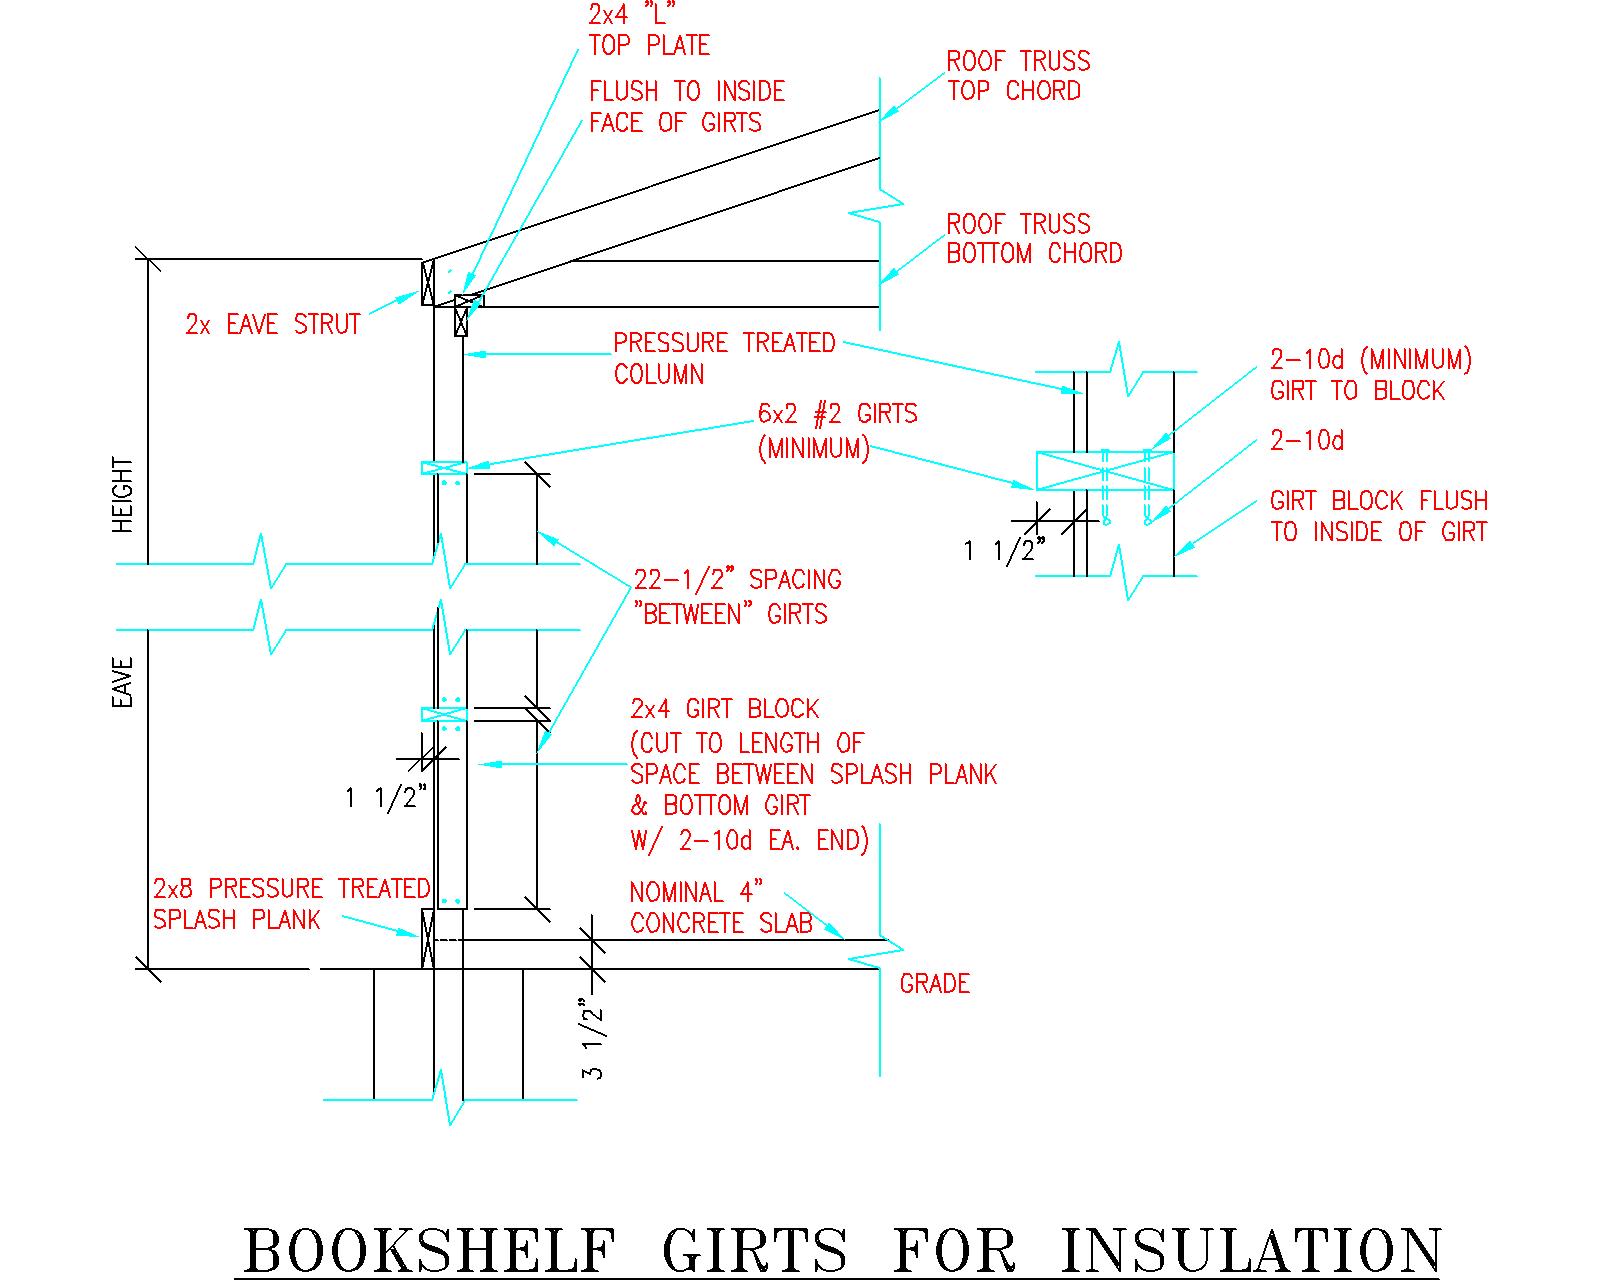
Figure 29-2 Commercial Bookshelf Girts For Insulation
Nail each girt end securely into girt block tops below, with two 10d common nails minimum. Repeat for each bay around building.
Where two adjacent wall columns are 2’ or less in between, 2×4 exterior (barn style) girts will be provided to nail on outside column faces, as insulation batts will fill space remaining.
Nail 2x blocking material to exterior column faces in line with girts. This a good way to use up cutoffs from bookshelf girts. See Figure 29-3
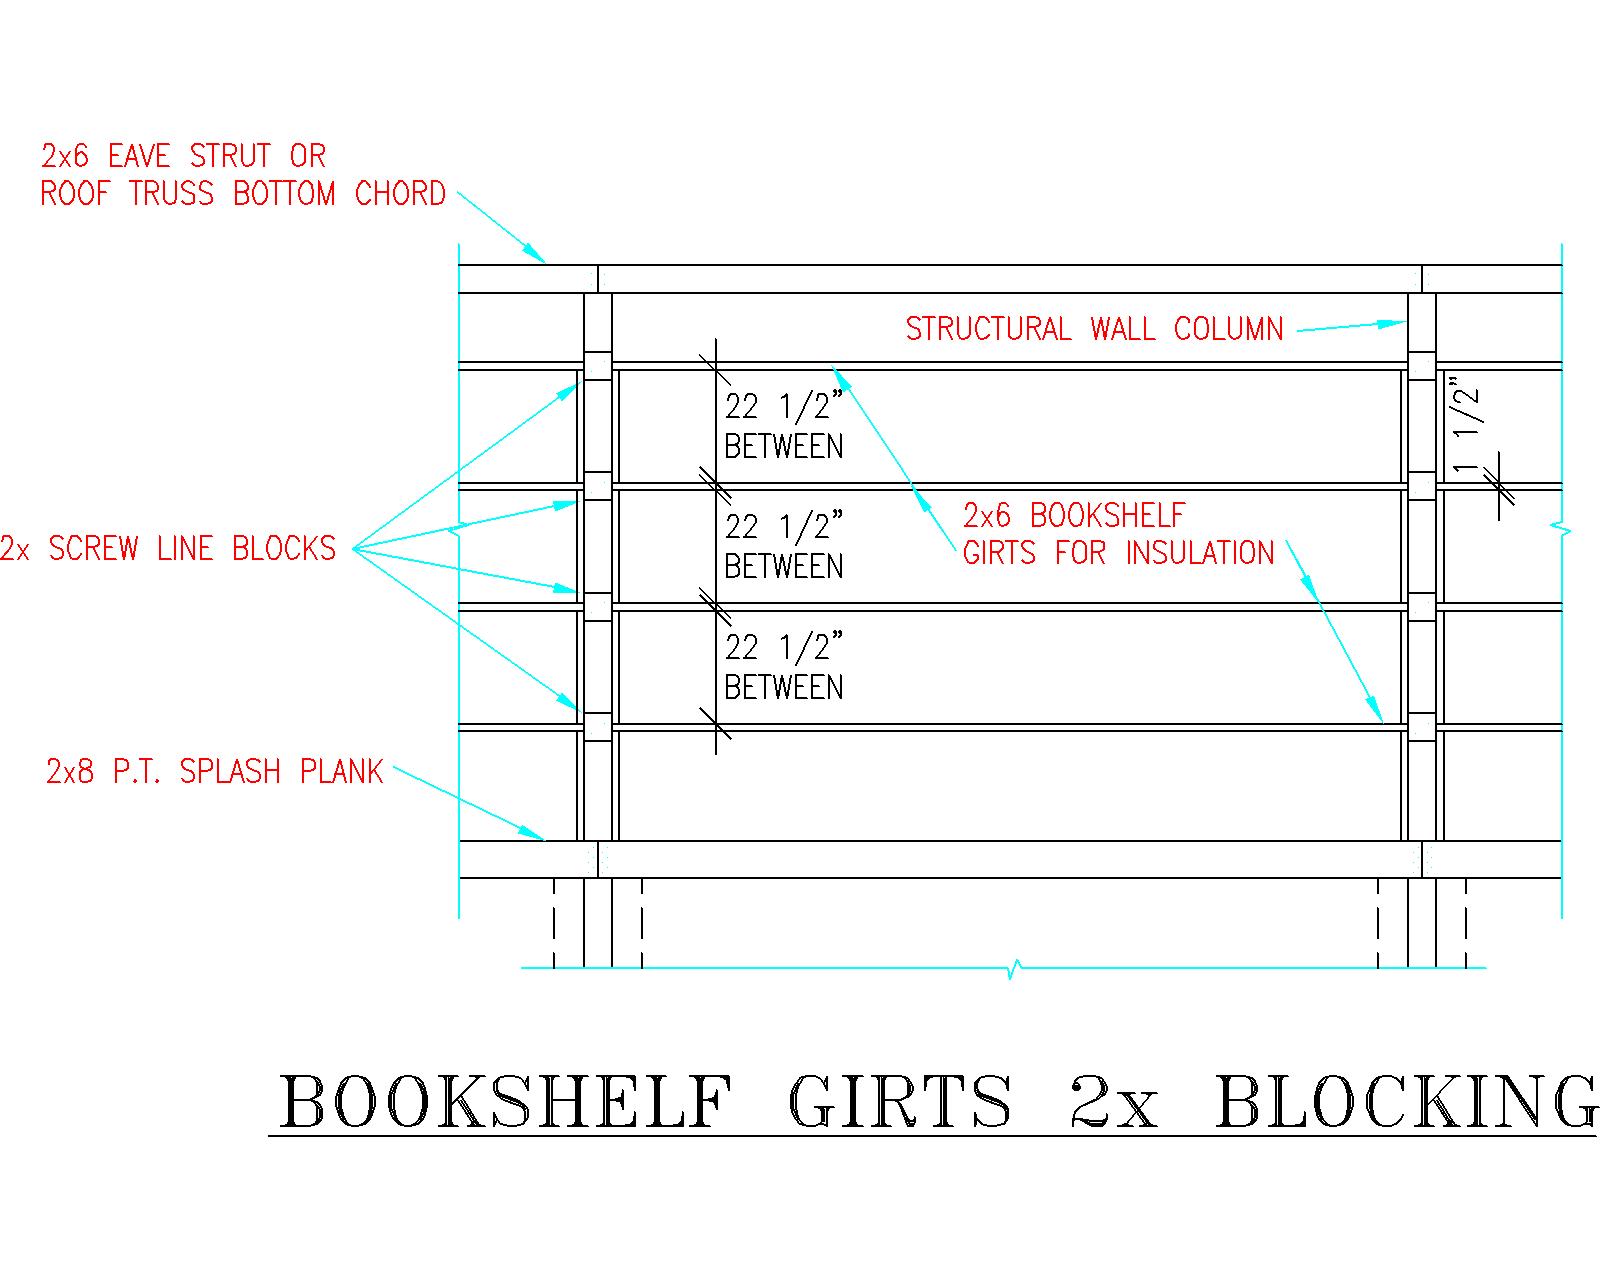
This blocking will serve as backing material for any screws falling in this area.
Figure 29-3: Commercial Bookshelf Girts 2x Blocking
Install 2×4 inverted “L” sidewall drywall backing using 2-10d common toe-nails through “L” vertical member into columns. See Figure 29-4
4” shown in Figure 29-4 is for 2×6 girts; for 2×8 girts, it will be 5-3/4”.
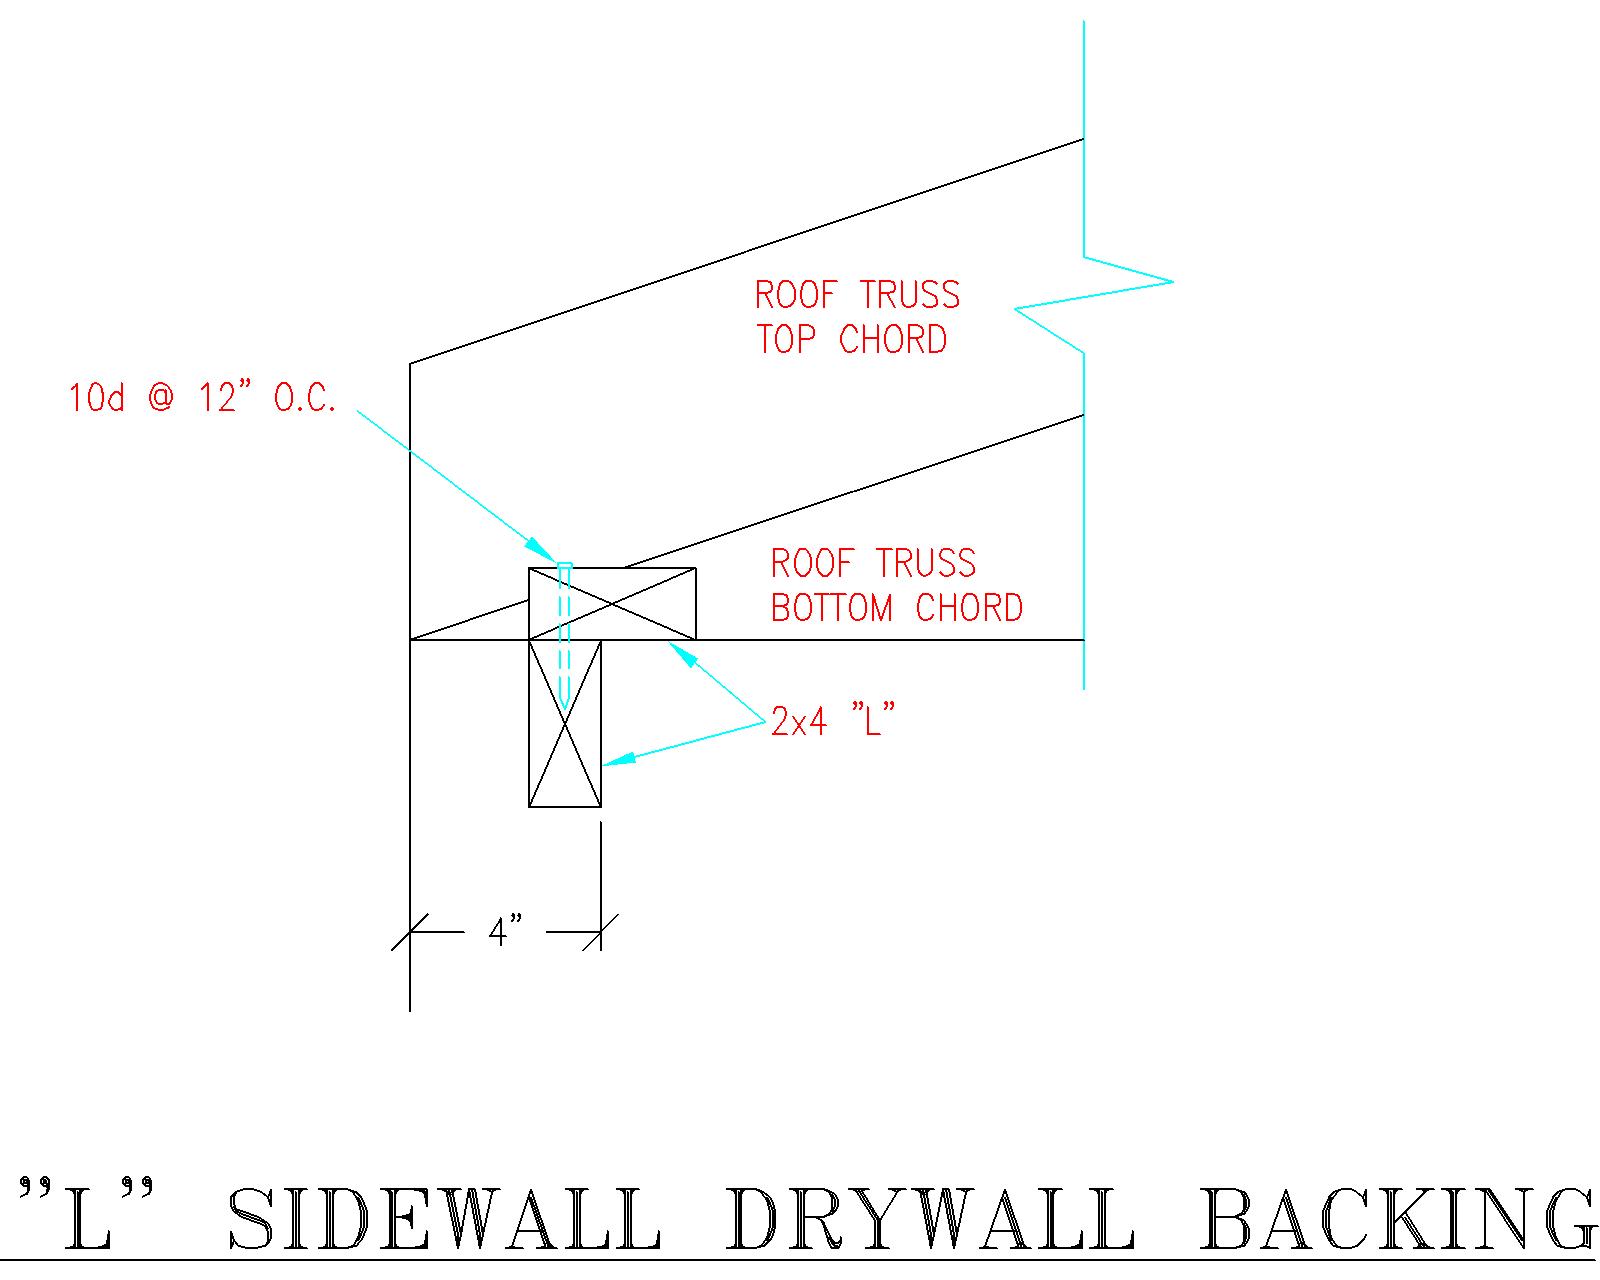 Figure 29-4: L Sidewall Drywall Backing
For buildings without ceiling joists, install 2×4 inverted “L” endwall drywall backing using 2-10d commons toe-nailed through “L” vertical member into columns.
See Figure 29-5
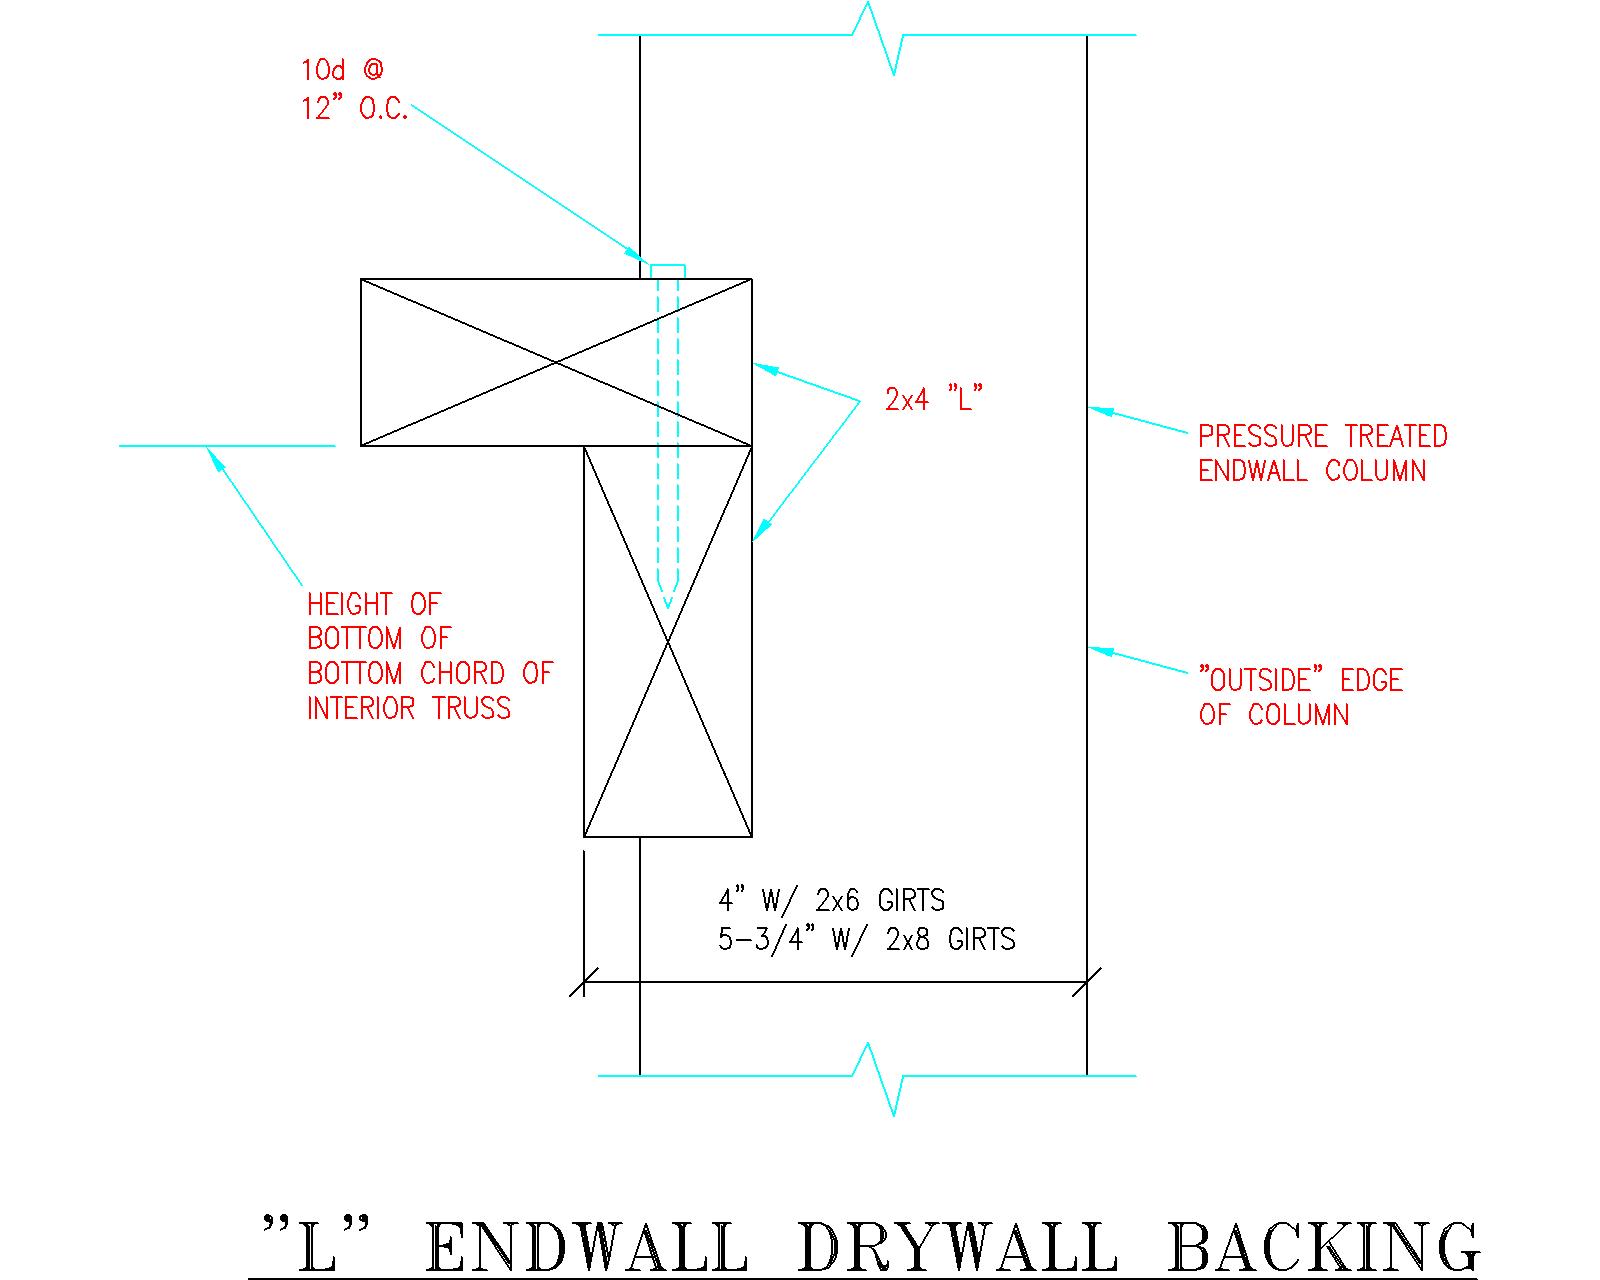
Figure 29-5: “L” Endwall Drywall Backing
This should give you a good start. Good luck and let me know how it all turns out. Pictures appreciated!


Is there a detail on the column base penetrating the concrete through the grade with materials and dimensions,
Sincerely,
Bryan Z
Can you provide a bit more information please? Our best guess is you are referring to a wet set column bracket, however we are not 100% certain.
Hi, I was wondering if 2×6 bookshelf girts can be installed after the metal siding has been put up and have 2×6 supports in the middle (at the 4’ point between columns to prevent sag)? I am going to build a 40×40 post frame home where 20×40 of it is open 2 stories in the kitchen/living area. Being I need to frame the wall for drywall, I was looking at the bookshelf style for speed and ease of installation. It just won’t have the siding attached.
Any help/advice is appreciated!
Thanks
Eric
You could, but why not just use them to support both exterior steel siding and interior drywall? It would take less material, less labor and limits exterior siding deflection.
Can you please clarify, are the girts nailed into the columns only or only into the 2×4 blocks or both?
Thank you!
In most instances, just into the blocks below each girt end.