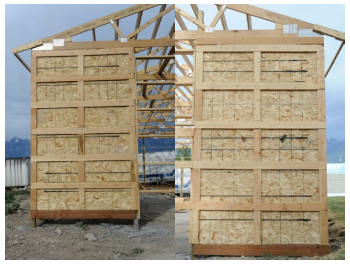
AdvanTech®
Christina reached out to me on social networking and asked:
“Hello, always look forward to your advice and I ran across something I didn’t find on the Hansen website. AdvanTech flooring as an alternative to OSB or plywood. Thoughts?”
While I have successfully utilized AdvanTech subflooring myself, rather than reinventing a wheel, today’s expert opinion comes from Matt Risinger (you may recognize him from www.buildshownetwork.com).
Matt writes:
When I started out in construction, I was working for a production builder. For many years, like most builders of that era, we used OSB (oriented strand board) subfloor — typically a 3/4-inch tongue and groove panel. There was no real choice in OSB then. It was whatever was available from the lumber supplier and we didn’t think a whole lot about it. We used a conventional construction adhesive and nailed off the floor, as that was the fastest method. But we had all kinds of squeaks on the houses we built. I thought that making the transition to screwing down the subfloor would be the answer to my squeak problems, but this didn’t help all that much. We still had frequent callbacks for squeaks. We also had a fair amount of edge swelling — an inevitable result of rain during the framing stage before we got the house dried in. That was a pain, too, because the swelling resulted in a wavy, bumpy floor that contributed to the squeak problems. Floor squeaks are the result of wood movement. Either a nail comes loose, or a screw shears off and you have up-and-down movement, or the edges swell and cause gaps beneath the underlayment that allow for creaks. Frequent callbacks did not do a lot for either the builder’s reputation or for the bottom line.
When I was working for a production builder, I didn’t really have much say in the purchase of materials, so I wasn’t able to change to a different subflooring product. Honestly, at that time, I did not really know there were other options. But when I started building custom homes about 12 years ago, one of the first changes I made was the switch to plywood. It was 1-1/8-inch plywood we should have glued to framing but just nailed it. This provided a nice stiff floor and eliminated my squeak issues. However, on one of my very first houses using plywood, we had a giant downpour during construction when the frame was open. This resulted in a ton of edge swell. Being a custom-built house, I had to fix it by sanding the edges and flattening the floor. The whole time the job was on pause for this to happen, all I could think was “OK, I love that I have eliminated squeaks. I love that I have a stronger, stiffer floor. But, man, this edge swell is a pain.” (And I hadn’t budgeted for the sanding either.)
I was looking for something better, but I thought “OSB? I’ve used that before and had problems. I’m not going back to that!” It was around that time, maybe 10 years ago that someone suggested I try AdvanTech subflooring.
I was soon to learn that there’s a big difference between AdvanTech panels and other subflooring options. Commodity OSB uses glues and a process that permits the panel to soak up moisture. Most subfloor-grade plywood uses similar glues between the laminators. While plywood gives you a more consistent panel, it is still prone to wicking moisture.
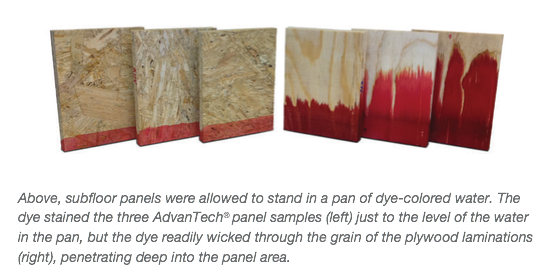
Plywood and OSB manufacturers try to improve this by sealing the panel edges, but the sealant, whether it is a wax or a paint, tends to get scuffed off. Think about how often panels get dragged on their edges across a truck bed or across the floor deck in the process of installing them.
Two things really distinguish how AdvanTech panels are made that contribute to their high performance over commodity OSB: resin technology and manufacturing precision. AdvanTech panels use an advanced liquid resin that coats flakes during the manufacturing process to make sure the panel is thoroughly protected. A lot of engineering and quality control goes into how the strands in AdvanTech panels are oriented and sized within the multiple layers to create a woven matrix of fibers that achieves the right balance of stiffness and dimensional stability. Commodity OSB is also set up in layers but can have larger variations in strand size and orientation within the layers and may use a different kind of resin that does not necessarily have the same moisture resistance. The AdvanTech subflooring manufacturing process also has a high level of precision to make sure the wood strands are the optimal thickness and dimension for a more stable panel. During manufacturing at AdvanTech panel mills, there are extensive quality control checks along the whole panel production process so that only the very best final boards earn the AdvanTech brand mark.
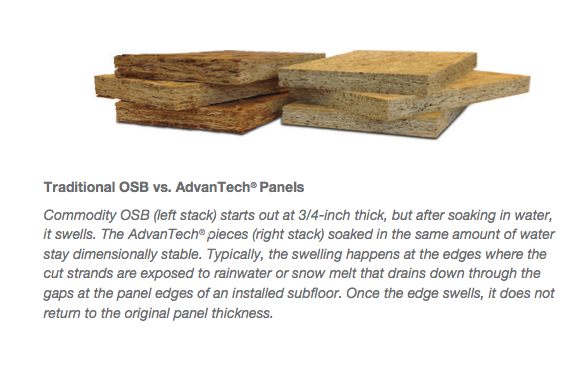
Once I made the switch to AdvanTech subflooring, I had zero edge swell, even with heavy rains during construction.
I’ve not had a single squeak and never had to sand edges down. That has been a huge change for me. I opt for the 1-1/8-inch panel on most of my projects because I want zero bounce in the floor. Certainly, I spend a little more on this subfloor than I have in the past. However, the elimination of problems makes it totally worth it. As with most materials choices, it’s never just about initial cost. Think about it: Not having to pay the unexpected costs of sanding, which interrupts the flow of the project, is one thing. But if I had to fix a squeak after the owners have taken possession and are living in the home, that is a nightmare. My business is based on an expectation of quality. Having no callbacks — having a much stronger, squeak-free floor — has made all the difference in being able to build a solid reputation for high-performing homes.
Having now gained some insight into AdvanTech’s benefits, it does come with some added investment. As compared to OSB subflooring AdvanTech will add roughly 75 to 90 cents per square foot of surface area (comparing nominal ¾” thickness products at current market prices).
 DEAR POLE BARN GURU: Do your pole barns get covered with plywood or OSB boards? MICHELE in WASHINGTON
  DEAR WILLIAM: Thank you for your interest in a new Hansen Pole Building barndominium. We do not have crews of our own, however we do have an extensive network of independent contractors available to select from: https://www.hansenpolebuildings.com/builder-terms-conditions/ Fully engineered post frame homes and barndominiums, modest tastes, DIY, budget roughly $75-85 per sft for conditioned spaces, $35 for all others. Does not include land, site prep, utilities, permits. To hire it all done, could run double or triple this amount.
 DEAR POLE BARN GURU: Can you build a home per our layout design and not one of yours? JAMES in FORT WORTH
  DEAR DYLAN: Your easiest design solution is to place rigid insulation boards down 2′, then out horizontally (most Building Departments accept 2′ out). This places all of your insulation above tops of concrete collars. This guide should prove helpful (keep in mind, it is for traditional stick built, but concrete has no magical frost preventive properties, so replace “concrete” with compactable fill):
 DEAR DAVID: It is going to be far easier (and less expensive) to properly grade your site and compact fill before your building begins, than trying to do it afterwards. Working equipment around posts and walls is going to be time consuming and can result in structural damage, if not done carefully.
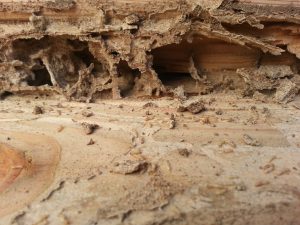
 DEAR POLE BARN GURU: We purchased property about 24 years ago with an existing Morton Barn. About 10 years ago we had an invasion of termites that loved the posts. We didn’t realize there were termites until damage was already done. How difficult is it to replace the posts that are damaged? Thanks, IRMA in DENISON
  DEAR POLE BARN GURU: Dear Pole Barn Guru, I am getting ready to put up a small pole building that I will be turning into a cabin. It is 20×20 with 12′ eves. I am building my own truss winch system out of harbor freight boat winches that I will mount to the side of the poles and run up and over the top using a pulley cap. My question is should I be able to lift the entire truss system using 6 winches? Ideally I would have all the purlins in place and facia boards on as well and as a bonus I would like to add all the plywood sheeting so I don’t have to carry it up later. Would you think weight wise this is reasonable since it is such a small building? JOSH in VANCOUVER
 DEAR DAN: Inorganic arsenic based pressure preservative treatments are toxic to any type of termite. Even so, a pre-construction termite treatment should be done (read more here:
  DEAR POLE BARN GURU: Are you able to supply the osb 7/16 sheathing boards the insulation foam boards and interior wall lumber boards to my order if I purchase the custom design package deal to up grade and custom my order. RAFAEL in ANTIOCH
  DEAR POLE BARN GURU: Could you provide a kit 16′ x 32′ x 10 height? ROBERT in GASTONIA
 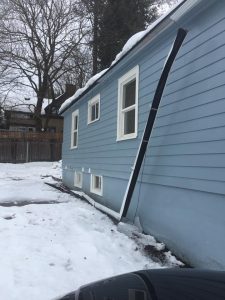 DEAR JAMES: Have you considered investing in a quality gutter system so you do not have to clean them out regularly? Raptor Gutter Guard seemingly is most highly recommended
 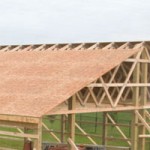 DEAR POLE BARN GURU: Good afternoon, I have been working with Cory in the design department. He has referred me for some additional information. We are looking at building a 30 wide by 60 long 15 foot sidewall 5/12 Pitch roof pole barn. My husband is being insistent on wanting to put plywood on the entire roof, saying it will make the roof stronger. Thus the entire building stronger. I was wondering if you could address that type of construction versus the construction that would be specked for my area which is upstate New York zip 13736. I appreciate your help and answering this question. KAREN in BERKSHIRE
 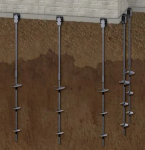 DEAR POLE BARN GURU: I own a helical pier installation company based out of MN, and I have a customer that’s interested in having install helical piers for their upcoming pole shed project. I was reading online that your company has a bracket available and I would like more information on that if possible. I appreciate your time and look forward to hearing from you. CHRIS in ALBERTVILLE
  Attached quote is how I would want my own building…..
  DEAR MICHAEL: As you have realized, your immediate challenge is your columns, their lack of adequate treatment for structural in ground use, and a missing foundation system.
 DEAR ZOE: It will depend upon how wide your building will be. If 12 feet wide, it may appear okay, if wider, it is going to start to look flat. One thing to keep in mind, most steel paint warranties are void on roof slopes of less than 3/12. Side lap sealants are also required for steel roofing on slopes under 3/12, adding to investment and complexity.
 “Mike, I have an existing pole barn (6×6 post with 2’ on center girts ) that has a 4” concrete floor with 10 mil plastic under it. The side walls have 1” XPS insulation on the outside of girt then steel siding with no wrap or barrier. My thought is put Tyvek on inside of girt ( facing same direction as if on outside application ) then put inch and a half XPS DOW insulation against that ( because there’s two bunks already there) then 2×4 frame with batten insulation between them, then 6mil or heavier vapor barrier then OSB. The floor has PEX tubing in it but not hooked up. Is this a proper install? Also I will have to have an engineer check the BCDL as I want to put OSB on the ceiling but would like to know how to insulate the ceiling. There is a one foot fully vented overhang with a ridge vent also. Thank You for the info in advance.
  Mike the Pole Barn Guru responds:
 When it comes to truss space/between truss framing/wall framing, he’s definitely concerned about drywall logistics, OSB logistics (or not), moisture, and labor. And I want to make sure he feels heard and informed before we dump these plans and materials on his plate. I see both sides, but at the end of the day, he’s our builder and I need him to be fully on board before pulling the trigger. Could you help? I’m sure I’m not the first person with this quandary but I’ve also used enough pole barn builders in our area to know that he’s our best option for this project.
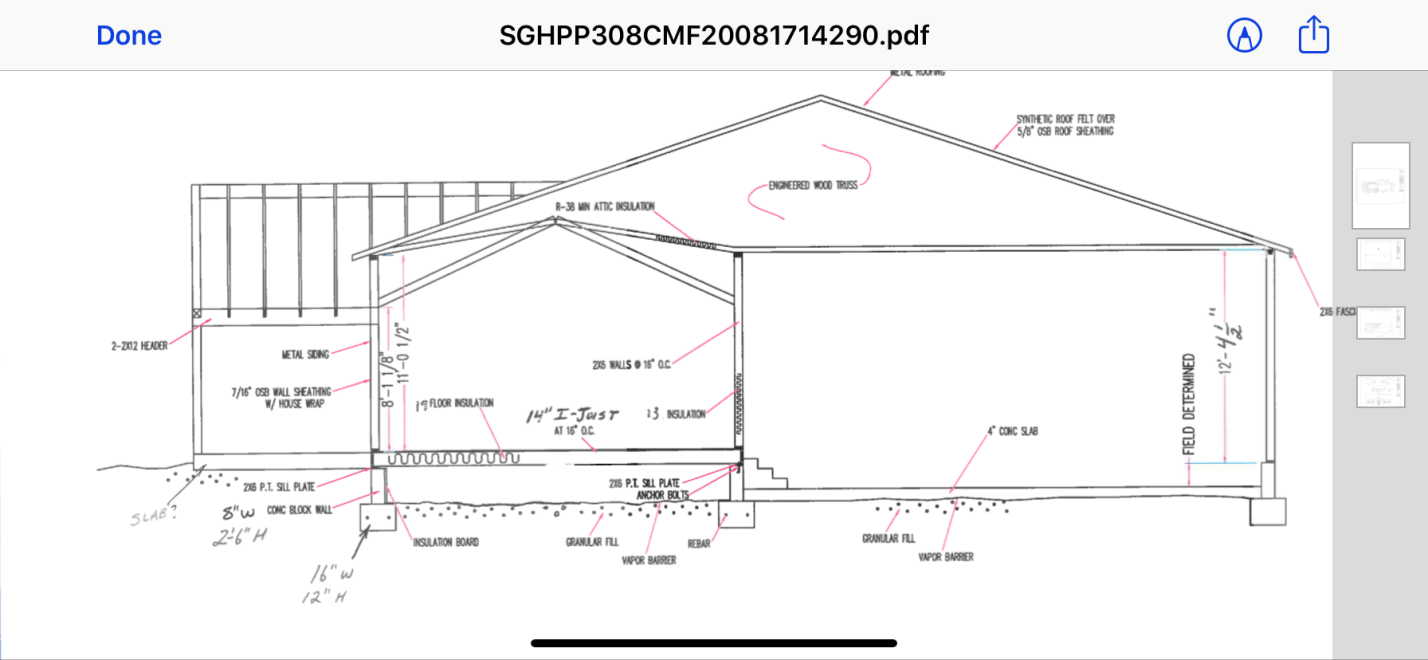
 Provided you have adequate available space, you may want to tweak your footprint dimensions in order to optimize your return for your investment. As steel comes in three foot widths and lumber in two foot lengths, your most cost effective dimensions of length and width will be multiples of six feet. In your instance, I would recommend 36 feet wide and 84 feet long.
 DEAR BRYAN: The prefabricated roof truss folks would refer to this as being a Polynesian roof – one in which the outer portion is at a lower slope than the center portion. I tend to steer clear of steeper-to-flatter roof slope changes as they just increase the possibility of a future leak, however it is certainly doable. Your photo also features a widow’s peak at the center.
 DEAR POLE BARN GURU: Hello Guru, I am Putting 1/2″ Plywood On the trusses first before the metal roof, what do U recommend to cover the plywood, for vapor barrier protection? I was just gonna use felt paper! any recommendations? Thanx MIKE in ROCHESTER
 DEAR CHRISTINE: I would call it a loafing shed with both eave sides open. It could be either single sloped, or have peaked endwalls.