Tag Archives: pole building plans

Financing a Shouse, Drawings, and Roofing advice

This week the Pole Barn Guru answers questions about financing a Shouse, a timeline for plans to build a large pole barn, advice for roofing with standing seam steel.

DEAR POLE BARN GURU: We are in the process of selling our home and buying a piece of property to build on. We want to build a pole barn home that is 40×80, half shop, half 2 story home (shouse).

Because we don’t own the property yet, what is the best way to go about financing this project?? Where do you start? How do you find out what types of financing are available? Any advice would be appreciated. HEATHER in DEER PARK

DEAR HEATHER: Reach out to New Century Bank as they specialize in post frame financing nationwide https://www.newcenturybankna.com/lending/post-frame-building-leases-loans

Here are some plan tips – consider these factors:

Direction of access (you don’t want to have to drive around your house to get to garage doors)

‘Curb appeal’ – what will people see as they drive up?

Any views?

North-south alignment – place no or few windows on north wall, lots on south wall
Overhang on south wall to shade windows from mid-day summer sun If your AC bill is far greater than your heating bill, reverse this and omit or minimize north overhangs.

Slope of site

Work from inside out – do not try to fit what you need within a pre-ordained box just because someone said using a “standard” size might be cheaper. Differences in dimensions from “standard” are pennies per square foot, not dollars.

Use the links in this article to assist with determining needed spaces, sizes and how to get expertly crafted floor plans and elevation drawings https://www.hansenpolebuildings.com/2019/10/show-me-your-barndominium-plans-please/


DEAR POLE BARN GURU: How do I get drawings quickly for a large pole barn, post frame? JAMES in LITTLE SILVER

DEAR JAMES: Your quickest way will be to call 1(866)200-9657 and speak with a Hansen Pole Buildings’ Designer. As soon as you have settled on a building design and get your building order placed, we can get it into our Drafting Department. Depending upon complexity, backlog of work and how quickly you electronically approve documents, you may be able to have your engineer sealed plans and verifying calculations in hand in seven to 10 days.


DEAR POLE BARN GURU: I am building my first pole barn. I plan to sheet the roof so i can do standing seem metal and spray foam the roof. I desire to have a thermal break on the top chord of the truss. I am considering laying R max before i sheet the roof. I have tried to find a foam tape or something I can just apply to the top edge of the truss, instead of using R Max to cover the entire structure. Any suggestions? I have set the Purlins between the trusses. STEVE in SOMERSET

DEAR STEVE: As standing seam roofing must be installed over minimum 5/8″ CDX plywood and 30# felt (or a synthetic underlayment) you will already have created a thermal break across your trusses as great as what is provided at your purlin locations.


Show me Your Barndominium Plans Please

Like a bunch of little kids exploring differences in body parts – “You show me yours, I will show you mine.” Barndominium, shouse (shop/house), post frame home want to be owners are not far removed from here when it comes to floor plans. In numerous Facebook groups I see this request over and over!

Each family truthfully has their own wants and needs – ones where chances of anyone else’s plans being ideal for them being close to those of winning a major lottery.

Gambrel roof pole barn
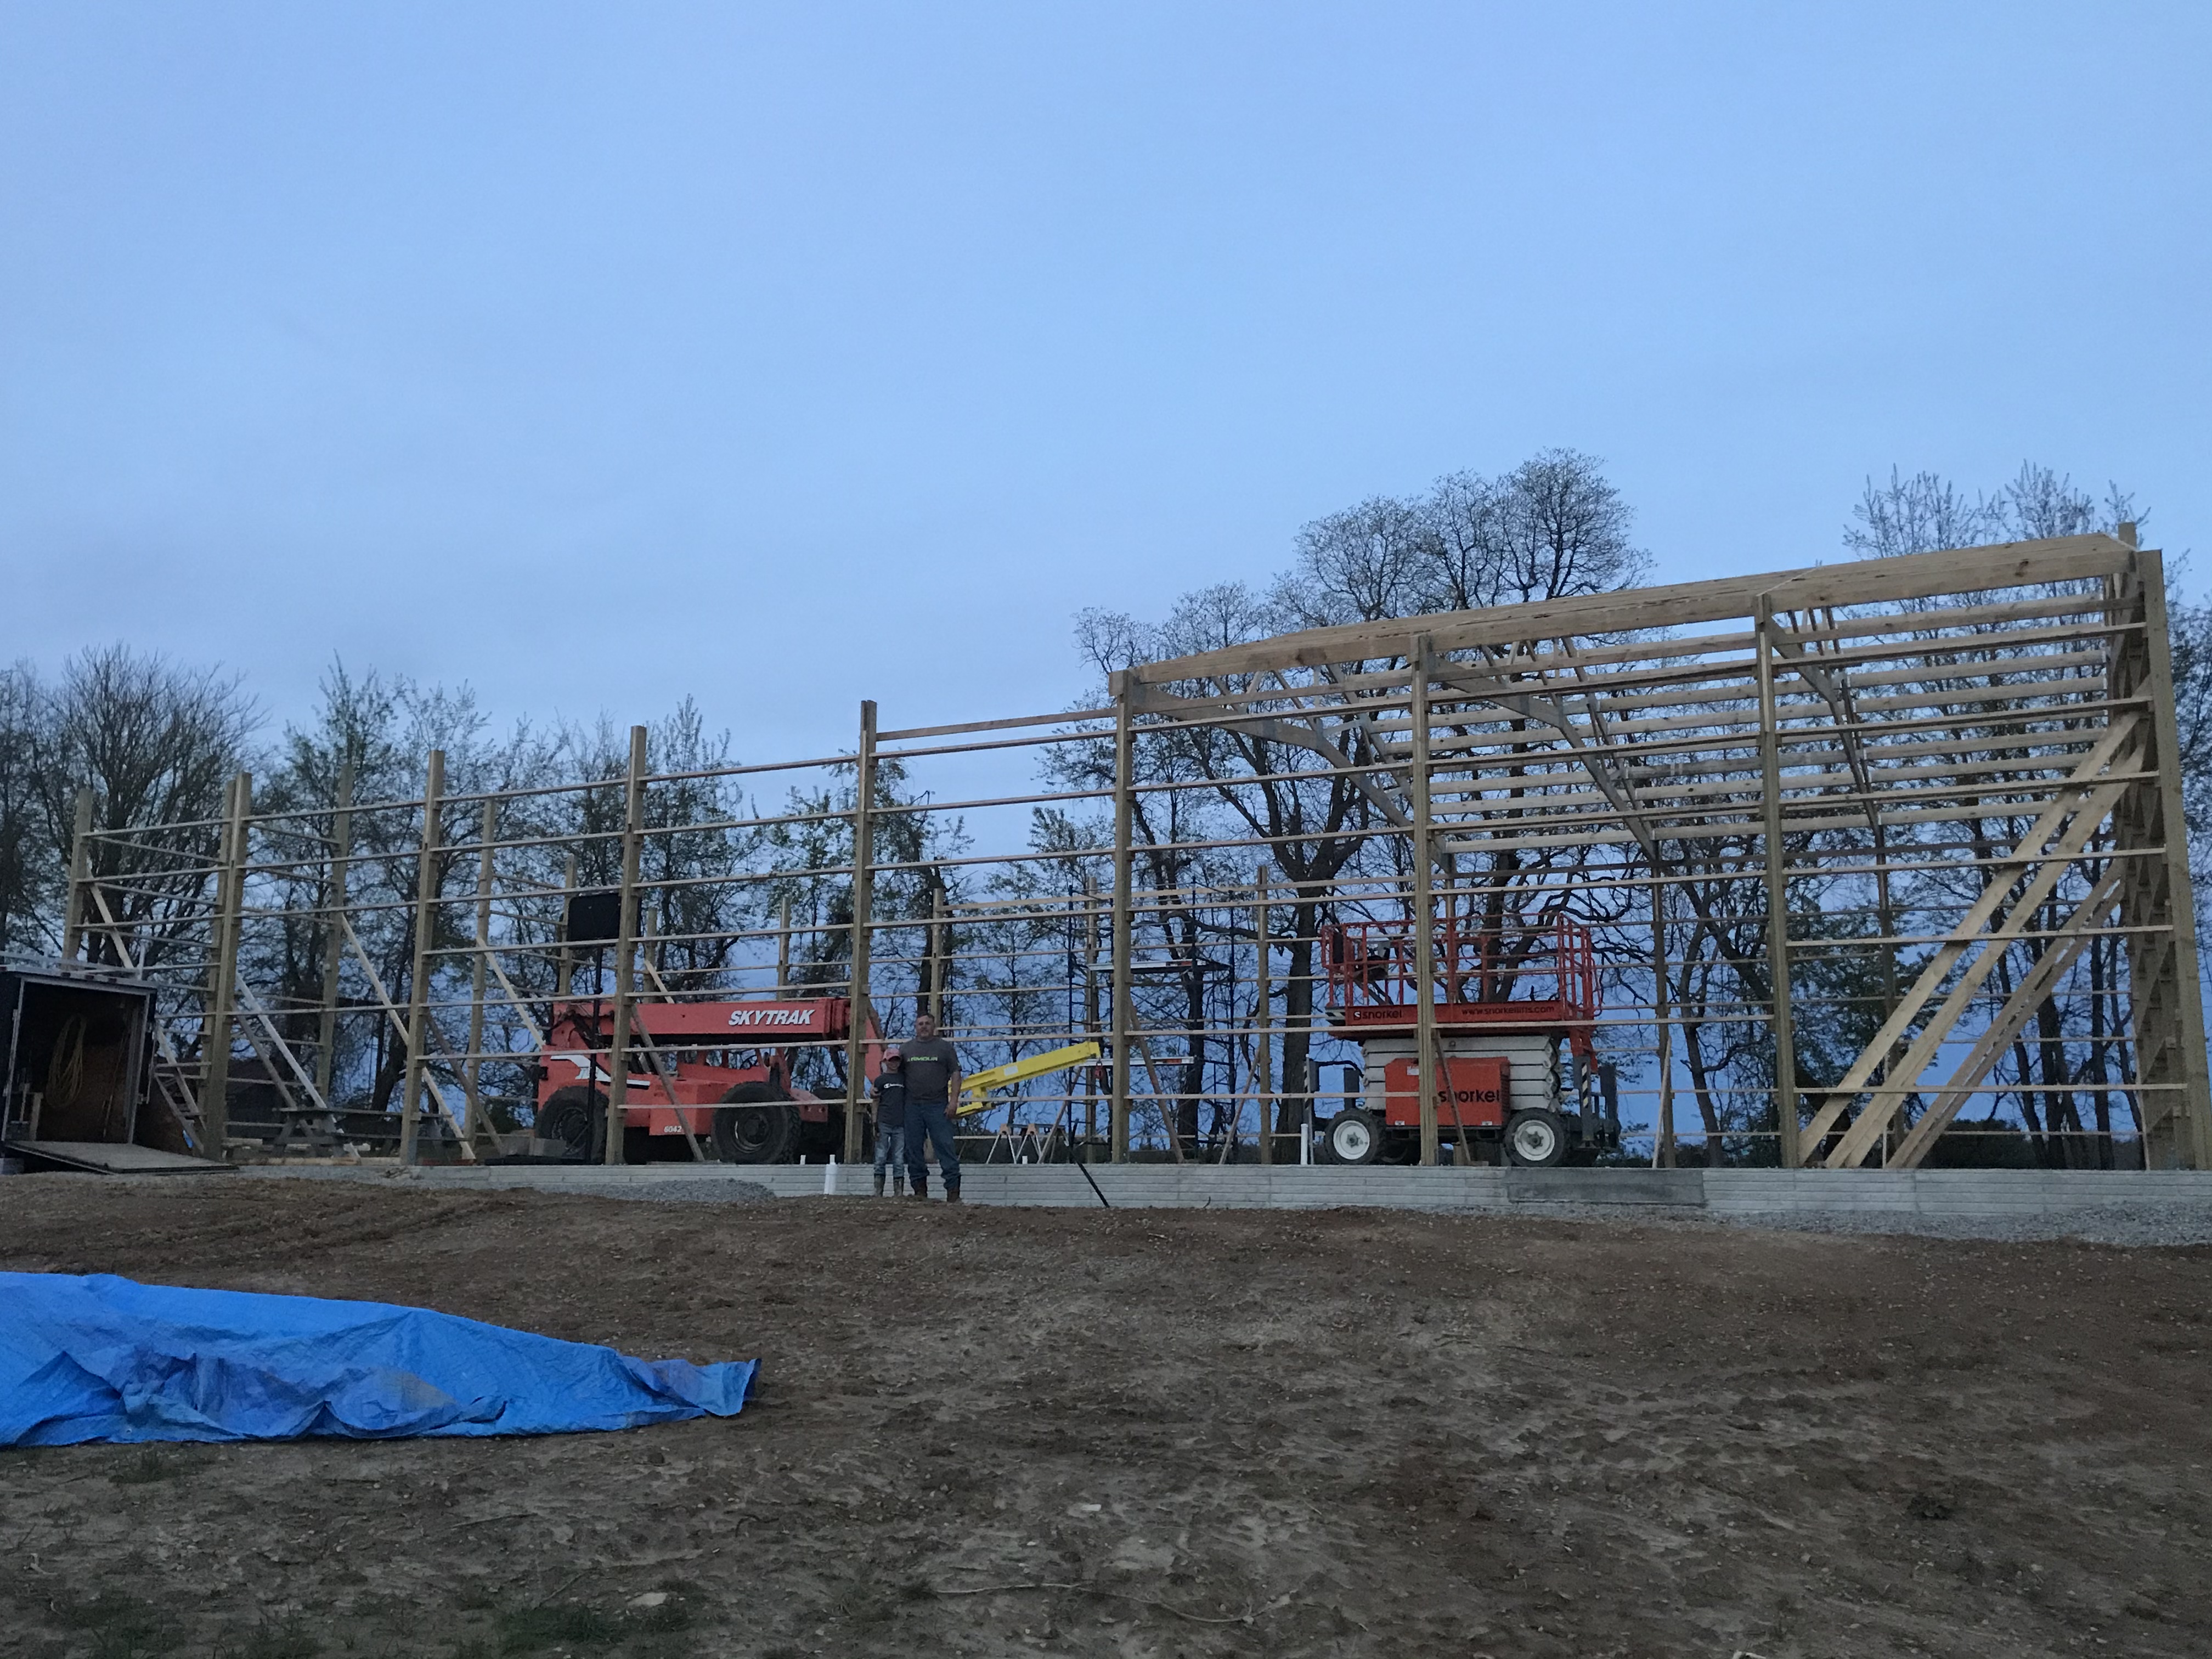
For those who have been following along, I have covered preliminary steps leading to actually designing a functional and affordable floor plan.

Step number one, determining if a new barndominium is even a financial reality: https://www.hansenpolebuildings.com/2019/07/how-much-will-my-barndominium-cost/

Once fiscal reality has sunk in – your new barndo will need to be located somewhere: https://www.hansenpolebuildings.com/2019/08/a-place-for-a-post-frame-barndominium/

And unless you and your significant others have been squirreling away stacks of Franklins or are independently wealthy, financing must be secured: https://www.hansenpolebuildings.com/2019/07/borrowing-for-a-d-i-y-barndominium/

With all of these steps squared away, it is time to start considering a floor plan. Popular home spaces and sizes need to be determined: https://www.hansenpolebuildings.com/2019/09/room-in-a-barndominium/ and https://www.hansenpolebuildings.com/2019/09/the-first-tool-to-construct-your-own-barndominium/.

I read about people in barndominium planning stages looking for free or low cost design software, attempting to put room sizes and orientations together in a fashion making any sort of sense. This becomes daunting and can be an all-consuming struggle, regardless of how many pads of grid paper you own.

Most people are not far removed from reader MARK in WAYNESTOWN who writes:

“Looking for a 3 bed- bath 1/2- open kitchen living room vaulted ceiling concept and maybe with 1 or 2 bedroom loft up top — and 2 car garage in back what size of pole barn should we look for?”

Here is where it is well worth investing in services of a design professional. Someone who can take all of your ideas, those wants and needs and actually craft a floor plan best melding them with the realities of construction. 

Hansen Pole Buildings has just this service available and it can be done absolutely for free! Read all the details here and we look forward to continuing to walk with you in your journey to a beautiful new home: http://www.hansenpolebuildings.com/post-frame-floor-plans/?fbclid=IwAR2ta5IFSxrltv5eAyBVmg-JUsoPfy9hbWtP86svOTPfG1q5pGmfhA7yd5Q

Where Oh Where Should My Purlins Go?

Where, Oh Where, Should My Purlins Go?

There are almost as many methods for assembly of a post frame building, as there are post frame buildings! I kid you not.

Amongst differences are how to space trusses – two, four, eight, 12 foot or numerous other possible centers. Along with different truss spacings are how to install roof purlins across or between trusses to support steel roofing.

Reader KELLY writes:

“So, I would like some info on purlins.  One builder has them laying flat on top of truss, one on edge on top of truss, and one on edge with hangers between trusses?  I have my thoughts but wonder what is technically better.

I like the hanger between trusses, for roof load,  but I wonder if you give up some of the diaphragm strength that is accomplished by purlins laying flat on the truss.  

To me, with a purlin that lays across multiple trusses, you get the benefit of added strength because you are tying multiple trusses together and the lateral stress is on the edge of the purlins.  When they are in hangers, the load stress in on the purlins edge, but the lateral stress allows the trusses to move independently.  

Trusses most likely on 8’s.  Purlins 24 spacing.”

Mike the Pole Barn Guru writes:

Purlins placed flat will not span eight feet, so eliminates this option. If you are planning upon going with edgewise purlins across a single truss, you are going to run into an uplift problem. Usually builders want to drive a 60d nail through purlins, into truss tops, however this connection doesn’t calculate out as being able to keep purlins from ripping off the building during severe weather. Most builders are not willing to spend time to install an engineered steel tie-down for purlins in this scenario. Over top also means purlins get staggered when they overlap. This precludes abilities to predrill roof steel. Predrilling gives nice straight screw lines and also eliminates possibilities of missing a purlin with a screw.

This leaves “in hangers” between trusses as your only viable (and practical) design solution.

Diaphragm stiffness of your roof will come from your building’s roof steel (and method of attaching steel to purlins), not how purlins are connected to trusses. Purlins tying multiple trusses together are not going to make your end resultant any stronger or stiffer.

Ultimately your RDP (Registered Design Professional – architect or engineer) who places his or her seal upon your building plans will be making a determination as to adequacy of any of these connections. If you are talking with a builder whose brilliant idea will be not building from engineered plans …run away from them as quickly as possible. This would be a risk not worth taking. If an engineer didn’t design your building…..then who did?

Poor Pole Barn Plans Lead to Poor Results

Poor Pole Barn Plans Lead to Poor Results

There are a plethora of places people can go to buy a pole barn kit package with plans – Hansen Pole Buildings (I’d like to believe there is a reason we are the industry’s leader), a few online resellers, nearly every lumberyard in America, as well as from many post frame builders. One could also have a RDP (Registered Design Professional – architect or engineer) draw up building plans for them, they could scrounge something up online, or wing it themselves.

In the end, the better the engineered building plans and instructions are, the better the end result is going to be. These are the intangibles which are worth paying for.

Reader JOSH in LOGAN is experiencing some of the pain, which luckily he caught before it is too late: Josh writes:

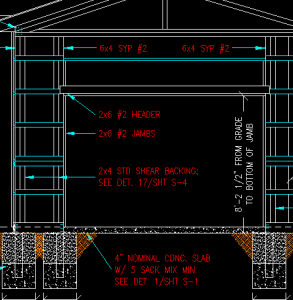
“I keep reading through your blog about the concrete surface being 3-1/2″ from bottom of splash board. My plans show my overhead doors closing to the bottom of the splash board or should I say lack thereof at garage door openings. This tells me that is where the top of floor should be according to my plans. I would like to revise my plans to have floor surface 3 1/2″ from bottom of splash board. Would this simply mean moving my header up 3 1/2 inches? Same plan w walk through door openings? Do I need to worry about wall steel no longer fitting? Anything else I should consider?”


Mike the Pole Barn Guru responds:

You have discovered one of my pet peeves about post frame building plans which are produced by people who really do not understand how pole buildings are best designed. If you were to follow these plans, you would have to excavate your site down below grade in order to pour the slab! How practical would this be? Next issue is – when it rains (or snow melts) water from outside would end up inside on top of the floor.

You really should not make changes on the engineered plans you have, you should request they be changed by whomever you got the plans from. With this said – if you raise the overhead door header up 3-1/2″ inches (again this change should be made on the plans) then those steel panels above the door opening will need to be trimmed down. If the overhead door is on the endwall, you will need to cut the panels to fit the slope of the roof, so it will not entail an extra cut. One thing which could be an issue is having adequate clear height for your overhead door tracks and the opener, as you are chewing up 3-1/2 inches of headroom.

Bottom line: good (engineered) building plans means good results.


Why Pole Barn Columns Settle

Don't be Like Jimmy's Parents

A new post frame (pole) building or barn is an investment, a very permanent investment. Readers have been following a couple of articles involving Jimmy's new building, which is NOT a Hansen Pole Building and Jimmy is not very happy.

This is how the building was purchased (in Jimmy's words): “This was an impulse purchase by my parents, basically picking a builder from a hat, and signing a contract before I could check around, and it's been a mess ever since.”

Here is the most recent round of conversations:

DEAR POLE BARN GURU: The mess of it is….you call guy #1, tell him what you want, he orders the materials, guy #1 calls guy #2 the excavator, guy #2 excavates, calls guy #1 when he's done, guy #1 then calls guy #3, the builder. I did get a chance to talk with the builder and I asked around, he's very reputable.

The building inspector said the same thing you did about the engineered plans, about not knowing if the 4×6's could support the attic trusses, without them. But couldn't those be doctored to say whatever they want? He did say something odd to me though, the more trusses on the supports, the less the support is stressed because of weight dispersion (not sure I'm explaining it the way he said).

If I can get the info you requesting, I will surely send it to you. But the contract isn't in my name, and is out of my hands.

Here's another thing, the 4×6 posts were buried 4ft without concrete, the explanation was most builders will put a couple of feet in the hole and fill the rest with dirt, so when it rains the water cant drain beyond the concrete, and the dirt above the concrete stays moister longer and will start to rot the posts. I don't know, wish I did.

About the vehicle lift, I don't need one to be able to stand under the vehicle, just one to get it about 3ft off the ground so i can work under, if need be, and it won't have any attachment to trusses, maybe anchored to concrete, but that's a ways off.

In the end it will be right, even if it has to be torn down and redone.

Thanks- JIMMY

engineer-sealDEAR JIMMY: Engineered plans include the “wet seal” in ink of the engineer who produced them along with an original signature in another color of ink. Could the plans be changed after the fact? Well yes, but it would take some work to do so and not have it show up as being a forgery. I am not a gambling man, but I would be will to wager there is no engineering on the building which is being constructed for you.

How do I know this?

Because no engineer in his right mind would be sealing a set of plans with posts just buried four feet in the ground and no means to prevent settling or uplift.

Many builders will at least try to resist settling by the use of a minimal concrete footing below the columns – however in your case, I can pretty well guarantee the columns are going to settle and perhaps drastically.

Here are some of my thoughts on how people have tried (and failed) to resist the forces of gravity: https://www.hansenpolebuildings.com/2014/03/concrete-cookies/ and https://www.hansenpolebuildings.com/2012/08/hurl-yourconcrete-cookies/ and a few words about uplift: https://www.hansenpolebuildings.com/2015/12/wind-uplift/

If your builder has supplied properly pressure preservative treated columns (https://www.hansenpolebuildings.com/2012/10/pressure-treated-posts-2/) then the columns should last pretty much indefinitely regardless of whether the posts get damp or wet.

In my humble opinion, what is a shame is your builder could actually have done your building right, with little or no extra expense. In his efforts to shave a dollar here and a dollar there, he is providing you with far less of a finished building than what you bargained for.

Considering a new building? Even if you are absolutely not going to invest in a Hansen Pole Building, I implore you to at least become educated in making what is most likely the biggest permanent investment you will ever make, other than perhaps your home. Read the blog articles, they are easily searchable, subscribe to our free emailed newsletters (https://www.hansenpolebuildings.com/tag/pole-building-newsletters/) and make use of our free Planning Guide (https://www.hansenpolebuildings.com/pole-barn-planning-guide/).

Reviewing Your Building Plans

Every Hansen Pole Building Kit Package comes with building plans which are drafted by a real live human being! They are then reviewed not once, but twice, by upper level team members – who catch just about every errant line.

building-plans
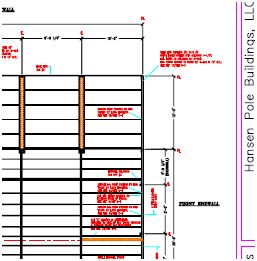
To insure the final building plans are correct (usually it is an issue of “no, the other left”) before printing and sending the plans, we do ask our clients to view and approve (or request edits). All of this is done via login on our website.

Here is an example of a response from one of our clients, who actually did have a very sharp eye!

“I have a few questions regarding these building plans and would prefer asking first rather than declining, but you can advise which path to take.

 On Sheet S-Oa and S-Ob under Basic Wind Speed it is listed as 123 mph.. In my original request and all subsequent communications I needed to make sure that the wind load was listed the plan for Building Permit purposes that it was designed for “at least” 115 mph with a 3 second gust. This was listed on the quote sheets as “Wind Speed (3 sec gust): 123 mph”, but here on the plans it only says “Wind Speed: 123 mph”. It is very important to my Building Department that this be stated correctly on the plan themselves. So, I request this information be added in that manner. As for the 123mph versus 115mph, if we are overbuilding and using larger materials than required for 115mph 3-second gust, that was not at my request or approval, so please advise on this.

 Under #10 on General Notes on S-Oa and S-Ob, and on Sheet S-3, Building A Section and Building B Section, AA / S-3, the steel roofing and siding is listed as .0157 plus/minus, which isn’t consistent with 26 gauge steel. The initial drawings were for 29 gauge steel, however prior to final quotes we changed to 26 gauge steel for both roof and siding. This may be listed in other places as well, but this one caught my eye. Please make the necessary changes to ensure the correct product is shipped.

 Throughout the plans the Poles/Columns are listed as 6″x8” measurement where in all prior quotes I was shown that the columns were going to be 6”x6”. I know the price was quoted at 6×8 because the designer mentioned this dimension in our last conversations, but I wanted to ensure that this size post was required as it seems excessive based upon what I have seen in the area. Again, if we are using larger materials than required to withstand the 115mph 3-second gust required in my area, I’m sure we are also spending more than necessary and I would like to use only what is demanded (other than my request for 26 gauge steel).”

 And my response:

 Wind Speed:

Actually your initial request for a quote had 110 mph on it. Our data base shows your area to be in a 123 mph 3 second gust area, and every quote we provided for you AND the invoices you approved show 123 mph. Under the 2006 IBC the basic wind speed and 3 second gust are the same (https://publicecodes.cyberregs.com/icod/ibc/2006f2/icod_ibc_2006f2_16_sec009.htm). Our Drafting Department will happily add the term “3 second gust” on Page S-0 and S-0b of your building plans. Your price is the same for either wind speed.

Steel thickness on plans will be corrected.

Basic pole location diagrams provided by use do not specify a column size and are “placeholders” – used merely for discussion purposes. Our design program does a complete Code Conforming analysis of every component and connection for any given building. Just because you have seen something smaller in your area, does not mean those buildings actually would meet Code.

We do guarantee, however, your building (and every building Hansen Buildings designs) does meet your local code. We never under-design a building, and believe me, there are plenty of companies out there who do.

 As always – crisis averted!

Steel Stretcher Needed

Along with this photo came the message: “The Contractor I hired to put up the building will be sending you video from his cell phone sometime today.

In the meantime I have taken two photos: one of the gable end and the other of the side wall. The side wall panels are perfect and the end gable ends are 6 inches too short on the high side.”

Just at a cursory glance, the workmanship on the building looks pretty clean. Now I am going to take you just a little closer into it.

Well, maybe this photo needs to be revisited…..

steel stretcher
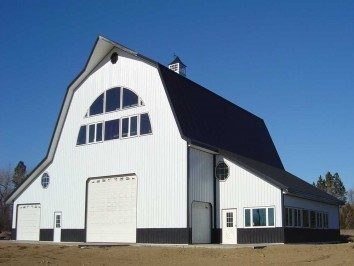
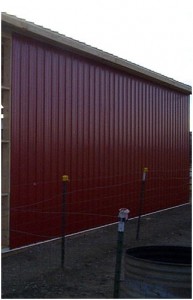
Look up at the top of the red wall steel. What do you see?

If you said, “wood”, you are correct about what you are seeing.

Unfortunately for the builder, there is not supposed to be wood showing at this part of the building! The wall steel is supposed to run up into an inverted piece of J Channel trim which is placed tight against the underside of the roof steel.

What does all of this mean?

It means the building is built six inches too tall!

My loyal readers have read over and over with me harping on this subject so many times they probably have blood shooting out of their eyes at the very thought of another builder who didn’t pay attention to the measure of eave height being shown on the plans five times on three different pages. Not to mention the Construction Manual which is almost annoying outlining how to measure eave height over and over again throughout the chapters.

One might notice the symbolism between the number of times eave height is mentioned in the Hansen Pole Buildings Construction Manual (51) and the infamous Area 51 of UFO and conspiracy theory claims. When it comes to some building contractors, I’m wondering if the extraterrestrials experimented on them!

This is a builder who could have used my patent pending eave height tape measure (https://www.hansenpolebuildings.com/blog/2015/02/eave-height-2/).

Free Pole Barn Plans

Humor me here – do a Google, Yahoo or Bing search for either “Free Pole Barn Plans” or “Free Pole Building Plans”. Up should come a million or so choices. With all of those possibilities, it has to be a great way to go….right?

To begin with, keep in mind free pole barn plans are most probably going to be worth exactly what they cost.

Nothing!

Want to totally embarrass yourself? Download and print a set of free pole barn plans and try to submit them as plans for permit in any jurisdiction which does any sort of structural plan review.

Chances are about 99.4% of obtaining one of two results from the Plans Examiner. Result Numero Uno – the Plans Examiner will do his or her best to not bust a gut rolling on the floor laughing, and will send you to get a real set of plans designed by someone with some actual structural knowledge (can we say, “Registered Design Professional”?). Or, behind Door Number Two – out will appear the red pencils as correction marks will be made all over the plans and a lengthy list of items to be corrected will be handed back with the lovely, now red colored, free pole barn plans.

But – there exists a saving grace….where you want to build does not require a Building Permit, or does not require a plan review or do inspections! Wow, really cool, right?

Please, do not fool yourself. If the plans are not adequate to pass a structural plan review, is it worth taking the risk to life and limb to attempt to build from them just because they were free?

homemade ferrariIn my mind this would be the equivalent of assembling one’s own Ferrari from a set of free Ferrari plans off the internet. Pole barns, while they may appear simple to the casual observer, are actually structures which, to be constructed correctly, require more than a passing amount of engineering.

Hence, avoid the “free pole barn plans”. You will be glad you did.

Dear Guru: When Do I Add a Reflective Radiant Barrier?

Welcome to Ask the Pole Barn Guru – where you can ask questions about building topics, with answers posted on Mondays.  With many questions to answer, please be patient to watch for yours to come up on a future Monday segment.  If you want a quick answer, please be sure to answer with a “reply-able” email address.

Email all questions to: PoleBarnGuru@HansenPoleBuildings.com

 DEAR POLE BARN GURU: I am building a 24 X 40 pole barn that will eventually turned into a work shop down the road. It has a vented ridge cap and soffit for some ventilation. I will be constructing it initially as a storage unit in cold climate conditions and like to insulate and finish the interior at a later time (3 years). What type of vapor barrier do I need initially? Can I place a vapor barrier across the purlins before construction and still insulate and finish the interior later? The trusses are rated for the weight and ceiling load. MARCHING IN MANISTIQUE

DEAR MARCHING: I will assume your question pertains to a building with steel roofing to be installed over the roof purlins. If this is the case, you should install a reflective roof insulation with adhesive pull strips to seal the joints over the purlins and beneath the roof steel. Check out www.buyreflectiveinsulation.com  And yes, you can still insulate and finish the interior later, but the reflective radiant barrier should be installed during initial construction.

DEAR POLE BARN GURU: I am considering purchasing plans from your organization. I would like to receive the auto-cad (.dwg) file format as well as the printed plan Will you be emailing the electronic version or do you provide it on a memory stick. MINING IN MINNESOTA

DEAR MINING: For some more reading on our pole building plans: https://www.hansenpolebuildings.com/blog/2014/06/pole-barn-plans-3/

We also are unable to provide plans as a .dwg, as it would allow them to be edited from their original format. Whether intentional or by accident, changes could be made which would compromise the structural integrity of the finished building.

DEAR POLE BARN GURU: I sent a request for a quote on a barn. I noticed the one that is listed as the’ Roanoke AL. I like this type barn. You can put attachments for your tractor on the sides, and us the inside for animals or a tractor and hay.   If you have the plans, can you send them, or is there a charge for that?? VASCILLATING IN VIRGINIA

DEAR VASCILLATING: Yes, this style of building is very flexible and allows for a multitude of options. We have the plans for every custom building we have ever provided, however the differences in climactic conditions (snow, wind and seismic) from one individual site to another, as well as potential differences in Building Code editions make it impossible to reuse them.

Once you have invested in your new Hansen Pole Building kit package, plans specific to your exact requirements will be produced for you. These plans are included in your investment price.

Dear Guru: Can I Purchase Just Pole Barn Plans?

Welcome to Ask the Pole Barn Guru – where you can ask questions about building topics, with answers posted on Mondays.  With many questions to answer, please be patient to watch for yours to come up on a future Monday or Saturday segment.  If you want a quick answer, please be sure to answer with a “reply-able” email address.

Email all questions to: PoleBarnGuru@HansenPoleBuildings.com

DEAR POLE BARN GURU: Can I purchase pole barn plans from your company without purchasing the building? NEEDY IN NEOSHO

DEAR NEEDY: Technically, we do not sell pole barn plans only – however, you could order a pole building from us, paying 25% down to acquire the plans, and then never go further. As our materials are so affordable, it actually would not make much sense to not have them provided by us. Plus, we use some higher quality materials which have been tested to provide added strength, which are not available to the general public, other than with the investment in one of our pole building kit packages.

DEAR POLE BARN GURU: We recently received your quote on our new pole building. The price was close to budget, but a little high. We’d like to know how the price would change if we reduced the wind rating. HOPING IN HUNTERS

DEAR HUNTERS: The design wind speed for your building is the lowest which is possible anywhere in the country under the 2012 International Building Code (IBC). If your building site is protected from the wind in all four directions, then Exposure B could be used, rather than the more severe Exposure C. For more information on Wind Exposure please read: https://www.hansenpolebuildings.com/2012/03/wind-exposure-confusion/

There are probably other ways to get the cost “down” without sacrificing designing a building to code. We often have folks purchase a building the width they desire, but scale down the length a bit, and then add onto that building a year or two down the road.   We have a gal who boards horses who has added onto the length of her horse barn three times.  As her business grows, her barn grows with it!  This is easily done and spreads the “budget” out over time. Don’t skip on features – sacrifice “for now” those things you can “do without” and then add them on later on. Overhangs should be done at time of building, but windows and even additional doors can be added in at a later date. Get your “box” figured out, and then add to it as you can afford.

Blueprint Reading

roof framing plans
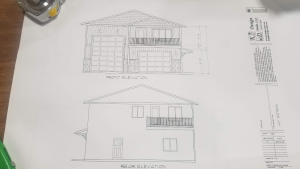
When I was a boy, I used to love it when my Dad would bring home fresh blueprints….I could smell the ammonia before I could see the roll of pages. The smell alone would trigger my senses to alert me to “something was going to get built”!

Yes, back in the day, plans graduated from being chipped in stone by monks with hammers and chisels, to actually being white lines on blue paper – hence “blueprints”.

Jobsite communication is done by pointing out portions of the drawings. Rough sketches get made on the reverse side of blueprints, or even on chunks of cutoff 2x4s to show what we’re trying to say. In order to advance a pole building construction project forward, learn to read the drawings and make rough sketches. While the language is simple, it does take some studying.

How does one learn to read blueprints? Just like eating an elephant, it is one bite at a time!

First time blueprint readers look at an entire page of words, lines, strange symbols and find it as overwhelming as my attempts at 56 years old to learn Spanish! It is all too easy for the brain to shut down and to say, “I can’t read blueprints.” Ever try to read a page of a book or newspaper all at one time? It can’t be done either. On a page of text, one starts at the upper left hand corner, reading one word at a time, which becomes one sentence at a time.

The difference between a page of text and the plans is blueprints don’t have an obvious place to start.

Think: Plan – Section – Elevation

The most basic concept about reading blueprints is, “Plan, Section and Elevation”. When looking at a drawing, first determine, “Is this a Plan, a Section or an Elevation?”

The Plan View is looking downward on the building (like a bird in the sky). Section is a cut through the building, usually showing how something will be built. Elevation is a view of the sides of the building….as if you are standing and looking at each of the 4 walls from the outside as you walk around the building.

The most important thing in understanding blueprints is to just do one thing at a time. Don’t try to understand everything at once, no one can do it! Take time, relax, look at each symbol and word and try to understand what it is there for. Most things on a blueprint are there for a reason, just take it slow and get the purpose for the words and symbols into your head.

I find it helpful to go over a new set of blueprints with a yellow highlighter – reading and highlighting every word. By the time a sheet is done, I have a fairly clear idea of what the designer and draftsperson were trying to convey.

The least interesting part of reading blueprints is always the General Conditions and Design Notes. Because of this, they tend to be easy to skip over. Besides specifying Code and loading information, important details such as types of fasteners to use or concrete requirements are often stated. These are the rules for the project and it is easier to win the game, when one knows the rules.

My focus here is going to be on construction plans.

A plan view is a view of an object or area as it would appear if projected onto a horizontal plane passed through or held above the object area – I like to think of this as being a “view from space”. The foundation plan (or pole layout) is a plan view of a pole building projected on an imaginary horizontal plane passing through at the level of the top of the ground, or grade.

The roof framing plan gives similar information with regard to roof trusses or rafters, purlins and other structural members in the roof.

Wall framing plans provide information for wall girts, headers and other structural members in the walls. They give important vertical dimensions, such as the distance from grade to eave height, as well as heights and widths of large door openings.

Section views are a view of a cross-section. The term is confined to views of cross sections cut by vertical planes. The most important sections are the wall sections. Starting at the bottom, column depths and hole diameters are specified. Exterior wall sections show dimensions and materials to be used. This section will also show the details of any second floor, showing if joists or trusses are to be used as well as dimensions and materials.

Detail drawings are on a larger scale than general drawings. They show features not appearing at all, or appearing on too small a scale in general drawings. The wall sections are details as well as sections, as they are sometimes drawn on a larger scale than the plans and elevations. Connection details, which are the most common types of details are often shown in the section drawings. Details are included whenever the information given in the plans, elevations and wall sections is not sufficiently detailed to guide assembly.

Understanding blueprints does not have to be a daunting experience – while it may feel like the street signs in Ecuador look to me (totally baffling at first), the language of plans is in English and with patience the road to success becomes easy.

Get your yellow hi-lighter out and get started!

Finding Stuff on the Road: Building Department Documents

Finding Stuff on the Road

Author’s Note: This is part 7 of a series of blogs written from a 6500+ motorcycle trip from WA to Ohio and back.  See Blog from Oct. 15th for the beginning…and hang on for the ride!

There are many Building Departments who offer nifty little handouts to property owners who want to design and construct their own post frame buildings. Most of these are one or two page documents and cover a relatively limited number of cases (typically smaller buildings). If one follows their guidelines, a structural Building Permit will be issued (provided the building meets with any other requirements imposed by the Planning and other related jurisdictional departments).

I picked up from one of the states I visited on my trip, a County Construction Code Office 10 page document on how to design a pole building. Most of the document deals with how to design truss carriers (they assume all post frame buildings will have columns every eight feet, with trusses every either two or four feet) to support trusses between columns. The other feature stressed in the document is adequate footings to keep buildings from settling.

There are many things the document overlooks. It gives a description of how to design truss carriers, but not how to attach the carriers to the columns. It gives concrete footing sizes, but fails to address column uplift and overturning due to applied wind loads.

Interesting, of note, all of the footings are greater in size than any concrete “cookie” would ever possibly support!

To learn more about concrete cookies: https://www.hansenpolebuildings.com/blog/2012/08/hurl-yourconcrete-cookies/

Building DepartmentEven for a modest sized building (30 feet wide) with generally accepted soil bearing pressure (using 2000 pounds per square foot as the soil bearing capacity), their prescriptive footing requirement takes over 600# of concrete per hole! Not too many people are going to mix up 10 60# bags of sackrete for each hole, so the potential for abuse exists.

Also not addressed by the document are…(and I shudder here) the wall columns, girts or purlins!

What all of these prescriptive requirements got me thinking about was – I wonder if the jurisdiction’s attorneys are aware their Building Departments are putting themselves in the position of being the Designer of Record for buildings constructed using them? Facing reality, if I was to construct a pole building, using the methodology ascribed to be one of these departments, and my building came down, I am thinking my attorney would have a field day with it!

For more information on prescriptive requirements: https://www.hansenpolebuildings.com/blog/2012/02/prescriptive-requirements/

See you tomorrow….for Part 8 in the series of my cycling across the upper U.S.

Building Plans: Why it Pays to Read Directions

One of our clients recently sent us the following by Email….

“The main issue we have is that the sidewall pieces and wainscot only add up to 8’7″, leaving almost 7″ of uncovered space between the top of the metal siding and the fascia all the way around.  We thought maybe it was a mistaken size that had been shipped, but now realize that the plans include the concrete pad in the 10 ft. high walls, rather than starting at the top of it, so the walls wouldn’t really end up being 10ft high, but closer to 9’4″.  But now everything has been framed based on calculations from the top of the pad. The endwall pieces will have the same problem.  What do we do now?  You can contact the builder (Joe xxxxxx) at xxx-xxx-xxxx with any specific questions.

My readers may recall back in March (Blog #199???) I addressed the subject of eave height. I wrote, “Eave height is: the measure from the bottom of the pressure treated splash plank, to the intersection of the underside of the roofing at the outside edge of the sidewall columns.”

When clients receive quotes, or place orders with Hansen Pole Buildings, they all state explicitly eave height is not interior clear height. This gives clients a pretty fair idea of what to expect.

To clarify matters, every building package comes with two sets of multiple page, two foot by three foot building plans. On at least three pages of the plans, in seven different places is stated, “Eave height = bottom of skirt board to intersection of roof steel and outside edge of sidewall columns”.

Assuming the building plans were somehow ignored, the correct measure of eave height is also stated repeatedly in the Construction Guide provided with the purchase of every post frame building kit.  There are diagrams and pictures with clear marking of dimensions, along with written encouragement for anyone not understanding eave height, to “call us”.

In this particular case, our client hired a builder to construct her new building. The builder’s error – he placed the roof trusses six inches higher on the columns than specified on the building plans and in the instructions.

Historically, clients who construct their own buildings rarely make this error – they read the provided documents. Considering hiring a builder? If so, find one who will read and pay attention to the plans and instructions.  Most of all, hire one who is not afraid to ask questions and clarify things if he’s not familiar with constructing a building kit from your chosen vendor.  Just like any other do-it-yourself kits, they are not all “the same.”

Pole Building Prescriptive Requirements

In a misguided effort to make things “easier” for potential building owners and builders, some Building Departments have prescriptive requirements for non-engineered pole buildings.

This means if someone walks in the Building Department door and wants to construct a pole building, as long as the building owner (or builder) agrees to build to match the prescriptive requirements, they will be issued a structural permit. This is, of course, with the caveat of being able to meet the requirements of other departments, such as Planning.

WHY IS THIS BAD?

Prescriptive requirements are often based upon, “the way things have always been done”, rather than having a basis in the sound fundamentals of structural design. Every three years a new version of the Building Code is published, sometimes with sweeping changes in structural design. Many highly qualified design professionals, including many engineers, are involved in revisions of the Building Code.

A classic example of this came when the International Building Codes were first adopted in 2000. Prior Codes did not have deflection criteria for wall members in those cases where the members did not support a rigid finish (like plaster or gypsum board). The new Code limits the deflection in all cases. In order to meet the new requirements, in many cases, pole building wall girts can no longer be installed “flat” on the outside of the wall columns.

Many times materials are included in the prescriptive requirements which do nothing but cause more work for whoever is doing the actual construction, as well as using materials which either are not necessary, or are larger than what an engineer would have specified.

On occasion, these prescriptive requirements do not actually meet the Building Codes. In my spare time, I have challenged more than one of them and gotten Building Departments to make changes. The prescriptive requirements resulted in a building which was under designed.

The scary part….if you build to prescriptive requirements, and have a collapse, the Building Department is absolved from any structural liability!

THE SOLUTION – IF a Building Department has PRESCRIPTIVE REQUIREMENTS for Pole Buildings – invest in an engineered building kit. It is less expensive to pay for the engineering and it guarantees a building which will be designed to actually meet the building codes.  Your bonus is the sealed plans are your “insurance’ – the engineer is now liable to for the safety and integrity of your new building.

Pole Building Plans 101: Endwall Elevations

Blog #97 Building Plans – Endwall Elevations

This is day 4 in discussion of building plans, which pages show what features and how to “read” them.

Endwall elevations are most often where sliding doors, overheads and entry doors are placed.  Not always, as some folks use the sidewall as the “front” of their building.  It always makes me smile when folks start to talk about the “west” or “south” end of their building.  Now this would be an apt description, if only I was standing on their property and had a clue as to which way was North or South!   Whatever you call it, the gable end…is still an “endwall”.

Here’s where specifics on your particular doors will be drawn, with heights of the openings so your doors fit properly.  It will also show the relationship of the 4” nominal concrete floor to the skirt board, or peeking out through any door openings.   The really cool thing about pole buildings is…you don’t have to pour a concrete floor at time of construction!  The posts with the concrete around them are your foundation, and if you never decide to plunk down the money for a full concrete floor, your building will stand the test of time just fine.

It’s easier to do the concrete at time of construction, with the skirt boards as your concrete “forms”.  You can nail a scrap 2×4 across the end of door openings while pouring, and pull them off after concrete is set.  It’s easier to pour concrete when the building is relatively empty, rather than haul everything you’ve stored in there to the outdoors, in order to add a floor down the line.  For those on a budget, “later” may be the best option, and we’ve had countless folks do it either way with great success.

Endwalls again show all of the posts into their respective size holes, how far to hold up the poles so you can do the holes all in one pour.  Endwall girts and spacings are shown on this elevation, with differences for sizes in lumber and spacings due to some of them possibly ending up in small (less than 5’) or even smaller (2’ or less) bays.  Shearwalls are shown on this view, although the detail on shearwalls (included on this same page) will give you a close up view of how to build one.  Shearwalls are very important for those small bays left after taking big chunks out of an endwall for one or more doors.  It’s just a matter of adding bracing and osb to provide a “stiffer” endwall against the wind.  Important but definitely not hard to build.

Endwalls will also show location of the wainscot girt to support those shorter panels.  Additions to the trusses are what are termed “siding backing” 2×4’s which provide additional support and a place for siding to be attached, as the end trusses are notched in.  Endwall truss to post connections are shown, along with a detail for a close up view.

If there is an entry door in an endwall, details on how to frame it in are shown, as well as any windows.

Both rear and front endwalls are shown on the plans, with the full endwall drawn, not just a portion of it as I’ve seen from other pole building kit providers.   We give you a complete view of the framing, and a good visual of your new building taking shape.

Check out the endwalls on a set of sample plans.

https://www.hansenpolebuildings.com/sample-plans.htm

Tomorrow we will discuss the sidewalls elevation drawings on a set of plans.  In some ways they are similar, but definitely not the same as endwalls.

Have a good one!

Pole Building Plans 101: Pole Layout

As important as carefully investigating the style, quality and features of the building you are going to buy, is taking the time to look over a sample set of plans and directions of how it all goes together…before you buy the building.  I’ve purchased what looked to be the simplest projects in the past (how hard can a child’s toy box be?) only to come home and wonder if the people writing the directions had ever put one together themselves!

As I mentioned yesterday, our plans are a minimum of 6 pages:

  1. Pole layout
  2. Roof Framing Section
  3. Interior Section
  4. Endwall framing elevations (both front and rear)
  5. Sidewall framing elevations (both left and right)
  6. Steel or Wood Siding Cutting and Layout Sheet


Depending upon your building size and features, there could be more pages for lofts, stairs or those pretty drawings certain building departments like to see, called “elevation drawings”.

Plans are drawn in a commonly used scale, which is required by most building departments.  A word of caution here  -do not ever and I say ever, try to use a ruler and “scale” off the drawing!  Why?  In printing, sometimes depending upon the computer and printer, the scale can get slightly altered.  We also have detail drawings which are scaled at different scales, for you to get a closer look as if you zoomed in on them with field glasses.  Getting the scales mixed up for the inexperienced could result in disastrous building errors.  All dimensions are marked in “real foot” measurements, so read, use your tape measure and you will be just fine.

A word here about some of the common abbreviations used on your plans, before we get into discussing a pole layout.  We try very hard to not use any abbreviations which are out of the ordinary, or difficult to figure out.  Most folks can read BL  and CL and understand they mean Building Line and Center Line.  But not everyone reads: U.O.N. as Unless Otherwise Noted. And what does this mean anyway?!  So we stick to the common ones, but when in doubt, ask! If you are looking over a sample set of plans and don’t understand half of what it is telling you, maybe this is not the building kit you want to purchase.

A pole layout is the first page of our plans.  It shows outside of post to outside of post Building Line dimensions for the corners.  This means if you have a building 24’ x 36’, and drew a line on the ground for those exact dimensions, all the posts including the corners would fit tight against the line on the inside of the rectangle.

The sidewall and endwall posts which are not corners, are measured to the centerline of each post.  Why do we use centerlines for the inside posts?  Not all posts are exactly the same size.  They can vary as much as an inch or more, so a 6×4 which is normally 5-1/2” x 3-1/2” could be 5-1/4” x 3-3/8”!  Small measurements for one post won’t make a hill of beans difference overall, but think how far off you’d be if you had a building 120’ long and every post was off “just a bit”.

The pole layout shows the diameter of the hole you are going to dig and fill with concrete, and then it shows you the orientation of the post.  This means if you have a 6×4, on an endwall it could be placed with the 4” side “to the wind” or the 6” side “to the wind”.  And the direction is important.  Building codes, wind exposure and speed, along with large doors and width of your building will dictate both the size and orientation of the posts.  But don’t worry, every dimension is shown on your pole layout.

OK, page one is easy, right?!

Click here to check out a sample Pole Layout:

https://www.hansenpolebuildings.com/sample-plans.htm

Come back tomorrow and we’ll talk about taking another look at your building from the sky: the Roof Framing Section.

Buy Pole Barn Plans

Let’s Buy Pole Barn Plans

As I browse about the ‘net, checking out what is available in our industry, I find lots of folks who are selling plans for barns and pole buildings. Some of these are remarkably inexpensive.

Now, why might buying a set of pole barn plans off the internet not be a great idea?

Hansen Buildings offers engineer sealed plans

These standard boilerplate pole barn plans are not checked by any engineer for structural adequacy. While they may look “pretty” and appear to get the job done….attempting to build from them may cause you to end up with a new building which flattens your possessions from a snow load collapse, or blows upside down into your neighbor’s yard.

We get inquiries every day from clients who are looking for plans. Long ago our engineers told us they have no interest in being part of a plans service.

Why? Because the engineer has no ability to control the use of the materials – to make certain the materials which they specify, actually get purchased and used as they envision.

So, why not hire a registered design professional to do design a building for you?

Hire an architect? No offense intended, as I went to school to become an architect. Architects are a wealth of knowledge, for many facets of construction and are invaluable when having to deal with a planning department on a complex commercial project. However – I have yet to see a set of pole building plans produced by an architect, which I would have endorsed for use by a client.

How about an engineer? Very few engineers specialize in post frame building design. Find one of the very few who do (we are talking about ones who have designed hundreds or thousands of buildings) and you can be assured of a sound structural design. Be prepared, however, to pay appropriately for their work. A good engineer should command a price of about 10% of the value of the project.

Really want to have the job done right?

The best route is to deal with a pole building kit supplier, who can provide engineered plans designed specifically for your project. The supplier can also make certain the materials provided meet the engineer’s specifications.

To receive more pole building tips and advice subscribe to the pole barn guru blog!

With Recent Improvements – Less Building Technical Support

I am not much different than probably most of my readers, when we get to the end of the work week, it is time to kick back and relax. It was on one of these “after the work week” evenings, that I met with a few friends to indulge in our favorite beverages, grab a bite to eat and swap stories. One of my friends, knowing I do technical support for people who are constructing their own pole building kits (or have hired a contractor to build for them), wanted to know how much building technical support I actually do.

The question sort of caught me off guard. While I am officially, “Technical Director”, most of my time and energy is spent in educating staff, researching new products and structural design work.

Truthfully, I had to say, “Not very much”. I only talk to one or maybe two clients a week about true technical support issues.

Much of this I have to attribute to the rewriting of our Construction Manual, which was completed earlier this year. Previous versions just had more material added to the old ones, as we strove to add the solution to any question which was posed to us. We hadn’t changed the format in several years, and the book became, well…cumbersome.

Hansen Buildings Construction Manual

The latest edition is a complete rewrite, from the table of contents to the glossary. It was made more user friendly by having numerous, very focused chapters, and hundreds of new drawings and photos were added. We also now have it posted online, where clients can login to view and chapters specific to their building are highlighted.

My experience is, rarely will a new pole building owner contact us with a question. Why? Because it is their building, they take pride of ownership. The plans are carefully followed and the instructions read.

By far the greatest majority of my support work ends up being done with contractors, building for others, who made assumptions about how things should be done, or failed to follow the plans. Many builders are experts at what they do, but “not all pole buildings are alike”.  And ours is truly a hybrid of just about any style of pole building out there.  These tech support questions are usually not as fun to take, as some builders can become overly defensive.  For some of them,  mistakes could “not possibly have been theirs”. The nice part is, I have yet to ever be presented with a problem, which did not have a solution – often times, without the client or builder having to order more materials.

For me, I am thankful and tip my hat to the wonderful clients and builders, who do their part, pay attention to the plans, use the instructions and in the end – have gorgeous brand new pole buildings they will enjoy for years!