Welcome to Ask the Pole Barn Guru – where you can ask questions about building topics, with answers posted on Mondays. With many questions to answer, please be patient to watch for yours to come up on a future Monday segment. If you want a quick answer, please be sure to answer with a “reply-able” email address.
Email all questions to: PoleBarnGuru@HansenPoleBuildings.com
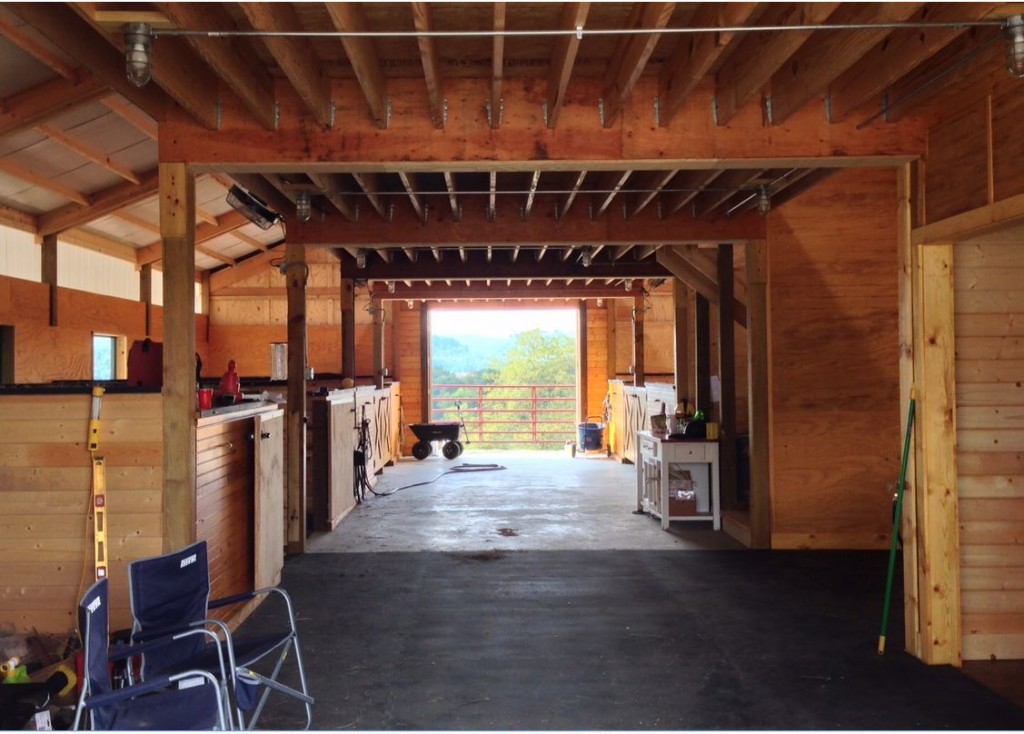
DEAR POLE BARN GURU: In northern Idaho, just east of Coeur d’Alene, I had a pole barn put up without insulation figuring I would build 2×6 walls between the posts and insulate with batts and then plywood the walls later for a work shop. Can spray foam be used instead? Could I frame 2×4 walls instead of 2×6? Can it be sprayed onto the metal siding and roof without any negative effects showing up later? I will have a heater in there, but probably not on full time. QUIRYING IN COEUR d’ALENE
DEAR QUIRYING: Can you use spray foam? The answer is yes, however it is probably the most costly choice, and the Building Code requires any spray foam to be covered with non-combustible material (e.g. gypsum wallboard).
For the walls, you could frame a non-structural 2×4 studwall, holding it flush to the inside of the columns, and place batt insulation between the studs. The studs do not have to be the same depth as the insulation, and in doing so, you will eliminate a thermal bridge.
Beware, less costly (per inch of thickness, not R value) open cell foams are permeable to moisture – so condensation could become an issue. To obtain an R-19 rating from spray foam, be prepared to spend around $3 to $4 per square foot of insulated area.
While spray foam is relatively light weight, always check with the manufacturer of the roof trusses and the Registered Design Professional (RDP – engineer or architect) who designed your building to verify the weight of the insulation being added will not compromise the structural integrity of the building.
DEAR POLE BARN GURU: I sent in three pole barns that i am looking to get a quote for. my families barn just recently burned down a few days ago due to undetermined causes. We lost our animals in the fire which was devastating. Our pigs and chickens were our livestock and our food. We need to get a barn up and built soon to get our farm running again. I have a few questions about this, first off if i go ahead and purchase this kit how does it get delivered to my house. Second, if this is purchased is the supplies all in one kit that you ship out or is it a list a what we need and i have to get it? please get back asap thank you. NEEDY IN NEW YORK
DEAR NEEDY: I am deeply sorry for your losses. Fire is so devastating.
When you order from us, the materials are delivered to you via truck.
You are purchasing from us the design, the complete 24″ x 36″ blueprints which are specific to your building and show where every board is placed. Not only to we provide all of the materials for construction, but we give you detailed instructions as to how to assemble everything.
DEAR POLE BARN GURU: What is your standard design practice to accommodate a wider O/C truss? Double the truss? Or increase the truss member sizes?
VASCILATING IN VERSAILLES
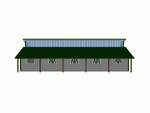
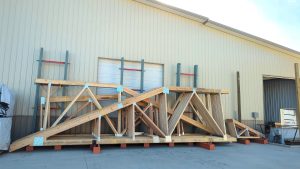
DEAR VASCILATING: Our most common practice design in general is a system using doubled trusses spaced most commonly every 12′ (although spacings 10′-16′ are also very common). The doubled (or more technically “ganged”) truss system affords some safety not found in single truss systems – as multiple trusses physically connected to each other all for true load sharing. The probability of two or more connected trusses having the exact same weak point is phenomenally low – reducing the risk of a catastrophic failure in an extreme loading situation. Ganged trusses also require less bracing than single trusses, adding to ease of installation, as well as lower costs and a “cleaner” finished appearance. It also may mean no cumbersome (and expensive) truss carriers. Lastly, if you put overheads in a sidewall, having the double trusses mean you could put as wide a door as 12’, and have plenty of room to put in a hoist system to lift a vehicle between the sets of trusses.
Vascilating then responded:
Thanks for the quick response. I assume, then, the practice is to utilize 12′ 2×6 purlins placed on edge on top of those trusses?
Is the spacing of 12′ the same for an attic truss? I recently got a quote from Hansen for a gambrel building with which I intend to have attic trusses. Is it common practice to finish a room using the knee walls of those trusses?
Dear Vacilating:
Every client gets my individual and undivided attention for as long as they need to get their questions answered.
The snow load will dictate purlin size, but they will be 2×6 or larger, joist hung between the trusses. Attic trusses will be the same, however may be more than just a 2 ply truss depending upon the span and load. Most typically people will finish those spaces with a knee wall.
Unless you are absolutely married to the gambrel look, the most efficient and cost effective design for multi-story space, is to just design a multi-story building. For about the same cost, you can get full room height from sidewall to sidewall
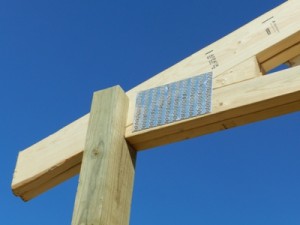 For Hansen Pole Buildings, any time we are using a “real” double (more specifically ganged) truss system, we specify top chords to be a minimum of 2×6, regardless of loads. I say “real” because placing a single truss along each side of a column is not a double truss. They are two single trusses, acting independently from each other. A true double truss system, such as used by Hansen Pole Buildings, features trusses physically attached face-to-face by means of mechanical connectors (e.g. nails, bolts, etc.). This allows for two members to actually load share, reducing probabilities of one weak single truss failing and pulling a roof system down with it.
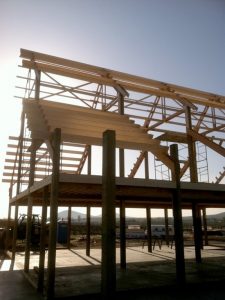
 DEAR JEFF: In my very humble opinion (and those of most Registered Professional Engineers and truss manufacturers) – in most instances knee braces at all cause far more harm than good. Under load, they can cause catastrophic truss failures. I would get a RDP involved who can physically examine what you have in place, determine if knee bracing can be entirely eliminated and design a column repair capable of a safe and sane design solution.
 DEAR POLE BARN GURU: I have spoken to my architect and he is saying to do my column spacing 8′ with truss every 4′. I have looked at your videos and several other videos. I noticed 10′ or 12′ Columns with double truss is more than enough. This is going to be my house for now and later turn into my garage when my actual house it built. The size is 30x60x12. Also I will be using shingles for my roof since my HOA doesn’t allow metal. I am wanting to be efficient and save money but also have this built safely. ANGEL in SEALY
  DEAR POLE BARN GURU: I read your article about raised floors in post frame homes. I live in a flood prone area an was considering something like this. Do you have any other information or details?
  DEAR POLE BARN GURU: Hey there! I’m wanting to self build a 50×70 or a 48×72 which is probably more cost savings. 16′ height and I’m leaning towards 10′ spacing. It’s a 3 sides equipment storage building. One of the 70′ sides being open. I need any help you can give on post spacing, 3ply or 4ply , truss spacing and a double header if I’m not locking into the post with the truss because the spacing won’t allow. I’m open to any suggestions. ERIK in SEYMOUR
  DEAR SUZANNE: Hansen Pole Buildings is America’s leader in providing fully engineered, 100% custom designed, post frame building and barndominium kits, with multiple buildings in all 50 states. Your deliveries come from one or more of our thousands of shipping locations across the country (minimizing delivery costs) – so chances are excellent we are ‘close’ to you (as well as supporting your local economy)!
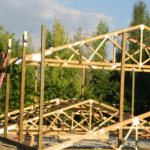 Even should all these manipulations be done successfully, it would result in having to utilize some significant lifting equipment to raise trusses, as opposed to being able entire bays straight up columns with truss winch boxes, as pre-installed wall girts would preclude this.
 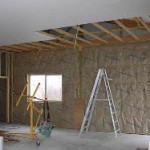 DEAR REID: While you do not necessarily “need” double trusses, there are some structural advantages to double trusses and they typically require far less bracing (read more about double trusses here:
  DEAR GREG: As long as you are measuring from a level point and top of your concrete slab will be below bottom of your base trim you will be all good with measuring down 3-1/2″ from splash board tops. While I have not done it personally, I know more than one person who has used a pressure preservative treated 2×4 to screed against as you describe. At a minimum it should be rated UC-4A (ground contact) for treatment.
 DEAR POLE BARN GURU:
  DEAR ERIC: Without knowing how far you intend to span with your trusses it is difficult to provide a definitive answer. Boundary County does not require building inspections, so even though you are in an area of extremely high snow loads – risks end up being upon you as a new building owner.
 Your fully engineered post frame home is 100% Building Code Compliant and most typically has pressure preservative treated columns embedded in ground with both concrete footings and bottom collars. Alternatively your home can be mounted to steel brackets set in concrete piers.
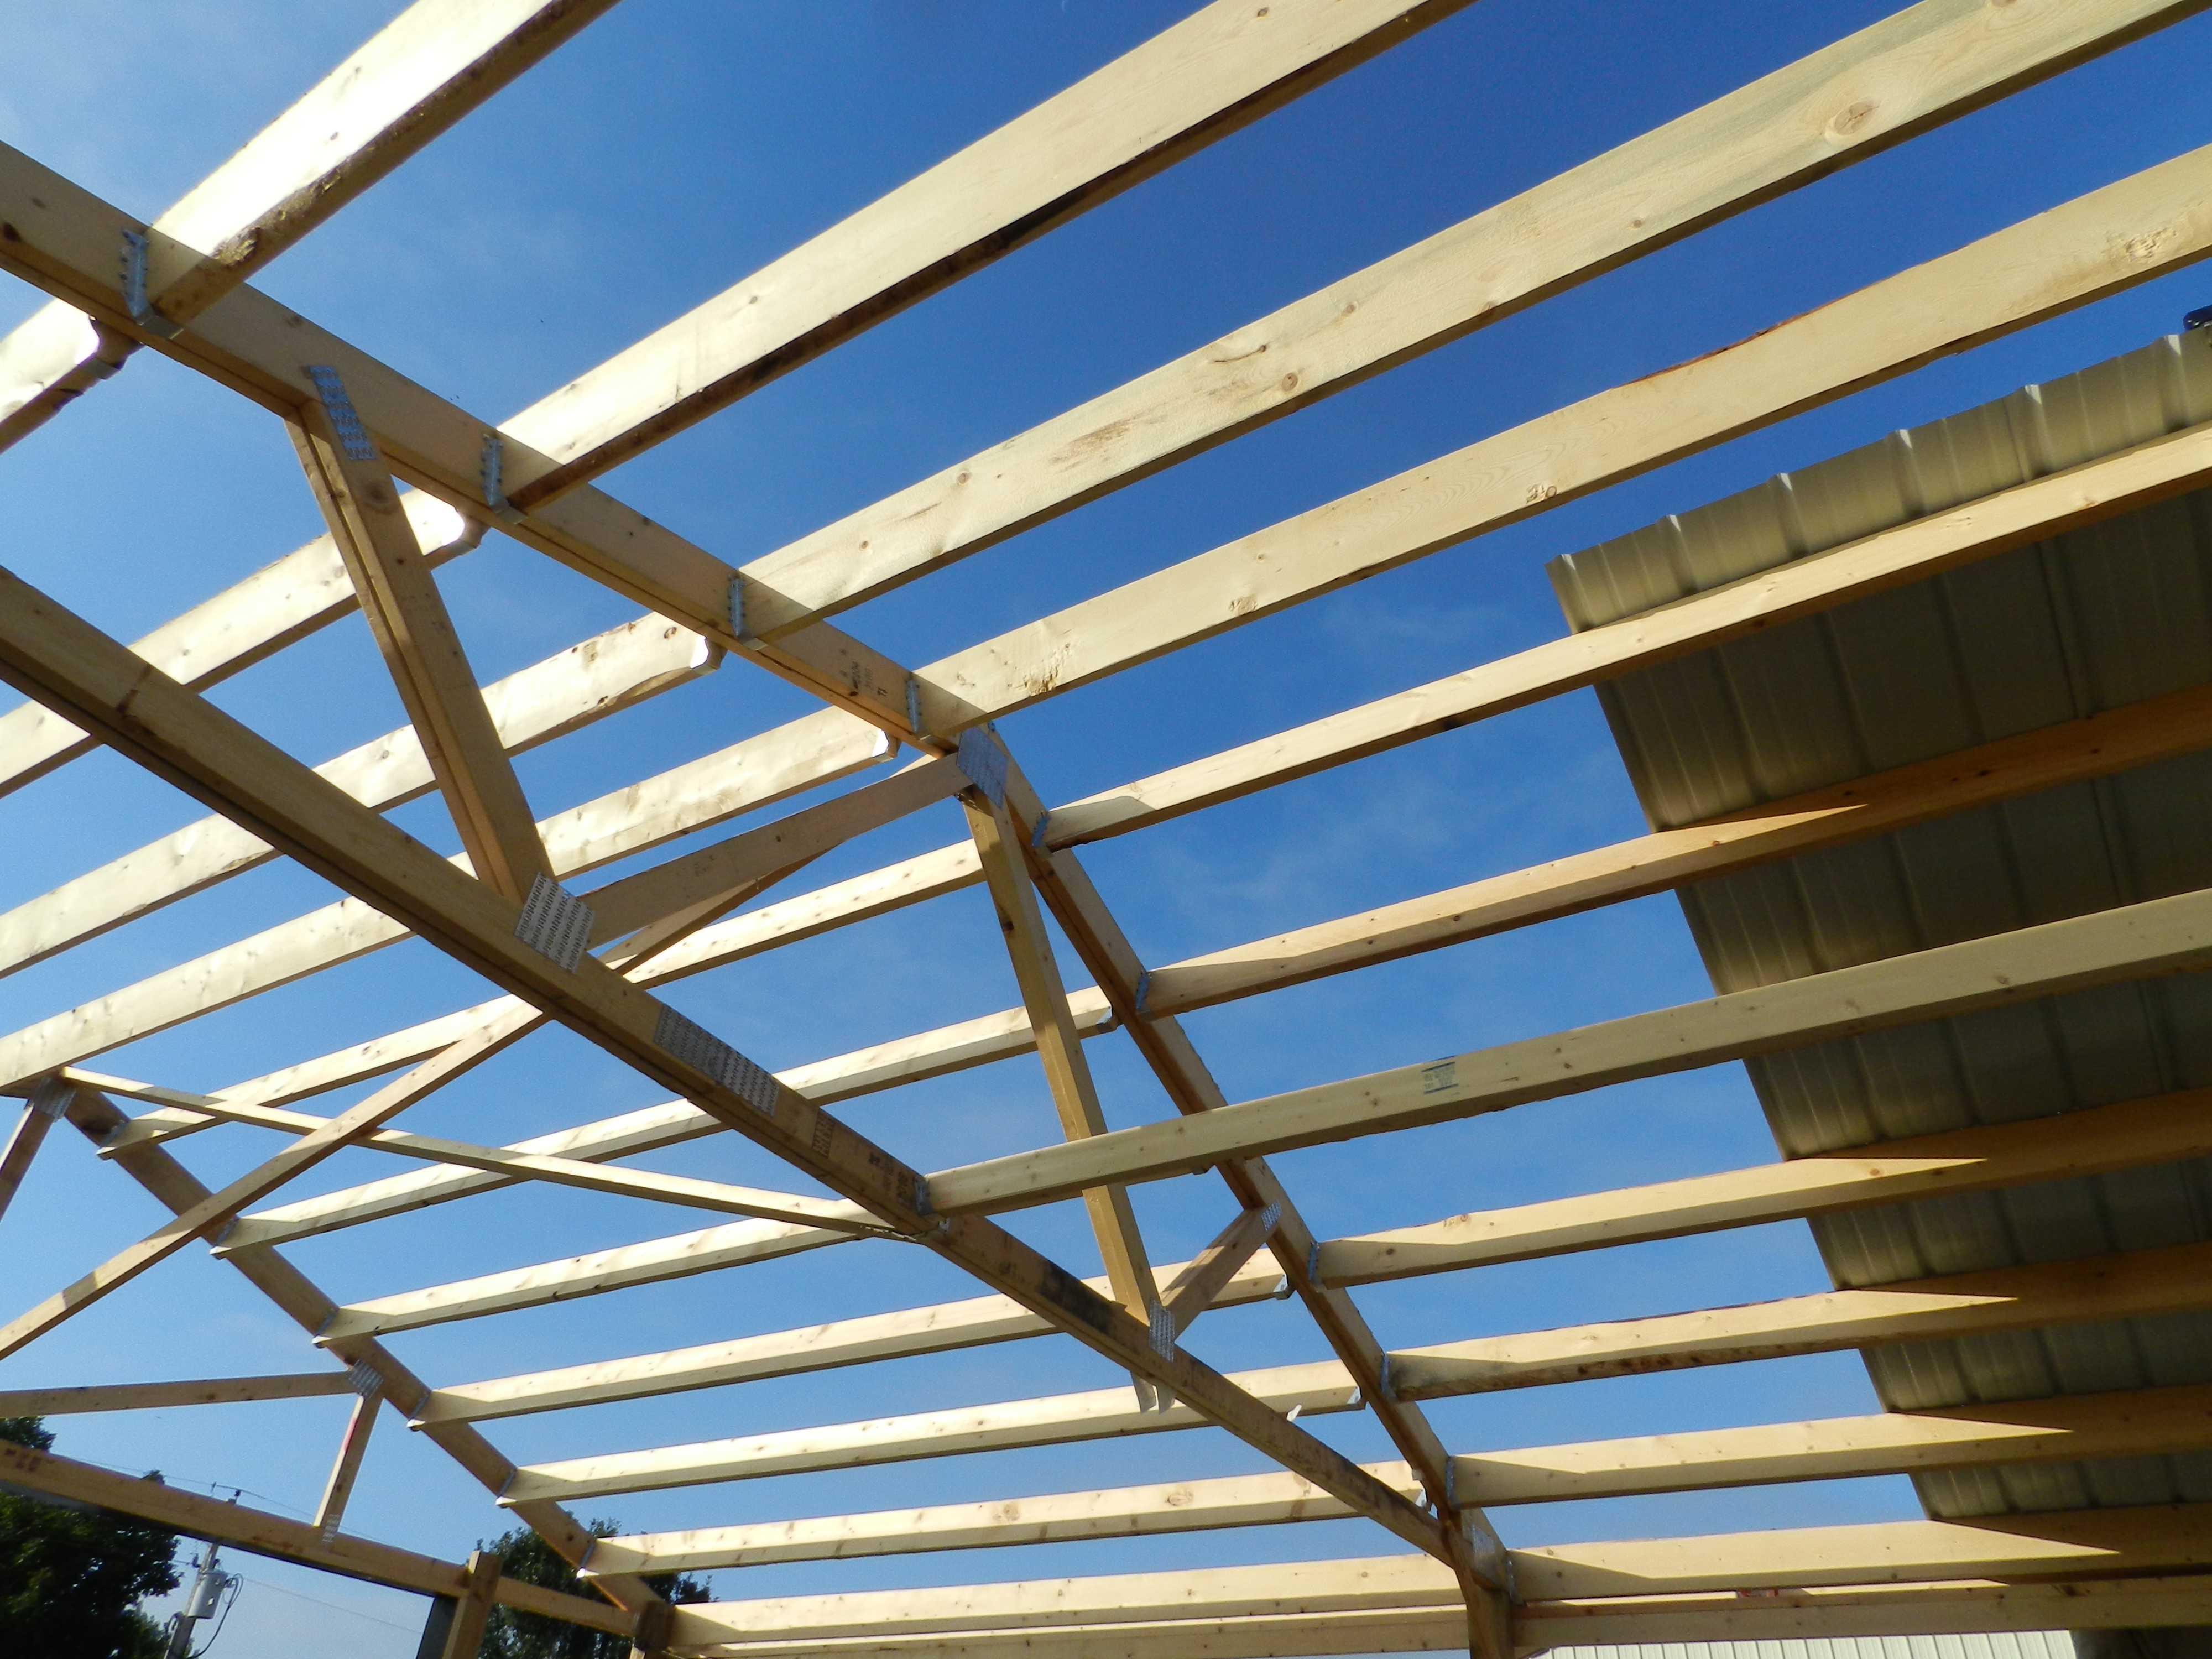

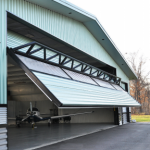 DEAR RANDALL: Typically each gable endwall would have just a single end truss. Some possible exceptions would be if you were designing to be able to extend building length in future, or for airplane hangars where there exists added strength requirement in order to support weight of a door.
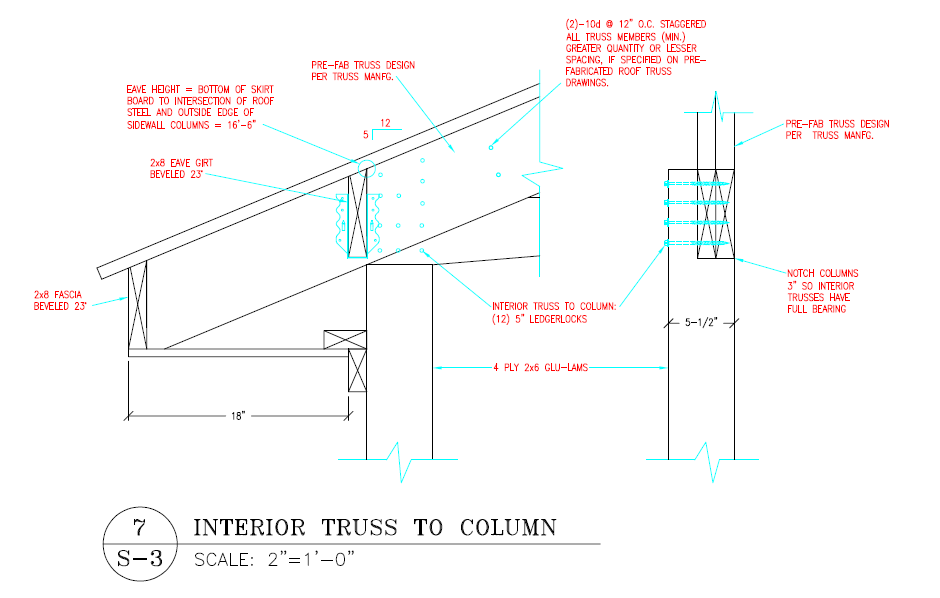
 DEAR ROB: 10 psf dead load is primarily to cover weight of ceiling gypsum wallboard. Your relatively light duct could be placed anywhere within roof system without adverse effects. A down side to placing duct work within a conditioned attic – effectively insulating roof slope plane and endwall triangles. For practical purposes this can only be achieved with closed cell spray foam. While being highly effective as an insulator, about R-7 per inch of thickness, it comes with a price tag not for those who are faint of pocketbook – usually around a dollar per square foot per inch of thickness. If you go this route, you need to eliminate venting eaves and ridge.
 RODNEY: In most instances a true double truss (not two single trusses spaced apart by blocking) will be most cost effective, as well as adequate to carry applied loads (along with properly sized roof purlins). However, depending upon a myriad of other factors such as eave height, truss span, roof slope and building length some other spacing may result in cost savings.
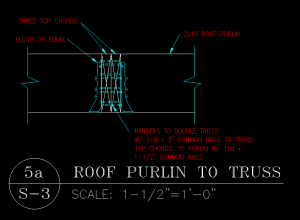 Do you think that mix of 1.5” and 3” nails for the connectors would be sufficient or should I really consider just temporarily attach the hangers and replace the temporary attachment with the 3” nails? If that is the case, is there an issue driving 3” nails basically tip to tip through the hangers?
 The originally patented post frame (pole building) design concept utilized columns spaced every 12 feet. Even the unimpeachable source of all knowledge (Wikipedia) references columns spaced every 12 feet (


