Welcome to Ask the Pole Barn Guru – where you can ask questions about building topics, with answers posted on Mondays. With many questions to answer, please be patient to watch for yours to come up on a future Monday segment. If you want a quick answer, please be sure to answer with a “reply-able” email address.
Email all questions to: PoleBarnGuru@HansenPoleBuildings.com
DEAR POLE BARN GURU: Good morning,
 I purchased a building back in February and just now starting to build. I have the Poles up and concrete down. Now I’m starting to install the Trusses. I have a question about the truss layout, on drawing S-4 It shows to drop the Back truss 7-5/8” and then the next set of trusses it looks like I need to drop the outer truss 7-5/8” also which will allow my purlins to be installed on top and tie into the 2nd truss. I have two questions. 1: The two interior trusses I understand they must set on a 3” ledger that I cut from the post, the way the post is laid out on plans is 6×4 on the outer post and the would only leave me with just an ½” of post to attach my Trusses to. 2: I understand the drop in truss’s but the purlins actual measurement is 7-1/4 and I setting them at 7-5/8” according to drawings. I just wanted to confirm that was correct.
Thank you. CHAD IN GROVES
DEAR CHAD: Your particular building has the rear 24 foot wide by 12 foot of length fully enclosed. The balance of the building is a roof only “carport”.
At 12′ from the rear endwall only the truss towards the rear of the building (the truss with “tails”) notches into the columns 1-1/2″, leaving two inches of column remaining. The truss on the front side of the columns (without tails) attaches to the column face with 10-10d nails to each column.
This allows the rear truss to have full bearing on the columns, and the top chord will seal the enclosed portion from the carport area. The roof purlins of the carport section will bear on top of the lowered truss on the face of the columns.
Although a 2×8 physically measures 7-1/4″, because it is rotated at a 4/12 slope, the trusses themselves must be lowered 7-5/8″ to compensate. We know it sounds counter intuitive, but it actually works.
For those following along at home, you can do the math yourself. For a 4/12 slope…square four (4 x 4 = 16) and square 12 (12 x 12 = 144). Add the two together (16 + 144 = 160) and take the square root (which is 12.649). Divide 12.649 by 12 to get the slope factor for 4/12 (1.05409). Multiply the dimension of the 2×8 (7.25”) by the slope factor and the resultant is 7.642”. The closest easily measured fraction is 7-5/8” (7.625”).
Mike the Pole Barn Guru
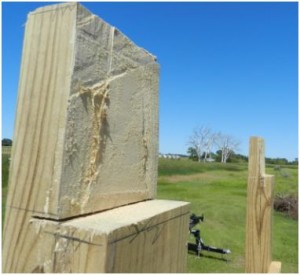
DEAR POLE BARN GURU: I’m currently constructing a Hansen building, and as we started notching the columns, noticed that one has a split in it near where the notch will be. It will work fine if I notch it on the other side, so my question is: Can I notch one pair of interior columns on the opposite side? The purlins should be long enough. Anything else to consider? Thanks JP IN GRAND SALINE
DEAR JP: Every once in a while someone is kind enough to throw up a “softball” question (think of friendly interviews of political candidates) for me and I sure appreciate them!
As long as your purlins/eave girts and fascia boards are all long enough – it is not a problem from a structural aspect. You are all good to go!
Mike the Pole Barn Guru
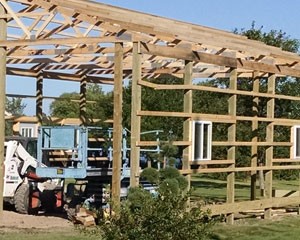 The load, however was not from the wind (as might have been expected), but instead, it was from one of the crew standing in the middle of it!
 One of those “maybe simple” things is the overall footprint of our buildings. In the photo is a partially framed 30 foot wide by 48 foot long building. When we measure those dimensions, it is from outside of column, to outside of column. All of the wall framing is to extend out 1-1/2” past the posts. Done correctly, the finished framework of this building will be 30’3” by 48’3”.


