Builder Says, “These designs are the Worse”!
Like all good stories begin…..
“It was a dark and stormy night”
Oops, wrong beginning!
Once upon a time I was a post frame building contractor. From 1991 until 1999 my construction company could only have been described as being prolific – at one time we had as many as 35 crews erecting buildings in six states.
I had a few advantages going into being a post frame building contractor – architecture school, managing several (and later owning) prefabricated metal connector plated roof truss plants, and having provided nearly 7000 post frame building kit packages from my lumberyard.
 My most important advantage was a thirst for knowledge. One of my favorite childhood books was 1967’s “The Way Things Work” by Neil Ardley and David McCaulay. I read it cover-to-cover repeatedly. This same thirst for wanting to know how things work led me to Dr. Frank Woeste at Virginia Tech. He challenged me with learning structural calculations involved in what made post frame (pole barn) buildings work.
This, in turn, led me to join ASAE (American Society of Agricultural Engineers) where I was a member of their structures committee. It also led me to be humble as I learned as I knew more, there was so much more to learn. I became an NFBA member – and found there was more than a single ‘right way’ to build post frame buildings.
Now it seems every small town in America has one or more post frame ‘builders’ and I will use this term ‘builder’ lightly as owning a jacked up 4×4, having a big dog and a loud stereo are not necessarily qualifiers for being a good builder. While there are actually some good builders (and a few great ones), far more a rule than an exception is “Chuck-in-a-truck” who believes he (or she) is Builder Bob – a legend in their own mind!
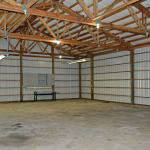
A Hansen Pole Buildings’ Do-It-Yourself client recently posted photos of their framed post frame building with commercial bookshelf girts.
Before being banned from the Facebook group for use of colorful language, builder Jason had this to say about this client’s photo:
“These designs are the worse! I don’t understand why anyone would do it this way. I really don’t understand why any company would promote such a design to a DIY. Book shelve wall girts are the weakest way to build building. All seams in wood is stacked. Not staggered. Toe nailed also is week. And if any system requires you to “hide” something or “never see it”, It’s a bad design! Just run wall girts on out side of post and stagger seams. Simple!”
Well Jason, not everyone has your narrow view of structural design solutions (or your grasp of English composition).
 People (both builders and DIYers) do bookshelf girts because they are, at a minimum, over 300% stronger in supporting wind loads than externally mounted girts (based upon 2×6 material of same grade at same spacing). They are also more resistant to deflection by more than 1300%. Moreover, with proper dimensional sizing, they allow for creation of an insulation cavity where clients can do interior finishes without having to add more framing.
Jason appears to have a belief staggering joints on externally mounted wall girts somehow makes a building stiffer! It is the use of diaphragm design to create a stiff roof plane to support column tops making a building more rigid, not some close to insignificant contribution from girts. Our ‘builder’ went off on his rant before noticing the ends of each girt are solid blocked to columns at each end and no toe nails are involved in their fully engineered connection (nor was anything required to be hidden).
Thinking of hiring a builder to erect your new post frame building? Look for one who is open to considering multiple design considerations rather than “this is how we have always done it and always will”.
For extended reading on bookshelf girts please read: https://www.hansenpolebuildings.com/2020/04/creating-extra-work-in-barndominium-framing/


