A Post Frame Building at Newman Lake
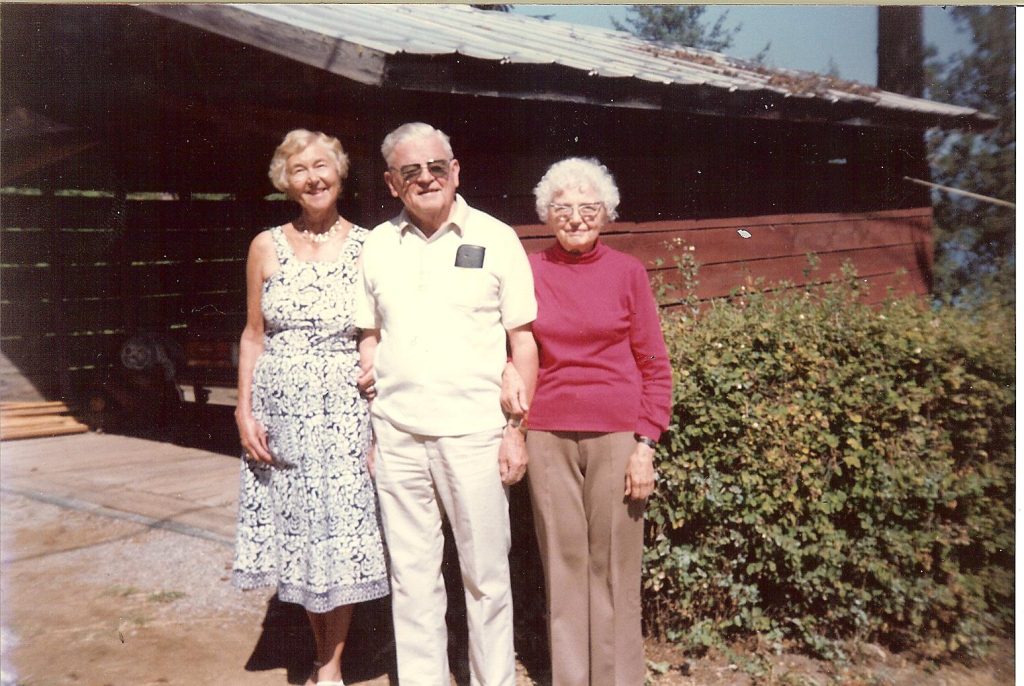
In this mid-1980’s photo, from left-to-right are Margaret and Frank Rostead (Frank was best man when my Grandparents were married in 1933), my grandmother Jerene McDowell (b. 1910– d.2006) and a Model A garage built by Grandma Jerene’s father – W.C. McDowell.
Back to our story after some brief history….
Newman Lake is in Northeast Washington State, roughly some 20 miles East Northeast of downtown Spokane and just West of Idaho. It is Eastern Washington’s largest natural lake. Early area inhabitants were Indians who roamed this lake and hillsides for berries and game.
Later traders from Hudson’s Bay company constructed gardens at Newman Lake.
Before 1880’s, each summer, Newman Lake’s shady shores were covered with Indian encampments. Indians picked huckleberries, dried them and made them into pemmican for winter. Camas root was dried and ground into flour. Their main diet was meat – deer, peasant, grouse, rabbit and fish. Venison portions were jerked and dried for winter use.
These Indians returned each summer for many years, after white settlers began moving in.
Slipper Point (named when a white lady lost her slipper at a gathering there) is at an end to a long gradual ridge. Indians used this as a playground and a place to race. One time, at a gathering there, they were having their contests in archery and races. During one race, from ridge top to Slipper Point, a running Indian ran into a partially fallen, slivered and splintered tree.
A long splinter ran him through and killed him. Indians immediately stopped their games and left, thinking evil spirits had placed this splintered tree in their way to chase them away. Those who came back, refused to stay overnight.
William Newman, was from England. At 20, he sailed from Liverpool to New York City in 1858. After having served for five years with US Army’s 9th Infantry, Newman was selected as one of a 25 man Boundary Commission escort, in Washington Territory, where he first saw what later became Newman Lake.
Newman then settled on and farmed an area bordering Newman Lake’s southern portion, until passing in 1887. Just after 1880, white men began homesteading in this area.
Pioneers caught trout in nearby Liberty Lake and transplanted them to Newman. A federal government fish tank railroad car was parked at Moab, on Northern Pacific’s main line. In 1887, residents carried carp to Newman Lake in buckets.
Excursion trains from Spokane ran to Moab, where busses and stages took passengers three miles across split log roads to Newman Lake, where guests could stay at one of four busy hotels.
Early 1900’s found surveyors carving up lake front lots to sell to those wanting to build summer cabins. One such interested party was a Swede – Mr. Swanson. Swanson spent a summer camping in different locations all around Newman Lake. He told his good friend Olof Lilliequist he had found an exact perfect location.
When Swanson went to purchase his lot, he found his friend had purchased every lot along what became known as Swede Bay for $500, including Swanson’s lot. Swanson ended up paying Lillequist $500 for his lot!
Lillequist set out to build his cabin (to be named “Terrace Lodge”), immediately adjacent to his friend Swanson (but higher up his steeply sloped lot). He hired an alcoholic stone mason from Spokane – under a condition of sobriety! In 1909 a flat area was carved out and cornerstones were laid for a 36 foot wide by 20 foot deep cabin. Trenches for two foot thick native stone walls were dug – and stone set starting five feet below grade, with no mortar, and allowed to settle for two years before being grouted in.
Lillequist eventually tired of trips up and down stairs from cabin to beach. He built another cabin– this time shoreline and west of Terrace Lodge. In July 1936, he sold Terrace Lodge to my Great-Grandparents, William C. and Mary Elenis McDowell – grocers in nearby Greenacres.
Here it comes….
Despite a treacherous, winding and steeply sloping dirt access road, McDowell wanted to drive his Model A and park it in a garage when he came to Newman Lake.
A small, flat parking area had been carved out uphill from Terrace Lodge. W.C. poured a concrete wall along this parking area’s downhill, North edge and proceeded to attach a post frame “stilt” garage to it. This two car garage was designed for Model A’s – so was 16 feet wide and 20 feet deep. Eight cedar trees we set on stone pads – two rows of four at 10 and 20 feet from the parking lot. This made for logs from eight to 12 feet in height, due to steep grade!
These logs (poles)were X braced to each other using full dimension, rough, green 2×4 from Eller’s Sawmill. Log tops were trimmed even, and 3 ply rough 2×8 beams were placed from concrete wall, across logs at 10’ to logs at 20’. Three layers of 2×12 decking then ran across beams – at 45 degrees both directions, then straight with building depth on top.
On top of this deck, walls were stick framed, trusses built by hand, 1×4 purlins placed and aluminum roofing was nailed on. Doors were eight foot wide bi-passing sliding barn doors.
These doors had been removed by my youth.
Come back Thursday to find out what happens to our post frame stilt garage.
 DEAR BRANDON: Provided they are vented cupolas, I am finding nothing in Building Codes prohibiting this. You will want to confirm this with your local Building Inspector.
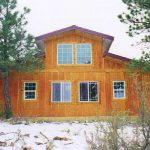 DEAR HEATH: The most economical for heating and cooling will be a square building on a single level. Your challenge with any two-story or lofted building is heat rises – so to cool to a comfortable level upstairs, it is frigid downstairs. I had this problem with our two story home in Washington, so when we built our multi-level shouse, we had individual heat pumps, heating and A/C units for each floor. Your need for venting will depend upon how you are insulating. If you are doing a finished ceiling across bottom of trusses, with blown insulation directly above, then your dead attic space being created will need to be vented (ideally with eave and ridge vents).
 DEAR STEVE: When our mountainside home near Spokane, Washington needed a new garage with 14 feet of grade change in 24 feet, we went with post frame – doing a ‘stilt’ house. Unless you are in a flood zone, this is normally far less expensive than excavating your bank to do a footing and foundation, or bringing in a plethora of truckloads of fill in order to get to a level building site. This should work well with your new cabin.

 I’m considering building a pole barn however am concerned because about 30% of the vertical posts would be on a rock ledge at an elevation above the frost line.


