Welcome to Ask the Pole Barn Guru – where you can ask questions about building topics, with answers posted on Mondays. With many questions to answer, please be patient to watch for yours to come up on a future Monday segment. If you want a quick answer, please be sure to answer with a “reply-able” email address.
Email all questions to: PoleBarnGuru@HansenPoleBuildings.com
DEAR POLE BARN GURU: My question concerns insulation and ventilation. I have an existing 30 x 50 pole barn. It is split in half lengthwise, with one half enclosed and the other half open on one side. I am wanting to frame and enclose the open wall and make the building into a woodworking shop. I would primarily use this shop during the warmer months, but would like to be able to work in there in the wintertime on occasion. I am planning to re-tin the entire building including the roof. The current enclosed portion has trusses that span roughly 15 feet from wall to wall with a 12/3 pitch. The area that I am wanting to enclose is “lean to” construction with 2 x 10 rafters that span from the truss beams of the already enclosed area to a double 2 x 12 beam (approximately 15 feet). My building does not have soffit ventilation or ridge ventilation. From what I have learned from your blog, I am planning to add reflective barrier between the purlins and metal roof when it is replaced. I also know that my trusses are most likely not designed to bear the weight of a ceiling and insulation. I would like to either insulate the entire building or at least the newly enclosed area and keep the other as cold storage. I would like to know what options I have to make either of these a reality and what steps to take as far as insulation and vapor barrier is concerned? I have included my e-mail and I tried to include photos but could not attach them. Please respond with your e-mail and I will send the photos right away and any additional information you might need. Thanks so much! NO CRISIS IN KANSAS
DEAR KANSAS: We did figure out how to get photos from your hands to our eyes, thank you very much for your efforts.
After seeing the photos, my response was, “Rather than throwing a lot of dollars into your existing building, have you considered just leaving it as is for cold storage, and putting up a new woodworking shop?”
I’ve written in the past about renovation and remodel work on pole buildings:
https://www.hansenpolebuildings.com/blog/2013/01/pole-barn-remodel/
https://www.hansenpolebuildings.com/blog/2013/05/renovating-a-pole-barn/
A little more input from this very kind gentlemen helped: “I was trying to use my existing building because it already has concrete floors and 200 amp electrical service.”
And back from me: “Trying to re-purpose and existing building is rarely the most economical or practical solution. Especially if it involves the cost of residing and reroofing (since these two items typically represent about 50% of the cost of the building). In looking at the photos, the way the concrete is poured leads me to believe you are going to have water coming in under the outside building wall.”
What clinched me having to help this guy out was: “The existing barn may be my only option due to the wife wanting its appearance improved regardless!”
If mama ain’t happy, ain’t no body happy!
As I do not know the version of the Building Code (if any) your building was constructed under, nor the applicable wind and snow loads, I can only make broad structural recommendations. In most permit issuing jurisdictions, they work you propose to do does require a building permit to be acquired. I’d recommend you confirm yes or no.
In the end, it would be an excellent idea to contract with a registered design professional RDP (engineer or architect) to confirm structural integrity of the existing building, as well as to appropriately size new members being added, as well as their connections.
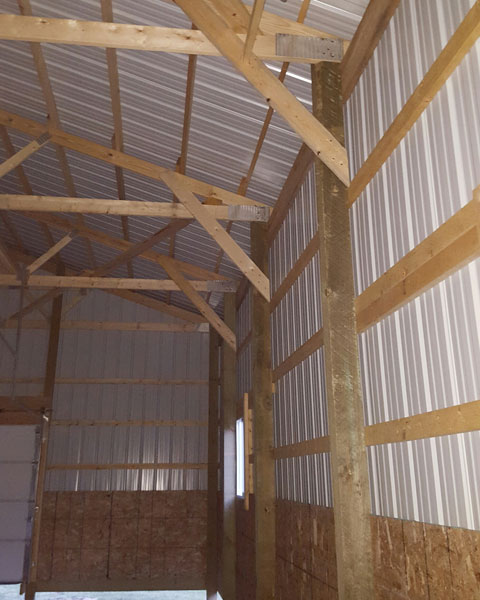
Starting with the basics, remove all of the siding and roofing. Where an exterior wall will have a climate controlled area opposite, remove all girts. Install new wall girts at 24 inches on center, of a size large enough to be flush on the outside of the walls with existing pressure treated splash planks, etc. With 6×6 columns, it will take 2×8 girts placed like bookshelves. In order to keep wall screw lines even, you may want to opt to swap out the girts universally (it also allows the future ability to insulate other portions of the building at a later date).
As you will be down to bare framing, I would highly recommend adding enclosed vented overhangs on all four sides of the building. This will allow for an air intake, which is going to be essential to the overall system performance during steps outlined below.
Before installing new roof steel, install the reflective radiant barrier on top of the roof purlins. I recommend the A1V product from www.buyreflectiveinsulation.com, as it has tabs with adhesive pull strips to seal each piece to the prior one. Use high quality vented ridge closures under the ridge cap, to provide an air exhaust.
Wrap the building walls with a high quality building wrap.
Read more here: https://www.hansenpolebuildings.com/blog/2012/11/house-wrap/
In areas you want to climate control, install a 2x beam (or header) to the inside face of the columns. From beam to beam ceiling joists can be placed every two feet to support gypsum wallboard.
With the newly created wall cavities, you can use batt insulation or BIBs. For the ceiling, I’d suggest blowing in insulation, once the ceiling has been drywalled.
Assuming you move forward with this, I am hoping you won’t mind sharing progress photos.
When it is all done, it should look and function just like a new building.


