When the temperature and humidity conditions reach the dew point, moisture can condense on the underside of steel roofing. This condensation has the potential to cause water damage and other problems inside of pole buildings.
Some of the Hansen Pole Buildings steel suppliers are now offering an internationally patented CCM (Condensation Control Membrane) which can be pre-applied to their steel panels. This innovative product works by creating a medium for trapping moisture in the specially designed pockets formed within the felt’s membrane. Holding moisture until conditions go back below the dew point, Drip Stop is then able to release the moisture back into the air in the form of normal humidity.
Drip Stop is durable – it isn’t susceptible to ripping, tearing or deterioration like many common metal building insulation and vapor barrier products. It is easily cleaned with a hose or pressure washer. It may result in time savings – as no other product needs to be installed between the roof purlins and roof steel. It is approved for use in animal confinement buildings. Drip Stop is UL 723 approved for flame spread and smoke generation and comes with a 20 year adhesion warranty. It also reduces exterior noise.
 The skids of steel with Drip Stop applied must be stored prior to use, to prevent moisture from becoming trapped between panels, which may cause staining as well as damage to the panels. This moisture can originate from a variety of sources, such as rain, high humidity or condensation. Panels should be stored in a dry location and installed as quickly as possible after delivery. If this is not possible, panels should be separated from one another to allow for air circulation to prevent panel damage.
The steel panels do require some extra preparation work, prior to installation. Panels are to be first laid with the Drip Stop material facing up. Using a heat gun, the exposed end lap or eave portion needs to be heated to fuse the Drip Stop fibers. Care must be given to avoid overheating any one spot, which could potentially damage the panel’s finish on the exterior side. The Drip Stop material should neither be completely melted, nor fused beyond the lap or overhang area of the panel. Allow panels to cool, prior to installation. Failure to properly prepare panels may result in the Drip Stop material attracting water from outside the building, resulting in possible leaks, mold and/or mildew.
If anyone has personal experience using this product, feel free to respond and let me know what the pluses and minuses were in using Drip Stop. It sounds like a great product, and may be a step in the right direction for a better moisture barrier than what has been currently available. However, at first glance the application sounds too complicated and somewhat risky for anyone other than someone who has lots of practice installing it. Let me know what you think folks, I am always looking “for a better mousetrap”!


I have installed the drip stop material on my building. It does reduce the major dripping that can happen, but there is still some dripping on the north side of my building. My building is insulated so this is an issue to me.
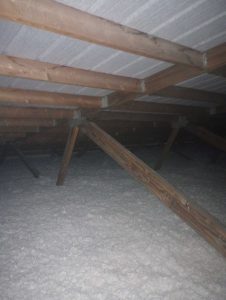
When inspecting it closer, the felt material under the metal is saturated with water. This means that the purlins are in contact with water saturated material every morning during freeze thaw conditions in the winter. I am concerned that this will rot my purlins if I do not install a vapor barrier under the metal.
I would start by looking for the source of the moisture. Usually it is from a recently poured slab on grade (in the first few months after a pour a lot of water vapor is coming from it). Next would be – is there a well sealed vapor barrier under your slab? If no, you need to seal the surface, which will not eliminate all water passing through, but it will help. Third – is your attic adequately ventilated?
I had Drip Stop panels installed on 3 large buildings (30×50, 30×80, and 30×100) last year. They are very low pitch roofs (essentially flat) and these replaced the panels that were 30 years old. They were installed over top the original fiberglass vapor barrier. Since then, all of these buildings leak like a sieve. What can be done to correct this problem?
I would need to know more about the slope of your roof and what panels were installed. From the limited amount of information, my guess is the panels used were perhaps 5/8″ – 3/4″ high ribs, which should not be used on slopes below about 2.5/12 slope. Your panels also may not have strip mastic between over and under laps. Dripstop won’t be a cause of your current challenge.
I have dripstop on my panels. I plan to insulate the roof as well. What are my options? Can I use bats with Kraft paper? Should they not touch the dripstop? Should I use spray in foam?
I would recommend installing a ceiling at the truss bottom chord line and blowing in fiberglass above it. Vent dead attic space at eaves and ridge. You should not spray foam to Drip Stop.
I can’t seem to find the added cost for having Drip Stop applied at the roof steel factory. My roof is 2510 square foot and received a quote of $1600 from my contractor to have Drip Stop applied to the steel at the factory. That price includes the installation of the panels on the roof (I believe there is some labor involved to heat / fused the Drip Stop on areas exposed outside the building – i.e. above the soffits and protruding past the facia). I have faith in my contractor but $1600 seems a lot and I can’t find a way to determine if it is reasonable.
We sell at under 60 cents per square foot of roof surface, so it appears your contractor’s price is right on.