When it comes to post frame barndominiums, rooflines run from simple gabled roofs, to complex designs including hips, valleys, reverse gables, etc. Basically, if you can imagine it, post frame can provide a design solution.
Loyal reader (and my Facebook friend) RUSS in PIPERSVILLE writes:
“Hello Mike. As we get a little further along with our design I would like to ask for your opinion. I read in past blog topics that you don’t recommend designing roofs with valleys when going metal over purlins. Our current plan has a large reverse gable on the front of the house covering the entry and porch and our utility mechanical room is a reverse gable room attached at the rear. All roofs are 6/12 pitch. I’m a bit worried about getting the details right. Is it that difficult to install the metal roof correctly over purlins, or should I just consider installing solid sheathing with metal over? Perhaps forego the metal and return to wood deck and shingles? Tom Z. has been a help in explaining how the gables must be framed but I must confess that the details don’t leave me all warm and fuzzy about the roof construction. Any insight you can offer is always appreciated.”
Mike the Pole Barn Guru says:
If I led you to believe I have issues with valleys on steel roofing over purlins I somehow took you astray.
In order to have a successful valley, these steps are followed:
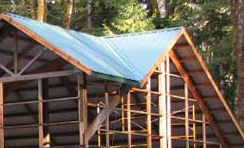 Main roof is framed up, including purlins across area where reverse gable will intersect. 2×12 blocking is then placed between main roof purlins, centered on what will eventually be the middle of the valley. This provides a landing point for intersecting roof purlins from reverse gable (next to be installed). Once these purlins are in place, any reflective radiant barrier (RRB) is installed (I prefer using roof steel with Integral Condensation Control to a RRB). Valley flashing is then installed. We furnish Emseal® self-expanding foam closures to seal between valley flashing and roof steel, following slope of valley flashing. Roof steel is then applied and you are buttoned up tight.
Most challenging parts of assembly are cutting intersecting roof purlins (besides cut being at a 26.6 degree angle along wide face of purlin, cut also needs to be done at 26.6 degrees from perpendicular to compensate for slope of intersecting purlins from vertical) and cutting roof steel at valley to end up with a nice straight line up valley. Neither one is actually beyond most people’s abilities.
There really is no structural advantage to solid sheeting your roof and even the best of shingles have a very poor warranty and I cannot, in all good conscience recommend them as a practical design solution.
For extended reading on Emseal® closures: https://www.hansenpolebuildings.com/2016/03/emseal-self-expanding-sealant-tape-closures/