Tag Archives: vapor retarder

Properly Insulating Between Roof Purlins

Properly Insulating Between Roof Purlins

Reader SAM in MATTAWAN writes:

Hi, I have a wood framed pole barn that is fairly unique in design and doesn’t have any “attic” space. It’s very similar to what a steel building would be. There are 2×8 roof purlins to support OSB sheathing. My question is regarding ceiling/ roof insulation and venting. I will be doing a shingle roof and vinyl siding. Since there is no attic space, are ridge and eave vents still required? And what would be recommended for insulation? Spray foam would probably be ideal, but more than likely out of budget. Would fiberglass batts be ok to use right up against roof OSB? Thanks.”

According to Martin Holladay (Green Building Advisor):

Experts usually advise builders that you can’t install fiberglass insulation directly against the underside of roof sheathing. If you want to install fiberglass between your rafters, you have two basic choices: either include a ventilation channel between the top of the fiberglass insulation and the underside of the roof sheathing, or install enough rigid foam above the roof sheathing to keep the roof sheathing above the dew point during the winter. These rules were developed to prevent damp roof sheathing.”


With post frame construction ‘purlins’ would replace ‘rafters’ above.

You have some options….

Per IRC R806.5 (4) In Climate Zones 5, 6, 7 and 8, any air-impermeable insulation shall be a Class II vapor retarder, or shall have a Class II vapor retarder coating or covering in direct contact with the underside of the insulation.

IRC R806.5 (5.1.1) Where only air-impermeable insulation is provided, it shall be applied in direct contact with the underside of the structural roof sheathing.

My note – this would be closed cell spray foam

IRC R806.5 (5.1.2) Where air-permeable insulation is installed directly below the structural sheathing, rigid board or sheet insulation shall be installed directly above the structural roof sheathing in accordance with the R-values in Table R806.5 for condensation control.


My note – Van Buren county is in Climate Zone 5A. IRC Table R806.5 requires a minimum of R-20 for your Climate Zone. This would require R-20 rigid insulation boards on top of your roof OSB, you could then use your choice of batt insulations between purlins.

IRC R806.5 (5.1.3) Where both air-impermeable insulation and air-permeable insulation are provided, the air-impermeable insulation shall be applied in direct contact with the underside of the structural roof sheathing in accordance with item 5.1.1 and shall be in accordance with the R-values in Table R806.5 for condensation control. The air-permeable insulation shall be installed directly under the air-permeable insulation.

My note – this would require R-20 (roughly 3 inches) of closed cell spray foam applied directly to the underside of your OSB sheathing, with a balance of insulation (either batts or open cell spray foam) applied directly below between purlins.

In summary – do not vent your eaves and ridge, and fiberglass batts between roof purlins may not be used directly below roof sheathing without either R-20 insulation directly above or below roof deck.

2018 IRC Attic Ventilation Requirements

2018 IRC Attic Ventilation Requirements

Reader SCOTT in MINNESOTA writes:

“I read a couple of articles on your website and was hoping you could answer a question or give me some insight on venting my shop building,

It is pole barn construction with 24” vented soffits and a ridge vent.   The original foam/screen closures on the ridge vent were along the entire length of the ridge but over the years have pretty much deteriorated and come down in pieces.  This last Minnesota winter was hard on them.  I think replacing them with an “LP2 like” option available from Midwest Manufacturing will be a good idea and probably last longer than the simple 1” wide foam style.   My building is 40’ x 40’ with a 42’ ridge and it is finished inside with a level ceiling.

Questions:

Should I do the entire length of the ridge with vented closures or do I just need a percentage? 

If I don’t do the entire length should the sections of venting match on both sides of the ridge?  

Any thoughts on this matter would be appreciated.

Thanks for your time.”

Mike the Pole Barn Guru says:

Historically, IRC (International Residential Code) ventilation requirements are applicable to one and two family homes and have been based on a ratio of “net free ventilating area” (NFVA) being area of ventilation openings in attic to area of attic space. NFVA is the total unobstructed area air can pass through and it is calculated at the most restricted location through a vent’s cross section.


Ventilation requirements listed in Section R806 in IRC’s 2018 edition are listed in excerpts below:

  • R806.1 Ventilation Required. Enclosed attic and enclosed rafter spaces formed where ceilings are applied directly to the underside of the roof rafters shall have cross ventilation for each separate space by ventilating openings protected against the entrance of rain or snow. Ventilation openings shall have a least dimension of 1/16 inch minimum and ¼ inch maximum. Ventilation openings having a least dimension larger than ¼ inch shall be provided with corrosion-resistant wire cloth screening, hardware cloth, perforated vinyl or similar material with openings having a least dimension of 1/16 inch minimum and ¼ inch maximum. Openings in roof framing members shall conform to the requirements of Section R802.7. Required ventilation openings shall open directly to the outside air and shall be protected to prevent the entry of birds, rodents, snakes and other similar creatures.

  • R806.2 Minimum Vent Area. The minimum net free ventilating area shall be 1/150 of the area of the vented space.  Exception: The minimum net free ventilating area shall be 1/300 of the vented space provided both of the following conditions are met:

  1. In climate zones 6, 7 and 8, a Class I or II vapor retarder is installed on the warm-in-winter side of the ceiling.

  2. At least 40 percent and not more than 50 percent of the required ventilating area is provided by the ventilators located in the upper portion of the attic or rafter space. Upper ventilators shall be located no more than 3 feet below the ridge or highest point of the space, measured vertically. The balance of the required ventilation provided shall be located in the bottom one-third of the attic space. Where the location of wall or roof framing members conflicts with the installation of upper ventilators, installation more than 3 feet below the ridge or highest point of the space shall be permitted.

  • R806.3 Vent and Insulation Clearance. Where eave or cornice vents are installed, blocking, bridging and insulation shall not block the free flow of air. Not less than a 1-inch space shall be provided between the insulation and the roof sheathing and at the location of the vent.

  • R806.4 Installation and Weather Protection. Ventilators shall be installed in accordance with manufacturer’s installation instructions. Installation of ventilators in roof systems shall be in accordance with the requirements of Section R903.

In summary,  ventilation requirements in IRC’s 2018 edition are:


  • Provision of 1 square foot of NFVA for each 150 square feet of attic floor. One important note – attic floor area is just as it reads – area – not volume. This is a minimum requirement and does not stipulate  required ventilation openings provide intake (low), exhaust (high), or both.
    • Provision of 1 square foot of NFVA for each 300 square feet of attic floor if both following conditions are applicable:
    • A Class 1 (≤ 0.1 Perm) or 2 (> 0.1 to ≤ 1.0 Perm) vapor retarder is installed on warm-in-winter side of ceiling when the structure is located in climate zone 6, 7, or 8.
    • At least 40%, but not more than 50% of NFVA is provided by vents located not more than 3 feet below roof’s highest point.
    • Provision for a minimum 1 inch air space between roof sheathing and insulation in attic at vent location.

Hopefully this Code lingo didn’t dull your senses too badly!

A Marco LP-2™ ridge vent (read more here: https://www.hansenpolebuildings.com/2014/12/ridge-vent/ provides 18.4 square inches of net free ventilation per lineal foot of ridge when placed on each side of ridge, provided roof steel’s upper edges from each side are at least 1-9/16” apart.

As a maximum of 50% of required ventilation can be at ridge, 18.4 X 2 X 300 / 144 = 76’8” as maximum building width these vents can handle on a gabled roof.

You will need to determine NFVA of your vented soffits in order to calculate the correct ratio of intake to exhaust. If the entire ridge does not have to be vented, it would be prudent to have equal footage of vented closures on each side of the ridge.

Insulated Ceiling Vapor Barrier

Should a Vapor Barrier Be Installed in an Insulated Ceiling?

Should you put a vapor barrier in an insulated ceiling or not? I build in a cold climate, where many longtime builders swear that you shouldn’t put a ceiling vapor barrier in. The reasons go something like, “Because you have to let the moisture escape,” or “Because the house has to breathe out the top.” What do the experts say?

Here I will defer to Joe Lstiburek – building scientist and the founding principal of Building Science Corporation:

Mike the Pole Barn Guru says:

To heck with the experts — here’s my answer. Plastic vapor barriers should only be installed in vented attics in climates with more than 8,000 heating degree days. You can forego the plastic and use a vapor retarder (kraft-faced insulation or latex ceiling paint) in all other climates except hot-humid or hot-dry climates. In hot-humid climates, attics should not be vented and vapor retarders should not be installed on the interior of assemblies.

In hot-dry climates a vapor retarder should also not be installed, but attics can be vented. All attics — vented or unvented — should have an air barrier (a properly detailed airtight drywall ceiling, for example) regardless of climate.

Omitting a ceiling vapor barrier by arguing that “you have to let the moisture escape” or “because the house has to breathe out the top” is actually correct, in a way. It’s also incorrect, in a way. Now, I’m a real fan (ha, ha) of controlled mechanical ventilation to limit interior moisture levels in cold and mixed climates, as well as to limit other interior contaminants in all climates. In other words, all houses require controlled mechanical ventilation in order to “breathe.” It is also my view that this necessary air change should not happen because of a leaky attic ceiling, attic vents, or even leaky walls. Hence the requirement for an air barrier and controlled mechanical ventilation in all houses regardless of climate.

Having said that, I do not have a problem with relieving some of the moisture load in the house via diffusion. This can be achieved through a roof assembly designed to handle it, such as a vented attic in a moderately cold or mixed climate. It’s important to understand that this is a climate-specific recommendation. In a well insulated attic in a very cold climate (more than 8,000 heating degree days), there is not enough heat loss into an attic from the house to allow for much moisture removal through ventilation. That’s because attic ventilation requires heat loss to remove moisture from attics. Cold air can’t hold much moisture. So ventilating a heavily insulated attic with outside air when it is really cold does not remove moisture. We do not want any moisture to get into an attic in a severely cold climate for this reason. As you move south into regions where it is not so miserably cold, this changes: Hence, the recommendation for a vapor barrier in a severely cold climate but only a vapor retarder in most other locations.

In the old days in severely cold climates, where attics were poorly insulated, it was okay to omit a plastic ceiling vapor barrier. The heat loss from the house warmed the attic sufficiently to allow attic ventilation to remove moisture from the attic. Cold outside air was brought into the attic and warmed up by the escaping heat loss, giving this air the capacity to pick up moisture from the attic and carry it to the exterior. This worked well until we added large quantities of attic insulation. With the added insulation, the attic stayed cold and so did the ventilating air from outside, which was now unable to effectively remove attic moisture. Hence the need to reduce moisture flow into the attic and the need for a vapor barrier.


There’s one other important qualification: Vapor moves in two ways, by diffusion through materials, and by air leakage through gaps and holes in building assemblies. Between the two, air leakage moves far more moisture than vapor diffusion. A vapor barrier in an attic assembly in a severely cold climate with the absence of an air barrier will likely be ineffective. On the other hand, an air barrier (a properly detailed air-tight drywall ceiling, for example) in the absence of a vapor barrier can be effective, since it stops the flow of vapor-laden air. You can’t just install plastic in a ceiling and assume it is also an air barrier. For plastic to be an air barrier, it needs to be continuous, meaning all joints and penetrations must be taped or caulked.

11 Reasons Why Barndominium Crawl Space Encapsulation is Important

11 Reasons Why Barndominium Crawl Space Encapsulation is Important

Today’s Guest Contributor is Joseph Bryson. Joseph was born in Alberta, raised in NYC and is living in New Zealand. He has been working in 4 different industries and helped numerous businesses grow. Now, he is focused on writing as his next career from home and lives a peaceful life with his family and a whole pack of dogs.

No matter what kind of a barndominium you will have, if there is a crawl space present then it can potentially cause you a whole host of problems. People tend not to realize this because they don’t think too much about crawl spaces. 

Like it’s not a place people generally venture to in their own homes. It’s just down there beneath your elevated wood floor, out of sight and out of mind. And so various issues can arise in your house you don’t know how to fix because you don’t realize they’re originating in your crawl space. 

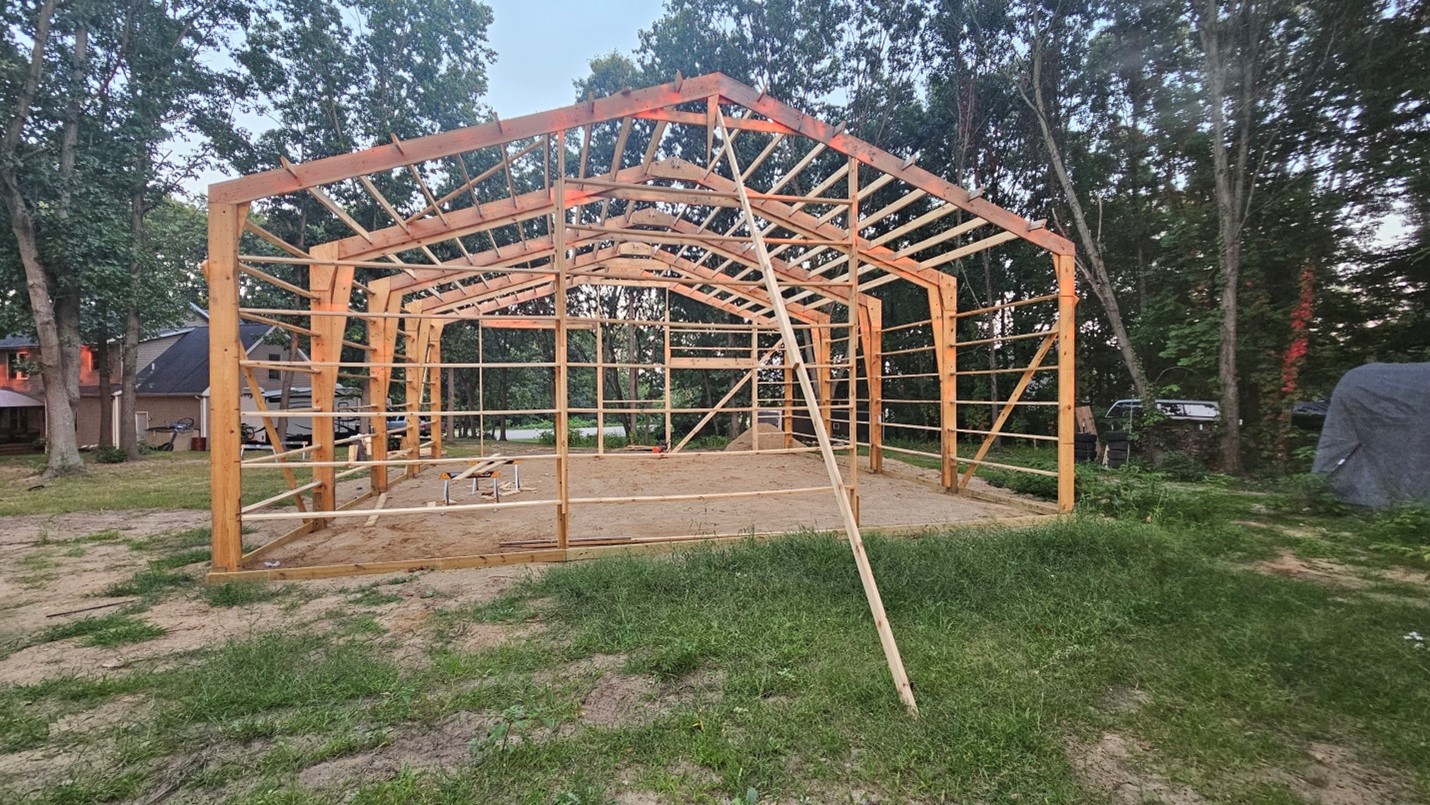
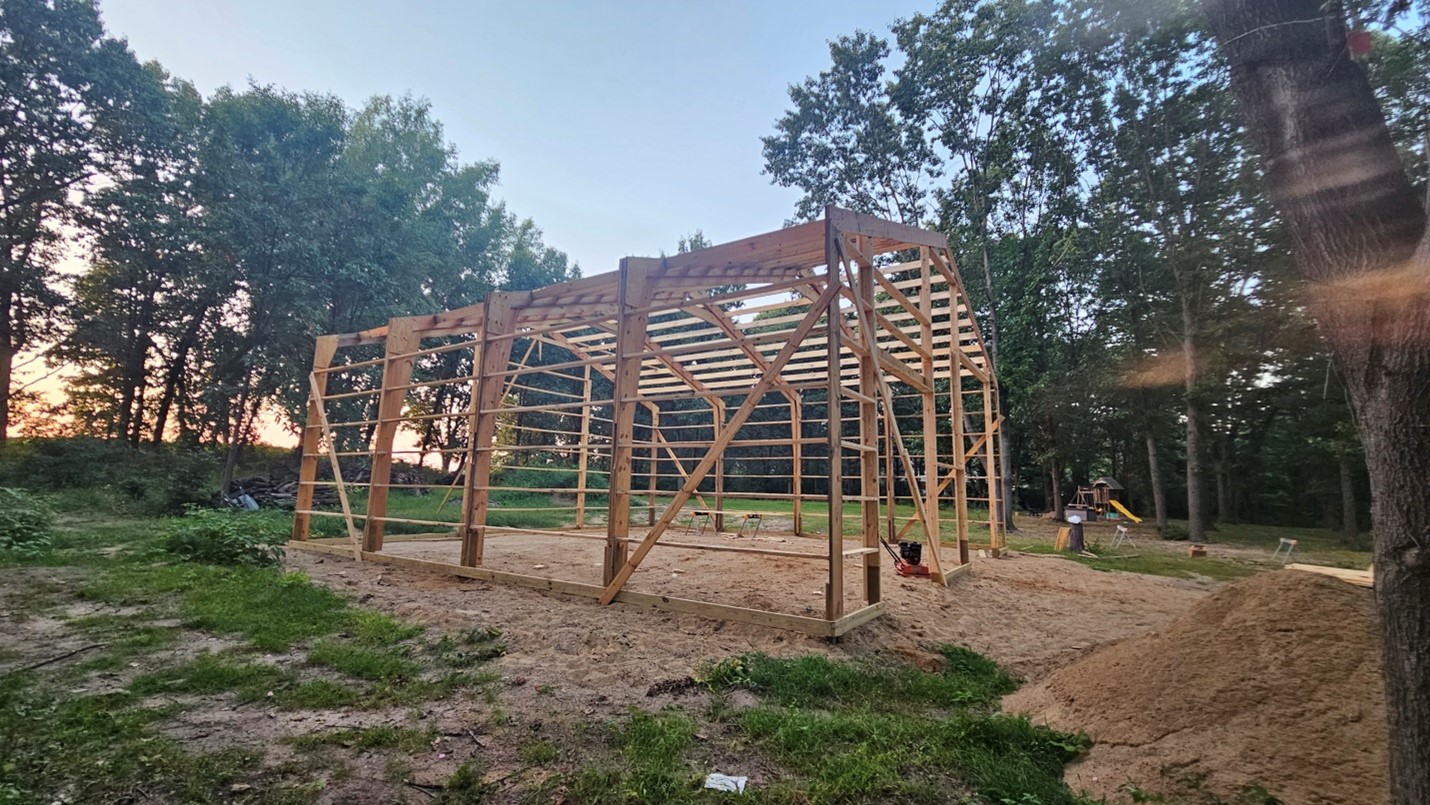
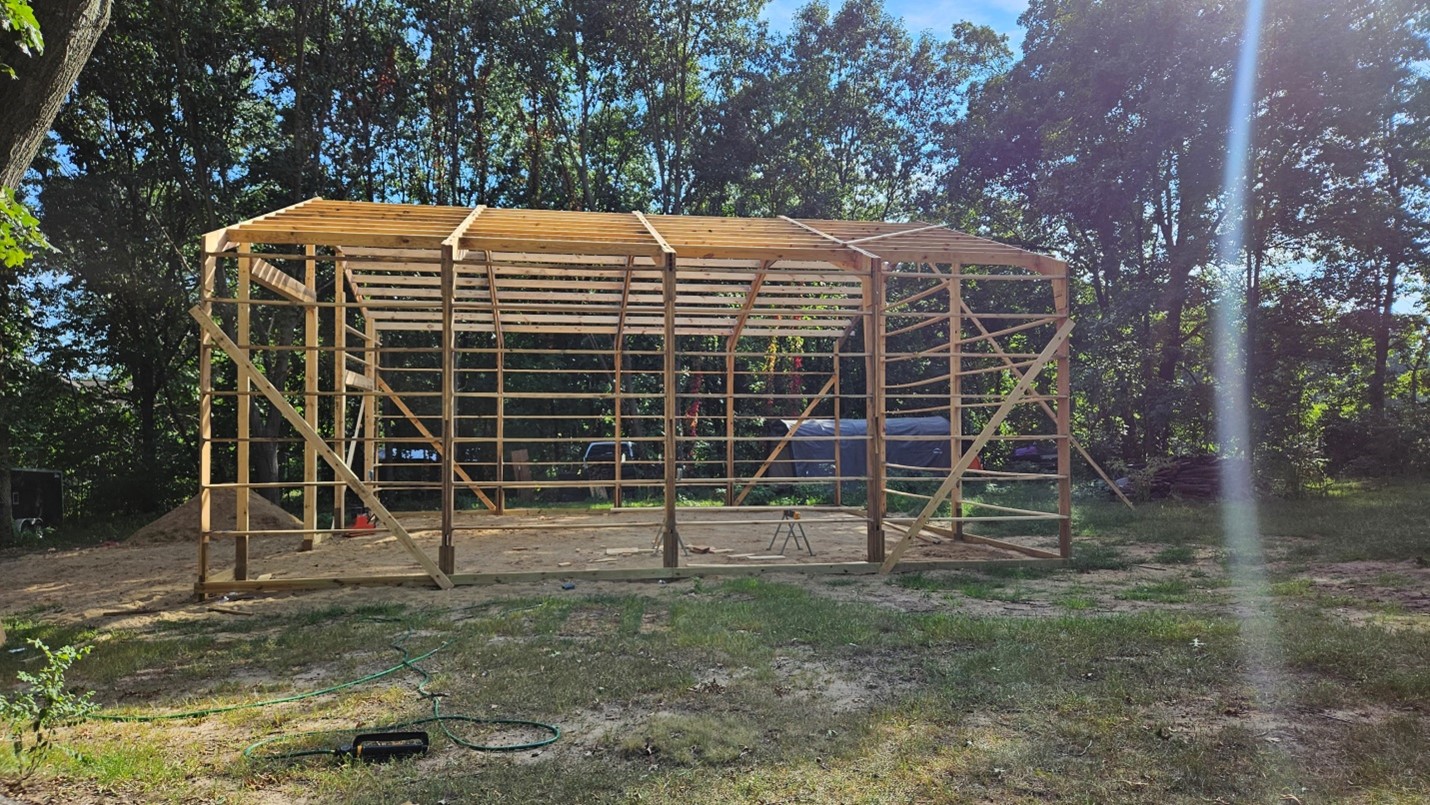
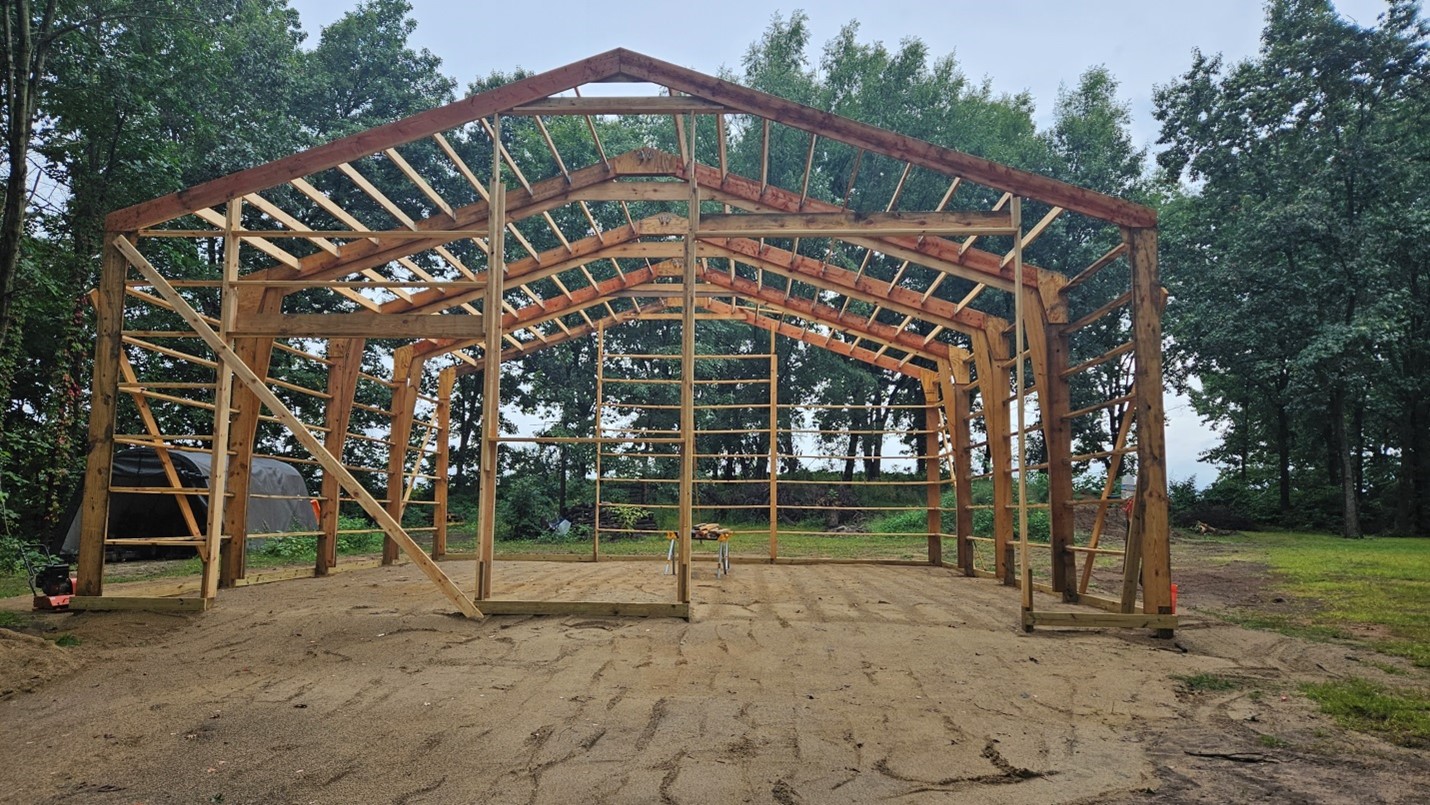
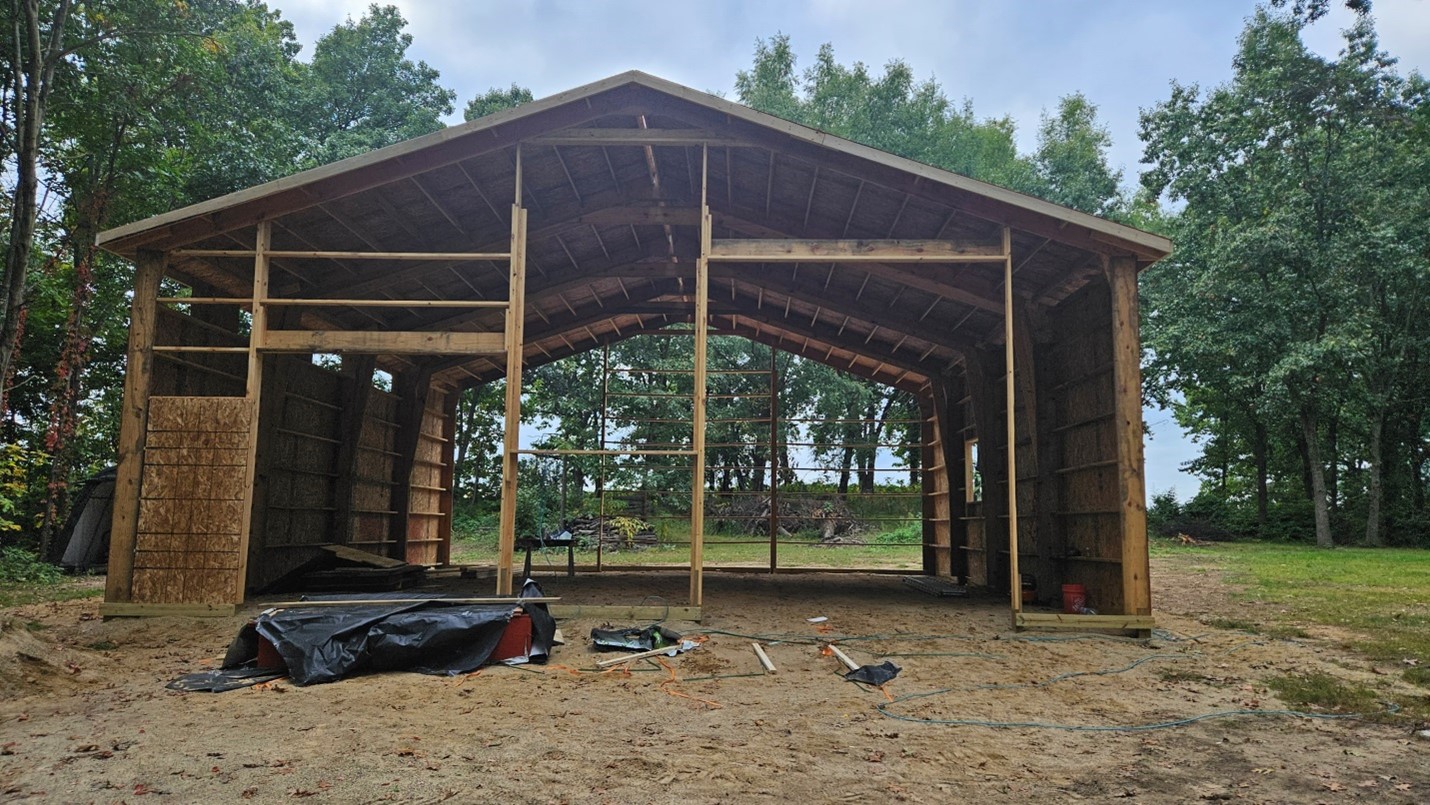
In a post-frame building, crawl spaces are set up a little bit different. Instead of having a perimeter of concrete and a concrete slab, it is instead a wooden framework on short pressure preservative treated timber or glu-laminated columns.

It’s a style of crawl space allowing for much better access to plumbing, ventilation ducts and electrical wiring, but without a concrete slab. It also makes it somewhat more susceptible to some of these problems. 

This leads us to crawl space encapsulation creating an unvented crawl space. A process involving installing a vapor barrier in your crawl space to cover ground, walls and seal up all vents and seams. Air is then conditioned using a humidifier or HVAC system.

International Residential Code (IRC) R408.3 addresses unvented crawl spaces. Exposed earth is covered with a continuous Class I vapor retarder. Vapor retarder joints shall overlap at least six inches and be sealed or taped. In post frame buildings, this vapor retarder must extend up perimeter walls to floor level and be attached and sealed to floor. One of four possible options outlined in IRC R408.3(2) must also be met.

Let’s have a look at what issues a crawl space encapsulation will help to prevent and why it’s so beneficial:

  1.   Controls Pests

One very important thing you’ll be doing by sealing up all openings is removing access to your crawl space for a wide variety of pests. You can get mice, rats, cockroaches, racoons and even birds have been known to find their way into crawl spaces.

Once pests find their way in, it can be a nightmare getting them out but an encapsulated crawl space removes a primary entry point for pests so you would be reducing possibilities significantly.

Roaches can be disastrous for a wooden framework and so you should be very serious about keeping them out of your crawl space and your home in general.

  1.   Improves Air Quality

Because air coming up through your crawl space will be going through HVAC or a humidifier, you can rest assured it will be much higher quality than if it was just blowing in unfiltered. A crawl space is a hot bed for low quality air, but not if it’s encapsulated.

  1.   Allows for Better Energy Efficiency

One thing you will probably notice after encapsulation is your energy bills will be lower. Your heating and air conditioning won’t have to struggle against crawl space damp air, meaning they’ll be doing less work.

And this will of course result in you having to spend less on utilities. While encapsulation might cost a bit, it is Code required and will be financially beneficial over time.

  1.   Keeps Floors Warm

As we just mentioned, the normal state for a crawl space is to be full of damp air. It’s exposed to elements and especially during winter months, this just means there’s consistent moisture and low temperatures blowing through.

All of this is prevented with encapsulation meaning the only thing rising from below will be heat. And while it won’t necessarily be equivalent to under floor heating as such, it will make floors more warm and comfortable to walk on, especially in a post-frame home where there isn’t concrete separating heat from floors.

  1.   Prevents Mold

Mold is very problematic. For some people it’s just an irritant causing things like coughing, sneezing and sore throats, but it can also be toxic if left to grow for too long. And for anyone with a compromised immune system or who suffers from asthma, it’s dangerous.

Mold and mildew are further consequences of dampness and moisture retention and most crawl spaces are full of it. It’s much more likely to build up on wood than it is on concrete meaning this is more common in wood frame structures.

  1.   Improves Storage

Not everyone opts for using their crawl space for storage, even after it’s been encapsulated, but  it can be done. If your encapsulation is neat, you should definitely have some room down there to store a few boxes.

If you did this with an unencapsulated crawl space, then anything you store could be potentially damaged by moisture or mold. So it’s basically a really safe storage space once encapsulated.

  1.   Prevents Flooding

I’ll start this point by saying crawl space encapsulation doesn’t necessarily prevent floods entirely, but it can help in a lot of cases. Excess rainwater and runoff can build up down below and can result in flooding, but not if everything is sealed and blocked up.

Flooding takes a much greater toll on wood than it does concrete and although your post-frame home will be sturdy by design, too much water over time could do some serious damage.

  1.   Protects Structural Integrity

If left for long periods of time without intervention, moisture and mold will slowly eat away at untreated wood under your home. This will eventually destroy structural integrity and you won’t have any idea it’s happening because it takes so long.

Just another reason why you should be slowing down, or entirely stopping mold growth and retention of moisture.

  1.   Keeps Allergens at Bay

Spread of allergens is primarily caused by moisture and dust. We’ve discussed to death how moisture is controlled by encapsulation, but because air coming through is unfiltered, dust shouldn’t be a problem either so if you’re prone to allergies you will benefit.

  1. Can be Done Without Professional Help

Key word here is ‘can’. Crawl space encapsulation can be done without professional help. Before hiring a professional it’s worth looking into how you would do it yourself.  

If you have an interest in DIY and are particularly adept at this type of handiwork, you could for sure give this a try. Again, not everyone will be up to this task, but if you are then it will save a lot of money.

  1. Enhances Longevity of Your Home

With all of these different things considered, it’s clear crawl space encapsulation will help make sure your barndominium is in livable condition for a long, long time. Every issue we’ve discussed here will gradually build up until it becomes potentially disastrous.

Crawl space encapsulation is a big job, but fairly easily accomplished DIY.